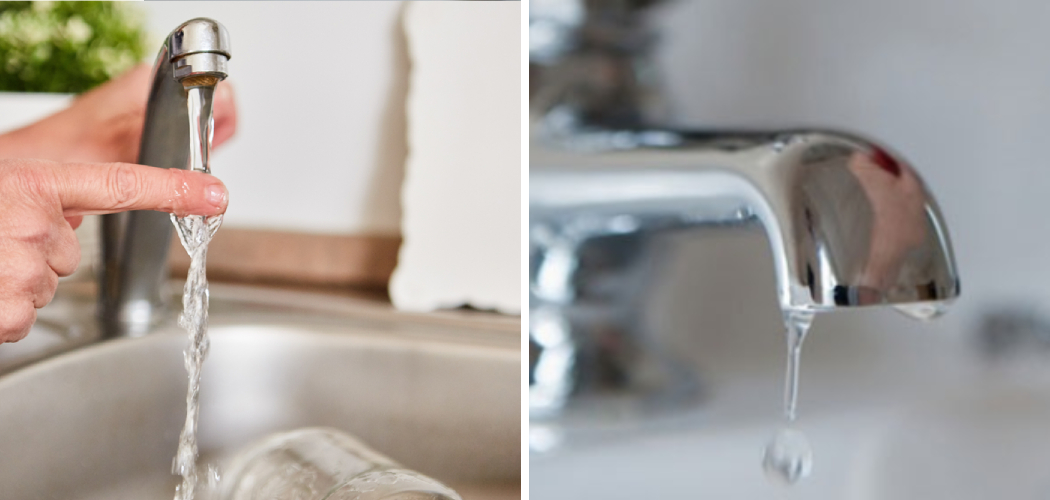
Stopping running water from a tap is a fundamental skill that can save water, prevent wastage, and avoid potential water damage in your home.

Whether dealing with a leaky faucet or simply needing to turn off the water temporarily for maintenance or repairs, knowing how to stop running water is essential. In this article, we’ll explore various methods and techniques to how to stop running water from tap.
From basic manual adjustments to utilizing shut-off valves and addressing common faucet issues, we’ll provide step-by-step instructions and helpful tips to help you confidently handle situations where running water needs to be stopped.
By mastering these techniques, you’ll not only conserve water but also gain greater control over your plumbing fixtures, ensuring a more efficient and functional home.
Importance of Addressing Running Water from Taps
Addressing running water from taps promptly is crucial for several reasons. Firstly, it helps in water conservation, which is increasingly vital in a world where water scarcity is a growing concern. Every drop saved contributes to sustaining this essential resource for future generations. Secondly, fixing running water issues prevents unnecessary increases in water bills.
A seemingly small leak can add up to a significant volume of lost water over time, leading to higher costs. Additionally, continuous running water can cause water damage to sinks, countertops, and cabinets, potentially resulting in expensive repairs.
Addressing the issue also helps in maintaining the overall integrity of your plumbing system, reducing the risk of more severe problems in the long run. Hence, understanding and solving running water issues not only benefits the environment but also ensures financial savings and protects the infrastructure of your home.
Understanding Common Causes of Running Water
Understanding the common causes of running water from taps is the first step towards effectively addressing the issue. One frequent cause is a worn-out or damaged washer inside the tap. Over time, washers can become hardened or corroded, leading to a poor seal and resulting in water leakage.
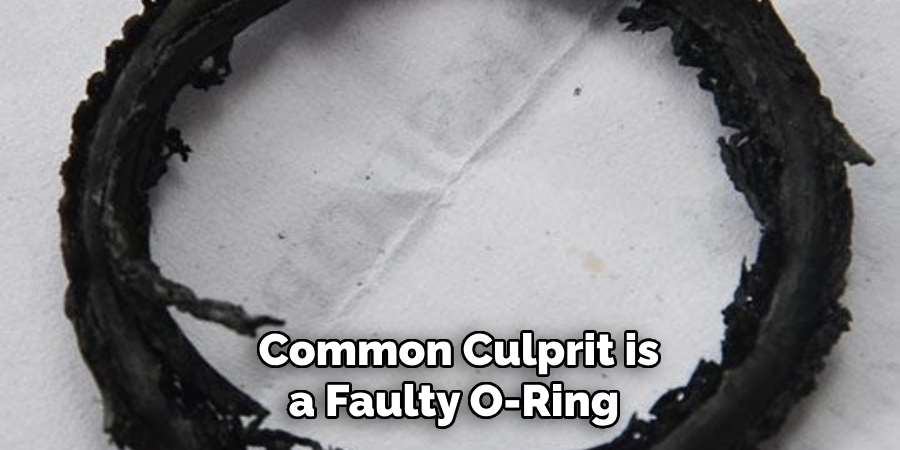
Another common culprit is a faulty O-ring, which is a small rubber ring that helps hold the tap handle in place. When the O-ring becomes loose or damaged, it can cause water to leak around the handle. Additionally, sediment buildup from hard water can interfere with the proper functioning of the faucet, causing drips and leaks.
In some cases, issues with the valve seat, the part that connects the tap to the spout, can also lead to running water if it becomes corroded or damaged. By identifying these common problems, homeowners can take proactive steps to fix them, ensuring their taps operate smoothly and efficiently.
Water Conservation and Utility Bills
Water conservation is not only a vital practice for environmental sustainability but also a practical way to reduce utility bills. By ensuring that taps and other plumbing fixtures are properly maintained and free from leaks, homeowners can significantly cut down on water wastage.
Even minor leaks, such as a dripping tap, can lead to substantial water loss over time, translating into higher water bills. Implementing simple measures like fixing leaks, installing water-efficient fixtures, and practising mindful water usage can collectively make a considerable impact on both water conservation efforts and household expenses.
Additionally, many local governments and water utilities offer incentives and rebates for the adoption of water-saving devices, further encouraging households to engage in conservation practices.
By being proactive in addressing running water issues and adopting water-efficient habits and technologies, individuals can contribute to the global effort of preserving water resources while enjoying the financial benefits of lower utility bills.
Tools and Materials Needed for Repairs
To effectively stop running water from taps, it’s essential to have the right tools and materials on hand. Here’s a list of commonly needed items for carrying out faucet repairs:
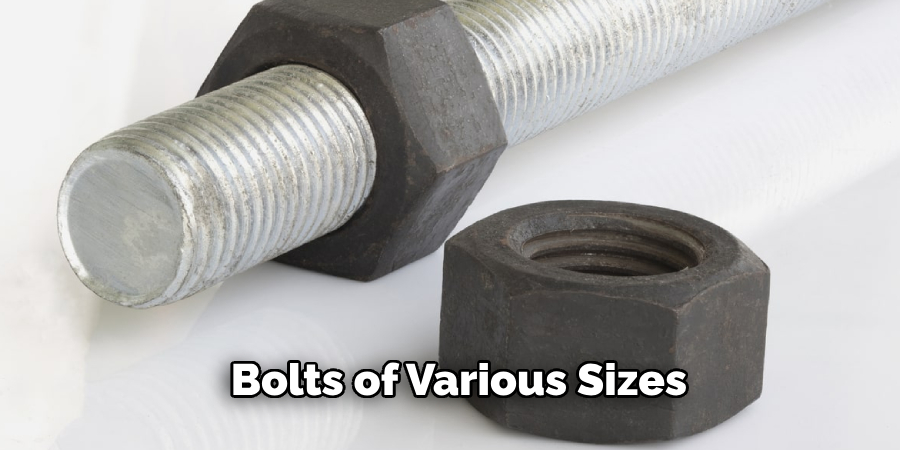
- Adjustable Wrench: A versatile tool used to tighten or loosen nuts and bolts of various sizes.
- Screwdrivers: Both flathead and Phillips screwdrivers are often required to remove and replace screws on faucet handles and other components.
- Plumber’s Tape (Teflon tape): This tape is used to seal threaded connections and prevent leaks.
- Replacement Washers and O-Rings: These are critical for repairing internal components of the tap that may be worn out or damaged.
- Faucet Repair Kit: Many hardware stores sell kits tailored to specific faucet types containing all necessary parts for common repairs.
- Pliers: Useful for gripping and manipulating small parts, such as washers and O-rings.
- Penetrating Oil: Helps loosen corroded or rusted parts, making them easier to remove.
- Bucket and Towels: To catch any water spills and keep the workspace clean and dry.
- Silicone Grease: Used to lubricate O-rings and other moving parts, ensuring smooth operation and prolonging their lifespan.
- Flashlight: Handy for illuminating hard-to-see areas, especially under sinks where lighting may be poor.
Having these tools and materials readily available will make the repair process more efficient and effective, helping you quickly fix running water issues and restore your taps to proper working order.
10 Methods How to Stop Running Water from Tap
1. Turn Off the Tap Handle
The most straightforward method to stop running water from a tap is to turn off the tap handle. Simply twist the handle clockwise (to the right) until it stops turning. This action closes the valve inside the tap, cutting off the flow of water. Make sure to turn the handle firmly to ensure a tight seal and prevent any residual dripping.
2. Check for Leaks
If the tap continues to drip or run after closing the handle, there may be a leak in the faucet mechanism. Inspect the area around the tap for any signs of dripping or pooling water. Check the base of the tap, the spout, and any visible connections for leaks. If you find any leaks, address them promptly to prevent water wastage and potential damage.
3. Utilize Shut-Off Valves
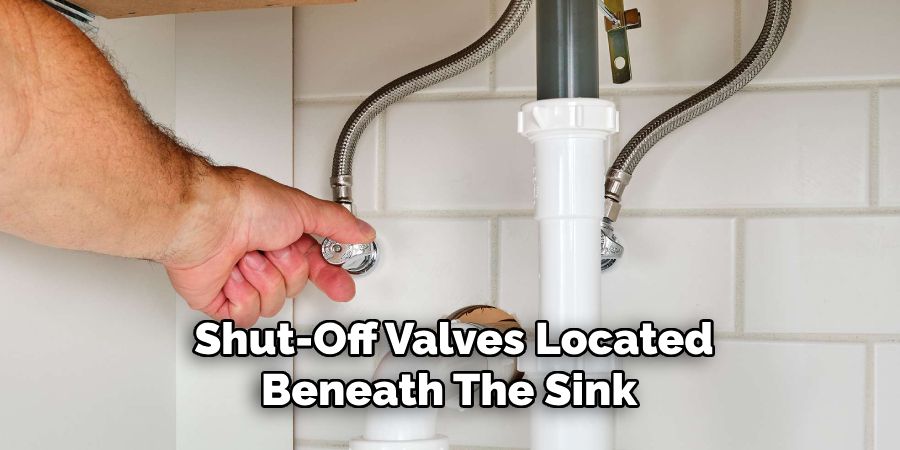
Many taps are equipped with shut-off valves located beneath the sink or behind the wall. These valves allow you to cut off the water supply to the tap without affecting the rest of the plumbing system. Locate the shut-off valve corresponding to the tap you want to stop, then turn it clockwise to close the valve and stop the flow of water. Use a wrench if necessary to ensure a tight seal.
4. Turn Off the Main Water Supply
If you’re unable to locate or access the shut-off valve for the tap, you can stop running water by turning off the main water supply to your home. The main shut-off valve is typically located near the water meter or where the main water line enters your home. Turn the valve clockwise to close it and shut off the water supply to the entire house. Keep in mind that turning off the main water supply will affect all the taps and fixtures in your home.
5. Inspect the Washer
If the tap continues to drip or run even after closing the handle, the washer inside the tap may be worn or damaged. Remove the handle and the valve stem to access the washer. Inspect the washer for any signs of wear, tear, or deformation. If the washer is damaged, replace it with a new one to create a proper seal and stop the flow of water.
6. Clean the Aerator
A clogged aerator can cause water to flow irregularly or drip from the tap even when it’s closed. Remove the aerator from the end of the tap spout and rinse it thoroughly under running water to remove any debris or sediment. Use a toothbrush or a small brush to scrub away any stubborn buildup. Once clean, reinstall the aerator and test the tap to see if the water flow has improved.
7. Adjust the Water Pressure
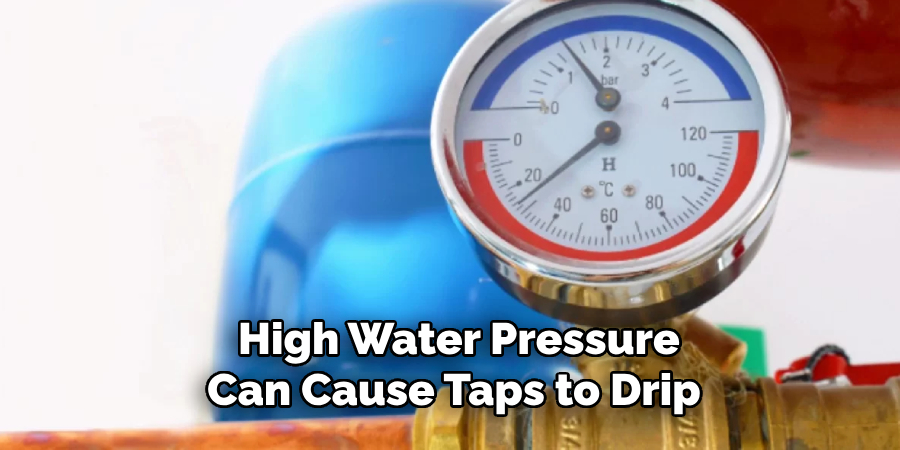
Excessively high water pressure can cause taps to drip or run continuously, even when closed. Check the water pressure at the tap using a pressure gauge and adjust it if necessary. Reduce the water pressure by adjusting the pressure regulator valve or installing a pressure-reducing valve if your home’s water pressure is too high. This can help prevent leaks and conserve water.
8. Replace the Tap Cartridge
If the tap continues to run despite your efforts to stop it, the cartridge inside the tap may be faulty or worn out. Remove the handle and the valve stem to access the cartridge. Inspect the cartridge for any signs of damage or deterioration, such as cracks or leaks. If the cartridge is damaged, replace it with a new one to restore proper functionality to the tap.
9. Install a Drip Tray
To prevent water damage from a dripping tap, consider installing a drip tray beneath the tap. A drip tray collects any water that drips from the tap and channels it away from the surrounding area, helping to protect the sink, countertop, and cabinet from moisture damage. Empty the drip tray regularly to prevent overflowing and ensure effective water containment.
10. Seek Professional Help
If you’re unable to stop running water from a tap despite trying the methods mentioned above, it may be time to seek professional help. A licensed plumber can diagnose the issue and recommend appropriate solutions to repair or replace the tap. They have the knowledge, experience, and tools necessary to address complex plumbing problems and ensure the proper functioning of your taps and fixtures.
Preventive Maintenance Tips
Preventive maintenance is key to ensuring your taps and plumbing fixtures remain in optimal condition, thereby avoiding the hassle of dealing with running water issues. Here are some essential tips to keep in mind:
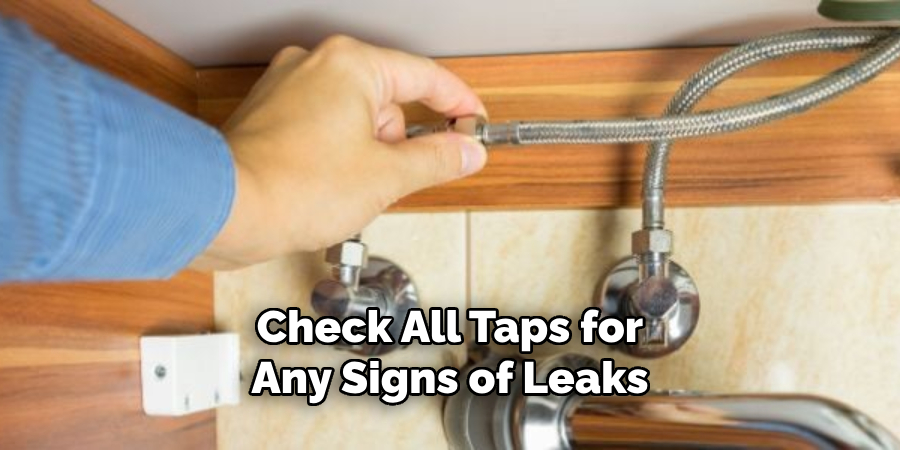
- Regular Inspections: Periodically check all taps for any signs of leaks or drips. Early detection can prevent minor issues from escalating into major problems.
- Clean Aerators: Tap aerators can accumulate sediment and debris over time. Removing and cleaning them regularly ensures a steady and efficient water flow.
- Replace Washers and O-Rings: Worn-out washers and O-rings are common causes of leaks. Inspect these components and replace them if they show signs of wear.
- Monitor Water Pressure: High water pressure can stress plumbing fixtures, leading to leaks. Use a pressure gauge to check your home’s water pressure and install a pressure regulator if necessary.
- Use Water Softeners: Hard water can cause mineral buildup in faucets, leading to leaks and inefficiencies. Installing a water softener can mitigate this issue.
- Shut-Off Valves: Familiarize yourself with the location of shut-off valves and test them periodically to ensure they are functioning correctly. Knowing how to quickly turn off the water supply can be crucial in an emergency.
- Professional Maintenance: Consider scheduling annual inspections by a licensed plumber to identify and address potential issues before they become significant problems.
By incorporating these preventive maintenance practices, you can enhance the longevity of your plumbing fixtures, conserve water, and avoid the inconvenience and expense of dealing with running water issues.
Things to Consider When Choosing a New Tap
When it’s time to replace an old tap or install a new one, there are several factors to consider to ensure you select a tap that suits your needs and preferences. Here are some key considerations:
1. Type of Tap
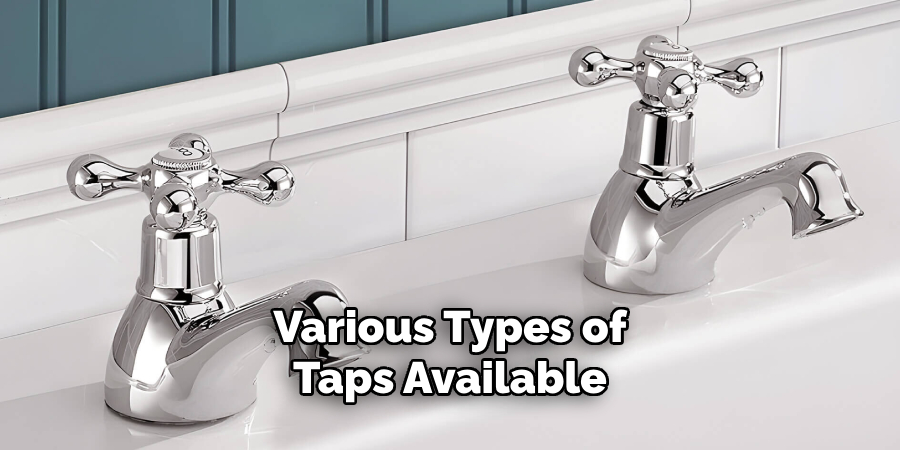
There are various types of taps available, including mixer taps, pillar taps, and monobloc taps. Consider the function and aesthetic of each type to determine which fits best with your sink and overall design scheme.
2. Material and Finish
Taps come in different materials such as stainless steel, brass, and chrome. The finish can also vary, with options like polished, brushed, or matte. Opt for a material and finish that complements your bathroom or kitchen décor and offers durability.
3. Spout Height and Reach
The height and reach of the tap spout are important factors, especially in kitchens. Ensure the spout is high enough to accommodate large pots and pans, and that it reaches adequately into the sink for efficient usage.
4. Water-Saving Features
Consider taps with water-saving features such as flow restrictors or aerators, which can help reduce water usage without compromising performance. These features are eco-friendly and can lead to savings on your water bill.
5. Ease of Installation and Maintenance
Some taps are easier to install and maintain than others. Look for taps with straightforward installation processes and design features that allow for easy cleaning and maintenance to save time and effort in the long run.
6. Budget
Taps can range from budget-friendly options to high-end designer models. Determine your budget and find a tap that offers the best balance of quality, functionality, and aesthetics within your price range.
7. Compatibility with Existing Plumbing
Ensure the tap is compatible with your existing plumbing system. Consider factors like the number of holes in your sink, the type of water pressure in your home, and any additional plumbing adjustments that may be needed.
8. Brand Reputation and Warranty
Choose taps from reputable brands that offer good warranties. A solid warranty provides peace of mind and assurance that the manufacturer stands behind their product’s quality and craftsmanship.
Taking these factors into account will help you choose a tap that not only enhances the look of your kitchen or bathroom but also serves your needs effectively for years to come.
Common Mistakes to Avoid
When handling plumbing tasks or selecting new taps, it’s essential to be mindful of common mistakes that can lead to costly repairs or inefficiencies. Here are some frequent errors to avoid:
1. Ignoring Small Leaks
One of the most common mistakes is ignoring small leaks, assuming they are insignificant. Over time, even minor leaks can lead to substantial water wastage and potentially cause water damage to surrounding areas.
2. Over-Tightening Connections
While it’s important to ensure connections are secure, over-tightening can strip threads and damage components, leading to leaks. Tighten connections just enough to ensure a watertight seal without applying excessive force.
3. Using Incompatible Parts
Using parts that are not compatible with your plumbing system or taps can cause malfunction or damage. Always verify compatibility with your existing setup and consult with a professional if unsure.
4. Neglecting Water Pressure Considerations
High water pressure can put excessive stress on taps and other plumbing fixtures, leading to leaks and reduced lifespan. Always check and regulate water pressure to maintain the health of your plumbing system.
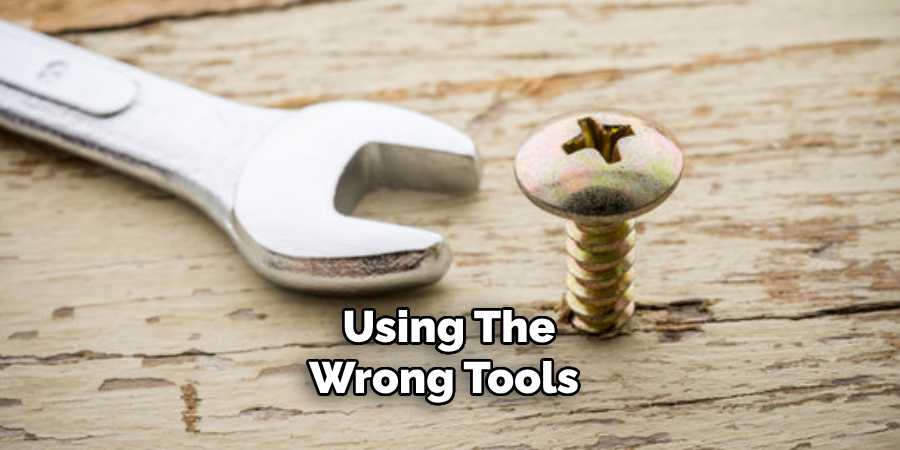
5. Improper Tool Usage
Using the wrong tools or improper techniques can damage fixtures and pipes. Ensure you have the correct tools for the job and familiarize yourself with proper usage to avoid mishaps.
Conclusion
In conclusion, mastering the art of stopping running water from a tap is an invaluable skill for every homeowner.
By following the step-by-step instructions provided in this guide, from identifying the cause of the issue to performing the necessary repairs, you can confidently address leaks and prevent water waste in your household.
Remember, prompt action is key to minimizing water damage and conserving this precious resource. Whether tightening a loose handle, replacing a faulty cartridge, or applying plumber’s tape to threaded connections, taking proactive steps to address faucet leaks ensures a more efficient plumbing system and lower water bills.
Thanks for reading, and we hope this has given you some inspiration on how to stop running water from tap!