Embarking on a home improvement project to lay mosaic tiles on the floor unveils a creative journey that merges functionality with aesthetic flair. Mosaic tiles, with their diverse colors, intricate patterns, and versatile materials, offer a unique way to breathe life into any space. In this comprehensive guide, we navigate the intricate process of how to lay mosaic tiles on floor, from meticulous surface preparation to the delicate art of placing each small tile with precision.

Whether you’re a seasoned DIY enthusiast or a novice seeking to elevate your home decor, this article serves as your go-to resource. Explore the nuances of mosaic tile installation, discover the array of design possibilities, and gain insights into the tools and techniques that will bring your vision to life. Join us on this transformative expedition, where creativity meets craftsmanship, and learn the steps to lay mosaic tiles that redefine the character of your floors.
Benefits of Using Mosaic Tiles for Flooring
While mosaic tiles have been around for centuries, they continue to be a popular choice for flooring. Mosaic tiles are small in size and come in different shapes, colors, textures and materials such as glass, ceramic or stone. They are perfect for creating unique designs and patterns that can elevate your space.
Here are some of the benefits of using mosaic tiles for flooring:
- Durability: Mosaic tiles are known for their durability and can withstand heavy foot traffic, making them ideal for high-traffic areas such as hallways, entryways, and kitchens. They are also resistant to stains, scratches, and moisture.
- Versatility: With the wide variety of colors, shapes, and materials available, mosaic tiles offer endless design possibilities. Whether you prefer a classic, modern or eclectic look, you can create it with mosaic tiles.
- Easy Maintenance: Unlike carpet or wooden floors, mosaic tiles are easy to clean and maintain. They only require regular sweeping and mopping to keep them looking new. In case of any stains or spills, they can be easily wiped away without leaving any marks.
- Cost-effective: Mosaic tiles are a cost-effective flooring option, especially when compared to natural stone or hardwood floors. They come in various price ranges, making them accessible for all budget levels.
- Eco-friendly: Mosaic tiles are made from natural materials such as glass, ceramic, and stone, making them an eco-friendly choice for flooring. They do not release any harmful chemicals into the environment and can be recycled once they reach the end of their lifespan.
- Heat and Water-resistant: Mosaic tiles are ideal for areas with high humidity or heat, such as bathrooms and kitchens. They are resistant to both water damage and heat, making them a practical choice for these spaces.

10 Methods How to Lay Mosaic Tiles on Floor
1. Prepare the Floor
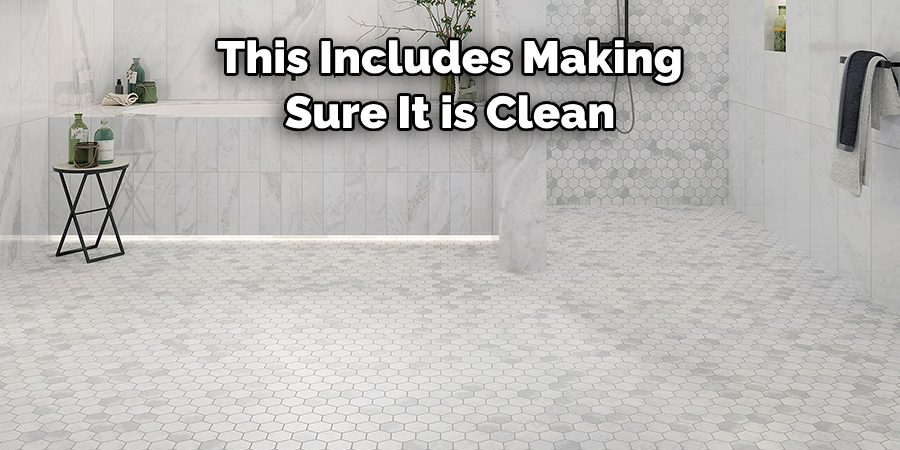
Before you begin laying mosaic tiles, it is important to prepare the floor by cleaning it and making sure that it is free from any dirt, dust, or debris. You should also make sure that the surface is level and smooth so that your tiles will lay flat and look their best. Additionally, you may need to use a primer or sealant before laying your tiles to ensure that they adhere properly.
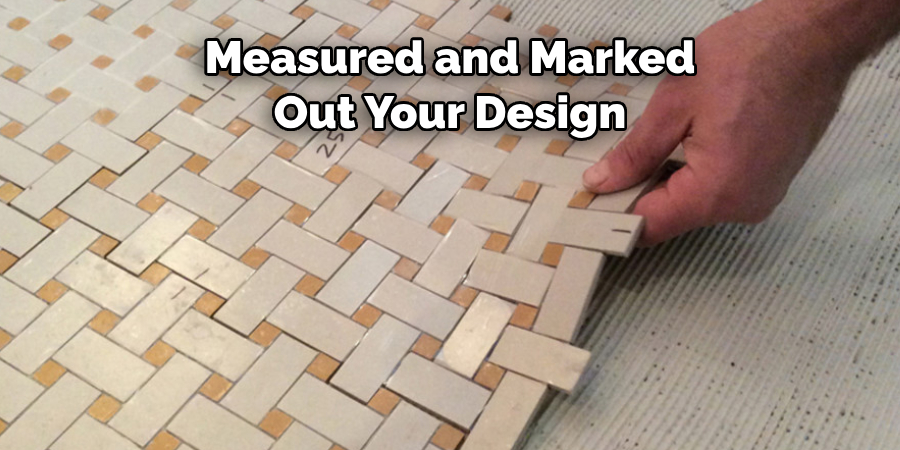
2. Measure and Mark Out Your Design
Once you have prepared the floor, you can then measure out your design and mark where each tile will go with a pencil or chalk. This will help ensure that your design is symmetrical and that all of your tiles are evenly spaced apart. Additionally, it can be helpful to draw a grid on the floor so that you can easily keep track of where each tile should go.
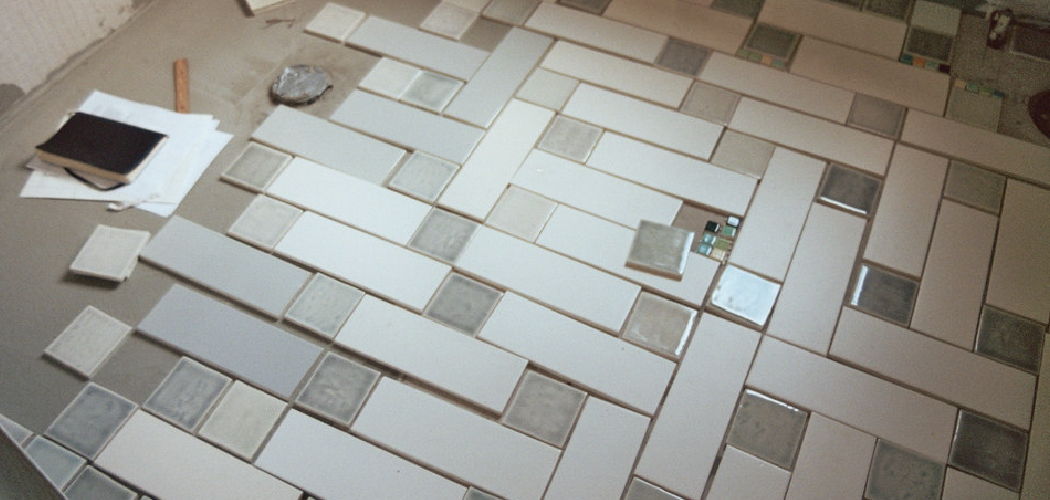
3. Lay Out Your Tiles
Once you have measured and marked out your design, you can then begin to lay out your tiles in order to get an idea of what the finished product will look like. This step is important as it allows you to make any changes or adjustments before actually adhering the tiles to the floor.
4. Apply Adhesive
When you are ready to start adhering the tiles to the floor, use an appropriate adhesive according to the manufacturer’s instructions. Make sure that each tile has an even layer of adhesive applied before pressing it firmly into place on the floor. It is also important not to move or adjust any of the tiles once they have been pressed down into place, as this could cause them to become misaligned or unevenly spaced apart.
5. Cut Any Necessary Tiles
If necessary, use a wet saw or tile nippers to cut any excess pieces off of each tile in order for them all to fit together perfectly within your design. Be sure not to cut too much off, as this could leave gaps between some of your tiles, which would be visible after grouting them into place later on in the process.
6. Allow Adhesive To Set
Once all of your tiles have been laid out and adhered onto the floor with adhesive, allow them time for their adhesive bond with the surface beneath them to set properly before moving on to grouting them into place later on in the process. The amount of time required for this step will vary depending on factors such as temperature and humidity levels in addition to what type of adhesive was used when laying down your mosaic tiles initially.
7. Apply Grout
Once your adhesive has had enough time to set properly, apply grout overtop of all of your mosaic tiles using a rubber trowel or float in order for them all to fit together perfectly without leaving any gaps between them visible after they are sealed in place with grout later on. Be sure not to press too hard when applying grout, as this could cause some of it to seep underneath some of your already laid-down mosaic pieces, causing them to become misaligned or unevenly spaced apart from one another.
8. Remove Excess Grout
Once all of your mosaic pieces have been adequately covered with grout , use a damp sponge to lightly wipe away any excess grout from overtop each tile until only enough remains to fill small spaces between each piece . This step helps ensure that no air pockets remain between pieces, which could lead to moisture build-up underneath, causing damage to both individual pieces as well as the entire design.

9. Seal Grouted Tiles
After allowing adequate drying time, seal all grouted areas with an appropriate sealant to protect against dirt, water, mildew, etcetera. Depending upon the type of sealant used , multiple coats may be necessary in order to achieve the desired result.
10. Clean & Enjoy!
Once sealant has dried completely, thoroughly clean area using warm water mild soap remove excess dirt residue before finally enjoying beautiful new mosaic tile floor! Although mosaic tiles may take a little extra time and effort to lay down properly compared some other flooring options, they undoubtedly worth every moment because once installed correctly, they are sure look absolutely stunning! And with proper maintenance, your new mosaic tile floor will continue looking beautiful for many years come!
Things to Consider When Laying Mosaic Tiles on Floor
Mosaic tiles are a popular choice for flooring in many homes and buildings. They offer a unique, eye-catching design that can elevate the look of any room. However, before you start laying mosaic tiles on your floor, there are some important things to consider.
Subfloor Preparation
Before beginning your mosaic tile installation, it’s crucial to ensure that the subfloor is properly prepared. This includes making sure it is clean, level and dry. Any debris or bumps on the subfloor can affect the final result of your tile installation.
Tile Layout
Deciding on a tile layout before starting the installation process is key. With mosaic tiles, you have various design options such as grid patterns, herringbone, or random placement. Planning out the layout beforehand will help you determine the number of tiles needed and any necessary cuts.
Choosing the Right Adhesive
Not all tile adhesives are created equal, so it’s essential to choose the right one for your mosaic tiles. Thinset mortar is typically used for floor installations, but make sure to check if it is suitable for your specific type of mosaic tile. You may also need to factor in the type of subfloor and any special considerations, such as moisture resistance.
Conclusion
In conclusion, laying mosaic tile on floors is not as difficult as it initially may seem. Following the simple steps outlined in this blog post, you can easily get a professional-looking result that you and your family will enjoy for years to come! The combination of colors and patterns obtained with mosaic tiles create a unique aesthetic that cannot be obtained from other materials.
Next time you want to add some style and character to your home, consider adding mosaic tile to your floors. With the right preparation and proper tools, this simple DIY project can provide beautiful results. So don’t hesitate to begin! Take this opportunity to learn how to lay mosaic tiles on floor and give your house the perfect finishing touch.