
Embarking on the journey of transforming your living space from carpeted comfort to the timeless elegance of hardwood flooring is a rewarding endeavor that enhances both aesthetics and functionality. The process of removing carpet and installing hardwood involves a series of well-coordinated steps, from meticulous preparation to the skilled execution of flooring installation techniques. As homeowners increasingly seek the warmth and durability of hardwood, understanding the nuances of this transition becomes essential.
In this comprehensive guide, we delve into how to take out carpet and install hardwood, offering valuable insights on everything from prepping the existing surface to selecting the right hardwood material. Whether you’re a seasoned DIY enthusiast or a first-time home improver, this article provides a roadmap to success, empowering you to navigate the challenges and embrace the beauty of hardwood flooring. Join us on this transformative journey as we explore the art of taking out carpet and ushering in the enduring allure of hardwood underfoot.
Benefits of Replacing Carpet with Hardwood Flooring
When it comes to flooring options, there are a variety of choices available for homeowners. Carpet is a popular and comfortable option that has been used in homes for many years. However, as trends and styles change, more and more homeowners are choosing to replace their carpets with hardwood flooring. In this section, we will discuss the benefits of replacing carpet with hardwood flooring.
First and foremost, hardwood floors are much easier to clean and maintain compared to carpets. Carpets can easily accumulate dust, dirt, and allergens which can be difficult to remove even with regular vacuuming. On the other hand, hardwood flooring is easy to sweep or mop, making it a more hygienic option for those who suffer from allergies or have pets.
Another advantage of hardwood flooring is its durability. Unlike carpets which need to be replaced every 5-10 years due to wear and tear, hardwood floors can last a lifetime with proper care. They are resistant to scratches and stains, making them the perfect choice for high traffic areas such as living rooms, hallways, and kitchens.
In terms of aesthetics, hardwood flooring offers a timeless and classic look that can complement any interior design style. With a variety of wood types, colors, and finishes available, homeowners can choose the perfect hardwood flooring to match their home’s decor. Additionally, hardwood floors are known to increase property value, making it a wise investment for homeowners.
Furthermore, installing hardwood flooring can also improve indoor air quality. As mentioned earlier, carpets tend to trap dust and allergens which can affect the air quality in a home. Hardwood floors, on the other hand, do not trap these particles and are much easier to clean, resulting in better air circulation and a healthier living environment.
10 Methods How to Take Out Carpet and Install Hardwood
1. Prepare the Room
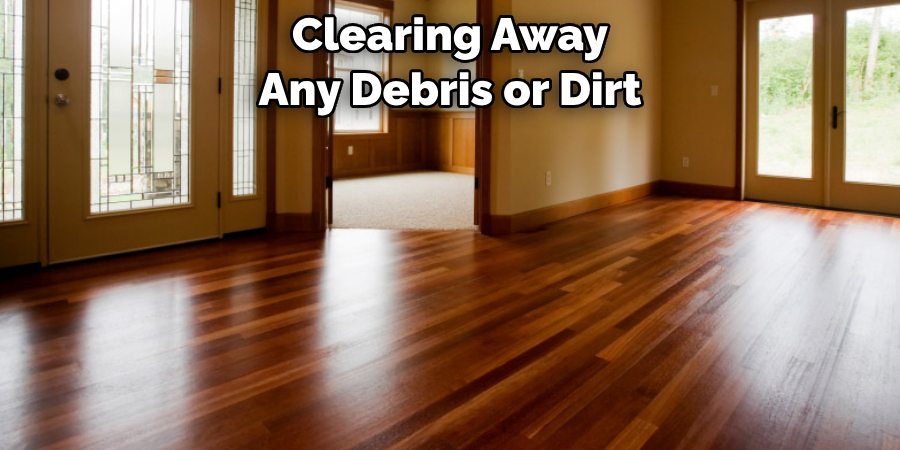
Before you can begin to take out the carpet and install hardwood, you’ll need to prepare the room. This includes removing any furniture and other items that may be in the way, as well as clearing away any debris or dirt. You’ll also want to make sure that the floor is level and free of any nails or screws that may be sticking up. Once the room is prepped, you can begin taking out the carpet.
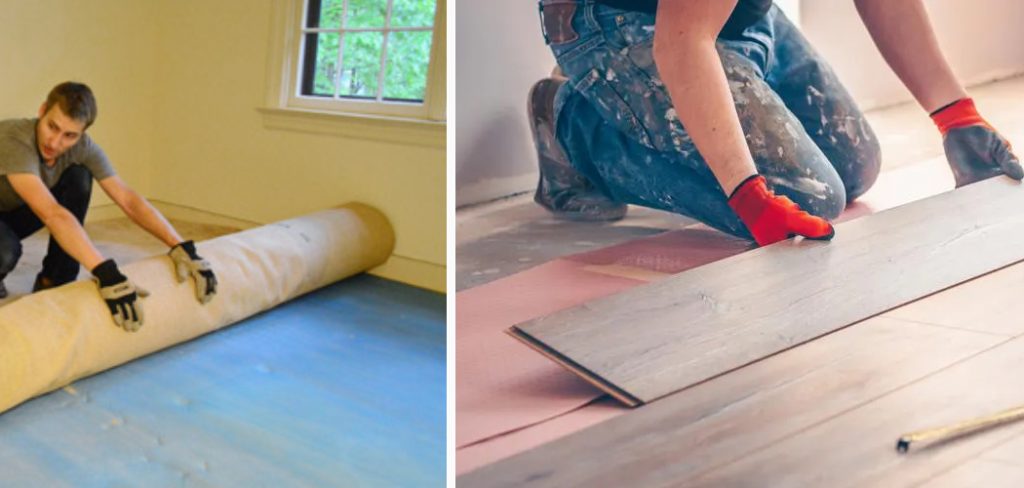
2. Remove Carpet Pad
The first step in taking out your carpet is to remove the carpet pad. To do this, use a utility knife to cut through the pad along each wall and then carefully pull it up from the floor. Make sure to wear gloves when doing this, as some of the padding material may contain hazardous materials such as asbestos or formaldehyde.
3. Pull Up Carpet
Once you have removed the carpet pad, you can begin pulling up your carpeting. Start at one corner of the room and use a flat pry bar to gently lift up a section of carpeting from one side of a wall until it comes loose from its backing on all four sides of that wall section. Continue working around the room until all of your carpet has been removed from its backing material.
4. Remove Nails and Staples
Once all of your carpet has been pulled up, you will need to remove any nails or staples that were used to secure it in place. Use a pair of pliers or a hammer and nail setter to remove these items from your subflooring material so they don’t interfere with installing your new hardwood flooring later on down the line.
5. Clean Subfloor
Once all nails and staples have been removed from your subflooring material, it’s time to give it a good cleaning before laying down your new hardwood flooring material. Vacuum up any remaining pieces of old padding or debris that may still be stuck in place and then mop down with warm soapy water for an even cleaner surface before moving onto installation steps for your hardwood floors.
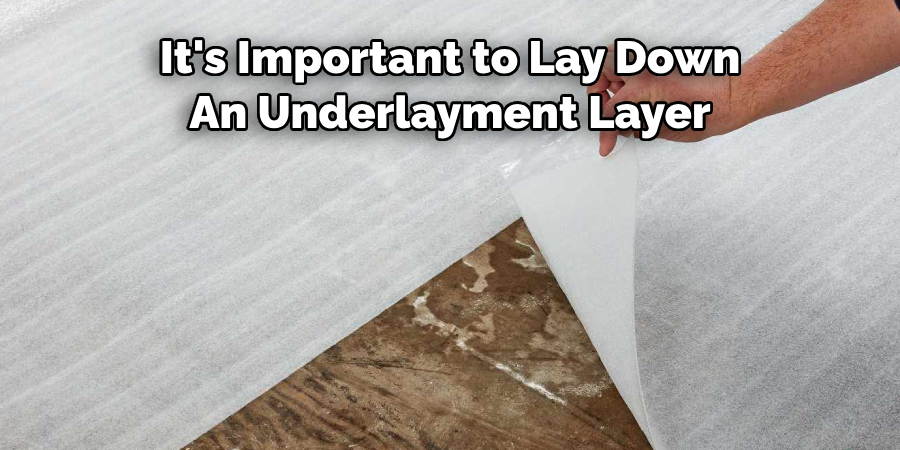
6. Install Underlayment
Before installing hardwood flooring, it’s important to lay down an underlayment layer between your subflooring material and new hardwood planks for added cushioning and insulation benefits during the installation process as well as after installation is complete for extra soundproofing benefits throughout the home environment when walking across floorspace areas within property boundaries overall too! Underlayment materials come in rolls, which should be laid down across the entire surface area before beginning the installation process itself for the best results possible!
7. Measure Room
Now that you’ve prepped everything for installation, it’s time to measure out how much hardwood flooring material you’ll need for your project by measuring length & width dimensions for each individual room space being worked on one at a time accordingly too! Make sure measurements are precise & accurate so there won’t be any problems with having too little or too much left over afterward, either!
8. Cut Planks
In order to fit planks into tight corners & around door frames/other obstacles within each room space being worked on during the installation process, they must first be cut into appropriate sizes beforehand using saw tools specifically designed for cutting wood materials like jigsaws & circular saws depending upon what type/brand plank product being installed within property boundary overall too! Also, make sure safety precautions are taken while cutting planks, like wearing protective eyewear/gloves, etc., just in case something goes wrong during the procedure itself as well!
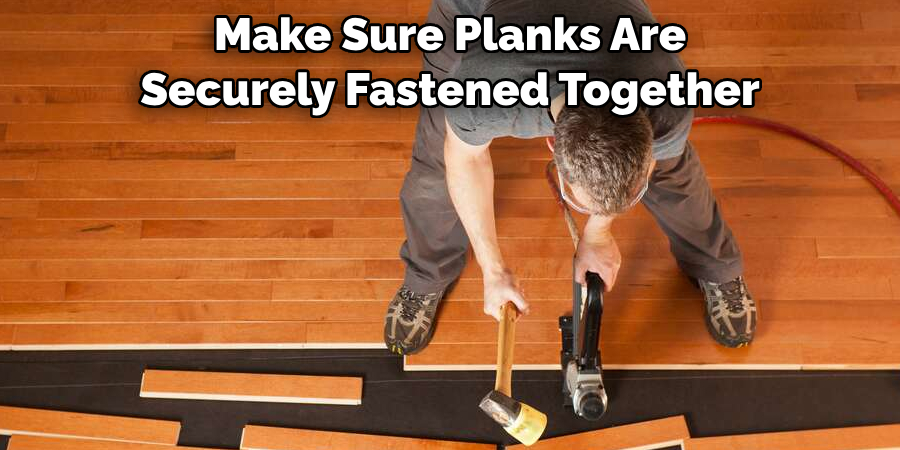
9. Lay Planks
Once planks have been cut into appropriate sizes, they can now finally be laid down onto the subfloor space area where desired, starting from the far back corner & working towards the frontmost corner accordingly, too! Make sure planks are securely fastened together using proper tools/techniques; otherwise, they might not stay put once finished with the entire installation process overall either!
10. Finish Installation Process
Finally once all planks have been successfully laid out within each individual room space being worked on during installation process itself then next step would involve finishing off entire project altogether by adding trim pieces around perimeter edges where needed plus applying sealant/wax coats onto surface areas afterwards if desired accordingly too!
Things to Consider When Installing Hardwood
When planning to install hardwood floors in your home, there are several factors that you need to take into consideration. These factors will not only affect the overall outcome of the installation process but also determine the longevity and functionality of your hardwood floors. In this section, we will discuss some important things to consider when installing hardwood.
Type of Hardwood
Selecting the type of hardwood to use is one of the most crucial decisions when it comes to installing hardwood floors. The type of wood you choose will determine the strength, durability, and appearance of your floors. Some popular options for hardwood include oak, maple, cherry, and walnut. Each type has its own unique color, grain pattern, and hardness level, so make sure to choose one that best suits your preferences and needs.
Subfloor
Before installing hardwood, it’s important to check the condition of your subfloor. The subfloor is the layer underneath the flooring that provides stability and support. It should be flat, dry, and free of any damage or debris. If you have a concrete subfloor, you may need to apply a moisture barrier to prevent any future damage to your hardwood floors.
Moisture and Humidity
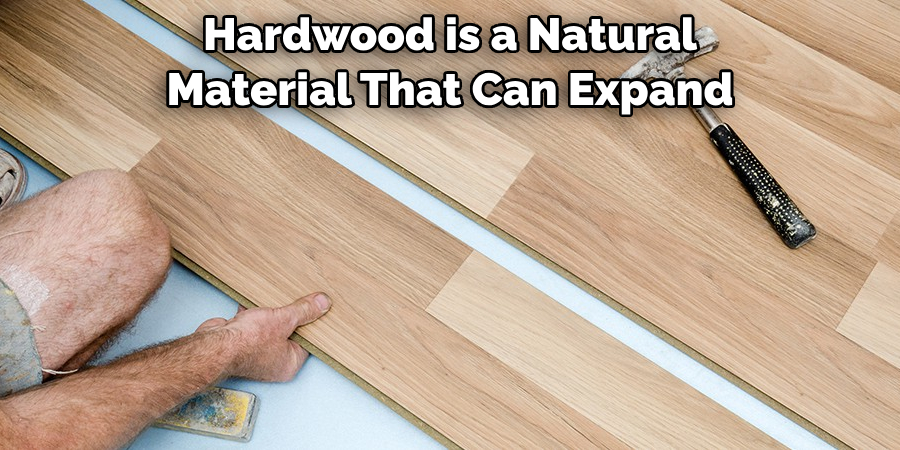
Hardwood is a natural material that can expand and contract with changes in temperature and humidity levels. Therefore, it’s important to ensure that the room where you plan on installing hardwood has proper ventilation and humidity control. Excess moisture or humidity can cause warping, buckling, and gapping in your hardwood floors.
Acclimation
Hardwood needs to be acclimated before installation, meaning it needs time to adjust to the environment of the room where it will be installed. This is important because if the wood is not properly acclimated, it can shrink or expand once installed, causing issues with the floor’s stability.
Conclusion
Installing hardwood and taking out carpet is a great way to spruce up your home. For those who are looking to modernize their living space, this is the perfect solution. Although it may sound intimidating, taking out the carpet and replacing it with hardwood is a relatively straightforward process that can be done in just a few steps.
Taking the time to do things correctly can help give your home an attractive, refreshed look. You’ll be amazed at how much of a difference it makes! Now that you know how to take out carpet and install hardwood, there’s no reason not to give it a try! Take the leap, gather the supplies, start measuring and get ready for your beautiful new floors!