
Are you someone who experiences chronic pain and has been relying on a heating pad for relief? Or maybe you’re looking to splurge on a new one but unsure how to maintain it properly? Whatever the case may be, understanding the importance of proper cleaning and care is essential in prolonging the life of your heating pad.
Heating pad washes are often overlooked, but keeping them clean is crucial as they come in direct contact with our skin. Over time, sweat and oils from our bodies can build upon the surface, harboring bacteria and reducing the effectiveness of the heating pad.
This blog post will delve into an easy-to-follow guide explaining how to wash a heating pad. With just a bit of dedication, your trusty device can remain clean while providing lasting comfort!
What Will You Need?
First and foremost, you’ll need to gather some essential materials before starting. The good news is that many of these items can be found in your home!
- A mild detergent
- Water
- Soft cloth or sponge
- Towel
- Bowl or sink for soaking
Once you have all these items ready, it’s time to start cleaning your heating pad!
10 Easy Steps on How to Wash a Heating Pad
Step 1. Unplug the Heating Pad:
The first and most crucial step for your safety is to ensure that the heating pad is disconnected from any power source. Never attempt to clean an electronic device while it is still plugged in. If your heating pad has a detachable cord, remove it before proceeding.
Step 2. Check the Manufacturer’s Instructions:
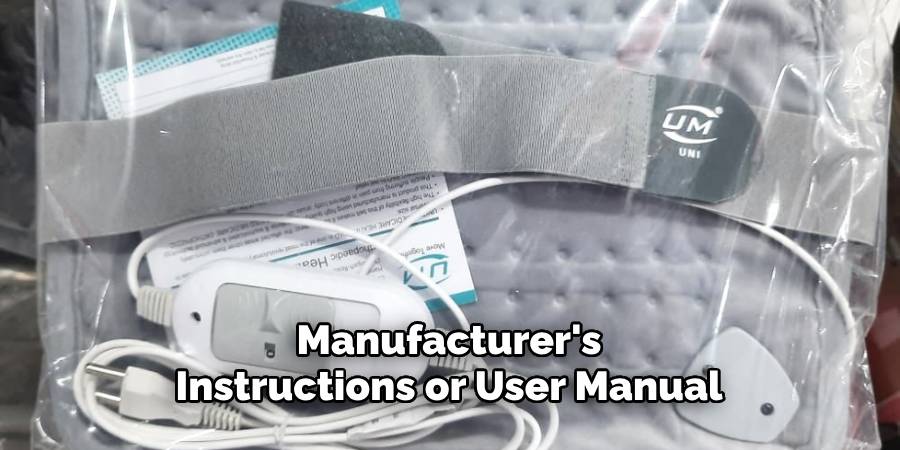
Before proceeding to clean your heating pad, it’s crucial to consult the manufacturer’s instructions or user manual, if available. Different heating pads can be made of different materials, and certain cleaning methods may not be suitable for some types. Following the manufacturer’s guidelines will help ensure that you clean the pad correctly without causing any damage.
Step 3. Spot Cleaning:
Before immersing your heating pad in water, it’s advisable to do spot cleaning first. Especially if there are visible stains or discolorations on the pad, using a damp cloth or sponge with mild detergent can be an effective method. Gently rub the stained area with a cloth or sponge until the stain lifts. Remember not to use harsh cleaners or scrub too hard to avoid damaging the material of the heating pad. Rinse the cloth or sponge and wipe the area to remove any soap residue.
Step 4. Soak the Heating Pad:
If your manufacturer’s instructions allow it, and your heating pad doesn’t contain any electronic components, you may proceed to soak it. Fill a bowl or sink with lukewarm water and a small amount of mild detergent. Immerse the heating pad in the soapy water and let it sit for approximately 10-15 minutes. This soaking process will help dislodge any dirt or grime clinging to the fabric.
Step 5. Rinse Thoroughly:
After soaking, rinse the heating pad thoroughly under cool, running water. Keep rinsing until you’re sure that all the soap has been removed. Any remaining detergent may cause skin irritation or damage the heating pad’s material over time.
Step 6. Dry the Heating Pad:
Gently squeeze the heating pad to remove excess water, but avoid twisting or wringing it, which could potentially damage the internal elements. Lay the heating pad flat on a clean, dry towel and roll it up to absorb more moisture. Finally, unroll the towel and leave the heating pad to air dry completely. Make sure it’s scorched before using it again to ensure safety.
Step 7. Reconnect the Cord:
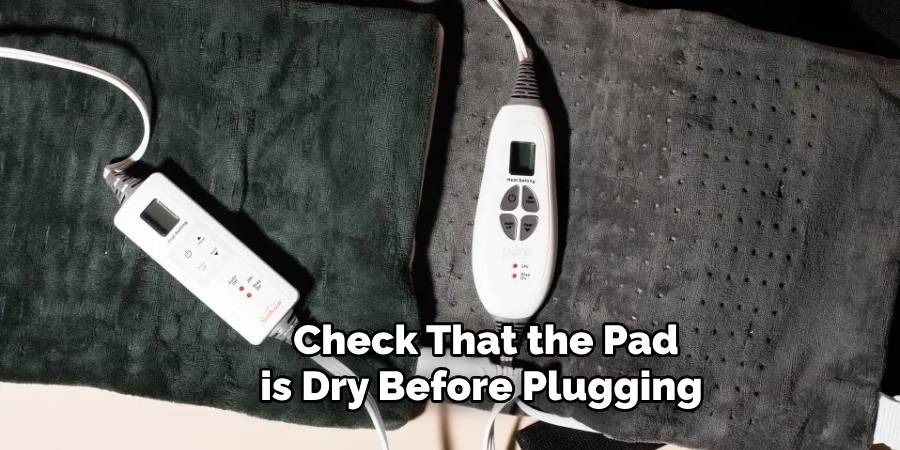
Once the heating pad is fully dry, you can reconnect the cord if it was removed earlier. Always double-check that the pad is dry before plugging it back in to avoid any risk of electrical shock. Additionally, inspect the cord for any damages or frays that may have occurred during the cleaning process.
Step 8. Test the Heating Pad:
After everything is dry and reconnected, it’s crucial to test the heating pad to ensure it still functions correctly. Plug the device into a power source and turn it on. Let it heat up for a few minutes and check if it’s heating evenly and performing at the expected temperature. If you notice any issues or irregularities, consult the manufacturer’s customer service or consider getting a replacement.
Step 9. Store the Heating Pad Properly:
After confirming that your heating pad is working correctly, it’s time to store it properly. Do not fold or roll the heating pad too tightly, which might damage its internal components. Instead, store it loosely folded in a cool, dry place. If your heating pad comes with a storage bag, it’s best to use it for storage to prevent dust accumulation. Regular cleaning and proper storage can significantly extend the life of your heating pad.
Step 10. Regular Maintenance:
To maintain the longevity and effectiveness of your heating pad, it’s recommended to clean it regularly. Depending on your frequency of use, aim to wash your heating pad once every three to four months. Also, remember to inspect it for any wear and tear before each use to ensure safety. Regular maintenance can help your heating pad stay clean, hygienic, and function at its best for years to come.
Following this easy guide lets you keep your device clean and safe whenever needed. Always follow the manufacturer’s instructions, spot clean before soaking, and regularly maintain your heating pad for optimal performance.
5 Additional Tips and Tricks

- Air Dry the Pad: Let the heating pad air dry after washing. Using a dryer may damage its internal components.
- Add a Moist Cloth: If your heating pad is filthy or has stains, place a damp cloth on top of it before turning it on. The moisture will help loosen the dirt and make it easier to clean.
- Use White Vinegar: For tough stains or odors, mix equal parts of water and white vinegar in a spray bottle and lightly mist the heating pad. Let it sit briefly before wiping off with a damp cloth.
- Avoid Submerging in Water: While most heating pads can be hand washed, avoid completely submerging them. The electrical components may get damaged and render the pad unusable.
- Use Antibacterial Spray: If you are using a heating pad to treat injuries or sore muscles, it’s a good idea to disinfect it after each use. Use an antibacterial spray or wipe to keep the pad clean and free from germs.
With these additional tips and tricks, you can ensure that your heating pad stays clean and in good condition for longer.
5 Things You Should Avoid
- Don’t Use Bleach or Harsh Detergents: These strong cleaning agents can deteriorate the fabric of the heating pad and damage its internal components. Stick to mild, fabric-friendly detergents for cleaning.
- Avoid Drying Under Direct Sunlight: While air drying is recommended, exposing the heating pad to intense sunlight can compromise the integrity of its materials. Opt for a shaded, well-ventilated area for drying.
- Don’t Machine Wash or Dry: Avoid using a washing machine or dryer to clean your heating pad unless specifically stated in the product’s instructions. The agitation in the machines can damage the internal wiring.
- Avoid Using Damaged Pads: If you notice any signs of damage – such as fraying wires, torn fabric, or inconsistent heating – stop using the heating pad immediately. Continuous use of a damaged heating pad can be a safety hazard.
- Don’t Ignore Manufacturer’s Instructions: Each heating pad is different and may require specific maintenance procedures. Ignoring these guidelines can damage the pad or pose a risk to your safety. Always adhere to the manufacturer’s instructions for cleaning and maintenance.
By avoiding these common mistakes, you can ensure that your heating pad stays clean and functional for a long time.
Can You Boil a Heat Pack?
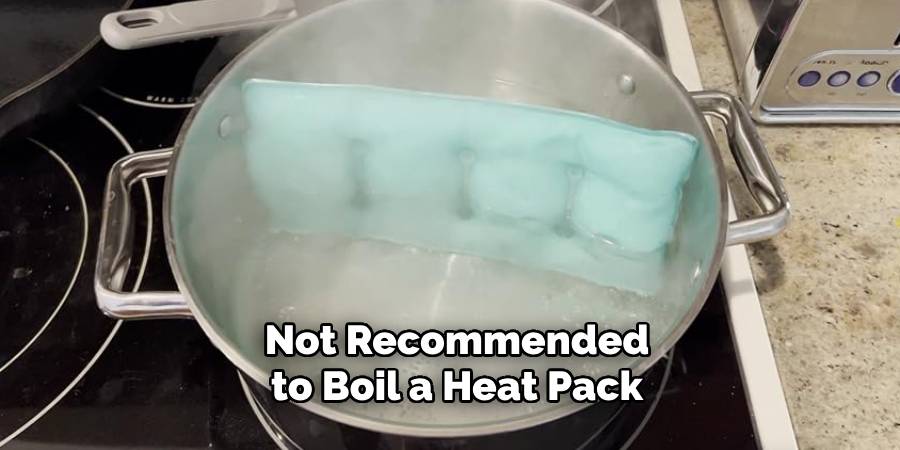
No, it is not recommended to boil a heat pack as it may cause damage to the internal components and render it unusable. Always follow the manufacturer’s instructions for cleaning and using your heating pad.
If you need clarification on specific instructions, consult the product manual or the manufacturer for guidance. Safety should always be a top priority when using any electronic device.
Additionally, never use a heat pack that has been damaged or shows signs of wear and tear. This can pose a safety hazard and should be replaced immediately.
Conclusion
After reading this article on how to wash a heating pad, you are now prepped and ready to clean your heating pad safely. To recap, don’t forget to turn off and unplug your heating pad before cleaning.
Be sure to either dunk or hand-wash it in a shallow basin of warm water and a mild detergent. Once that’s done, it’s best to rinse it once or twice more with clear, warm water to make sure all detergent has been scrubbed away.
Don’t dab or wring out the heating pad, as it could damage the material of the heating element inside. And now you can hang up your freshly washed heating pad for drying in an airy place away from direct sunlight.
There’s no need to make cleaning this an arduous task, so don’t feel overwhelmed by the prospect – cleaning your heating pad doesn’t have to be complicated.
So get those machines running – you’ll soon be wrapping yourself up in a cozy heated hug!