
Do you ever feel like your jewelry, coins, or other small valuable items are scattered all over the place, and it’s time to get organized? If so, you’re in luck—making silver storage bags is easy and economical!
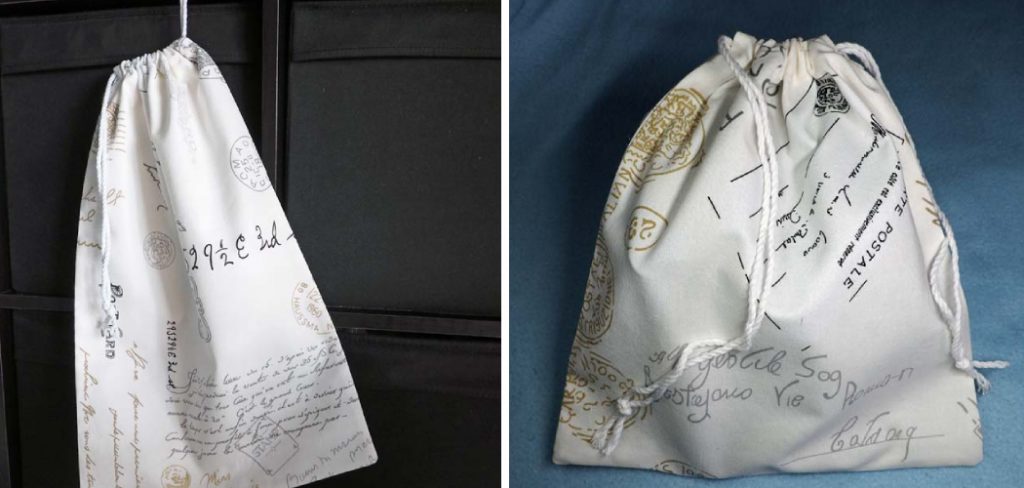
With a few basic supplies from your local craft store and some simple instructions, you can quickly create convenient little pouches that will keep all of your valuables safely stored away. In this blog post we’ll walk through how to make silver storage bags that not only save space but look great too!
What Are Silver Storage Bags Made of?
Silver storage bags are made of a special, highly reflective material called aluminized mylar. This material is composed of two layers: an inner layer of low-density polyethylene plastic and an outer layer of metalized aluminum oxide. The combination of these two layers makes for a strong, durable bag with excellent light-reflecting properties. Aluminized mylar is often used in industrial insulation applications, such as for pipeline wrap and exhaust systems.
The combination of aluminum oxide and plastic creates a barrier that prevents heat transfer through the bag material. This means your items stay cooler longer than in conventional plastic bags or containers. This helps preserve the quality and freshness of the food stored inside by reducing oxidation, which can cause food to spoil more quickly. Additionally, silver storage bags are non-toxic, so they are safe to use to store food.
Silver storage bags also have antimicrobial properties that inhibit bacterial growth, which makes them an excellent choice for storing perishable items like fish and meat. The reflective nature of these bags also helps protect delicate items from light damage that can occur when left in direct sunlight.
Finally, silver storage bags are highly effective at blocking moisture from the environment, which helps to keep food fresher for longer periods of time.
10 Methods How to Make Silver Storage Bags
Method 1: Gather the Materials
To make silver storage bags, you’ll need the following materials: silver fabric (such as anti-tarnish silver cloth or silver storage bags fabric), scissors, ruler or measuring tape, sewing machine or needle and thread, fabric pen or chalk, and a cord or ribbon for closure.
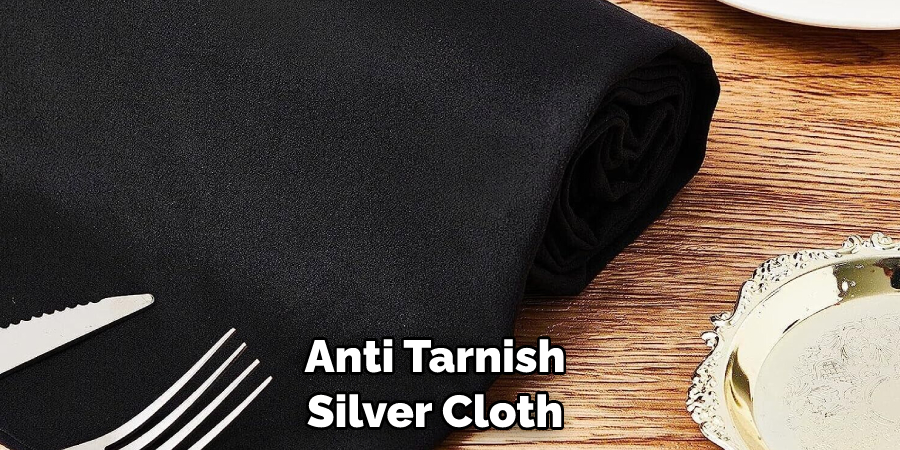
However, if you only need to store something small like jewelry, the cord or ribbon may be unnecessary. Try to find silver fabric that is treated with an anti-tarnish agent, as this will help keep your items from tarnishing over time. Make sure the fabric you choose is a substantial weight and will not tear easily.
Method 2: Measure and Cut the Fabric
Measure and cut the silver fabric into rectangular pieces according to the desired size of the storage bags. Consider the dimensions of the silver items you plan to store and leave extra room for folding and seams.
Using sharp fabric scissors, cut the silver fabric to the desired length and width. To ensure a professional finish, remember to use straight pins to keep the fabric in place while cutting. If you are making several bags of the same size, lay out the fabric, pin multiple layers together and cut everything at once. This will save you time and effort.
Method 3: Fold and Pin the Fabric
Fold the fabric in half lengthwise, with the right sides facing each other. Use pins to secure the sides and bottom of the fabric, leaving the top open for the bag’s opening. Sew the sides and bottom with a sewing machine, creating three seams: one on each side, and one at the bottom.

Trim any excess fabric and remove the pins. Turn in the fabric so that the right side is facing outwards, and press it flat with an iron. However, if you are using a delicate fabric, use the steam setting instead. Finally, top stitch along all three seams to reinforce the structure of the bag.
Method 4: Sew the Sides and Bottom
Using a sewing machine or needle and thread, sew along the sides and bottom of the fabric, leaving the top open. Use a straight stitch or a zigzag stitch to ensure durability. Remove the pins as you sew. For extra durability, add a second line of stitching 1/4-inch from the first. Make sure that all edges are properly secured.
Method 5: Trim Excess Fabric and Corners
Trim any excess fabric and corners to reduce bulk and create neater edges. Be careful not to cut through the seams. Measure and mark the fabric, then cut with sharp scissors. If you have opted for a patterned fabric, make sure to keep the design symmetrical.
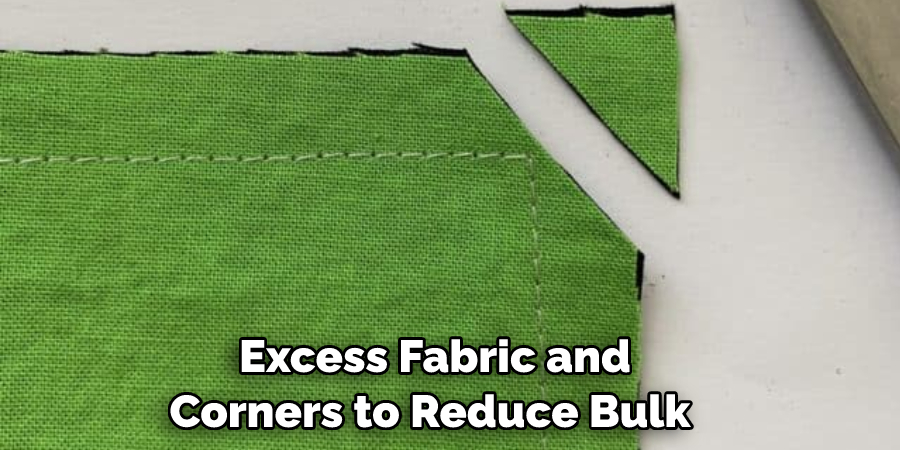
Once trimmed, press the edges with an iron to create a finished look. Your silver storage bag is now ready to use! Additionally, you can use a sewing machine to create decorative stitchings along the edges. This is a great way to add flair and personality to your project.
Method 6: Turn the Bag Inside Out
Carefully turn the bag inside out, ensuring that the right side of the fabric is now facing outwards. Use a pencil or blunt tool to push out the corners and create clean edges. Stitch the side seams down with matching thread to secure the shape of the bag.
Finally, stitch a decorative hem along the top edge of the bag, adding a matching or contrasting decorative touch. Once the hem is finished, you have completed your silver storage bag and can use it to store treasured items or make a beautiful gift for someone special.
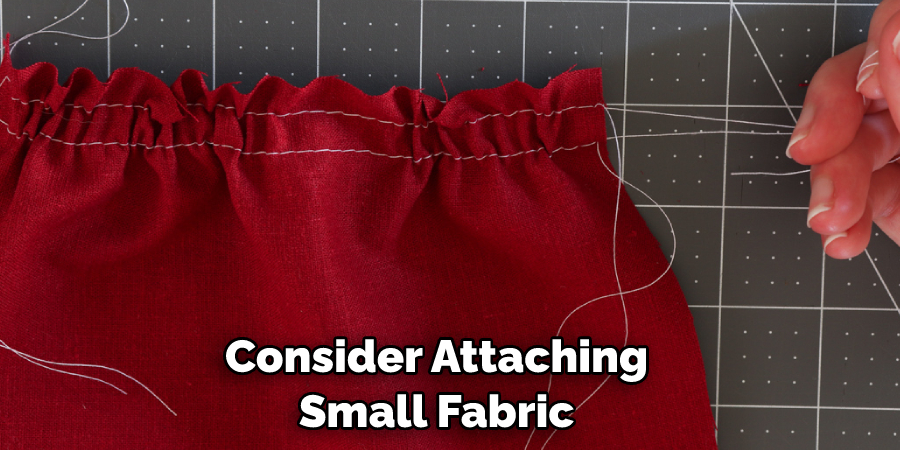
Method 7: Fold and Hem the Top Edge
Fold the top edge of the bag down about an inch (2.5 cm) and press it with an iron to create a clean, folded hem. Pin the hem in place and sew along the folded edge, leaving a small opening for the cord or ribbon. Tie the cord or ribbon through the opening, forming a drawstring closure.
Your silver storage bag is now complete and ready to store your items safely. With the help of this tutorial, you can now make your own silver storage bag that will keep your precious items protected. Have fun and be creative with your designs!
Method 8: Attach the Cord or Ribbon
Thread a cord or ribbon through the opening in the hem, going all the way around the bag. Pull the cord or ribbon tight, ensuring that both ends are even. Tie a knot or bow to secure the closure. Place the ribbon or cord in a position that is easy to access.
Your silver storage bag is now ready for use! Additionally, you can add a label to the bag with the type of silver item it contains. This will help you easily identify its contents when needed. Make sure to store your silver items in a cool and dry environment. Use these bags to keep your valuable silver items safe and organized.
Method 9: Add Decorative Embellishments (Optional)
If desired, you can add decorative embellishments to the silver storage bags. Consider attaching small fabric flowers, buttons, or personalized labels to make them more visually appealing. Hot glue, fabric glue, or strong adhesive tape can be used to attach the embellishments. Additionally, you can use ribbons, trims, or laces to decorate the bags.
Be sure to use only strong adhesives that can withstand wear and tear. Allow the adhesive to dry completely before using the bag. With some creativity, you can create custom designs and textures on the bags that are unique and attractive. Have fun and get creative!
Method 10: Store Your Silver Items
Once the silver storage bags are complete, carefully place your silver items inside, ensuring they are clean and dry. The silver fabric will help protect against tarnishing by reducing exposure to air and moisture. Store the bags in a cool, dry place away from direct sunlight. You can further protect your silver items by wrapping them in a soft cloth before placing them in the bags.
It is important to remember that tarnishing prevention is an ongoing process, so check your bags regularly for signs of oxidation and clean the silver items as needed. Taking these simple steps will help you preserve your silver items for years to come.
Conclusion
Crafting a silver storage bag is a great way to keep your things safe and sound. Not only does it provide the right kind of protection, but it also adds an extra bit of style and flair to whatever you’re storing in it. You can easily create your own silver storage bag with the help of some readily available materials, such as fabric glue and double-sided tape.
With that said, make sure to be aware of safety precautions when handling glue or any other materials for that matter, lest there be any issues inadvertently caused by carelessness. Furthermore, by making use of silver storage bags now, you will prevent something valuable or fragile from getting damaged in the future – all with a few simple steps!
Now that we’ve explored how to make silver storage bags, why not try one yourself? Give it a go and see if these homemade silver storage bags are enough for keeping all your lovely items safe!