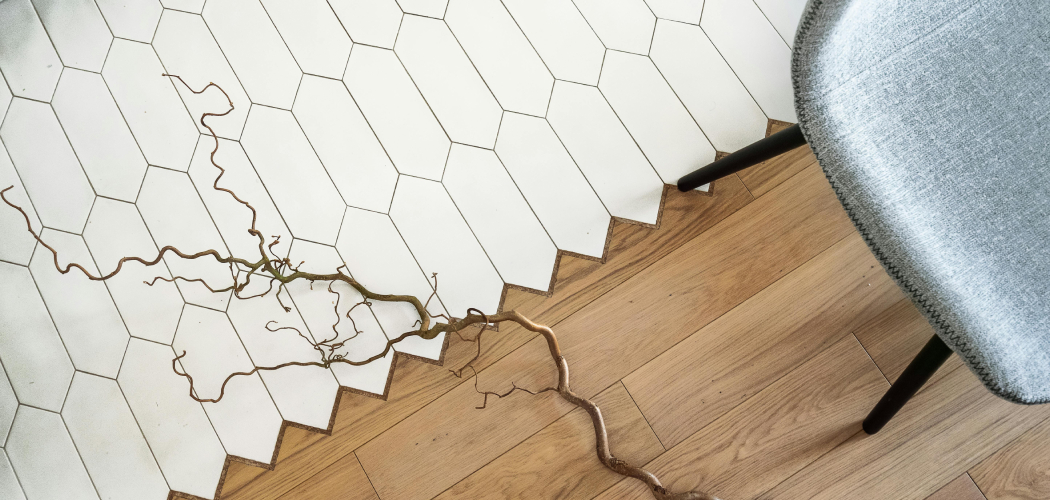
Achieving a seamless and aesthetically pleasing transition between tile and wood flooring is an art that requires careful consideration and skill. The juxtaposition of these two materials can enhance the visual appeal of a space, but improper transitions can result in a jarring effect. In this guide, we explore how to transition tile to wood floor, unraveling the key techniques and considerations for a flawless merge.
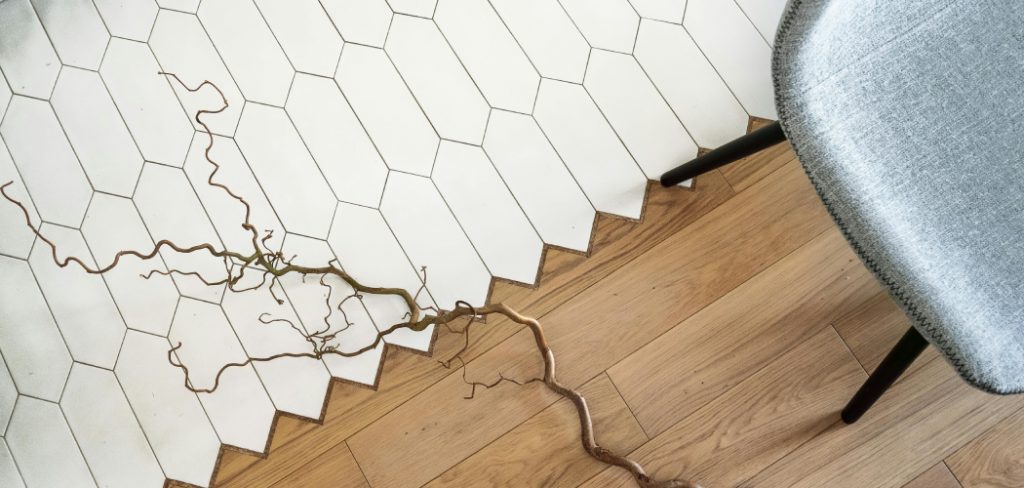
Whether you are renovating your home or contemplating a new design, understanding the methods to create a harmonious connection between these diverse surfaces is essential. From selecting the right transition strips to addressing differences in height and expansion gaps, this article provides a comprehensive roadmap to help you achieve a seamless and sophisticated transition that not only connects tile and wood but elevates the overall design aesthetic of your living spaces.
Importance of Proper Transition Methods
Employing proper transition methods between tile and wood flooring is not just a matter of aesthetics; it also ensures the longevity and durability of your floors. An improperly executed transition can lead to uneven surfaces that pose tripping hazards, as well as create spaces for moisture and debris to accumulate, potentially damaging both materials over time.
On the other hand, a well-thought-out and executed transition safeguards the edges of both flooring types from wear and tear, minimizing maintenance issues. By focusing on the right techniques, you not only achieve a visually appealing flow between spaces but also contribute to the overall structural integrity of your flooring investment.
Different Types of Transitions
When planning the transition from tile to wood flooring, there are several types of transitions you can consider. Each type serves a unique purpose and suits different aesthetic and functional needs.
- T-Molding: T-Molding is often used in doorways where the tile and wood floors meet. It gets its name from its T-shaped profile. The top of the “T” sits flush with both flooring types, creating a smooth transition. It’s an excellent choice for areas where the two floors are at the same height.
- Reducer Strip: A reducer strip is ideal for situations where the tile and wood flooring have significant differences in height. It smoothly angles down from the higher surface to the lower, reducing the risk of trip hazards and creating a pleasing taper between the two materials.
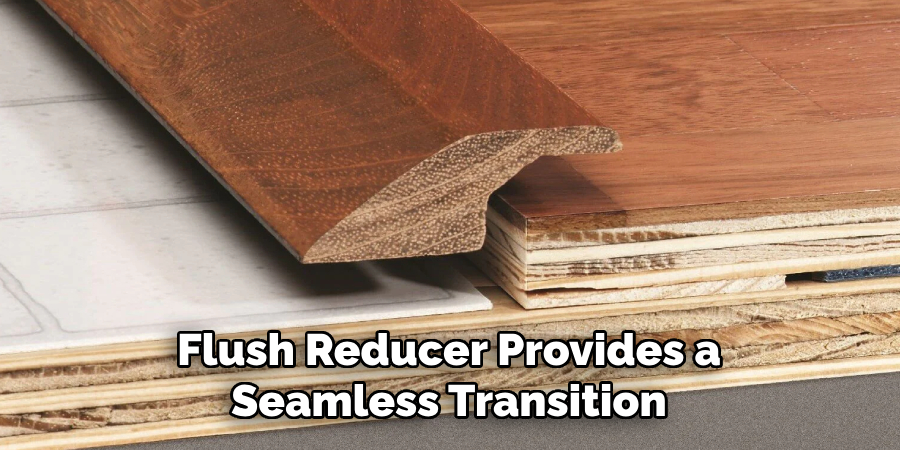
- Flush Reducer: Similar to a reducer strip, a flush reducer provides a seamless transition between wood and tile flooring that differ in height. However, it is designed to meet more flush against the higher surface, offering a sleeker look and feel.
- Transition Strip with Metal Track: This option involves a metal track that is anchored to the subfloor, with a transition piece that snaps into the track. It’s versatile and can accommodate a variety of height differences and materials.
- Custom Wood Strips: For a more high-end and unique transition, custom wood strips can be crafted to match the wood flooring. This approach is perfect for curved or irregularly shaped transitions, offering a bespoke solution that can be precisely tailored to match the design and aesthetics of your space.
Each of these transition types has its advantages, depending on the specific requirements of your flooring project. The key is to choose the one that best matches the aesthetic appeal, functionality, and safety needs of your space.
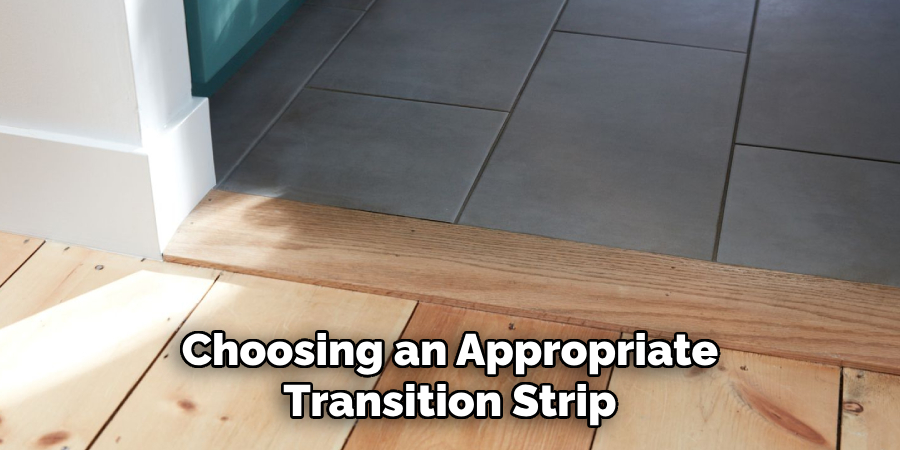
Factors Influencing Transition Selection
Several factors play a pivotal role in selecting the most appropriate transition between tile and wood flooring. Understanding these factors ensures that the chosen transition not only meets aesthetic desires but also addresses practical considerations effectively.
- Height Difference: The height disparity between the tile and wood flooring significantly affects the choice of transition. Different transition types accommodate various height differences, ensuring a smooth and safe changeover.
- Flooring Material Expansion: Both tile and wood floors respond differently to temperature and humidity changes, expanding and contracting at different rates. An appropriately chosen transition accommodates this movement, preventing buckling, gaping, or damage.
- Aesthetic Continuity: The visual transition between two different flooring materials should complement the overall design theme of the space. The choice of transition can enhance or detract from the space’s aesthetic appeal, influencing the room’s feel and flow.
- Location and Traffic: The transition area’s location within the home and the expected traffic levels are crucial considerations. High-traffic areas require durable and less obtrusive transitions to minimize wear and tripping hazards.
- Moisture Exposure: In areas prone to moisture, such as bathrooms or kitchens, the transition material’s resistance to water and humidity becomes an essential factor to avoid warping, swelling, or mold issues.
Careful consideration of these factors will guide you in choosing the most fitting transition type for your tile to wood floor project, ensuring a beautiful and functional outcome.
10 Methods How to Transition Tile to Wood Floor
1. Selecting the Right Transition Strip:
Begin the transition by choosing an appropriate transition strip. T-moldings, reducers, and threshold transitions are common choices. Ensure the strip complements the colors and styles of both the tile and wood for a cohesive look. Additionally, consider the functionality of the transition strip. For example, a reducer can provide a smooth transition between two different flooring heights, while a T-molding can allow for expansion and contraction in floating floors.
When selecting a transition strip, also take into account the type of installation method used for the tile and wood. If one is installed using glue or mortar, while the other is a floating floor, choose a transition strip that can accommodate both installation methods. This will ensure a seamless and secure transition between the two types of flooring.
Another important factor to consider when choosing a transition strip is the location in which it will be installed. Different areas of the home may require different types of transitions. For example, a doorway or entryway might benefit from a threshold transition to create a smooth surface for foot traffic, while a T-molding might be more suitable for a hallway or larger open space.
2. Ensuring Subfloor Consistency:
Before installing the transition, confirm that the subfloor beneath both the tile and wood surfaces is level and consistent. Any irregularities should be addressed to prevent unevenness in the transition. While slight variations in height may not be noticeable, larger discrepancies can cause tripping hazards and make the transition appear uneven or unprofessional.
To check for subfloor consistency, use a long level or straight board laid across both surfaces. If there are any gaps or dips, these should be filled with floor leveling compound to create a smooth and even surface. It is important to wait for the compound to fully dry and cure before proceeding with the installation.
In addition to subfloor consistency, it is also important to ensure that both the tile and wood surfaces are clean and free of any debris or adhesive residue. This will not only create a better aesthetic appearance for the transition, but it will also help with the adhesion of any transition strips or molding.
3. Addressing Height Differences:
If the tile and wood floors have different thicknesses, it’s crucial to address the height difference. Transition strips come in various profiles to accommodate varying height levels. Choose one that bridges the gap without creating a tripping hazard. Also, make sure to use a transition strip that complements the overall design and aesthetic of the room.
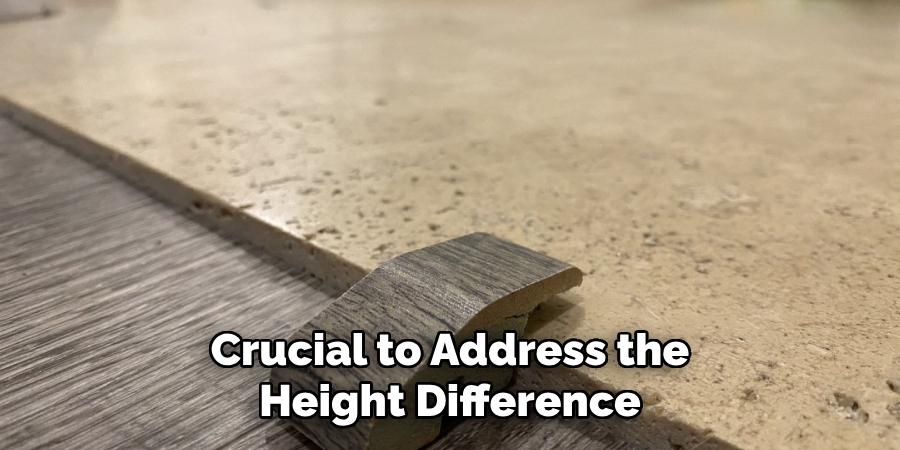
Other options for addressing height differences between floors include using floor reducers or T-moldings. Floor reducers gradually slope down from one floor level to another, while T-moldings create a flat transition between two different floors. Find the best option that suits your needs and fits seamlessly with your flooring choices.
4. Creating a Flush Transition:
Achieving a flush transition is ideal for a sleek and modern look. This method involves installing the transition strip so that it sits level with both the tile and wood surfaces. It provides a smooth and visually appealing connection. Though it may take a bit more effort to install, the end result is well worth it.
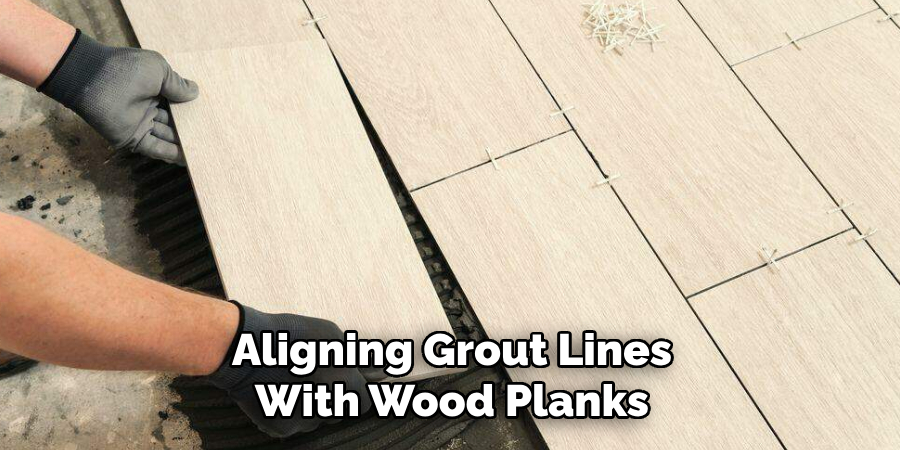
5. Grout Line Alignment:
If the tile and wood are laid in adjacent rooms, aligning the grout lines with the direction of the wood planks enhances continuity. This alignment minimizes visual disruption, creating a more natural flow between the two flooring types.
In addition to aligning grout lines with wood planks, there are various other ways to create a cohesive and visually appealing transition between tile and wood flooring. One option is to use the same type of flooring material but in different sizes or patterns. For example, you could choose large rectangular tiles for one room and small square tiles for another, creating a subtle contrast while still maintaining a cohesive look.
Another option is to use wood-look tile or plank flooring that mimics the appearance of real wood. This allows for easy maintenance and durability while still achieving the desired aesthetic of wood flooring. For added visual interest, you can also incorporate different colors or shades within the tile or wood planks, creating a unique and eye-catching design.
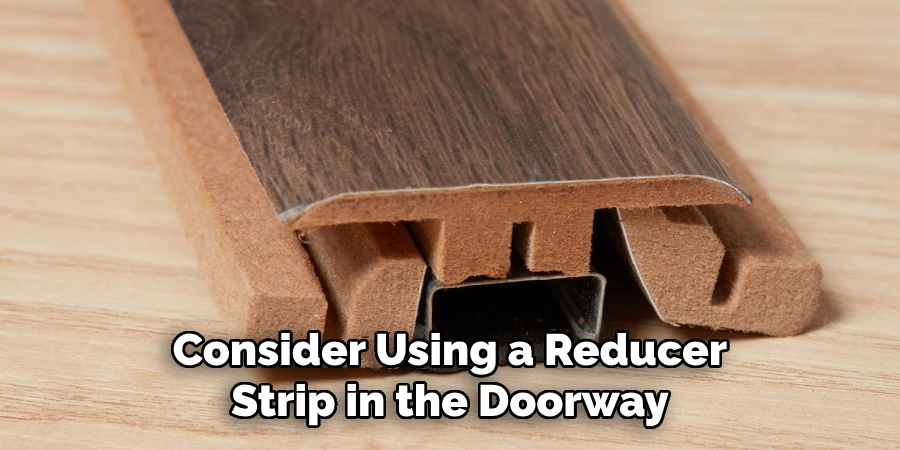
6. Transitioning in Doorways:
Doorways present a unique challenge in transitioning between tile and wood. To maintain a cohesive look, extend the transition strip across the doorway, ensuring a seamless connection as you move from one room to another. This will not only enhance the visual appeal of your space, but also prevent tripping hazards.
Additionally, you could consider using a reducer strip in the doorway. This type of transition features a gentle sloping edge that creates a smooth transition between floors with different heights. It can also be used to bridge gaps between uneven flooring surfaces.
Another option is to use a T-molding strip in the doorway. This type of transition features a T-shaped design that creates a smooth transition between floors with similar heights. It also has the added benefit of covering any gaps that may appear over time due to natural expansion and contraction of the flooring.
7. Custom Transitions for Unique Situations:
In cases where standard transition strips may not suffice, consider custom transitions. This could involve creating a transition piece that complements intricate tile patterns or replicating wood profiles for a tailored transition. Additionally, custom transitions can be used in situations where there are height differences between flooring materials or where a transition is needed between non-standard flooring types such as carpet and tile.
To create custom transitions, you can work with a contractor or carpenter to design and build them. Alternatively, some manufacturers offer customizable options that allow you to choose the style, color, and material for your transition piece. This can be a great option for those who want a unique and personalized touch in their flooring transitions.
8. Expansion Gap Considerations:
Both tile and wood can expand and contract with changes in temperature and humidity. Leave an appropriate expansion gap when installing the transition strip to accommodate these natural movements, preventing buckling or warping.
Expansion gaps are crucial when installing any type of flooring, especially when transitioning between two different materials. Without proper expansion gaps, the flooring can become damaged and potentially ruin the entire project.
When it comes to tile and wood flooring, both materials have the potential to expand and contract with changes in temperature and humidity. This is why it’s important to always leave an appropriate expansion gap when installing a transition strip between the two materials.
9. Creating Visual Borders:
Use contrasting materials or patterns to create a visual border between the tile and wood. This technique not only adds a decorative element but also emphasizes the intentional separation between the two flooring surfaces. For example, you can use a border of marble tiles to highlight the transition from hardwood floors to ceramic tiles in a kitchen or bathroom.

Additionally, you can also incorporate different textures to create borders in your flooring design. This adds another layer of visual interest and can help define specific areas within a larger space. For instance, using rough stone tiles as a border between carpet and hardwood can separate the living room from the dining area in an open floor plan.
Moreover, consider using patterns or shapes to create borders instead of just relying on contrasting materials. Geometric designs, such as chevron or herringbone, can add a modern touch while still defining different areas in a room. Alternatively, you can opt for more intricate patterns inspired by Moroccan or Spanish tile work to add a touch of elegance and uniqueness to your flooring design.
10. Professional Installation for Complex Transitions:
For intricate designs or challenging transitions, seek professional installation. Flooring experts can assess the specific requirements of your space, ensuring a seamless and durable transition that enhances the overall aesthetic appeal of your home.
They have the expertise and tools needed to properly level subflooring, cut and fit flooring pieces, and secure transitions in place. Additionally, professional installation often comes with a warranty or guarantee, providing peace of mind for any potential issues that may arise.
One benefit of professional installation is the ability to customize transitions to fit your specific needs. Whether you have uneven flooring, different height levels, or unique design elements, professionals can create custom transitions that not only look great but also function effectively. This level of customization is crucial for ensuring a smooth and safe transition between flooring types.
Troubleshooting and Common Challenges
Even with meticulous planning and professional installation, you might encounter some challenges with your flooring transitions. One common issue is the misalignment of transition strips due to uneven subflooring. This can cause a tripping hazard and detract from the overall appearance of your flooring.
To resolve this, ensure that your subfloor is perfectly level before installing any transition strips. Another frequent challenge is the wear and tear on transition strips in high-traffic areas. Over time, these strips can become loose or damaged, posing a safety risk. Regular inspection and prompt replacement of worn-out strips are essential to maintain both the aesthetics and functionality of your flooring transitions.
Choosing the right material for your transition strips is also crucial. Materials that are too soft may wear out quickly, while those that are too hard may cause discomfort when walked upon. Additionally, color matching can be tricky, especially with natural materials like wood that have inherent variances.
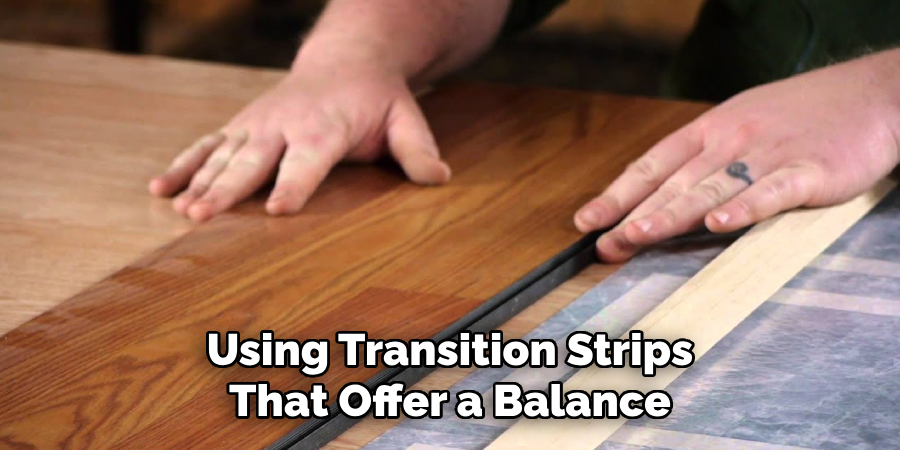
To mitigate these challenges, consider using transition strips that offer a balance of durability and comfort, and try to purchase extra material at the outset for future repairs or replacements. Properly addressing these common challenges will ensure that your flooring transitions remain beautiful and functional for years to come.
Conclusion
In conclusion, mastering the art of transitioning from tile to wood flooring is pivotal for achieving both aesthetic cohesion and functional integrity in home design. By understanding the various transition methods and selecting the most suitable one for the specific context, homeowners can seamlessly blend different flooring materials while ensuring smooth transitions between spaces.
Through careful preparation, precise installation, and diligent maintenance, the transition process can elevate the overall look and feel of interior spaces while also enhancing their practicality and durability. Attention to detail during installation, such as ensuring proper alignment and addressing potential challenges, fosters a seamless transition that withstands the test of time. Hopefully, this article gave you some helpful tips about how to transition tile to wood floor successfully, so now that you have the proper knowledge on how to get the job done, why not give it a try today?