
Running wire through the first-floor ceiling can be a challenging task, whether you’re installing new electrical wiring, setting up a home network, or incorporating additional lighting.
It’s a job that requires precision, safety measures, and a strategic approach to seamlessly navigate the structure of your ceiling without causing damage. Knowing how to run wire through the first-floor ceiling effectively is a fundamental skill for any DIY enthusiast or homeowner.
In this guide, we’ll explore the essential steps of how to run wire through first floor ceiling with confidence. From planning and preparation to executing the wiring process, we’ll provide you with valuable insights to ensure a successful project. Whether you’re a seasoned DIYer or a first-timer, mastering this skill will empower you to enhance your home’s functionality and aesthetics.
The Need to Run Wires through a First-Floor Ceiling
In any home or building, there are various reasons why wires may need to be run through a first-floor ceiling. This could be for installing new electrical outlets, adding lighting fixtures, setting up a home theater system, or even for security purposes such as installing cameras.
No matter the reason, running wires through a first-floor ceiling can seem like a daunting task. However, with the right tools, knowledge, and safety precautions, it can be easily done.
Tools Needed for Running Wires through a First-Floor Ceiling
Before beginning any project involving running wires through a first-floor ceiling, it is important to have the necessary tools on hand. These may include:
- Drill
- Fish tape or wire snake
- Stud finder
- Wire cutters
- Pliers
- Drywall saw or keyhole saw
- Safety goggles and gloves

Importance of Proper Planning and Safety Measures When Running Wires Through First Floor Ceiling
When it comes to electrical work, safety should always be the top priority. This is especially true when running wires through first floor ceilings. Not only can this task be physically demanding, but it also involves working with electricity which poses potential hazards.
Therefore, proper planning and safety measures should be taken before attempting to run wires through your first floor ceiling. In this section, we will discuss the importance of these two factors and how they can ensure a successful and safe wire installation process.
Planning Ahead
Before starting any electrical work, it is important to have a clear plan in place. This includes determining the route of the wires, the type and amount of materials needed, and having all necessary tools on hand.
The first step in planning is to carefully assess the layout of your first floor ceiling. Identify any potential obstacles such as pipes, ductwork, or structural support beams. This will help you determine the best route for running the wires and avoid any interference with other systems.
Next, make a list of all the materials needed for the job. This may include wire, conduit, junction boxes, and connectors. It is important to use materials that are up to code and suitable for the type of wiring being installed. Gathering all necessary tools beforehand will also make the process more efficient.
Safety First
Electrical work can be dangerous if proper safety precautions are not taken. When running wires through a first floor ceiling, there are a few key safety measures that should be followed.
First and foremost, always turn off the power to the area where you will be working before starting any electrical work. This will greatly reduce the risk of electrocution. It is also recommended to use a voltage tester to double check that the power is indeed turned off.
Wear proper protective gear, such as gloves and safety glasses, to protect yourself from any potential hazards. It is also important to work with a partner when running wires through a ceiling, as they can provide assistance and help ensure your safety.
In addition, be mindful of your surroundings and avoid working in wet or damp conditions. This includes avoiding contact with water while working with live wires.

10 Steps How to Run Wire through First Floor Ceiling
1.Gather the Necessary Tools and Materials
Before you begin running wire through your first floor ceiling, it is important to gather the necessary tools and materials. This includes a drill, drill bits, fish tape, wire cutters, screws, wire connectors, and electrical conduit. You will also need the appropriate type of electrical wire for the job. Make sure you have everything you need before beginning the project.
2.Turn off Power to Ceiling Circuit
The next step in running wire through your first floor ceiling is to turn off power to the circuit that you will be working on. You can do this by turning off the breaker at your home’s main panel or disconnecting the fuse at your home’s fuse box. It is important to make sure that no one turns on power while you are working on this project as it could result in an electric shock or serious injury.
3.Measure and Mark Ceiling Opening Location
Once power has been turned off to the circuit that you will be working on, measure and mark out where you want the ceiling opening to be located. Use a pencil or marker to mark out where you want the hole for the wiring to go through. Make sure that there are no other wires in this area before drilling into your ceiling as it could cause a short circuit or other issues down the line.
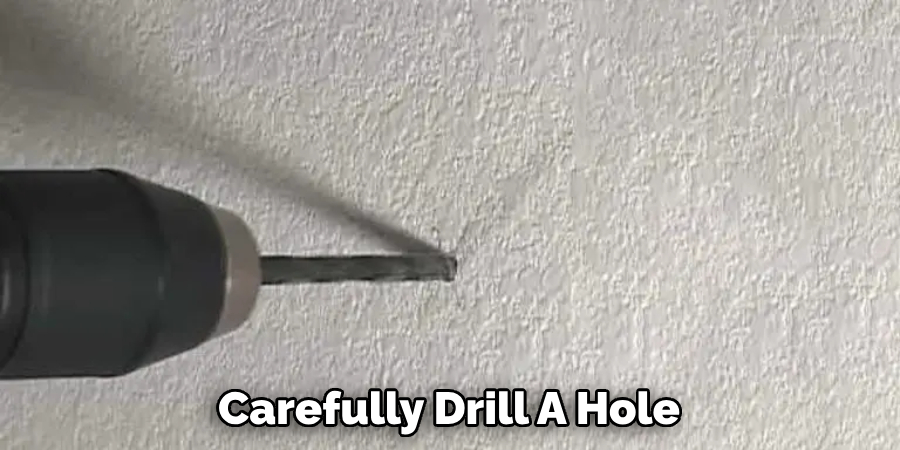
4.Drill Hole Through Ceiling
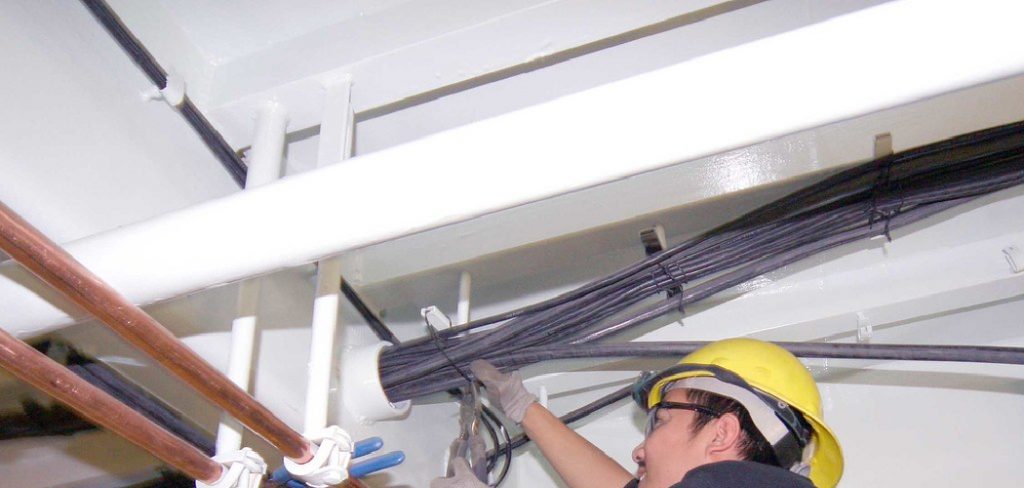
Using a drill with an appropriately sized bit for your wiring project, carefully drill a hole through your marked out area of your first floor ceiling. Take care not to damage any existing wiring when drilling as this could cause a short circuit or other issues down the line if not done properly.
5.Thread Fish Tape Through Hole
Next, thread a length of fish tape through the drilled hole in your first-floor ceiling so that it is accessible from both sides of the opening (one side from inside and one side from outside). The fish tape should be long enough so that it can reach both ends wherever you plan on running wire throughout your home’s walls and ceilings (if applicable).
6.Pull Wiring Through Hole
Once fish tape has been threaded through both sides of the drilled hole in your first-floor ceiling, use it to pull wiring from one end of wherever you plan on running wire throughout your home’s walls and ceilings (if applicable) all the way back up through the hole in your first-floor ceiling until all desired wiring is pulled up through hole in ceiling.
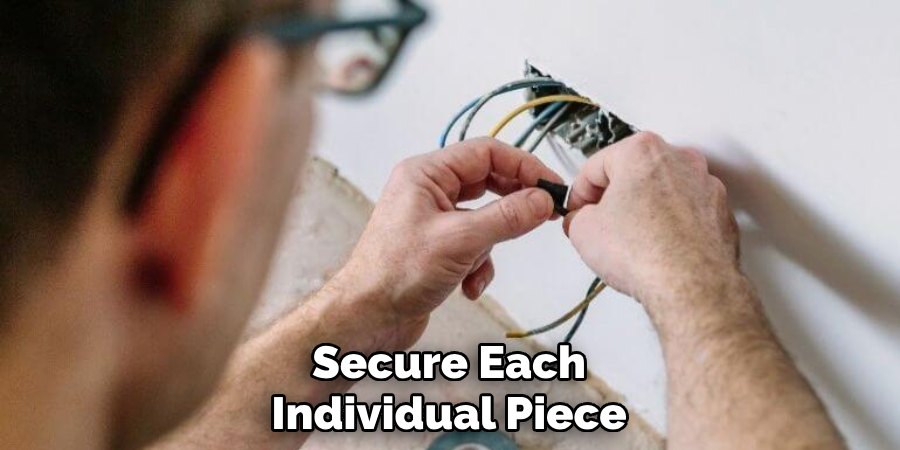
7.Secure Wiring Inside Ceiling
Once the desired wiring has been pulled up through the hole in first floor ceiling, secure each individual piece using screws or clips so that they are held firmly in place inside ceiling. Make sure each piece of wiring is securely fastened so that it does not move around too much when installed inside walls/ceilings later on during the installation process.
8.Install Electrical Conduit
Once all pieces of desired wiring have been secured inside the first-floor ceiling, install an electrical conduit over top of them so that they are protected from potential damage due to moisture or other environmental factors. Make sure the conduit fits snugly around each individual piece of wiring without pinching them.
9.Connect Wiring Together
Once all pieces of desired wiring have been secured inside the first-floor ceiling with electrical conduit overtop, connect them together using appropriate connectors according to local codes and regulations.
Ensure all connections are secure before proceeding further with the installation process. However, if you are unsure about how to properly make these connections, it is always best to consult a licensed electrician for assistance.
10.Test for Proper Operation
After connecting all pieces of desired wiring together, test them for proper operation by turning the power back on at the main panel/fuse box then testing each connection individually with a voltage tester/multimeter according to manufacturer instructions.
If any connections fail the test, turn the power back off immediately then re-check connections before attempting another test again until successful operation is achieved. If all connections pass the test, turn the power back off before moving on to further steps in the installation process.
Conclusion
Running wires through a first floor ceiling may seem like an intimidating task, but by following these simple steps you can tackle the job with confidence. Not only will you have the satisfaction of being able to complete this task independently, but you will also have added value and safety to your home. Additionally, taking initiative to properly install yourself can prevent costly fees from contractors or electricians.
Then take precautions for safety such as wearing protective clothing and gloves, use the proper drill bit onto the ceiling joist so that they do not crack or splinter, and be careful while cutting into walls to access wire boxes.
By utilizing these steps after studying the materials needed, anyone can easily run wire through their first floor ceiling with little effort! So now that you are informed on how to run wire through first floor ceiling, let’s get started!