
Are you looking for a cost-effective way to connect your office computers but unsure of the best tools and techniques? Running an Ethernet cable between floors can be an easy task when done right. This blog post gives you step-by-step instructions on how to run ethernet cable between floors.
With just a few tools and some careful planning, you can run Ethernet cables horizontally, vertically, or even through walls to link up computers and other devices, irrespective of their location.
Follow along as we explain which materials are necessary and provide guidance regarding installation techniques that will help ensure optimal performance. Whether wiring up the latest gigabit network or using simple Cat5e cables, our complete guide will show you exactly what steps to take to succeed.
What Will You Need?
Before you start running Ethernet cables between floors, it’s important to ensure you have all the necessary tools and materials. Here’s a list of what you will need:
- Ethernet cable
- Cable clips
- Fish tape (in case of wall installation)
- Screwdriver or drill (if necessary).
Once you’ve gathered all the necessary materials, you can run your Ethernet cables.
10 Easy Steps on How to Run Ethernet Cable Between Floors
Step 1. Horizontal Method:
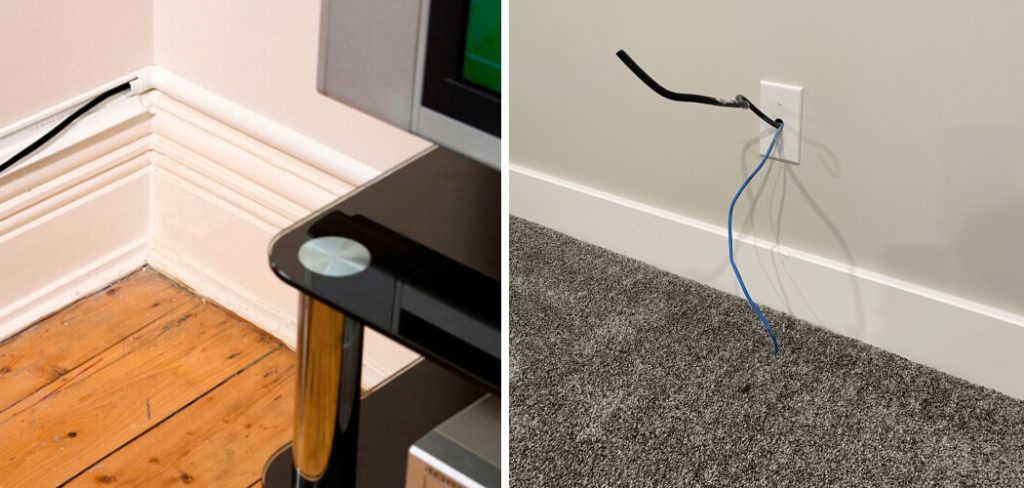
The most straightforward way to run Ethernet cable between floors is using a horizontal method which involves laying out an entire cable from one floor to another along either the ceiling or the walls. If you’re using a single-floored building, you can run the cables along the ceiling or walls.
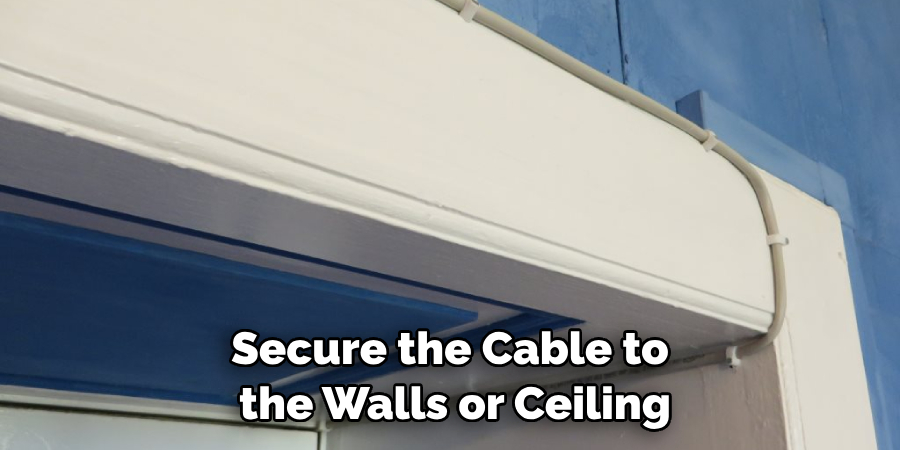
Step 2. Secure Cable:
If necessary, secure the cable to the walls or ceiling using cable clips and a screwdriver/drill. Be sure to leave enough slack for devices that will be connected on either end of the cable. Ensure that the cable is secure and won’t budge due to vibration.
Step 3. Vertical Method:
If running Ethernet cables horizontally is not an option, you can opt for a vertical method which involves drilling holes and running cables through them to connect different floors. In this case, it’s advisable to use fish tape in order to pull the cable up from one-floor level to another without having any kinks in it. As with the horizontal method, make sure to secure the cable using cable clips.
Step 4. Wall Installation:
In some cases, wall installation may be necessary, and if so, then you should ensure that the holes drilled are large enough to fit the cables without bending them. As with the other methods, secure the cables using cable clips. Don’t forget to leave enough slack.
Step 5. Connectors:
Once your cables have been installed, it’s time to connect devices on either end of the cable using RJ45 connectors. Ensure that any exposed wires are clean and secure before connecting them to the connectors, and plug the Ethernet cable into a network switch or router. Be careful not to bend the cables too much when connecting them.
Step 6. Testing:
Now that your Ethernet cables have been successfully installed between floors, it’s time to test them out by running some speed tests or transferring files from one computer to another. This will help you check whether your setup is working properly or not. Try running the tests on multiple devices to ensure they are connected correctly.
Step 7. Final Touches:
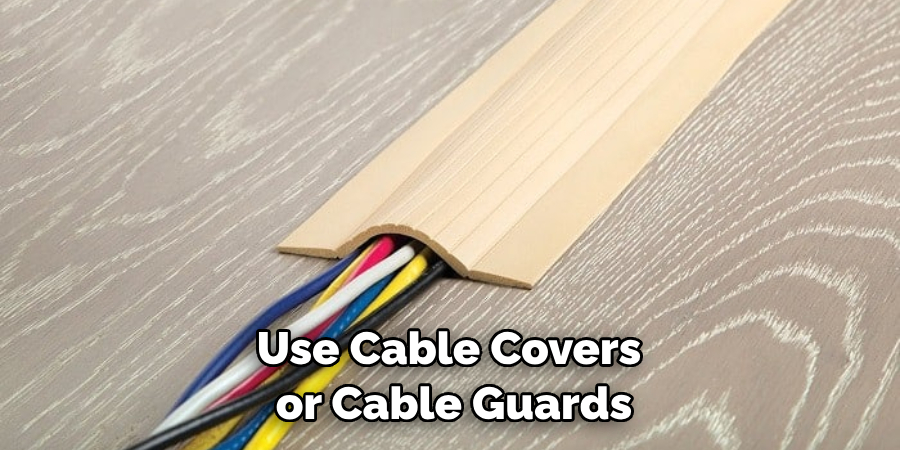
Once you’re satisfied with the performance of the cables, make sure to clean up any mess or clutter around them in order to provide a neat and tidy finish. You can also opt to use cable covers or cable guards in order to protect the cables from further damage.
Step 8. Keep Cables Out of Reach:
If your setup involves running Ethernet cables between different floors, it’s important to keep the cables out of reach to prevent any accidental damage. It will also help protect the cables from dust, dirt, and other elements that could interfere with their performance.
Step 9. Label:
It’s also a good idea to label each Ethernet cable so that you can easily identify which one is connected to which device when needed. You can use different colors of cable ties or even write directly on the cables with a marker. Another good tip is using waterproof labels and UV-resistant to ensure durability.
Step 10. Enjoy Working:
Now it’s time to sit back and enjoy your new speedy network connection between floors! Remember to regularly check on the cables and ensure they are still securely installed and in good condition. Just follow these steps, and you will be running Ethernet cables between floors in no time.
Following these simple steps, running Ethernet cables between floors should be easy and straightforward. Remember that safety is paramount – always wear safety goggles when drilling through walls, ceilings, or floors. We hope this blog post has helped you understand how to run Ethernet cables between floors quickly and easily!
5 Additional Tips and Tricks
1. Make sure to leave enough slack in the cable when connecting it from one floor to another; the extra length gives you some room for error down the line.
2. If you’re running the cable through walls, always use the right tools and materials to ensure a smooth transition. Don’t forget to wear safety glasses when drilling or cutting holes!

3. When running the ethernet cable between floors, make sure that any corners you go around are rounded; this will help keep your signal from degrading over long distances.
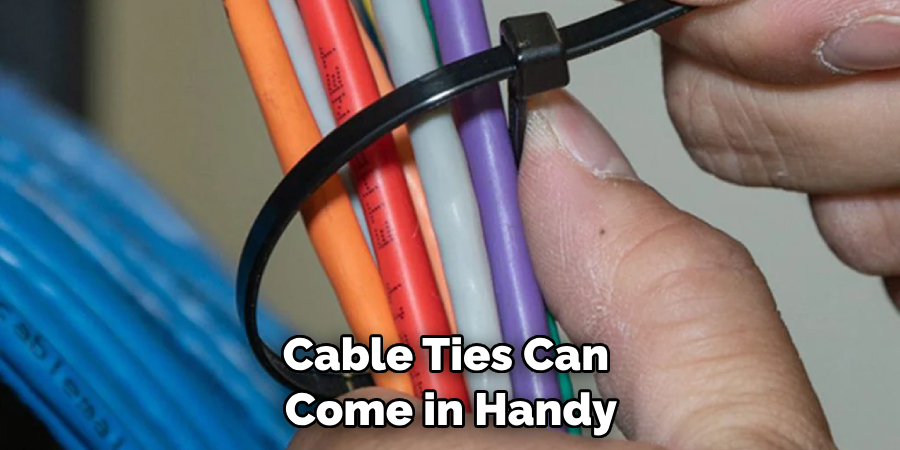
4. Cable ties are your friend! They’ll help keep your cables neat and organized and prevent them from becoming tangled or frayed over time.
5. Always inspect the connections before powering on the devices connected with the ethernet cable; if something looks wrong, disconnect everything and double check all wiring before trying again. This will save you time and effort in the long run.
By following these tips, you can ensure that your ethernet cable will be installed properly between floors for current and future use.
5 Things You Should Avoid
1. Don’t skimp on the quality of your cable. If you purchase a cheap one, it won’t last as long and won’t be able to handle heavy loads.
2. Avoid running the cable through areas with extreme temperatures; this can cause damage and reduce its efficiency over time.
3. Never attempt to run ethernet cables outdoors without proper insulation; this could lead to electrical shock or worse!
4. Make sure to keep any exposed cables away from water sources; even a seemingly small amount of moisture can quickly corrode connections if not properly sealed off.
5. Don’t use staples or screws to secure the cable, as they may become loose over time and create weak spots in your connection. Instead, use cable ties to hold it in place effectively.
By avoiding these common mistakes when running ethernet cables between floors, you can
ensure that your connection remains stable and secure for years to come!
How Do You Run an Ethernet Cable in a Two Story House?
If you’re looking to run an ethernet cable in a two story house, the first step is to ensure that you have enough slack in your cable when connecting it from one floor to another. This extra length will give you some room for error down the line.
Next, if you’re running the cable through walls, make sure that you use the right tools and materials, such as drill bits, hole saws, and safety glasses, when drilling or cutting holes. You should also ensure that any corners you go around are rounded; this will help keep your signal from degrading over long distances.
Cable ties can come in handy here too! Use them to keep your cables neat and organized and prevent them from becoming tangled or frayed over time. It’s also a good idea to inspect the connections before powering on any devices connected with the ethernet cable; if something looks wrong, disconnect everything and double check all wiring before trying again.
Finally, avoid skimping on quality regarding your ethernet cables and always keep them away from areas of extreme temperature or water sources. Staples and screws should also be avoided when securing the cable, as they may become loose over time. Cable ties are much better at holding it firmly in place!
By following these steps, you can run an ethernet cable in a two story house effectively and securely for current and future use!
Conclusion
Running new ethernet cables between floors can definitely prove to be a challenge. It’s not an easy job and requires careful consideration of the space and tools needed to get the job done. But with all that in mind, if you feel up for it, running ethernet cabling between different stories in your home or office can improve your connectivity capabilities significantly.
Remember to follow all safety regulations as you work through this potential DIY project, and take extra care when drilling holes through any wall or floor barriers. With patience and guidance, you’ll find yourself connected and ready to go quickly.
Hopefully, the article on how to run ethernet cable between floors has provided you with all the information you need to get started. Good luck!