
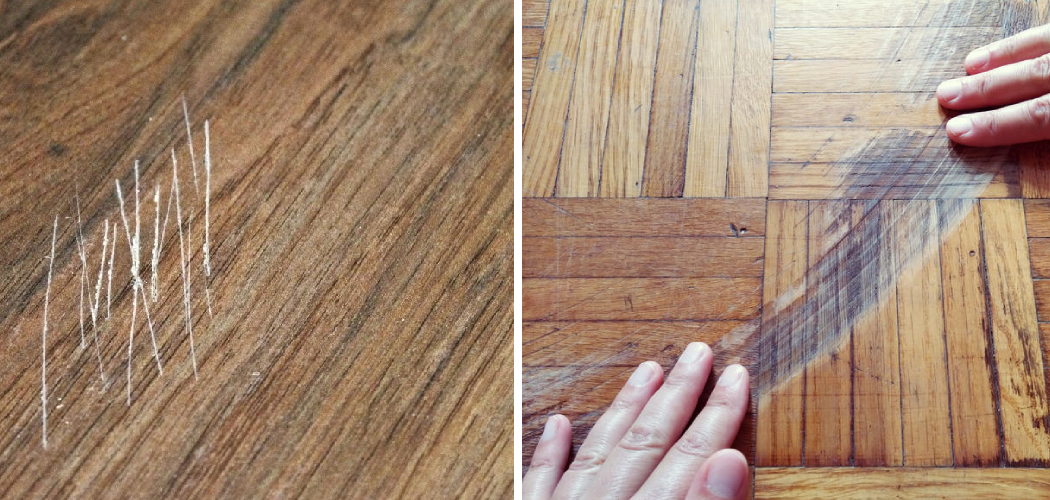
Vinyl flooring is popular for many homes and businesses due to its durability and attractive appearance. However, this type of flooring can be subject to scratches, dents, scuffs, and other signs of wear over time. Repairing these scratches can help restore the beauty of your vinyl floors and prevent further damage from developing.

One of the main advantages of repairing a scratch on a vinyl floor is that it can be done relatively easily and inexpensively. With just a few tools and some spare time, you can restore your vinyl floors’ original look and feel without replacing them entirely.
The materials required for this type of repair are typically available at most hardware stores, making it a convenient and cost-effective solution. In this blog post, You will learn how to repair scratch in vinyl floor.
Tools You Will Need
- White spirit
- Soft cloth
- Scrubbing brush
- Masking tape
- Fine sandpaper (220 to 320 grit)
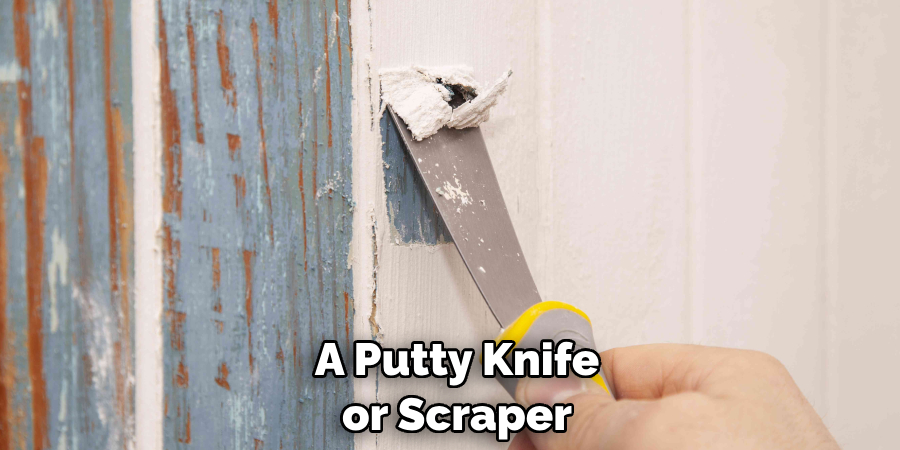
- Putty knife or scraper
- Vinyl floor patch kit
- Paintbrush
- Vinyl adhesive
- Rubber roller
- Plastic bag
- Protective gloves
Once you have gathered all the tools, you can begin the repair process. First, clean the area around the scratch with a soft cloth and white spirit to remove any dirt or debris.
Step by Step Processes for How to Repair Scratch in Vinyl Floor
Step 1: Inspect the Scratch
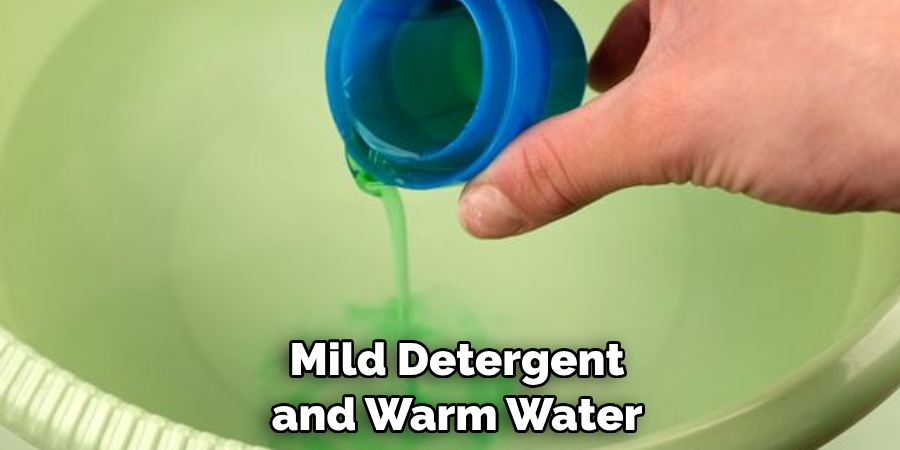
The first step to repairing a scratch in your vinyl floor is to inspect the area. Look closely at the depth and width of the scratch and any debris or dirt that may be present. Once you have inspected the scratch, clean it out using a vacuum cleaner. You may also need to use a mild detergent and a damp cloth. Make sure the area is arid before moving on to the next step.
Step 2: Prepare the Repair Area
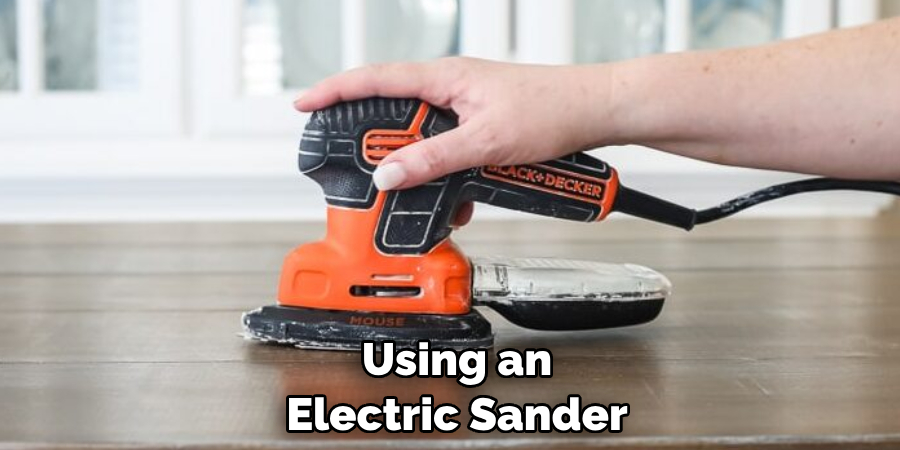
Using an electric sander, sand down the area around the scratch until it is smooth and level with the rest of your vinyl floor. Vacuum up any dust or dirt from sanding and ensure the repair area is debris-free. Using a brush, apply a thin primer layer to the repair area. Once the primer is dry, use an appropriate filler to fill in any depressions or uneven areas within the scratch. Allow the filler to dry before moving on to the next step.
Step 3: Sand the Repair Area
Once the filler is completely dry, use fine-grit sandpaper and lightly sand the repair area. Ensure all uneven areas are smoothed out and any residue removed. Vacuum up any dust created during this step. Using a paintbrush, apply a colored paint or stain to the repair area to match the color of your existing vinyl floor. Allow the paint or stain to dry before moving on to the next step.
Step 4: Apply Top Coat
Once the colored paint or stain is completely dry, use a brush to apply a protective top coat (such as polyurethane) to the repair area. Allow the top coat to dry completely before moving on to the next step. Use a vacuum cleaner and damp cloth to clean up any dust or debris created during the repair process. Ensure that all of the tools you use are cleaned and put away in a safe place.
Step 5: Inspect the Repair Area
Inspect the repair area to ensure all steps have been completed correctly and the scratch has been repaired. If you are satisfied with your work, move on to the next step. Your vinyl floor is now repaired and looking great. Enjoy your new vinyl floor, and practice proper maintenance to keep your floors looking beautiful for years.
Congratulations, you have completed the steps necessary to repair a scratch on your vinyl floor. You can easily restore your vinyl floor to its original state with patience and skill.
Safety Tips for How to Repair Scratch in Vinyl Floor
- Before starting any repair work, clear the area around the scratch and wear protective gear such as gloves, safety glasses, and a dust mask.
- Make sure you use the right tools for the job – suitable vinyl adhesive and glue, a putty knife or scraper, sandpaper (fine-grit), and clothes for cleaning and polishing.
- Check the instruction label on the adhesive or glue before using it.
- Apply a thin adhesive layer over the scratch, covering all sides evenly and pressing down firmly to adhere properly to the vinyl surface.
- Allow the adhesive to dry according to the manufacturers’ instructions before sanding the surface with a fine-grit sandpaper.
- Once the scratch is gone, use a damp cloth to wipe away any excess adhesive and then dry it off with a clean, dry cloth.
- Finally, buff the repaired area with polishing cream or wax for extra protection and shine.
By following these safety tips, you can quickly and easily repair any scratches in your vinyl flooring without compromising its look or durability. With proper care and maintenance, your vinyl floors will last for years.
How Can You Prevent Scratches From Occurring on Your Vinyl Floor?
It is impossible to guarantee that your vinyl floor won’t get scratched, but there are steps you can take to reduce the risk of scratches on your vinyl floor. Regular cleaning and maintenance are The most important preventative measures for keeping your vinyl floor scratch-free.
Cleaning regularly with a damp mop or cloth will help remove dirt, dust, and other particles that could cause scratches. Using the right cleaning products when cleaning a vinyl floor, harsh chemicals or abrasive pads can harm your floor’s finish.
You should also periodically wax the vinyl which will help protect it from damage. Furniture can also cause scratches on vinyl floors if taken care of properly. Always lift furniture instead of dragging it across the floor, which can cause scratches and scuffs. Also, consider using furniture protectors such as felt pads on the bottom of chairs and tables to minimize scratching when moving around the room.
How Long Does It Take to Repair a Scratch in the Vinyl Floor?
The time it takes to repair a scratch in the vinyl floor depends on the size and depth of the scratch, as well as the complexity of the fix. Smaller scratches not too deep can be fixed with just a few minutes of work. However, deeper or more complex scratches may require additional time for proper repair. Generally speaking, it is recommended to allow 30 minutes to an hour to repair a scratch in the vinyl floor.
First, thoroughly clean the area with mild detergent and warm water. Once the area is dry, use a cloth to rub some furniture wax into the scratch. This will help fill in any gaps and make it easier to blend in with the existing color and pattern of the floor. If a more substantial repair is needed, you may need to apply some vinyl repair paste or putty to the scratch. This will help fill in any gaps left by the furniture wax and protect your floor from further damage.
What is the Best Way to Clean Up After Making Repairs to a Scratched Vinyl Floor?
When repairing scratched vinyl floors, you want to clean up after yourself properly. Vinyl flooring is generally low-maintenance and durable, but it still needs special care when cleaning or repairing. Here are the steps for cleaning up after repair work on a scratched vinyl floor:
- Vacuum up any dirt, dust, or debris the repair work creates. Use a soft brush attachment to avoid scratching the floor further.
- Use a damp mop and non-abrasive cleaner to remove any remaining dirt and residue from repairs. Be sure not to soak the vinyl flooring with water, which could cause warping or discoloration.
- Dry the area thoroughly with a clean, dry towel. This will help prevent water spots and streaking.
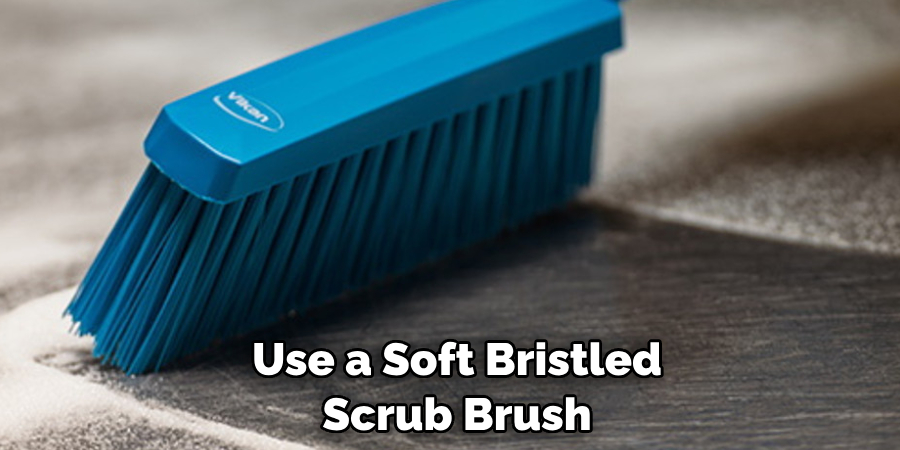
- Use a soft-bristled scrub brush to remove any sticky adhesive residue from repairs gently. If necessary, use an alcohol-based cleaner to remove stubborn residue.
- Apply a coat of vinyl floor wax to protect the repaired area. This will help seal the repairs and make your flooring look new.
Taking care of your vinyl flooring after making repairs is key to preserving its appearance and lasting quality. Following these steps for cleaning up after repair work, you can ensure that your scratched vinyl floor is clean and looks as good as new.
Conclusion
In conclusion, repairing scratches on the vinyl floor can be done with a few simple steps. It is important to take the time to clean and prepare the scratched area before attempting a repair. Also, choosing appropriate materials for the job is important, as always allowing repairs to dry completely before allowing foot traffic.
Taking care of your floors now will help you avoid more serious problems, such as water damage, in the future. This article has been beneficial in learning how to repair scratch in vinyl floor. Make Sure the preventive measures are followed chronologically.