Click-lock flooring, known for its easy installation and versatility, is a popular choice for many homeowners. However, over time, wear and tear or unforeseen incidents may lead to damage that requires repair. Whether dealing with a chipped plank, separation between boards, or water damage, knowing how to repair click-lock flooring is a valuable skill. In this comprehensive guide, we will explore effective methods to address common issues associated with click-lock flooring.

From replacing damaged planks to addressing gaps or issues related to subflooring, this guide aims to empower homeowners and DIY enthusiasts with the knowledge needed to restore the beauty and functionality of their click-lock floors. Let’s embark on a journey to discover practical solutions for repairing click-lock flooring, ensuring a seamless and enduring finish in your living spaces.
Understanding Click-Lock Flooring
Click-lock flooring, a revolutionary development in the realm of home renovation and decoration, stands out due to its unique installation method. Unlike traditional hardwood floors that require nails or glue, click-lock flooring planks are designed to interlock with a simple click. This not only simplifies the installation process, making it feasible for DIY enthusiasts but also reduces the time and labor costs associated with professional installations.
Constructed from materials like laminate, vinyl, or engineered hardwood, click-lock flooring offers a durable and attractive option for any room. Additionally, its versatility in patterns and colors allows homeowners to customize their spaces to match personal aesthetics. Understanding the structure and benefits of click-lock flooring is essential for anyone considering this flooring option for their home.
Characteristics of Click-Lock Flooring
Click-lock flooring is celebrated for several key characteristics that make it a preferred choice among homeowners and DIY enthusiasts. Firstly, Durability stands at the forefront, with most click-lock flooring options designed to withstand heavy foot traffic and the rigors of daily life. This makes them an ideal choice for both residential and commercial spaces. Secondly, the Ease of Installation is a significant advantage.
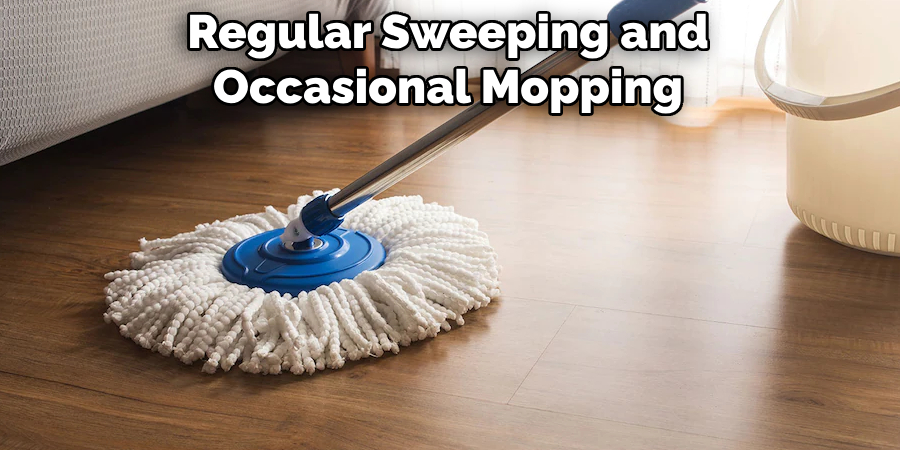
The unique click-lock mechanism allows for quick and easy setup, often without the need for professional help. Additionally, Maintenance of click-lock flooring is straightforward. Regular sweeping and occasional mopping are usually all it takes to keep these floors looking their best. Versatility also plays a crucial role; click-lock flooring comes in a wide range of materials, including laminate, vinyl, and engineered hardwood, each offering various designs and finishes to suit any decor.
Lastly, the Cost-Effectiveness of click-lock flooring cannot be overstated. Not only is the initial purchase often more affordable than traditional hardwood, but the reduced installation and maintenance costs also contribute to its overall value. These characteristics collectively contribute to the growing popularity of click-lock flooring among homeowners looking for a practical, stylish, and budget-friendly flooring solution.
Benefits of Click-Lock Flooring
The benefits of click-lock flooring extend far beyond its appealing characteristics, offering tangible advantages to homeowners. Affordability is a significant benefit, as click-lock flooring is often less expensive than traditional hardwood flooring, making it an accessible option for those on a budget. Versatility is another key advantage; with a variety of materials, designs, and finishes available, click-lock flooring can complement any interior design theme, from modern minimalist to rustic chic.
Durability ensures that click-lock floors can handle the demands of high-traffic areas, resisting scratches and dents that could mar the surface of softer flooring options. Ease of Maintenance is a practical benefit that cannot be overstated; click-lock floors require minimal upkeep, staying pristine with regular sweeping and occasional mopping. Lastly, the Installation Process is straightforward, enabling homeowners to potentially save on installation costs by undertaking the project themselves. These benefits make click-lock flooring a smart choice for those looking to enhance their living spaces with a durable, attractive, and cost-effective flooring solution.
Common Types of Click-Lock Flooring
Among the variety of flooring options available in the market, click-lock flooring stands out due to its diverse range of materials, each with its unique benefits and aesthetics. The most common types of click-lock flooring include:
- Laminate Click-Lock Flooring: Laminate offers a cost-effective and durable solution, mimicking the appearance of hardwood or stone floors with a photographic layer under a clear protective layer. It’s particularly popular for its resistance to scratches, making it ideal for high-traffic areas.
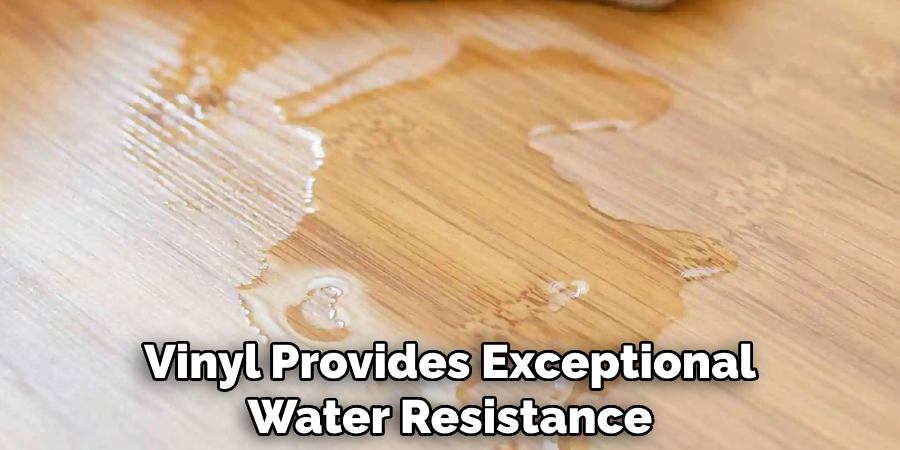
- Vinyl Click-Lock Flooring: Vinyl provides exceptional water resistance, making it suitable for kitchens, bathrooms, and basements. It comes in a wide range of designs, from realistic wood and stone finishes to colorful patterns, and offers a comfortable underfoot feeling.
- Engineered Hardwood Click-Lock Flooring: This type combines a real hardwood top layer with a core of plywood or high-density fiberboard, offering the beauty of hardwood floors with added stability and resistance to humidity changes. It’s an excellent choice for areas where solid hardwood is not recommended.
- SPC (Stone Plastic Composite) and WPC (Wood Plastic Composite) Click-Lock Flooring: These options blend the best attributes of vinyl and laminate, providing superior durability, water resistance, and ease of installation. They are gaining popularity for their environmental sustainability and comfort underfoot.
Each of these types has its set of advantages, catering to different preferences and requirements. Whether you prioritize durability, moisture resistance, or the aesthetic appeal of real wood, there’s a click-lock flooring option to suit every need.
Assessing Damage and Identifying Issues
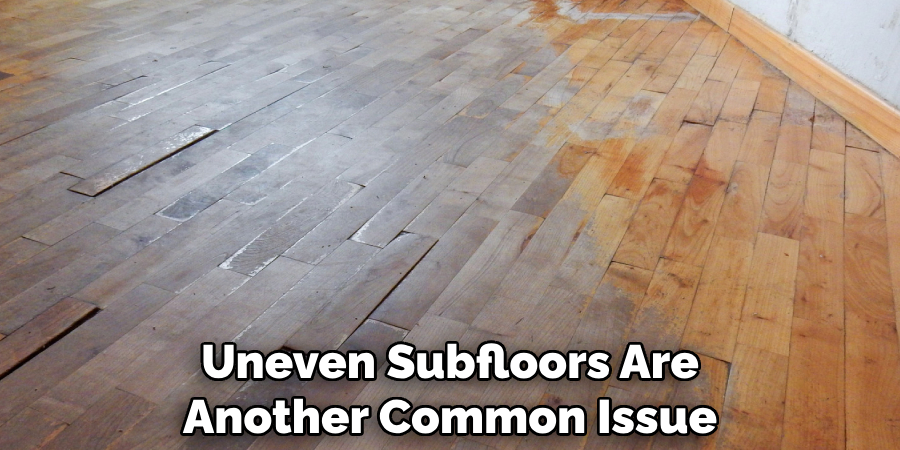
Before contemplating a new click-lock flooring installation, it’s crucial to assess any existing floors for damage and to identify potential issues that could affect the new installation. This evaluation should include a thorough inspection for signs of mold, moisture damage, or uneven subfloors. Mold and Moisture Damage can be particularly problematic, as they not only pose health risks but can also compromise the integrity of the flooring.
Signs to watch for include discoloration, a musty smell, or warping of existing floors. Uneven Subfloors are another common issue, as they can lead to improper locking of the click-lock system, resulting in gaps or misalignment. Using a level to check for unevenness across the subfloor can help in identifying areas that may require attention or correction. Identifying these issues before proceeding ensures a smooth installation and prolongs the lifespan of your new click-lock flooring.
10 Methods How to Repair Click-Lock Flooring
1. Identify the Type of Damage:
Before diving into repairs, assess the type and extent of damage to your click-lock flooring. Common issues include chipped edges, gaps between planks, water damage, or issues related to the subfloor.
Once you have identified the type of damage, you can determine the best course of action for repairs. For example, if your flooring has chipped edges, you may need to replace those specific planks or use wood filler to fill in the gaps. If there are gaps between planks, you may need to adjust their position or consider using a sealant to prevent further separation.
If you are dealing with water damage, it is important to identify the source of the moisture and address it before making repairs. Otherwise, any repairs made will be temporary and may lead to further damage in the future. If your subfloor is damaged, you may need to replace it or reinforce it before repairing your click-lock flooring.
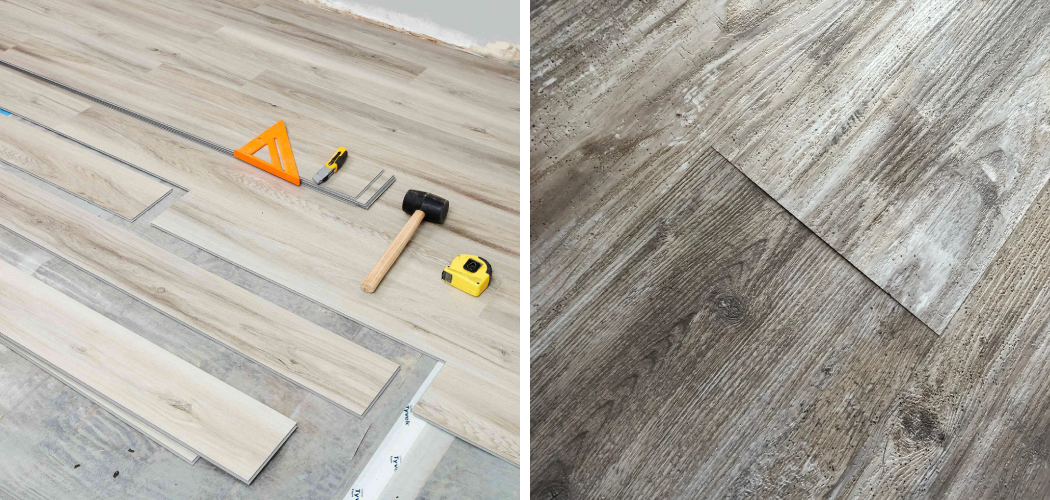
2. Acquire Replacement Planks:
If the damage is localized and involves a few planks, it’s essential to have replacement planks that match your existing flooring. Contact the manufacturer or check your original purchase documentation for information on the specific flooring type. If you are unable to find an exact match, look for planks with a similar wood species and finish.
There are also several online resources that provide replacement parts for various types of flooring. Make sure to measure the damaged plank accurately and compare it with the dimensions of the replacement plank before making a purchase.
In some cases, it may be necessary to remove a few planks from an inconspicuous area of the floor to use as replacements. If this is not possible, consider purchasing a few extra planks when installing new flooring for future repairs.
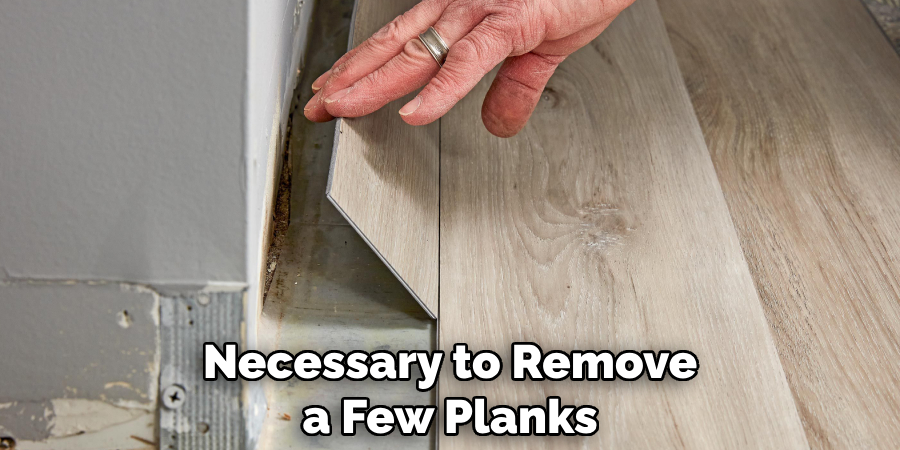
3. Remove Damaged Planks:
Carefully lift and remove the damaged planks by unlocking them from the surrounding boards. Use a flat tool like a putty knife or a pry bar to avoid causing additional damage to the neighboring planks. Once you have removed the damaged plank, inspect the surrounding area to ensure that there is no rot or water damage. If any additional repairs are needed, it is crucial to address them before replacing the removed plank.
To prevent future damage, it is important to properly seal and protect your hardwood flooring. Regularly check for any signs of moisture or humidity in the room and take necessary precautions to maintain a stable environment. Additionally, consider using rugs or mats in high traffic areas to protect your floors from wear and tear.
4. Inspect and Prepare Subfloor:
Once the damaged planks are removed, inspect the subfloor for any issues. Ensure it is clean, dry, and level. Address any subfloor problems before proceeding with the replacement of the click-lock planks. This will help ensure a smooth and long-lasting installation. While inspecting the subfloor, also check for any protruding nails or screws that may need to be removed or hammered down. To prepare the subfloor, sweep or vacuum any debris and use a leveling compound to even out any uneven areas.
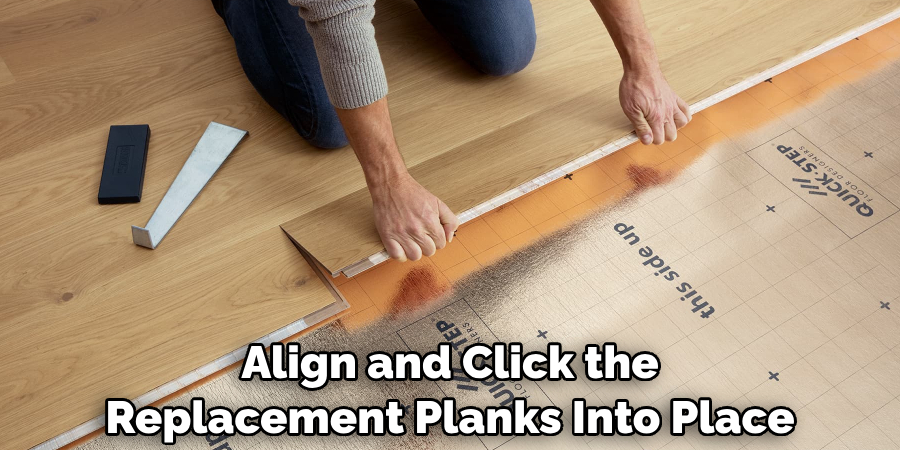
5. Install Replacement Planks:
Align and click the replacement planks into place, following the manufacturer’s installation instructions. Apply gentle pressure to secure the planks without causing damage. Ensure a snug fit and that the replacement planks are level with the existing floor. Once complete, check for any gaps or irregularities in the installation and make any necessary adjustments. It is also recommended to use a tapping block and rubber mallet to ensure a secure fit.
In addition to following the manufacturer’s instructions, it is important to properly prepare the existing floor before installing replacement planks. This includes removing any debris or damaged pieces of flooring, as well as cleaning and leveling the surface. This will ensure a smooth and seamless installation process.
6. Use Wood Filler for Minor Damage:
For minor chips or dents in the click-lock flooring, consider using wood filler. Select a filler that matches the color of your flooring, apply it to the damaged area, and smooth it out. Once dried, sand the filler to create a seamless finish. This method is perfect for repairing small damage without having to replace an entire section of flooring.
For larger damages, it’s best to use a replacement plank. However, if the damage is minor and you don’t have any spare planks, wood filler can be a temporary solution until you can replace the damaged plank.
Wood filler is also useful for filling in gaps between planks or along the edges of the flooring. This can help prevent dirt and debris from getting trapped in these spaces, keeping your floors cleaner for longer.
7. Address Gaps Between Planks:
If there are gaps between the click-lock planks, first, check for any debris or dirt that might be causing the separation. Clean the gaps and apply wood glue to the edges of the planks before gently tapping them back into place. Use a damp cloth to wipe away any excess glue, and place heavy objects on top of the area until the glue has fully dried. This will help to securely bond the planks and prevent future separation.
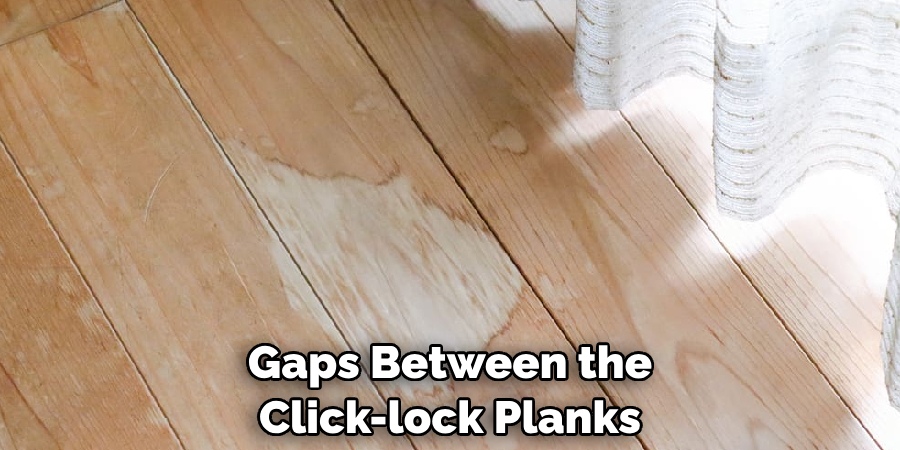
If the gaps are due to uneven subflooring, you may need to use a leveling compound or shims to even out the surface before installing the flooring. Make sure to follow the manufacturer’s instructions for proper application of these materials.
8. Repair Water-Damaged Areas:
For water damage, identify and address the source of the water to prevent further issues. Remove and replace any water-damaged click-lock planks. Ensure the subfloor is completely dry before installing new planks.
Water damage can cause serious problems for your flooring, but fortunately there are ways to repair these areas and prevent further issues. One of the first steps is to identify and address the source of the water. This could be a leaky pipe, a damaged roof, or even a flood from heavy rain. Once the source has been identified and fixed, you can move on to repairing the damaged areas of your flooring.
If you have click-lock planks, you will need to remove and replace any that have been damaged by the water. These planks have a locking mechanism that allows them to snap together and float on top of the subfloor. To remove the damaged planks, use a hammer and chisel to gently pry them up from the edges. Be careful not to damage any surrounding planks.
9. Secure Loose or Lifted Edges:
If the edges of the click-lock planks are lifting or have become loose, apply a small amount of wood glue to the affected area. Press the plank down firmly and use heavy objects or clamps to keep it in place until the glue sets.
For added security, you can also use a hammer and finishing nails to secure the edges of the planks. This will ensure that they stay in place and do not lift or become loose again.
Another helpful tip is to avoid walking on the newly installed click-lock flooring for at least 24 hours after installation. This will give the glue enough time to fully set and adhere to the subfloor, providing a strong hold for the planks.
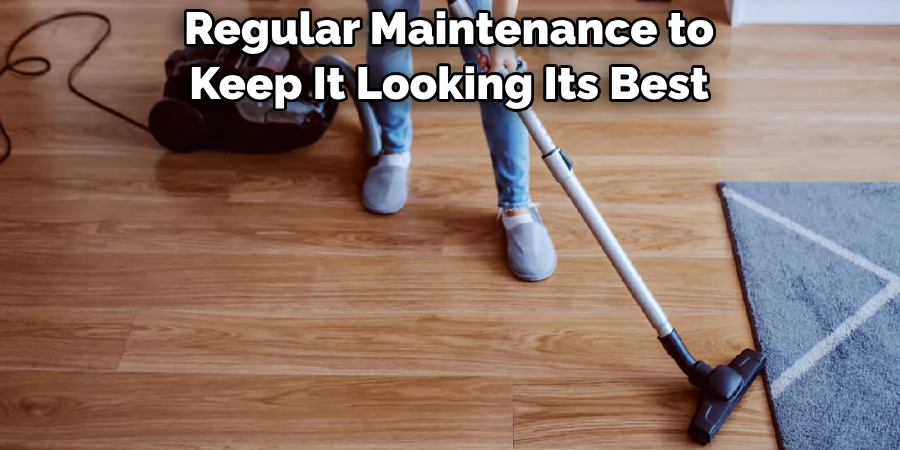
10. Regular Maintenance and Prevention:
To prevent future damage, practice regular maintenance. Keep the floor clean, promptly clean up spills, and use furniture pads to prevent scratches. Additionally, maintain consistent humidity levels to avoid expansion or contraction of the flooring.
Vinyl flooring is a durable and long-lasting option for any home or commercial space. However, like any other type of flooring, it requires regular maintenance to keep it looking its best and to prevent potential damage. In this section, we will discuss some essential tips for maintaining your vinyl flooring.
Conclusion
In conclusion, mastering the art of repairing click-lock flooring is essential for homeowners to maintain the integrity and beauty of their floors over time. By understanding the structure and components of click-lock flooring, individuals can effectively identify and address common issues such as gaps, water damage, and scratches. Armed with the right tools and materials, minor repairs can be tackled efficiently, ensuring that the flooring remains sturdy and visually appealing.
For more significant damage or complex issues, knowing when to seek professional assistance is key to achieving optimal results and preserving the flooring’s longevity. Moreover, implementing preventative measures and adhering to proper maintenance practices can help mitigate future damage and prolong the life of click-lock flooring. Hopefully, this article gave you some helpful tips about how to repair click-lock flooring successfully, so now that you have the proper knowledge on how to get the job done, why not give it a try today?