

Are there wooden floors in your home? Chipping, peeling paint or lack of luster can make the room appear dull and outdated. Fortunately, repairing chipped wood flooring is a relatively simple process that you can tackle with some basic skills and supplies. With the right tools and instructions, you’ll be able to restore beauty to your floors in no time! Read on to learn more about how to fix chipped wood floor properly.
Having any kind of damage to your hardwood floor can be an incredibly distressing experience, but when it comes to repairing chipped wood flooring in particular, the steps for repairs are essential. The process is quite involved and requires a few different materials and tools, as well as patience on your part. Here, we’ll provide you with some step-by-step instructions for how you can successfully repair chipped wood floors so that they look like new again!
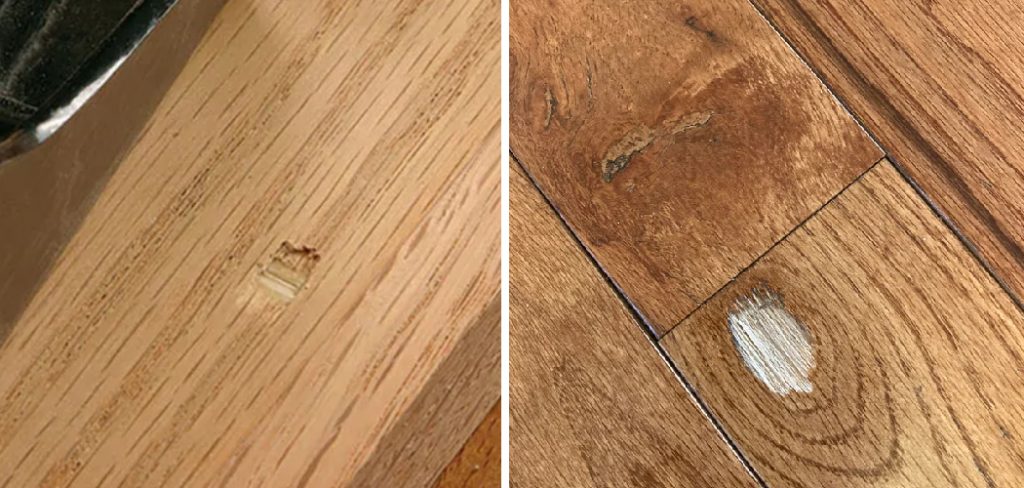
What Causes Chipped Wood Floor?
1. Furniture
Heavy furniture, such as tables and chairs, can cause chips in wood floors if they are dragged across the surface without a protective layer beneath them. This also causes scratches, which can leave an unsightly appearance.
2. Sun Damage
Exposure to UV rays from the sun over time can cause wood floors to become brittle and susceptible to chips and breaking. Additionally, extended exposure to moisture can also wear away at the protective finish of wood floors and make them more vulnerable to damage.
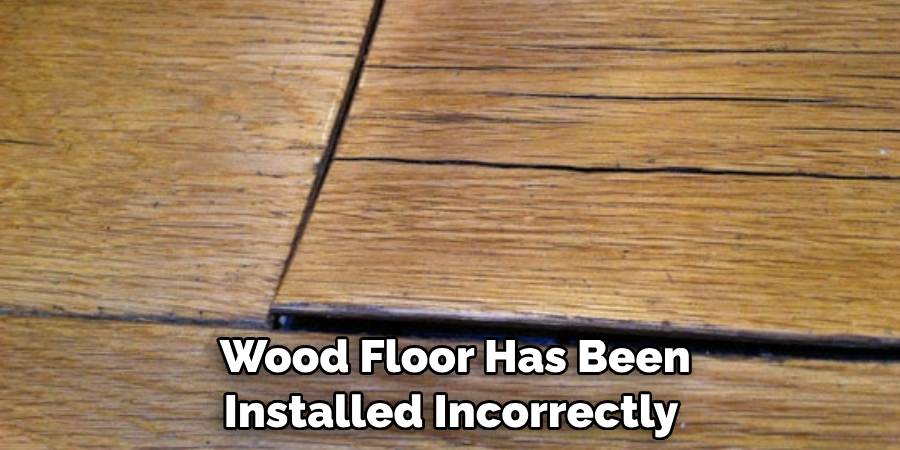
3. Improper Installation
If your wood floor has been installed incorrectly or with sub-standard materials, it can be more prone to chipping. Poorly fastened boards or insufficient interlocking joints can become easily damaged after regular wear and tear.
4. Pet Claws
Pets with long, sharp nails can also scratch and chip wood floors if they are allowed to run around freely on the surface without a protective layer. Also, cats and other animals have a tendency to scratch at wood surfaces, which can lead to chips over time.
Why is It Important to Fix Chipped Wood Floor?
1. For Safety
Wooden floors can be hazardous when chipped, splintered, or uneven. Having sharp or jagged edges on the flooring can cause cuts and scrapes to those walking over it barefoot or with socks. Also, a chipped floor can become further damaged if left in disrepair.
2. To Maintain the Floor’s Aesthetic Appeal
It goes without saying that a chipped wood floor looks unsightly and detracts from the overall aesthetic appeal of your home. By repairing it as soon as possible, you can help maintain its visual attractiveness for years to come.
3. To Preserve the Floor’s Integrity
Leaving a wood floor in disrepair can cause it to become weak or unstable, thus posing a risk for costly replacements down the line. By fixing chipped wood floors quickly and correctly, you can help preserve its integrity while avoiding any additional damage that may otherwise arise.
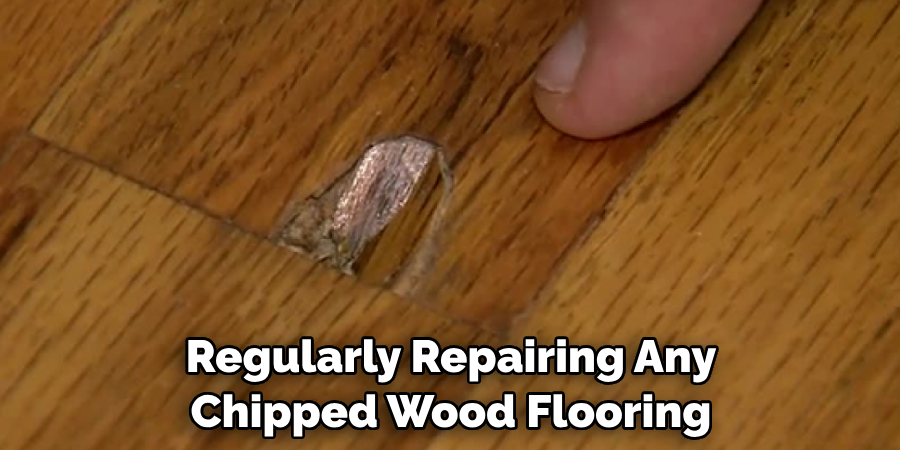
4. To Improve Its Durability
Regularly repairing any chipped wood flooring can help ensure that it remains durable and intact for years to come. Moreover, a repaired wooden floor will be less susceptible to environmental stressors such as dirt, dust, and debris buildup.
12 Ways About How to Fix Chipped Wood Floor
Now that you know the causes of chipped wood floors, it’s time to learn how to fix them!
1. Sanding & Refinishing
One of the more comprehensive methods of repairing a chipped or scratched wood floor is by sanding and refinishing. This process involves removing the top layer of your floors to reveal an even surface beneath.
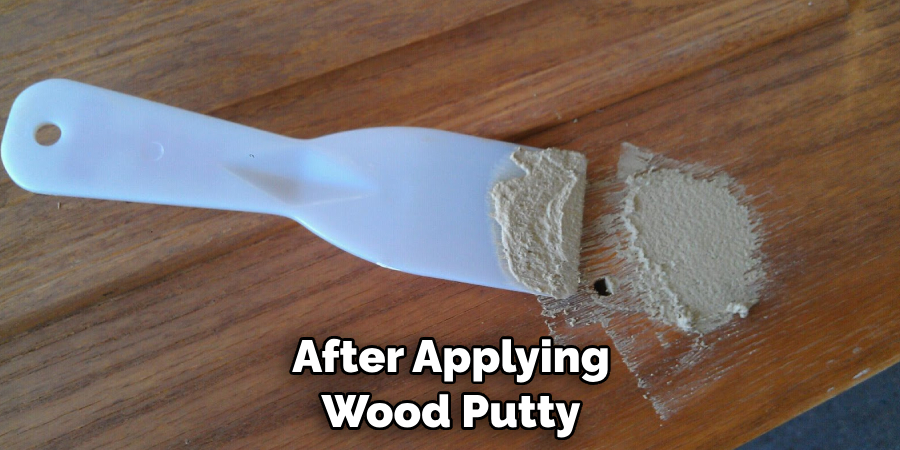
2. Filling in with Putty
Filling in damaged areas with putty is a cost-effective way to repair small gouges, chips, and dents on wooden floors. Putty is applied with a putty knife and smoothed over the damaged area before it dries.
3. Replace Damaged Boards
If you’re dealing with a bigger chip or dent, replacing the board may be necessary to ensure that your floor is level and uniform. Also make sure to check for damage below the surface, as this can cause further structural issues.
4. Cover with a Rug or Carpet
If you have deep gouges and scratches that you don’t want to repair, covering them up with rugs or carpets is a great option. This allows you to hide any blemishes while still enjoying beautiful floors in your home.
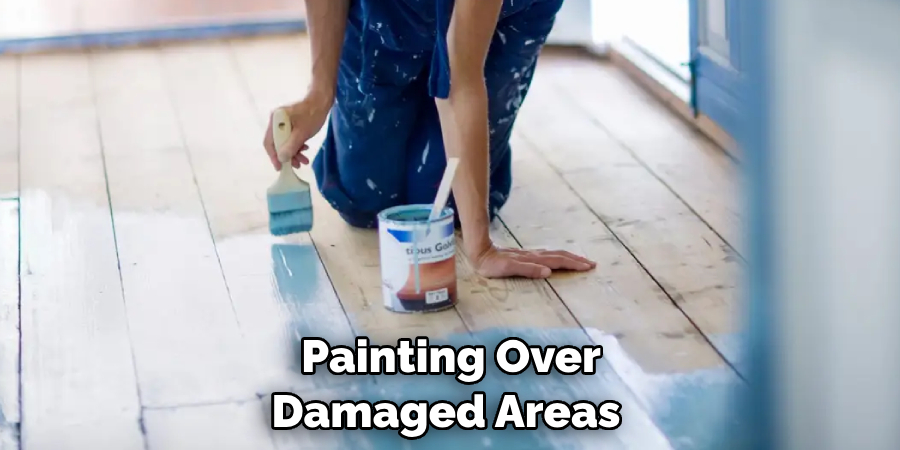
5. Paint Over Damaged Areas
Painting over damaged areas is a great way to conceal any chips and scratches that don’t require repairs. The paint should be the same color as your existing wood floors in order to blend in seamlessly. Also, make sure to use paint that won’t chip or crack over time.
6. Apply a Wood Filler
Wood filler is an easy-to-apply material used to fill in gaps, chips, and dents on wooden floors. It is available at most hardware stores and can be applied using a putty knife for small repairs. Also, be sure to choose a color that matches the rest of your flooring.
7. Use Hard Wax
For minor chips and scratches on wood floors, you can use hard wax to patch them up. This is applied with a putty knife and allowed to dry before being buffed out. Hard wax is also available in different colors if you need to match it with your flooring.
8. Glue in Small Splinters
If you have small splinters that jut out from the floor, you can use wood glue to secure them in place and even the surface out. Make sure to use a strong adhesive so that it doesn’t come loose over time.
9. Use Matching Wood Veneer
Wood veneer can be used to cover up bigger chips in wood floors. This is applied with a special adhesive and then sanded down to blend into the rest of the floor. Also, make sure to match the color and grain pattern of the veneer with your current flooring.
10. Use a Furniture Marker
For minor chips and scratches, you can use a furniture marker to hide them. This is especially useful for darker wood floors, as it will blend in more easily than paint or putty. Also, make sure to choose a color that closely matches your wood floors.
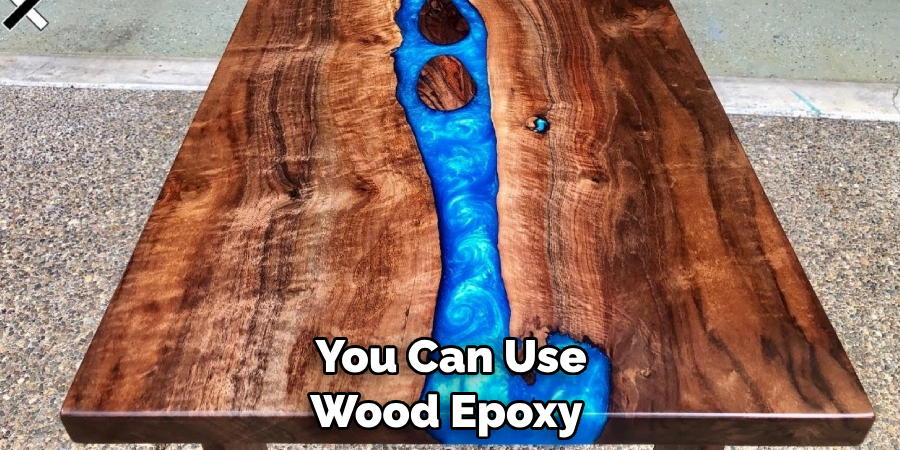
11. Use Wood Epoxy
For bigger chips and gouges, you can use wood epoxy to fill them in. This is applied with a putty knife and allowed to dry before being sanded down for a uniform finish. It comes in several colors so you’re able to match it with your existing wood floors.
12. Sand and Buff Out
If you have minor chips or scratches in your wood floors, you can sand them down and then buff out the area for a smooth finish. This process requires patience and precision to ensure that your floor looks even after it’s done.
By following these steps, you will be able to repair and restore your wood floors for a beautiful look that you can enjoy for years to come. Be sure to take the necessary precautions when repairing chipped wood floors and always consult an experienced professional if you’re unsure of what to do!
Frequently Asked Questions
What Precautions Should I Take Before Attempting to Fix Chipped Wood Floor?
Before attempting to fix a chipped wood floor, it is important to take the necessary precautions to ensure safety and a successful repair. First, make sure you are wearing protective gloves and eye protection while handling sharp tools. Additionally, if the area of damage is large or in an area with high foot traffic, it is a good idea to move furniture out of the way so you can work on the floor without obstruction. Finally, make sure the area around your work is well-ventilated and free of debris and dust.
What Tools Do I Need to Fix Chipped Wood Floor?
To fix chipped wood floors, you will need several tools including sandpaper, wood putty, a utility knife, and a putty knife. Sandpaper is important to help smooth out the edges of the damaged area before you begin filling it in with putty. The utility knife will help remove any excess debris from around the chip or crack. Finally, a putty knife should be used to apply the wood putty into the chipped area.
What Is the Best Way to Apply Wood Putty?
When applying wood putty, it is important to start with a small amount of putty and gradually build up until the chipped area is completely filled in and level with the rest of the surrounding flooring. The best way to apply putty is by using a firm putty knife to press it into the wood and then using a damp cloth to wipe off any excess putty.
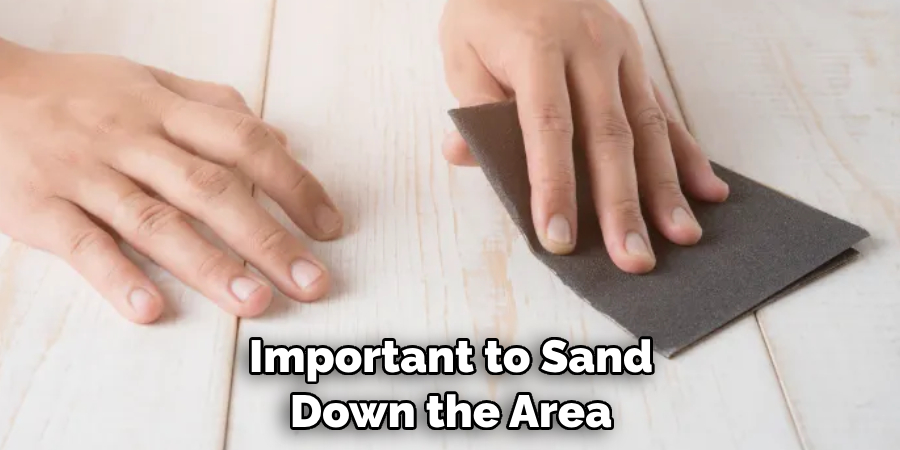
What Should I Do After Applying Wood Putty?
After applying wood putty, it is important to let the area dry for several days before sanding and refinishing the repaired area. Make sure you use high-grit sandpaper to help blend in the repaired area with the rest of your wood floor. After sanding, you can apply a stain or sealant to protect and finish the repaired area. With proper care, your repaired wood floor should last for many years.
Can I Repair Chipped Wood Floors Myself?
Yes, it is possible to repair chipped wood floors yourself. However, it is important to take the necessary precautions and use the correct tools in order to ensure a successful repair. Furthermore, if the damage is extensive or you are uncertain about how to make the repairs, it may be best to consult a professional for assistance.
No matter how you plan to repair your chipped wood floor, be sure to take the necessary safety precautions and use the correct tools in order to ensure a successful repair. With patience and care, you should be able to make a lasting repair that will help preserve your wood floor for years.
Can I Use a Repair Kit to Fix the Chipped Wood Floor?
Yes, many companies offer repair kits specifically designed for fixing chipped wood floors. These kits usually include the necessary materials and tools required to make repairs, such as sandpaper, putty, and a putty knife. Although these kits can be helpful in making repairs, it is important to read all instructions carefully before beginning and to take the necessary safety precautions.
Can the Chipped Wood Floor Be Refinished?
Yes, a chipped wood floor can be refinished as long as the damage is not too extensive. After repairing the damaged area with putty, it is important to sand down the area in order to blend it in with the surrounding flooring. Once this is done, you can apply a stain or sealant to protect and finish the repaired area.
What Should I Do If the Chipped Wood Floor Can Not Be Repaired?
If the damage is extensive and cannot be repaired with putty or other materials, it may be necessary to replace the damaged section of wood flooring. This process should not be attempted without professional assistance as it requires specialized tools and careful attention to detail. Once the damaged section is replaced, refinishing the entire floor may be necessary in order to ensure a uniform look throughout.
Conclusion
In conclusion, fixing a chipped wood floor is not the toughest job, and can be achieved with a couple of simple techniques. If you encounter minor chips in your wood floors, it’s best to fill, sand and refinish them yourself for cost savings. However, always remember to check with a professional if the damage is more severe because it is best to hire an expert for bigger jobs such as deep gouges or trouble spots that need replacing.
Above all, maintain routine care for your wood floors so they last longer and look their best. By following these tips on how to fix chipped wood floor and remaining vigilant about maintenance, you will get the most out of your wood flooring and ensure it continues to be part of your home for many years to come!