
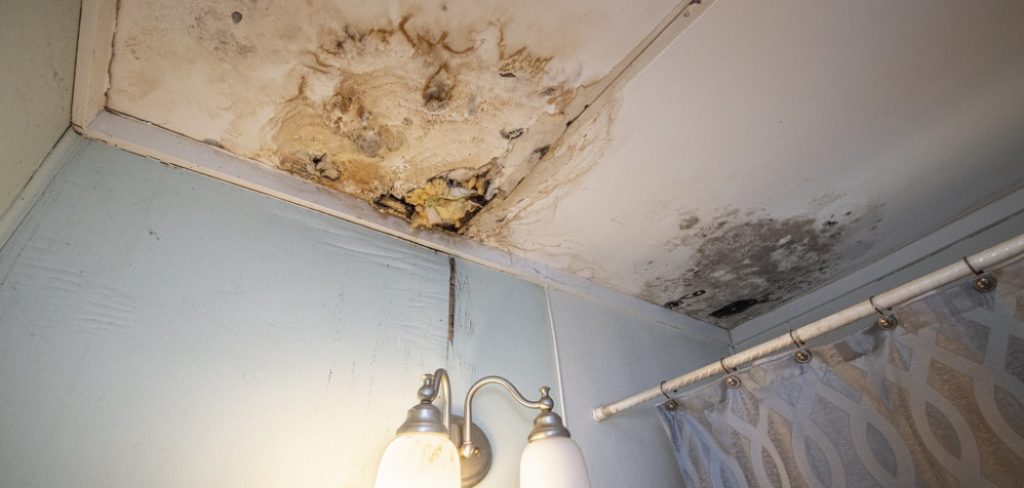
A wet spot on your ceiling can be a frustrating and unsightly problem. Not only can it ruin the look of your ceiling, but it could also indicate a bigger issue, such as a leak or water damage. It’s important to address this issue promptly in order to prevent further damage and potential safety hazards.
The main advantage of fixing ceiling wet spots is that it can save you time and money. If you notice a damp spot on your ceiling, fixing it yourself can prevent further damage and potentially costly repairs. Additionally, being able to fix small issues like this can help you maintain the overall condition of your home and potentially increase its value. In this blog post, You will learn in detail how to fix ceiling wet spot.
Step-by-step Instructions for How to Fix Ceiling Wet Spot
Step 1: Inspect the Ceiling
If you notice a wet spot on your ceiling, the first step is to inspect it closely. Look for any signs of leaks or water damage, such as discoloration, bubbling paint, or mold growth.
Step 2: Locate the Source of the Leak
Once you have inspected the ceiling, try to locate the source of the leak. This could be anything from a leaky pipe or roof, to an overflowed bathtub. If you can’t find the source of the problem, it’s best to call a professional plumber or contractor for help.
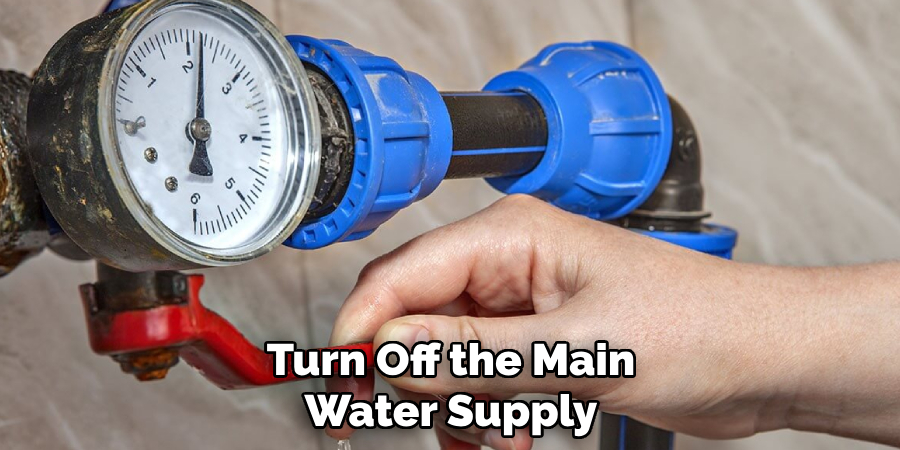
Step 3: Turn off the Water Supply
If the wet spot is caused by a plumbing issue, turn off the main water supply to your home. This will prevent any further water from leaking and causing more damage. Before you begin any repairs, make sure to protect your belongings by moving them away from the wet spot. Cover furniture and other items with plastic sheets or tarps to prevent them from getting damaged.
Step 4: Remove Water Buildup
Using a bucket or towels, remove any water buildup around the wet spot. This will help prevent further damage to your ceiling and allow you to see the extent of the damage. Once the excess water is removed, use a fan or dehumidifier to dry out the area. This will prevent mold from growing and also prepare the area for repairs.
Step 5: Repair the Damage
Once the area is completely dry, you can begin repairing the damage. This may involve patching up any holes or cracks in the ceiling or replacing damaged drywall. After the repairs are complete, paint over the affected area to blend it in with the rest of your ceiling. Make sure to use a high-quality paint and primer specifically designed for use on ceilings.
Step 6: Check for Any Lingering Issues
Even after the repairs are complete, it’s important to keep an eye out for any lingering issues. This could include water stains or mold growth, which may require further attention. To prevent future ceiling wet spots, make sure to take preventative measures such as regular maintenance and inspections. This can help catch any potential issues before they become major problems.
By following these step-by-step instructions, you can effectively fix a ceiling wet spot and prevent any further damage to your home. Remember, if you are unsure of how to proceed or the problem seems too complex, it’s always best to seek professional help.
Precautions for How to Fix Ceiling Wet Spot

- Always turn off the main water supply before attempting to fix a ceiling wet spot caused by plumbing issues.
- Wear protective gear such as gloves and goggles when handling repairs.
- Use caution when climbing ladders or standing on chairs to reach high areas of the ceiling.
- Avoid using electrical appliances or touching electrical outlets near a wet spot on the ceiling.
- Properly dispose of any damaged materials, such as wet drywall or insulation, to prevent mold growth.
- Be mindful of any potential hazards, such as exposed wiring or water damage to the ceiling’s structure.
- If in doubt, seek professional help. DIY repairs may not always be the safest option for fixing a ceiling wet spot.
By following these safety tips and precautions, you can ensure that you are taking the necessary measures to fix a ceiling wet spot safely and effectively. Safety should always be a top priority when dealing with any home repairs, so don’t hesitate to ask for help or consult with a professional if needed.
Recognizing the Signs of a Wet Spot on the Ceiling
Wet spots on the ceiling can be a major cause for concern in any home. Not only do they ruin the appearance of your ceiling, but they can also lead to more serious problems, such as mold growth and structural damage. It is important to recognize the signs of a wet spot on your ceiling so that you can take action before it becomes a bigger issue. Here are some common signs to look out for:
1. Discoloration
The most obvious sign of a wet spot on the ceiling is discoloration. This can range from light brown to dark yellow or even black in some cases. The color may also appear to be spreading, indicating that the water is still actively leaking onto your ceiling.
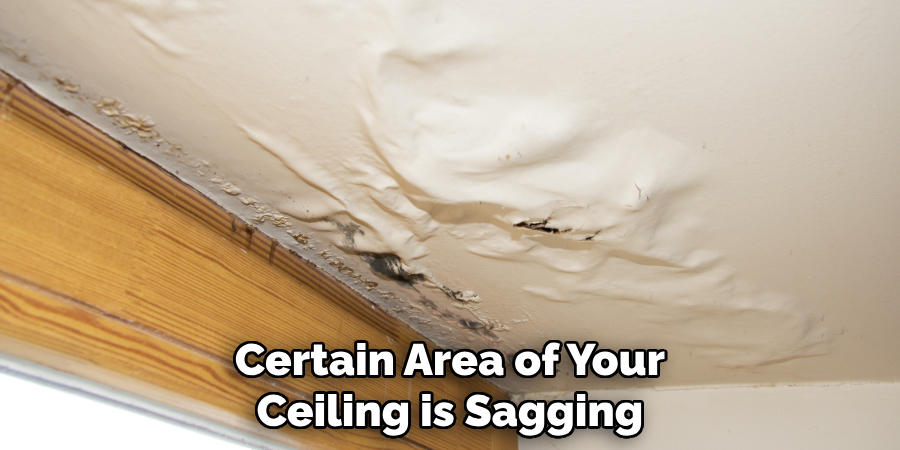
2. Sagging
If you notice that a certain area of your ceiling is sagging or looks like it’s bulging out, this could be a sign of water accumulation. When water seeps into your ceiling, it can cause the drywall to become soft and eventually sag.
3. Dripping
If you hear dripping sounds coming from your ceiling, this is a clear indication that there is an active leak. The sound may be soft or loud depending on the amount of water leaking and where it is coming from.
4. Musty Odor
A wet spot on the ceiling can also lead to a musty odor in your home. This is caused by mold growth, which thrives in damp environments. If you notice a strong musty smell, it’s important to investigate and locate the source of the water leak.
5. Stains or Peeling Paint
Sometimes, a wet spot on the ceiling may not be immediately visible, but you may notice stains or peeling paint on your walls. This could be a sign that the water is seeping through from above and is causing damage to your walls as well.
By paying attention to these signs, you can catch a wet spot on your ceiling early and prevent it from becoming a larger issue. If you do notice any of these signs, it’s important to take action immediately.
Importance of Addressing Wet Spots Promptly
Wet spots in any area can cause a range of problems, from mold growth to structural damage. It is important to address wet spots promptly and effectively to prevent these issues from occurring. Here are some reasons why addressing wet spots should be a top priority.
1. Prevents Mold Growth
One of the biggest concerns with wet spots is the potential for mold growth. Mold can start to form within 24-48 hours of a surface becoming damp, and it can spread quickly if not addressed. Mold not only looks unsightly, but it also poses health risks, particularly for those with respiratory issues or allergies. By addressing wet spots promptly, you can prevent mold growth from occurring and keep your space safe and healthy.

2. Preserves Structural Integrity
Water is a powerful force and can cause significant damage to the structure of a building if left unchecked. Wet spots can weaken walls, floors, and ceilings, leading to issues such as cracks, sagging, and collapse. This not only compromises the safety of those in the building but also leads to costly repairs. By addressing wet spots promptly, you can prevent structural damage and maintain the integrity of your building.
3. Prevents Slip and Fall Accidents
Wet spots can be a hazard, especially on hard surfaces such as tile or wood. They make the ground slippery, increasing the risk of slip and fall accidents. This is particularly dangerous in high traffic areas where people may not notice the wet spot until it’s too late. By addressing wet spots promptly, you can prevent these accidents and ensure the safety of everyone in your space.
4. Saves Time and Money
Addressing wet spots promptly can save you time and money in the long run. By dealing with them early on, you can prevent larger issues from occurring that would require more extensive repairs or replacement. Additionally, mold remediation can be expensive, so preventing its growth through prompt attention to wet spots can save you from costly expenses.
5. Maintains a Clean and Pleasant Environment
Wet spots not only look unappealing, but they also create a musty and unpleasant odor. This can be off-putting to guests and customers, affecting their perception of your space. By addressing wet spots promptly, you can maintain a clean and pleasant environment for everyone to enjoy.
By doing so, you can prevent mold growth, preserve structural integrity, prevent accidents, save time and money, and maintain a clean space. So the next time you spot a wet spot in your building or home, make sure to address it promptly and effectively.
Insurance Considerations for Fixing Ceiling Wet Spot
There are a few important things to keep in mind when considering insurance coverage for fixing a ceiling wet spot. Here are some key considerations:
- Cause of Damage: The first thing to determine is the cause of the wet spot on your ceiling. If it is due to a sudden and accidental event such as a burst pipe, most homeowner’s insurance policies will cover the cost of repairs. However, if the damage is due to wear and tear or neglect, it may not be covered.
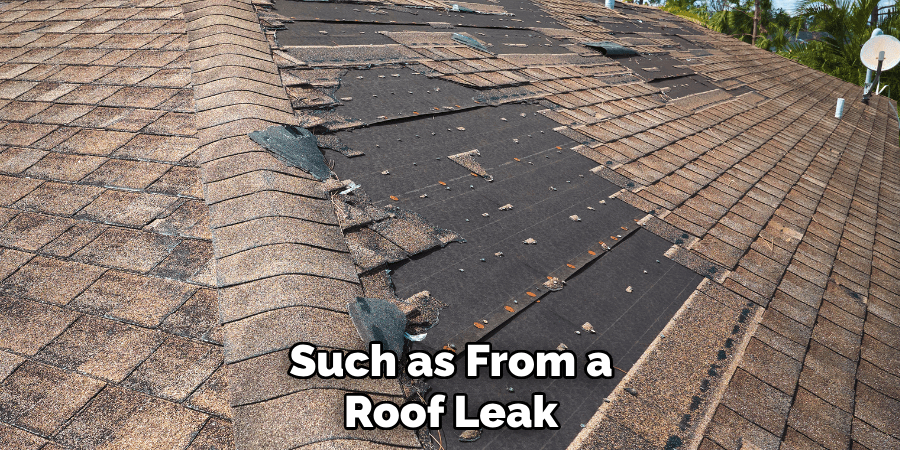
- Type of Coverage: It’s important to review your insurance policy to see what type of coverage you have for water damage. Some policies may have specific exclusions for certain types of water damage, such as from a roof leak or flooding. Make sure you understand the extent of your coverage and any limitations.
- Deductible: Before filing a claim for ceiling repair, it’s important to consider your deductible. This is the amount you are responsible for paying out of pocket before your insurance coverage kicks in. If the cost of repairs is lower than your deductible, it may not be worth filing a claim.
- Timely Reporting: It’s crucial to report any water damage to your insurance company as soon as possible. Waiting too long could result in a denial of coverage, as the insurance company may view it as neglect or not take responsibility for the cause of the damage.
- Documentation: Before and after photos are important evidence when filing an insurance claim for ceiling repair. Be sure to document the damage and the repairs in detail to support your claim.
- Alternative Options: In some cases, filing an insurance claim may not be the best option for fixing a ceiling wet spot. If the cost of repairs is relatively low, it may be more beneficial to pay out of pocket instead of risking an increase in insurance premiums.
- Contractor Requirements: Some insurance companies may require you to use a certain contractor for repairs in order to be covered. Before hiring a contractor, be sure to check with your insurance provider to see if they have any specific requirements.
- Prevention: While it’s important to have insurance coverage for unexpected events, prevention is key when it comes to ceiling wet spots. Regular maintenance and inspections can help identify potential issues before they become costly problems.
- Additional Coverage: If you live in an area prone to natural disasters such as floods or hurricanes, it may be worth considering additional coverage for water damage. This can help protect your home and finances in the event of a catastrophic event.
- Review Your Policy: It’s always a good idea to review your insurance policy annually to ensure you have adequate coverage for potential issues like ceiling wet spots. If you have any questions or concerns, don’t hesitate to reach out to your insurance provider for clarification and guidance. Remember, it’s always better to be prepared and informed rather than caught off guard by unexpected damage.
DIY and Budget-friendly Tips for Fixing Ceiling Wet Spot
Ceiling wet spots can be a common problem in many households, and they can be caused by various factors such as roof leaks, condensation, or plumbing issues. These wet spots not only look unsightly but can also lead to mold growth and damage to your ceiling if left untreated.
However, hiring a professional to fix them can be expensive. But don’t worry, with a little bit of DIY knowledge and creativity, you can easily fix ceiling wet spots on a budget. Here are some tips to help you get started:
1. Identify the Source of the Problem
Before starting any repairs, it is essential to identify the root cause of the ceiling wet spot. Carefully examine the area and check for any signs of leaks or water damage. If the wet spot is near a plumbing fixture, there may be a leak in the pipes. If the spot is directly under your roof, it could be due to a leaky or damaged roof. Identifying the source of the problem will help you determine the best course of action for fixing it.
2. Fix Any Leaks
Once you have identified the source of the problem, it’s time to fix any leaks. If it’s a plumbing issue, you may need to call in a professional plumber. However, if it’s a roof leak, you can try fixing it yourself with some basic tools and materials. You can use roofing sealant or caulk to patch up small holes or cracks in your roof. For larger damages, it’s best to call a professional roofer for repairs.
3. Dry the Wet Spot
Before starting any repairs on the ceiling, make sure that the wet spot is completely dry. You can use a dehumidifier or fans to speed up the drying process. It’s essential to dry out the area thoroughly; otherwise, mold can start growing, causing more damage and health hazards.
4. Prep the Area
Once the wet spot is dry, you can start prepping the area for repairs. Remove any loose paint or damaged plaster from the ceiling using a putty knife. Sand down any rough edges to ensure that the new patch blends in seamlessly with the rest of the ceiling.
5. Patch up the Spot

Next, you’ll need to create a patch for the wet spot using drywall or plaster. Cut out a piece of drywall or plaster slightly larger than the damaged area. Apply some adhesive on the edges of the patch and carefully place it over the wet spot, making sure that it is level with the rest of the ceiling. Smooth out any air bubbles and let it dry completely.
6. Paint and Finish
Once the patch has dried, you can paint over it to match the rest of your ceiling’s color. If you don’t have an exact match, you can create a custom color by mixing different shades of paint. You can also add some texture to your repair job using a textured roller or brush. Make sure to let the paint dry completely before applying a second coat if needed.
7. Prevent Future Wet Spots
To prevent future wet spots, it’s essential to address the root cause of the problem. Regularly inspecting your roof and plumbing fixtures for any signs of damage or leaks can help catch any issues early on. You can also take preventive measures such as adding insulation or improving ventilation in your home to reduce condensation.
Troubleshooting and Common Challenges for Fixing Ceiling Wet Spots
While fixing ceiling wet spots on your own can be a cost-effective solution, there are some common challenges you may face during the process. Here are some troubleshooting tips to help you overcome these challenges:
- If the wet spot keeps reappearing after repairs, it could indicate a more significant underlying issue that requires professional attention.
- Patching up the damaged area may not always be enough to fix the problem, especially if there is severe water damage. In such cases, it’s best to consult a professional for proper repairs.
- Matching the color and texture of your ceiling can be challenging, but you can always experiment with different techniques and colors until you find the perfect match.
By following these tips and troubleshooting advice, you can easily fix ceiling wet spots on a budget and prevent any future damage to your home. Remember to always prioritize safety and consult a professional if you’re unsure about how to fix the problem.
Conclusion
While there are various methods for fixing a wet ceiling spot, they each come with disadvantages. It’s important to consider these drawbacks before deciding on the best solution for your home. One major disadvantage is cost. Depending on the severity of the damage, fixing a wet ceiling spot can be expensive. This is especially true if you need to hire professionals or purchase specialized equipment.
In conclusion, a wet ceiling spot is not only unsightly, but it can also be a sign of underlying issues that need to be addressed. While there are various methods for fixing this problem, they all come with disadvantages such as cost and potential health hazards.
It’s vital to thoroughly assess the situation and consider these disadvantages before deciding on the best solution for your home. I hope this article has been beneficial for learning how to fix ceiling wet spot. Make Sure the precautionary measures are followed chronologically.