Do you have a gouge in your vinyl plank flooring? Seeing an unsightly blemish on the floors of your carefully selected home interior is frustrating. Don’t fret! This blog post will provide all the information needed to understand how to fix a gouge in vinyl plank flooring.

Whether it’s a small chip or a larger scrape, the following steps will guide you in restoring your vinyl plank floors to their original beauty.
We’ll cover everything from gathering supplies and assessing the depth of the gouge to filling it with putty and coloring over it for an invisible repair job. Get ready to learn some DIY tricks that can help restore your vinyl planks to their original condition — no professional assistance is necessary!
What Will You Need?
Before we dive into the process of fixing a gouge, let’s review the supplies you’ll need for this project:
- Floor Putty or Vinyl Flooring Repair Kit
- Sandpaper (grit 120)
- Clean Cloth or Sponge
- Latex Gloves
- Protective Eye Gear
Now that you have your materials ready, it’s time to fix that pesky gouge.
10 Easy Steps on How to Fix a Gouge in Vinyl Plank Flooring
Step 1. Clean the Area:
The first step to repairing a vinyl plank flooring gouge is thoroughly cleaning the gashed area. Using a clean cloth or sponge, gently wipe the area to remove dust, grime, or debris. This is important because any leftover dirt can interfere with the adhesion of the putty to the floor, making the repair less effective and potentially visible.
Step 2. Assess the Damage:
After cleaning the area, assess the size and depth of the gouge. This step is crucial because it determines the amount of putty you need. If the gouge is shallow, a small amount of putty will suffice. However, if the gouge is deep, apply more putty. Remember, it’s better to use less initially, as you can add more if needed.
Step 3. Apply the Putty:
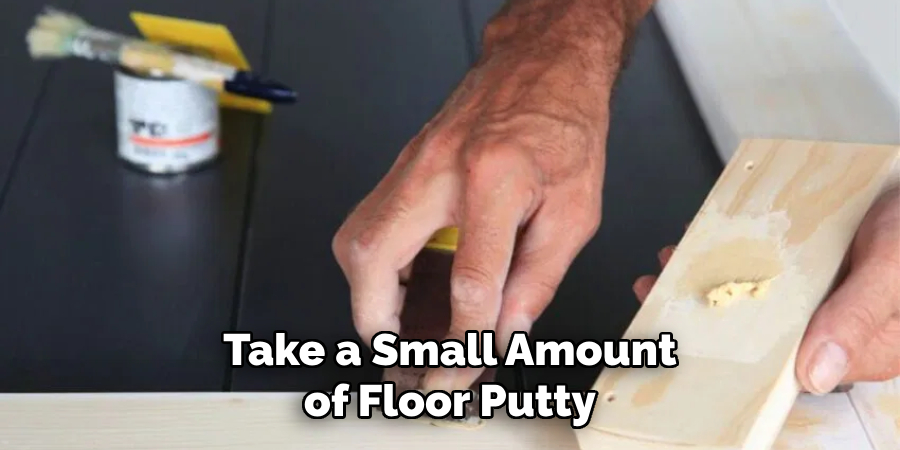
With latex gloves on, take a small amount of floor putty with your fingers or a putty knife, depending on the size and depth of the gouge. Gently press it onto the gouge, ensuring it fills the entire space. If the gouge is deep, you might need to apply several layers of putty, allowing each layer to dry before applying the next. Adding more putty later is easier, so start with a smaller amount and add more if necessary.
Step 4. Smooth the Putty:
Once the putty has filled the gouge, use a putty knife or the edge of a credit card to smooth out the surface. Ensure the putty is level with the rest of the vinyl plank floor. If the putty is above the level of the floor, gently sand it down using your 120-grit sandpaper until it’s even. Be careful not to sand the surrounding vinyl area.
Step 5. Let it Dry:
Allow the putty to dry completely. The drying time will depend on the depth of the gouge and the amount of putty used. Refer to the instructions on your vinyl repair kit or putty for exact drying times. It’s important to take your time with this step – if the putty is completely dry, it may not adhere properly to the vinyl.
Step 6. Color the Putty:
If your repair kit includes paint that matches your floor, use it to color the putty. This step is only sometimes necessary if the putty color matches your floor. However, if there’s a noticeable difference, carefully apply the paint to the dried putty, taking care not to get any on the surrounding floor. Let the paint dry completely before proceeding.
Step 7. Apply the Sealant:
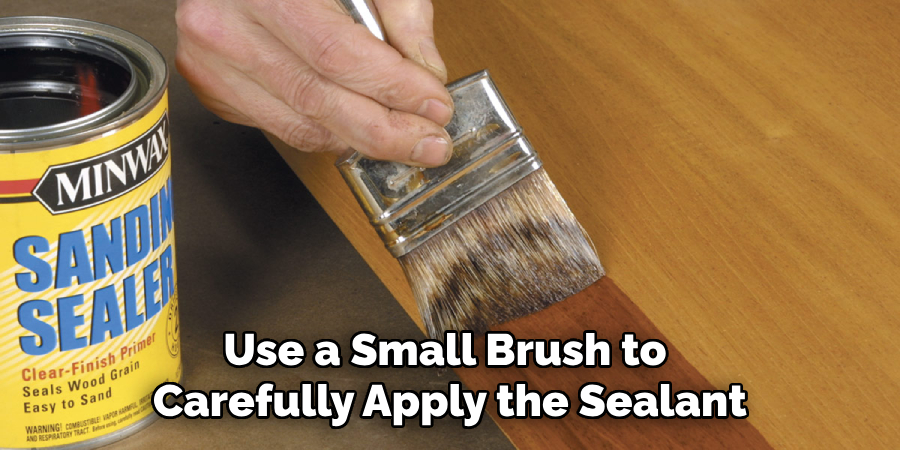
After the paint has dried completely, it’s time to apply a sealant. This will give your repair job a glossy finish that matches the rest of your flooring. Use a small brush to carefully apply the sealant over the repaired gouge, ensuring you don’t spread it onto the unaffected areas of the floor. Again, allow the sealant to dry completely before moving on to the next step.
Step 8. Final Inspection:
Once the sealant has dried, inspect your repair job. The gouge should now be filled and blend seamlessly with the rest of your vinyl plank flooring. If you still need to, repeat the previous steps until you achieve the desired result.
Step 9. Clean Up:
Collect all your materials and clean up your workspace. Remember to dispose of any used materials properly, especially the putty, paint, and sealant, which could be harmful if not properly handled. Be careful not to damage the repaired area while cleaning up.
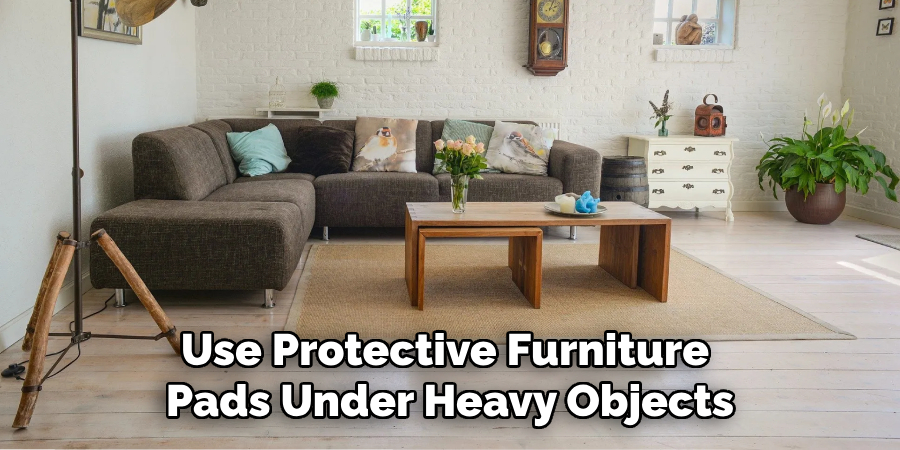
Step 10. Prevention:
Now that your gouge is successfully fixed, preventative measures are essential to avoid future damage. Use protective furniture pads under heavy objects like chairs and tables to prevent them from scratching or gouging the floor. Also, avoid dragging heavy objects across vinyl plank flooring.
Following these ten steps, you can repair a gouge in vinyl plank flooring without breaking a sweat. With a little patience and effort, your floors will look as good as new. Remember, practice makes perfect, so don’t feel discouraged if it doesn’t turn out perfectly the first time.
5 Additional Tips and Tricks
- Use a Vinyl Repair Kit: Repair kits are available in home improvement stores and online. These usually contain a filler material and a variety of colors to match your flooring.
- Keep Spare Planks: If spare planks are left from your flooring installation, these can come in handy for repairing any severe damage.
- Call a Professional: If the gouge is large or the damaged area is extensive, it might be best to call a professional to ensure a seamless repair.
- Maintain Your Flooring: Regular cleaning and maintenance can prevent small scratches from becoming bigger problems. Use soft cleaning tools to avoid causing damage.
- Use Furniture Pads: Placing pads underneath furniture legs can help prevent gouges and scratches. Regularly moving your furniture slightly can also avoid permanent indentations.
With these additional tips and tricks, you can effectively repair any gouges in your vinyl plank flooring and maintain its appearance for years to come.
6 Things You Should Avoid
- Avoid Dragging Furniture: One of the most common ways vinyl flooring gets damaged is by dragging heavy furniture across it. Always lift furniture or use protective mats or sliders when moving it.
- Avoid Using Abrasive Cleaners: Strong, abrasive cleaners can strip vinyl of its finish and cause it to look dull. Always use cleaners that are specifically designed for vinyl flooring.
- Avoid High Heels and Sharp Objects: High heels or sharp objects can gouge vinyl plank flooring. It’s best to remove such footwear before walking on the floor and to be mindful of sharp objects.
- Avoid Exposing to Direct Sunlight: Over time, prolonged exposure to direct sunlight can cause vinyl flooring to fade. Use window coverings to protect your flooring during peak sunlight hours.
- Avoid Ignoring Minor Damages: Small scratches or gouges can turn into larger problems if not addressed immediately. Regularly inspect your flooring and address any damages promptly to maintain the longevity and appearance of your floor.
- Avoid Using Harsh Tools: Avoid using harsh tools such as knives or sandpaper when fixing a gouge. These can cause further damage and make the repair more difficult.
By following these tips and avoiding common mistakes, you can keep your vinyl plank flooring pristine and top condition. With these tips in mind, you can avoid further damage to your vinyl plank flooring and keep it looking as good as new.
Why Does Vinyl Scratch So Easily?
Vinyl flooring is susceptible to scratches because it is made of a softer material compared to other types of flooring. It can also have a thin wear layer, making it more prone to damage from sharp objects or heavy furniture.
Another factor that can contribute to scratches is the quality of the flooring. Lower-quality vinyl or improper installation can make it more susceptible to damage. Moreover, using abrasive cleaners or walking in high heels can also cause noticeable scratches on vinyl flooring.
However, with proper care and maintenance, vinyl plank flooring can still be a durable and long-lasting option for your home. Following the above tips, you can prevent and repair any scratches or gouges, ensuring your flooring stays in top condition.
Conclusion
It’s important to be properly prepared before making any repairs on your flooring, as it could save you time, effort, and money in the long run. With everything you now know about how to repair a gouge in vinyl plank flooring, you should be well prepared for your next renovation project.
All that is left is for you to carefully assess the damage and make repairs with the right materials and tools. Don’t forget that when in doubt, it is best to reach out for professional assistance as they are skilled and experienced in performing such jobs. Take your time to ensure precision so that when it’s finished, you can stand back and admire your handiwork – after all, you did it yourself!
Hopefully, the article on how to fix a gouge in vinyl plank flooring has helped you gain the knowledge and confidence to tackle any future flooring damage. Remember to stay proactive in maintaining your flooring; it will continue to look beautiful for years. Happy repairing!