
Are you looking to replace your existing dryer venting system? Installing a dryer vent through the floor can be an efficient and effective way of removing warm, moist air from your home. Not to mention, it looks great too! It’s no wonder why this type of ventilation is becoming increasingly popular amongst homeowners who want not only quick-drying laundry but also indoor climate control in their homes.
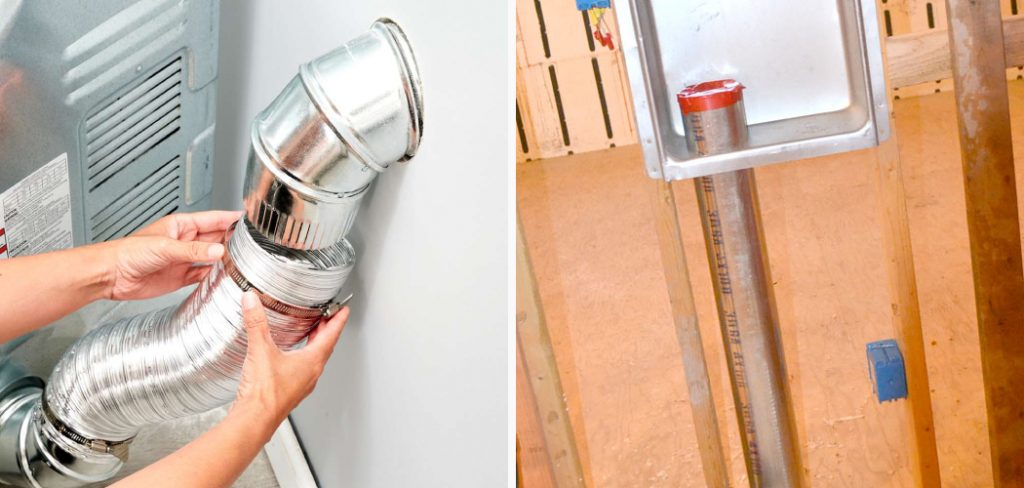
This guide on how to vent a dryer through the floor will walk you through all the essential steps necessary for properly installing a dryer vent either in your basement or on the first floor of your house!
Why Do You Need to Vent a Dryer Through the Floor?
Before we dive into the process of venting a dryer through the floor, it’s essential to understand why this is necessary. When you use your dryer, it produces hot and moist air that needs to be expelled from your home. If not appropriately vented, this warm and damp air can cause a variety of issues such as mold growth, musty smells, and even damage to your home’s structure.
By venting your dryer through the floor, you are effectively removing this hot, moist air from inside your house and preventing any potential problems. Additionally, it allows for proper airflow and helps maintain a comfortable indoor environment.
What You Will Need
To vent your dryer through the floor, you will need the following materials:
- Dryer Vent Kit (Includes Duct Pipe, Elbows, and Clamps)
- Drill
- Hole Saw
- Measuring Tape
- Pliers
- Safety Glasses and Gloves
Before you begin any installation, make sure to turn off the electricity and gas supply to your dryer. It’s also a good idea to have someone assist you with the installation for safety reasons.
11 Step-by-step Guidelines on How to Vent a Dryer Through the Floor
Step 1: Choose a Location
The first step is to determine where you want your vent to be located through the floor. This will depend on various factors such as the layout of your home, the location of the dryer, and any potential obstructions. It’s essential to choose a location that is convenient for both venting the dryer and accessing it for future maintenance. You may also need to check local building codes for any specific requirements.

Step 2: Measure and Mark the Location
Once you have chosen a location, use a measuring tape to mark the exact spot on the floor where you will be installing the vent. It’s important to measure accurately to ensure that your dryer vent lines up correctly with the opening in your basement or crawl space. It’s also a good idea to mark the center of the hole for easier drilling.
Step 3: Drill Pilot Holes
Using a drill, create pilot holes at the corners of your marked spot. This will help guide you when using a larger hole saw and prevent any accidental damage. Whether you are drilling through wood or concrete, make sure to use the appropriate drill bit. Otherwise, you risk damaging your drill and creating uneven or jagged holes. You can also use a hammer and chisel to create pilot holes in concrete.
Step 4: Cut the Hole
Next, use a hole saw to cut out the opening for your dryer vent. Make sure to follow the manufacturer’s instructions when attaching the hole saw to your drill. Also, take your time and cut slowly and steadily to avoid any mistakes or damage. If you are using a hole saw on concrete, it’s best to use a hammer drill for more efficient and accurate cutting.
Step 5: Create an Access Point
To make your vent installation easier, create a small access point in the floor near the exterior wall. This will allow you to reach inside and attach the dryer vent once it is installed through the floor. You can use a hole saw or jigsaw to create a small opening for this purpose. It’s essential to make sure this access point is covered and sealed properly once the vent is installed.
Step 6: Measure and Cut Duct Pipe
Now, you need to measure the distance from the top of your dryer to the floor. Once you have this measurement, use pliers to cut a piece of duct pipe that will fit snugly between your vent and the dryer. Make sure to leave enough extra length for connecting to the vent and for any adjustments needed during installation. But be careful not to make the pipe too long, as this can cause airflow restrictions.
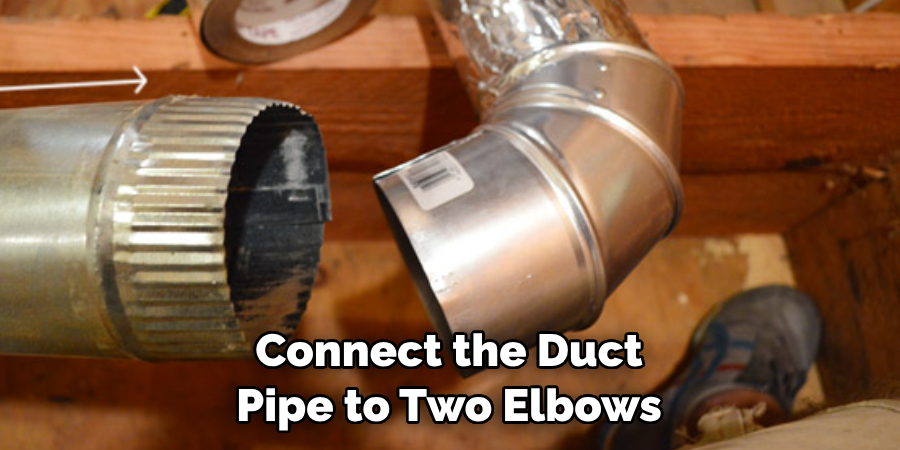
Step 7: Install Elbows
Connect the duct pipe to two elbows, one on each end. These will help redirect the airflow and allow for proper ventilation through the floor. Use clamps or foil tape to attach the elbows to the pipe securely. It’s important to make sure all connections are tight and properly sealed to prevent any air leaks. But be careful not to overtighten, as this can damage the pipe.
Step 8: Attach the Duct Pipe
Next, carefully insert the duct pipe through the hole in the floor. Make sure it is aligned with your access point and that there is enough clearance around the edges. If you need to adjust the length of the duct pipe, do so before attaching it to the vent. Once you are satisfied with the positioning, secure the pipe to the vent using clamps or foil tape.
Step 9: Secure the Duct Pipe
Use clamps or foil tape to secure all connections of the duct pipe and elbows. You can also use mastic sealant for a more permanent and airtight solution. This will prevent any air leaks and keep your vent functioning properly. Make sure to smooth out the mastic sealant for a neat and even finish. Otherwise, it may cause airflow restrictions.
Step 10: Seal Around the Hole
To prevent any air leaks and maintain proper ventilation, seal around the edges of the hole in the floor. You can use silicone caulk or foam insulation for this purpose. Make sure to fill in any gaps and smooth out the sealant for a clean finish. This will also help prevent any pests or debris from entering through the opening. You can also use a vent cover to seal off the hole when not in use. But make sure it is easily removable for maintenance.
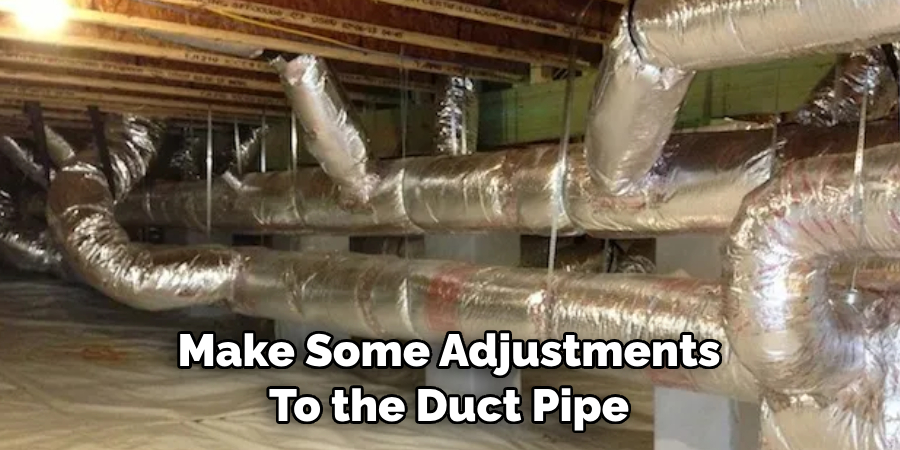
Step 11: Test and Make Adjustments
Once everything is installed, turn on your dryer and make sure it is venting properly. You may need to make some adjustments to the duct pipe length or connections if you notice any issues. If everything is working correctly, seal off your access point and enjoy a properly vented dryer through your floor. it is important to regularly check and maintain your dryer vent to ensure its effectiveness and prevent potential hazards. This includes removing any lint or debris buildup and replacing damaged parts as needed.
Following these step-by-step guidelines on how to vent a dryer through the floor can help you safely and effectively vent your dryer through the floor. By following proper installation techniques and regular maintenance, you can ensure that your dryer is functioning efficiently and safely in your home. Remember to always prioritize safety by turning off electricity and gas supply before any installation or maintenance work. Happy venting!
Frequently Asked Questions
Q: Can I Vent My Dryer Through the Floor Without Professional Help?
A: Yes, you can install a dryer vent through the floor by yourself with the proper tools and knowledge. However, if you are not confident or familiar with DIY projects, it is always best to seek professional help to ensure safe and efficient installation.
Q: Why is Proper Ventilation Important for Dryers?
A: Proper ventilation allows hot air and moisture from your dryer to escape outside, preventing it from building up inside your home. This not only helps maintain proper temperature and humidity levels but also reduces the risk of fire hazards and mold growth.
Q: How Often Should I Inspect and Clean My Dryer Vent?
A: It is recommended to inspect and clean your dryer vent at least once a year. However, if you notice any issues such as reduced airflow or unusual noises, it’s best to check and clean the vent immediately. Regular maintenance can also help extend the lifespan of your dryer and prevent potential hazards.
Q: Can I Use Foil Tape for All Connections in My Dryer Vent?
A: Foil tape is suitable for most connections in your dryer vent, but it should not be used on the exterior vent cover. This area is exposed to weather conditions and may require a more durable sealant such as silicone caulk or mastic sealant. Additionally, make sure to check the manufacturer’s instructions before using any sealant to ensure compatibility with your dryer vent materials. Overall, it is crucial to properly secure and seal all connections to prevent air leaks and maintain proper ventilation.

Conclusion
We hope our guide on how to vent a dryer through the floor has provided you with the knowledge and confidence to tackle venting a dryer safely. Whether you decide to complete it yourself or hire a professional, always keep in mind the importance of completing the job properly. Ensure there is nothing obstructing the duct in your floor line, that the vent is firmly secured, and that your dryer can exhaust freely without interruption.
Remember: Always thoroughly read your owner’s manual before beginning any repair, as they will provide more specific instructions tailored to your make and model. Good luck!