
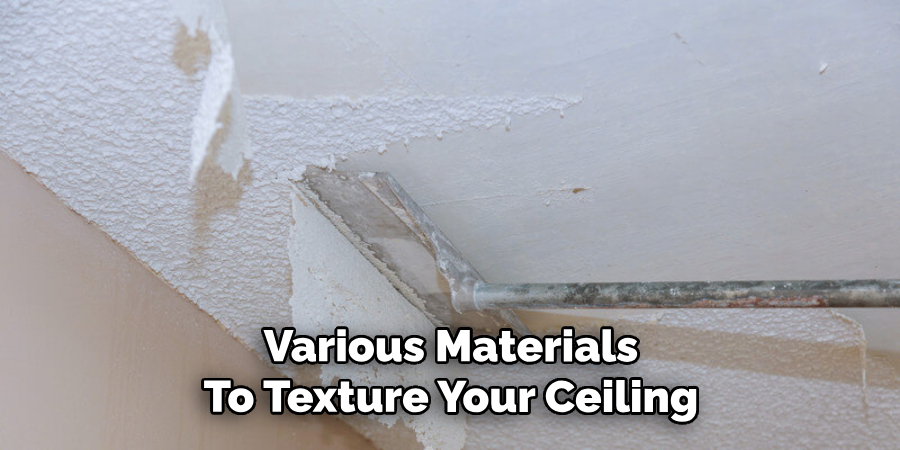
Popcorn textured ceilings were all the rage in the past, but now they’re becoming less and less desirable. If you have a popcorn ceiling in your home, you may be thinking about removing it and replacing it with a smooth ceiling. While removing popcorn is a challenging task, texturing a ceiling is even more daunting. Today, we’re here to guide you through the process of how to texture a ceiling after removing popcorn.

Can You Texture a Ceiling After Removing Popcorn
A popcorn ceiling may have been all the rage decades ago, but now it’s more of a nuisance than anything else. However, removing it can be a messy and time-consuming process. Once you’ve finally gotten rid of all that lumpy, bumpy texture, what’s next? The good news is that, yes, it’s possible to texture a ceiling after removing popcorn.
There are a variety of techniques and materials that can be used to create a new, smoother texture or even replicate the look of other types of ceilings. Whether you’re an experienced DIYer or want to hire a professional, it’s important to plan ahead and choose the right tools and materials for the job. So don’t let a popcorn ceiling be a deal breaker when buying a new home or give up on your current ceiling – there is hope for a fresh, updated look.
Why Should You Texture a Ceiling After Removing Popcorn
If you’ve recently removed popcorn from your ceiling, you may think that’s the end of your project. However, while popcorn might have been all the rage in the past, it’s left a bumpy, texture-less mess on your ceiling.
Texture not only gives your ceiling a more seamless and polished look, but it also masks any imperfections that may have resulted from the popcorn removal process. Plus, a textured ceiling can add depth and character to a room, making it feel more inviting and cozy. Don’t let your ceiling be a blank slate – add texture to complete your renovation.
Smooth Sailing: How to Texture a Ceiling After Removing Popcorn
Step 1: Prepare the Ceiling
Before starting the texturing process, you’ll need to ensure your ceiling is clean and debris-free. Use a vacuum and a broom to remove any particles left from the popcorn ceiling removal. It’s also essential to check if there are any cracks or holes that need to be fixed. Once the ceiling is dry, you can proceed to the next step.
Step 2: Choose the Texturing Material
You can use various materials to texture your ceiling, including drywall mud, joint compound, or texture paint. Drywall mud and joint compounds are ideal materials for creating a subtle texture. They are also easy to sand if you need to adjust the texture level. Texture paint, on the other hand, contains small particles that create a more visible texture.
Step 3: Apply the Texturing Material
Once you have decided on the material, you can start applying the texturing material to the ceiling. A plaster or a trowel is ideal for this task as it allows for easy and smooth application. If you’re using drywall mud or joint compound, you can thin them with water to get an easier consistency. Apply the material in a thin layer at first and check the texture level, then add more if needed.
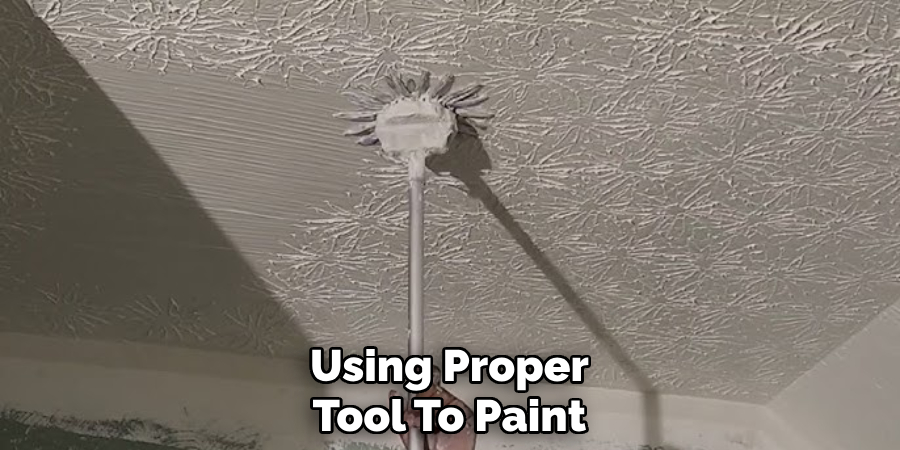
Step 4: Use a Texture Tool or a Brush
To achieve the texture you want, use a texture tool or a brush to create patterns on the ceiling. The most common texture patterns include swirls, stipples, and popcorn. For stippling, use a stipple brush and apply light pressure in random patterns.
You can use a trowel or putty knife to create circular motions for swirls. For popcorn, a texture hopper gun can spray on the texture. Be creative and experiment with different tools to achieve your desired texture.
Step 5: Let the Texture Dry
After applying the texture, let it dry completely before moving on to the next step. The drying time will depend on the type of material used and the thickness of the layer applied. Follow the manufacturer’s instructions for drying time, and ensure the room is well-ventilated to help with drying.
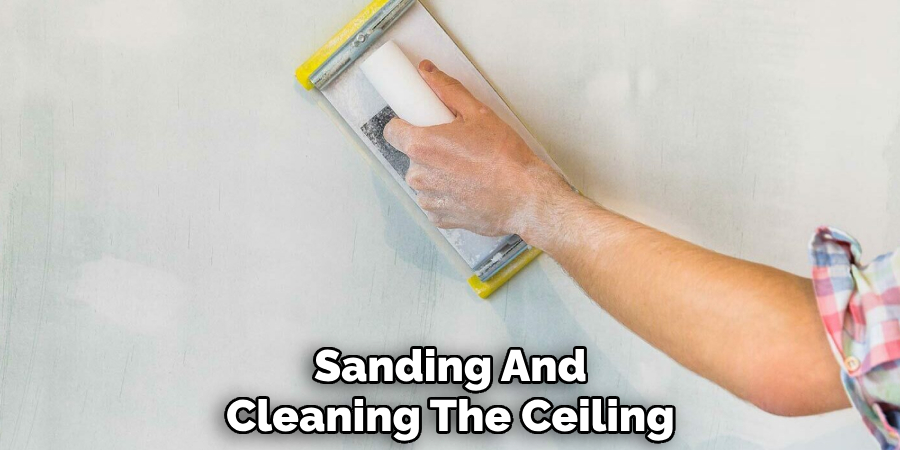
Step 6: Sand and Clean the Ceiling
Once the texture has dried, you can sand any rough spots or high points to achieve a more even texture. Use a pole sander or sanding block for this step. After sanding, use a vacuum to remove any dust and debris from the ceiling. Wipe down the ceiling with a damp cloth to get rid of any remaining residue before painting.
Step 7: Paint the Ceiling
The final step is to paint your newly textured ceiling. Use a roller or a paint sprayer for an even and smooth finish. You can choose to use one color or multiple colors to create a more unique texture. Let the paint dry completely before adding a second coat if needed.
With these seven steps, you can easily texture your ceiling after removing popcorn without the need for professional help. Remember to take your time and carefully follow each step for the best results.
5 Considerations Things When You Need to Texture a Ceiling After Removing Popcorn
1. Prepare the Surface
Before you start texturing a ceiling, it’s important to make sure the surface is properly prepared. This means removing any old popcorn texture and cleaning the area thoroughly. You should also check for any cracks or holes that need to be filled in before you begin applying the new texture. Once you’ve done this, you can then move on to the next step.
2. Choose Your Texture
Once you’ve prepared the surface, it’s time to decide what type of texture you want to use on your ceiling. There are many different types of textures available, from knockdown to orange peel and beyond. Consider your budget and desired aesthetic when deciding, as this will help ensure that you end up with a look that you love.
3. Gather Supplies
Once you’ve chosen your texture, it’s time to gather all of the supplies that you will need in order to complete the job. This includes things like drop cloths, a sprayer or roller for applying the texture, sandpaper or sponges for smoothing out any bumps or imperfections, and safety equipment such as goggles and a dust mask. Make sure that you have everything on hand before beginning so that there are no delays in completing the project.
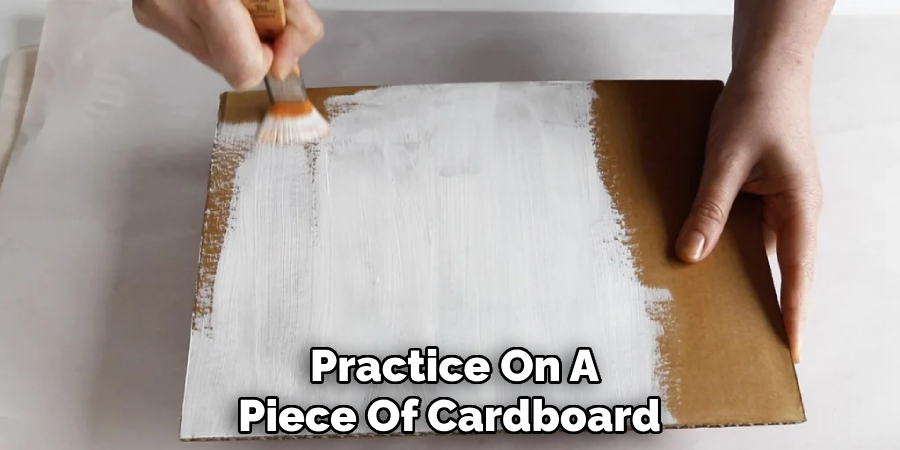
4. Practice on a Piece of Cardboard
Before applying your texture directly onto your ceiling, it’s a good idea to practice on a piece of cardboard or other similar material first. This will allow you to get comfortable with using your texture sprayer or roller and make it easier to adjust if something doesn’t come out quite right before tackling the real thing!
5. Allow Time To Dry
Finally, once you have finished applying your texture, it is important to allow enough time for it to dry completely before painting over it or adding any other finishes, such as wallpaper or trim work. Depending on what type of texture was used and how thickly it was applied, this can take anywhere from several hours up to several days – so plan accordingly!
Benefits of Texture a Ceiling After Removing Popcorn
If you’re considering getting rid of the unsightly popcorn ceiling in your home, you may also want to consider adding texture to create a more polished look. The benefits of texturing a ceiling after removing popcorn are plenty – from hiding imperfections to adding dimension and interest to a once dull surface.
With a range of textures to choose from, such as skip trowel or knockdown, you can customize the look and feel of your ceiling to suit your personal style. Plus, a textured ceiling can also add value to your home, as it is a popular design trend that many homebuyers are looking for. So, why not elevate the design of your home and enjoy the benefits of a textured ceiling after removing popcorn?
Some Common Mistakes People Make When Trying to Texture a Ceiling After Removing Popcorn
When renovating a home, removing popcorn ceilings is a popular choice. While many are excited to get rid of the bumpy texture, it can be tempting to jump straight into texturing the ceiling without proper preparation. One common mistake is not adequately cleaning the ceiling before applying texture.
Dust and debris can make it difficult for the texture to adhere properly, leading to an uneven finish. Another mistake is not using enough joint compound to smooth out any rough spots or divots left from removing the popcorn. This can cause the texture to look patchy and incomplete. Taking the time to properly clean and prepare the ceiling can make a difference in achieving a professional-looking textured finish.
Conclusion
Texturing a ceiling after removing popcorn is a project that may seem difficult, but with proper guidance, you can achieve great results. Remember that preparation is key, and the tools and materials you use will determine the final result. You can use drywall mud, joint compound, or texture paint.
Applying texture to the ceiling can be done with tools, and the most common texture patterns include swirls, stipple, and popcorn. Once everything is complete, you can enjoy your newly textured ceiling and reveal that you accomplished it yourself! We hope this guide helps you achieve the results you’re looking for. Thanks for reading our post about how to texture a ceiling after removing popcorn.