

Are you looking for a way to shorten sheer curtains without cutting or sewing? It can be done without damaging your window treatments. Here’s how to shorten sheer curtains without cutting or sewing.

Nothing adds to a room’s ambiance quite like sheer curtains. With light flowing through and adding visual interest, they provide privacy without completely blocking out the world outside your window.
But if you’ve ever bought ready-made sheer curtains that are too long for your windows, there’s no need to resort to scissors or a sewing machine! There are plenty of creative ways to shorten them up without altering them permanently – perfect if you want the versatility of changing things over time.
Keep reading, and we’ll go through some simple steps so you can get your interior craft project finished quickly!
What Will You Need?
To shorten your sheer curtains without cutting or sewing, you’ll need the following:
- A steamer
- Iron
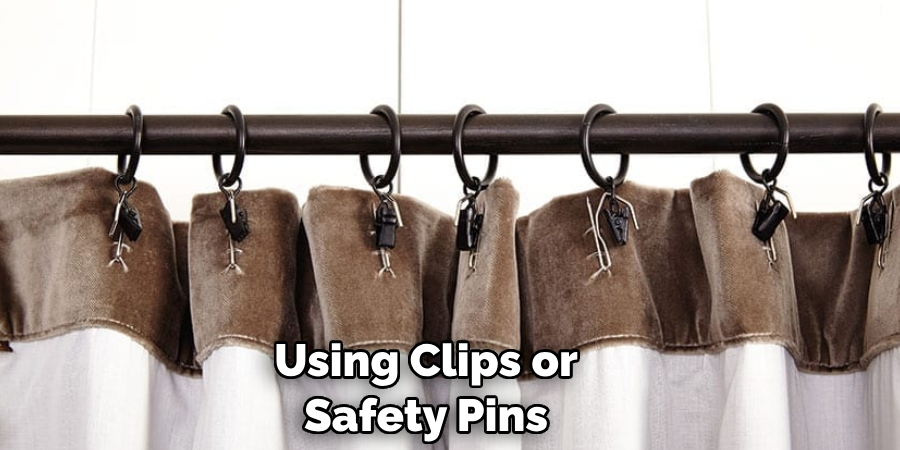
- -Clips or safety pins
- Hanging materials (rods, clips, etc.)
Once you have all the necessary materials, it’s time to get started!
10 Easy Steps on How to Shorten Sheer Curtains Without Cutting or Sewing
Step 1. Hang Your Sheer Curtains
Start by hanging your sheer curtains how you’d like them to be in the final look. This will tell you exactly how much of an alteration is needed. If you want the fabric to be bunched at the bottom, hang it that way.
Step 2. Measure and Mark Your Curtains
Once you’ve finished hanging your curtains, measure from where they need to be shortened, which is usually either from the top or bottom hem. Make sure to mark this area with a pencil or fabric marker so that you know where it needs to be steamed and ironed. It’s important to take your time and be precise with this step.

Step 3. Steam Your Curtains
You’ll want to use your steamer before ironing as this helps get rid of any wrinkles and makes it easier for the material to conform when pressed with an iron afterward. Use your steamer over the marked areas for a few minutes until you see steam coming through. If you don’t have a steamer, a good idea is to hang your curtains in the bathroom while taking a hot shower so that they’re exposed to steam for a few minutes.
Step 4. Iron Your Curtains
Once you’ve finished steaming your curtains, take an iron and press the fabric where you marked it previously with a pencil or fabric marker. This will make sure that the material stays in place when clipped later on. Try to use the lowest possible setting on your iron so that you don’t cause any damage to the fabric.
Step 5. Clip Your Curtains
Using clips or safety pins (whichever is easier for you to use), clip the area of fabric where you need it to be shortened from either the top or bottom hem accordingly. Make sure not to clip too much, as this may cause the curtains to hang unevenly. Otherwise, it’s a matter of personal preference.
Step 6. Hang Your Sheer Curtains Again
Hang your sheer curtains back up and check if they fit correctly. If needed, unclip and reposition the clips accordingly to ensure no extra fabric is hanging between the rods. Don’t forget to steam and iron again if needed before hanging.
Step 7. Iron Your Curtains Again
Once you’ve finished adjusting your curtains, iron them again to keep the fabric from moving around and creating creases. It will also help keep the fabric looking neat and crisp. Additionally, if you use clips, ironing the fabric will help them stay in place easier.
Step 8. Add Any Decorative Elements
Finally, if you want to add any decorative elements to the curtains, now is the time. This could be anything from ribbon or lace trim to buttons. Just make sure that it doesn’t interfere with clips or safety pins if you use them.

Step 9. Hang Your Finished Sheer Curtains
When everything is in place, and all of your decorative elements are added, it’s time to hang your finished sheer curtains. Ensure they look the way you want them to and that all clips or safety pins are in place. Keep in mind that you may need to make small adjustments if needed.
Step 10. Enjoy Your New and Improved Sheer Curtains!
And that’s it! With these easy steps, you have successfully shortened your sheer curtains without cutting or sewing. Now all that’s left to do is sit back and enjoy your newly altered window treatments.
You’ve just learned how to shorten sheer curtains without cutting or sewing – a simple way to get the perfect fit for any space! Give it a try and see how quickly you can transform any room with this useful skill. Thanks for reading, and happy crafting!
5 Additional Tips and Tricks
- Before you start, identify the place where you will shorten the curtains. Mark it with a piece of tape so you can easily track where to stop shortening.
- To ensure that your sheer curtains are even on both sides, measure the length from each end and ensure they’re equal before making any cuts or sewing.
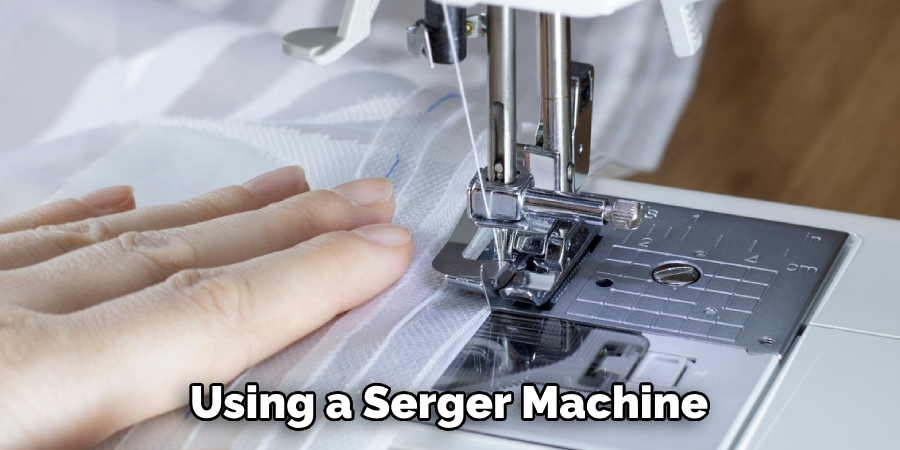
- If you’re shortening curtains with patterned fabric, consider using a serger machine to ensure that the ends of the fabric are hemmed neatly and securely.
- To keep your sheer curtains from fraying, use fray-resistant thread when sewing, or make sure to seal the edges with a sealer such as Fray Check.
- The easiest way to shorten sheer curtains without cutting or sewing is to simply tie them up at the top in order to shorten them – this will give you an instant result! To do this, put two curtain rings on each end of the rod and loop some decorative ribbon through both rings and then around the front of the sheers in order to gather them up at the top. You may need to adjust the rings over time as needed to keep them in place.
Following these steps will help you shorten your sheer curtains without cutting or sewing, ensuring the right length and a neat finish.
5 Things You Should Avoid
- Do not use regular scissors for cutting sheer curtains, as they could snag or tear the fabric.
- Do not sew by hand if you don’t have the necessary skill, as it can be difficult to get an even result.
- Do not use hot glue to seal the edges of sheers – this will damage the fabric and leave it looking messy.
- Do not use too many ties at the top if tying up sheer curtains in order to shorten them, as this could cause strain on the material over time.
- Avoid pulling or stretching out sheer curtains when measuring – this could cause permanent damage to the delicate fabric.
By following these tips and tricks and avoiding common pitfalls, you’ll be able to shorten your sheer curtains without cutting or sewing for a neat result every time!
How Do You Finish Sheer Fabric Edges?
One of the most important parts of shortening sheer curtains is finishing the edges to ensure a neat result. If you are sewing, use a zigzag stitch and fray-resistant thread to finish the edges in order to prevent fraying.
If you’re not sewing, use Fray Check or another sealer to seal the edges and keep them from unraveling over time. You can also try running a line of hot glue along the edge if using care not to burn or damage the fabric itself! Finally, remember always to measure twice and cut once when shortening sheers for best results!
Overall, you can easily shorten sheer curtains without cutting or sewing. Remember, it’s important to measure twice and cut once, use fray-resistant thread when sewing, tie them up at the top if desired, and finish the edges with a sealer or hot glue for neatness and durability.
With these tips in mind, you’ll be able to shorten sheer curtains without cutting or sewing for a professional-looking finish every time!
Conclusion
Congratulations! You have just learned how to shorten sheer curtains without cutting or sewing. We hope that this tutorial has been helpful in helping you decorate your living space with the perfect curtains for the most inviting environment.
With these skillful abilities now in your toolkit, think of all the creative and unique possibilities in front of you: different types of fabrics, colors, and patterns to match any décor.
With a few quick movements and easy modifications, you can give your room the personalized touch that will make it all feel like home. And if the urge arises, why not make matching throw pillows to complete your DIY craft item?
If you stick with this tutorial’s instructions, we are certain that you will end up with sheer curtains that add style and sophistication to your windows or doorways. Thank you for following our blog post. We hope it has been immensely insightful and useful to you.
Remember, by properly caring for your sheer curtains, they will provide comfort and beauty for years to come. Now go ahead and show off your DIY skills!