Painting rocks can be a fun and creative activity, whether you’re engaging in it as a hobby, for educational purposes, or as a therapeutic outlet. However, to ensure that your beautiful designs remain vibrant and intact, it’s crucial to seal your painted rocks properly.

Sealing helps protect the paint from chipping, fading, and weather damage, thus preserving your artwork for years to come. In this guide on how to seal rocks after painting, we will walk you through the steps and materials needed to effectively seal rocks after painting, ensuring a durable and long-lasting finish.
What is Sealer?
Before we dive into the process, it’s essential to understand what sealer is and its purpose. A sealer is a protective coating applied over painted surfaces to prevent damage caused by environmental factors such as UV rays, moisture, and scratches. It acts as a barrier between the paint and the elements, ensuring that your artwork stays vibrant and intact.
You can find sealers in various forms, including sprays, varnishes, and liquid coatings. Each type offers its unique benefits and is suitable for different types of paint and surfaces. It’s essential to choose the right sealer for your specific project to achieve the best results.
Types of Sealers
There are various types of sealers available in the market, each with its unique properties suited for different purposes. Some common types include:
1.Varnish:
This type of sealer provides a glossy finish to your rocks and is suitable for both indoor and outdoor use.
2.Polycrylic:
Similar to varnish but more durable, polycrylic offers added protection against moisture and UV rays. It’s ideal for outdoor projects.
3.Mod Podge:
Made from a combination of glue and water, this sealer provides a matte finish and is best for indoor use.

4.Polyurethane:
A durable sealer that can withstand harsh weather conditions, making it suitable for outdoor projects.
It’s essential to research and choose the appropriate sealer based on your project type, paint type, and desired finish. Always test the sealer on a small area before applying it to the entire surface to ensure compatibility with your materials.
Materials Needed
To seal rocks after painting, you will need the following materials:
1.Sealer of Your Choice:
As mentioned earlier, choose a sealer that suits your project and desired finish.
2.Paintbrush or Sponge:
For applying the sealer evenly on the surface of the rock.
3.Disposable Gloves:
This is to protect your hands from the sealer and make cleanup easier.
4.Newspaper or Drop Cloth:
To lay down and protect your work surface from any potential spills or drips.
9 Step-by-step Guides on How to Seal Rocks After Painting
Step 1: Prepare Your Workspace
Before you begin sealing your painted rocks, it’s crucial to prepare your workspace to ensure a smooth and mess-free process. Start by laying down newspaper or a drop cloth on your work surface to protect it from any potential spills or drips. This will also make cleanup easier once you finish sealing your rocks.
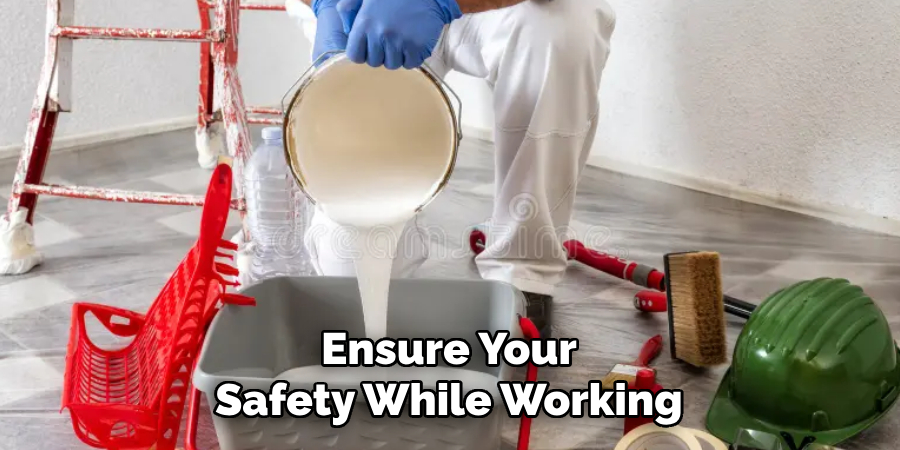
Next, gather all your materials, including the sealer, paintbrush or sponge, disposable gloves, and the rocks you plan to seal. Organizing your workspace and having everything within reach will save you time and frustration during the sealing process. Make sure the area is well-ventilated, especially if you’re using spray sealer or any sealer with strong fumes, to ensure your safety while working.

Step 2: Clean Your Rocks
Before applying the sealer, make sure your rocks are clean and free from any dust or debris. You can use a damp cloth to wipe off any dirt or residue on the surface of the rocks. Let them dry completely before proceeding to the next step.
You can also choose to use a primer before painting your rocks, which will help the paint adhere better and provide a smoother surface for sealing.
Step 3: Apply Sealer
Once your rocks are clean and dry, it’s time to apply the sealer. If you’re using a spray sealer, make sure to shake the can well before spraying. Hold the can about 6-8 inches away from the rock and apply an even coat of sealer over the entire surface. Be careful not to overspray or apply too much pressure as this may cause dripping or pooling of sealer on the rock.
If you’re using a brush or sponge, dip it into the sealer and apply a thin layer evenly over the surface of the rock. Make sure to cover all areas, including the sides and bottom.
Step 4: Let it Dry
After applying the first coat of sealer, let your rocks dry completely before adding a second coat. This may take anywhere from 30 minutes to an hour, depending on the type of sealer used. The drying time may also vary based on the temperature and humidity level in your workspace.
You can use a fan to speed up the drying process, but make sure there are no air currents that may cause dust or debris to stick to the wet sealer.
Step 5: Apply Additional Coats (if needed)
Once the first coat of sealer is dry, you can choose to add additional coats for added protection. This step is optional but recommended, especially if you plan on displaying your painted rocks outdoors.

Follow the same process as before, letting each coat dry completely before adding another one. Generally, 2-3 coats of sealer should be enough for most projects.
Step 6: Sand and Buff (Optional)
If you want a smoother finish or have any imperfections on the surface of your rocks, you can lightly sand them after the final coat has dried. Use fine-grit sandpaper to buff out any bumps or uneven areas on the surface.
Once done, wipe off any dust with a clean cloth before applying a final layer of sealer.
Step 7: Reapply Sealer Regularly
To ensure long-lasting protection for your painted rocks, it’s essential to reapply the sealer regularly. This is especially crucial for outdoor projects, as the sealer can wear off over time due to exposure to the elements.
It’s recommended to reapply the sealer every 6-12 months, depending on the conditions your rocks are exposed to. Always check for any signs of wear and apply a new coat if necessary.
Step 8: Let it Cure
After sealing your rocks, it’s important to let them cure for at least 24 hours before handling or displaying them. This will give the sealer enough time to fully dry and harden for maximum protection.
Step 9: Enjoy Your Sealed Rocks!
Congratulations, you have successfully sealed your painted rocks! Now you can display them proudly indoors or outdoors without worrying about any damage or fading.
Remember to follow these steps carefully, and always choose the right sealer for your project to achieve the best results. With proper sealing, your painted rocks will last for years to come, bringing joy and beauty into your space.
Following these steps on how to seal rocks after painting will also ensure that your rocks maintain their vibrant colors and protect them from any potential damage, allowing you to enjoy them for a long time. Happy painting!
Maintenance Tips
To keep your sealed painted rocks looking their best, follow these maintenance tips:
1.Regular Cleaning:
Dust and debris can accumulate on the surface of your rocks. Gently clean them with a damp cloth to keep them looking fresh and vibrant. Avoid using harsh chemicals or abrasive materials that may damage the sealer.
2.Avoid Direct Sunlight:
Direct sunlight can cause the colors on your painted rocks to fade over time. If you plan on displaying them outdoors, make sure they are placed in a shaded area.
3.Reapply Sealer Regularly:
As mentioned before, it’s important to reapply the sealer every 6-12 months to maintain maximum protection for your painted rocks. This will also help keep their colors vibrant and prevent any potential damage.
Following these maintenance tips will ensure that your sealed painted rocks look as good as new for years to come. So go ahead and enjoy your beautiful creations!

Frequently Asked Questions
Q: Do I Need to Seal Every Type of Rock?
A: It’s not necessary to seal all types of rocks, but it can help protect the paint and provide a smoother finish. Some rocks, such as porous or fragile ones, may require sealing to prevent the paint from chipping or flaking off. However, smoother and more durable rocks may not require sealing.
Q: Can I Use Any Type of Sealer on My Painted Rocks?
A: It’s recommended to use a sealer specifically designed for outdoor use on painted rocks. These sealers are usually water-resistant and provide better protection against UV rays and weather conditions. Always read the label and choose a suitable sealer for your project.
Q: How Long Will the Sealer Last on My Painted Rocks?
A: The duration of the sealer will depend on various factors such as the type of sealer used, exposure to elements, and how well it was applied. Generally, a good-quality sealer should last for 6-12 months before needing to be reapplied.
Conclusion
Sealing your painted rocks is a crucial step to ensure they remain vibrant and protected, whether displayed indoors or outdoors. By following the steps outlined in this guide on how to seal rocks after painting, you can achieve a professional finish that enhances the durability and appearance of your artwork.
Regular maintenance and the right choice of sealer will help preserve your painted rocks for years to come, allowing them to bring continuous joy and beauty to your space. Remember, the key to long-lasting painted rocks is proper preparation, application, and care. Happy sealing!
