Are you noticing a few cracks in your textured ceiling? Are peeling paint chips making it difficult to get a good night’s sleep? If so, have no fear! You can repair your textured ceiling quickly and easily with a few simple tools and techniques. Don’t let those pesky imperfections disrupt your home-sweet-home feeling; keep reading to learn how to repair a textured ceiling with just an hour or two of work.

Can You Repair a Textured Ceiling
Have you ever walked into a room and noticed a cracked or damaged textured ceiling? It can be an eyesore and bring down the space’s overall aesthetic. The good news is that textured ceilings can indeed be repaired! While it may not be the easiest task, you can restore your ceiling to its original appearance with the right tools and techniques.
Whether it be a small patch or a larger area of damage, some different methods and materials can be utilized for a successful repair. So don’t stress over a damaged textured ceiling any longer – get to repairing and restoring your space!
Why Should You Repair a Textured Ceiling
A textured ceiling can add character and charm to any room in your home. However, over time, that same texture can become a source of frustration if it begins to crack or peel. If you’ve noticed that your textured ceiling is beginning to deteriorate, it may be time to consider repairs. Not only can repairing a textured ceiling improve the appearance of the room, but it can also help to prevent further damage, such as water stains or mold growth.
Additionally, repairing a textured ceiling can increase the overall value of your home, making it a smart investment in the long run. With these benefits in mind, it’s easy to see why it’s important to address any issues with your textured ceiling sooner rather than later.
Don’t Panic: Here Is How to Repair a Textured Ceiling Yourself in 7 Easy Steps
Step One: Assess the Damage
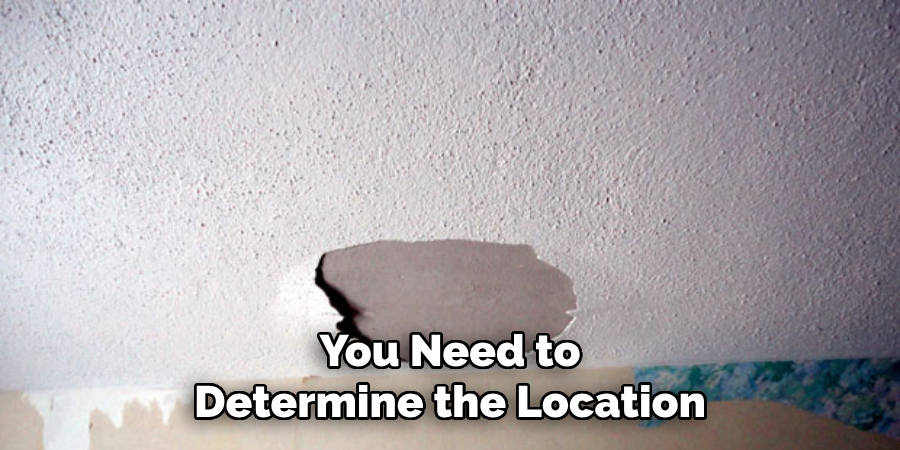
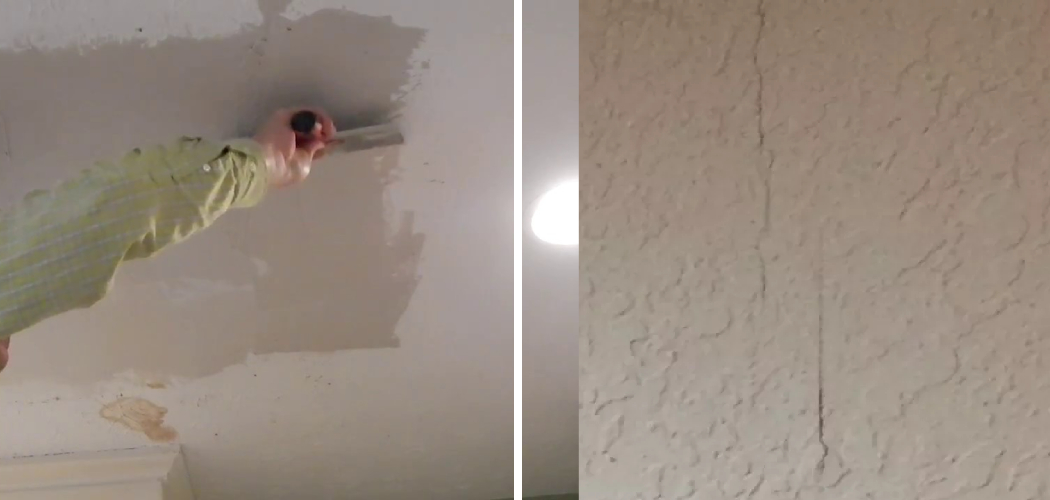
The first step towards fixing a textured ceiling is understanding the damage that has happened. You need to determine the location and the extent of the damage. You can use a flashlight to determine how deep the dent is and how much of the texture has chipped off. You need to ensure that there are no other issues, such as water damage. If water damage is present, you need to fix this issue first.
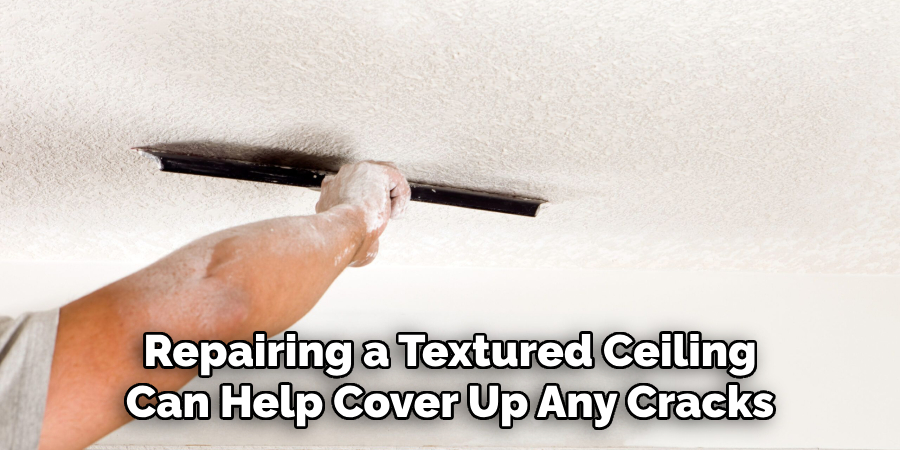
Step Two: Fix the Dent
After assessing the damage, you can then proceed to fix the dent or damage in your ceiling. If the damaged section is small, you can use a putty knife and joint compound to cover the dented portion and ensure that it is smooth. If the damaged section is larger, you can use a drywall knife to repair it.
Step Three: Restore the Texture
The next phase of repairing your textured ceiling is to match the texture of your ceiling to the new drywall section. You can use a textured spray, ceiling texture roller, or a brush. If you are using a textured spray, ensure that you do a test spray on a piece of cardboard before using it on the ceiling.
Step Four: Prepare the Surface for Painting
Once the texture has been restored and dried out, you can paint your ceiling. To do this, you need to ensure that you prepare the surface. This involves lightly sanding the surface with fine-grit sandpaper to ensure smoothness. You can then prime the surface. Primer helps seal the texture and make it easier to paint.
Step Five: Painting the Ceiling

Once the primer has dried out, you can then start painting your ceiling. Make sure that you use a roller with a thick nap, as this will help cover up the textured surface effectively. You can also use a paintbrush for areas where a roller cannot reach. It is recommended to use a paintbrush for the edges and corners.
Step Six: Apply a Second Coat (optional)
Depending on your preference, you may choose to apply a second coat of paint for better coverage. This step is optional but can help improve the overall look of your ceiling repair. Make sure that you allow the first coat to dry completely before applying a second coat.
Step Seven: Finishing Touches
Once the paint has dried completely, you can then inspect your textured ceiling repair. If there are any imperfections, you can fix them by using a small brush and some touch-up paint. You can also use a flat or satin finish to give your ceiling a smooth, uniform appearance.
That’s it! You’ve now learned how to repair a textured ceiling in just seven easy steps. Remember to always assess the damage, fix the dent, restore the texture, prepare the surface, paint with care, optionally apply a second coat, and add some finishing touches for a flawless finish. With these tips in mind, you can take on any textured ceiling repair project with confidence and skill. Happy repairing!
5 Considerations Things When You Need to Repair a Textured Ceiling
1. Assessing the Damage
The first step in repairing a textured ceiling is to assess the damage. It’s important to determine how much of the texture needs to be removed and whether any additional repairs, such as patching holes or replacing drywall, must be completed before starting the repair process. It’s also important to note if any of the existing texture needs to be preserved for aesthetic reasons.
2. Preparing the Area

Once you have assessed the damage, it’s time to prepare the area for repair. This includes removing all furniture and decorations from the room and covering any exposed surfaces with plastic sheeting or drop cloths. It is also important to ensure that all electrical outlets are covered and that any exposed wiring is properly insulated.
3. Removing Existing Texture
The next step in repairing a textured ceiling is to remove any existing texture from the affected area. This can be done using a variety of tools, including drywall knives, sanders, and scrapers. It’s important to take care when removing existing textures so as not to damage any surrounding surfaces or cause further damage to the ceiling itself.
4. Applying New Texture
Once all of the existing texture has been removed, it’s time to apply the new texture to the ceiling. There are several different types of textures available on today’s market, ranging from basic popcorn ceilings to more intricate stucco textures. Choosing a texture that complements your home’s aesthetic while also being durable enough for your lifestyle needs is important.
5. Finishing Touches
Once you have applied your desired texture, it’s time for some finishing touches! This includes painting over any exposed areas with a primer coat before adding a final coat of paint to your chosen color scheme. Additionally, if you’re feeling adventurous, consider adding embellishments such as stencils or wallpaper borders for an extra touch of personalization!
5 Benefits of Repairing a Textured Ceiling
1. Improved Appearance
Repairing a textured ceiling can improve its overall appearance and give it a more polished look. Textured ceilings are often used to hide imperfections, but over time they can become stained or discolored. Repairing the texture will help to restore the ceiling to its original condition and make it look new again. Additionally, repairing a textured ceiling can help cover up any cracks or holes that have developed over time.
2. Increased Durability
Repairing a textured ceiling can also increase its durability and make it more resistant to damage from water or other elements. Textured ceilings are often made of plaster, which is less durable than other materials, such as drywall. By repairing any damaged areas of the texture, you can ensure that your ceiling will be able to withstand wear and tear for many years to come.
3. Improved Insulation
Another benefit of repairing a textured ceiling is improved insulation in your home or office. Textured ceilings are typically made with an insulating material that helps keep your space warm in the winter and cool in the summer months. By repairing any damaged areas of the texture, you can ensure that your space stays at a comfortable temperature all year round.
4. Reduced Allergens
Repairing a textured ceiling can also help reduce allergens in your home or office by preventing dust and mold from accumulating on the surface of the texture. Dust and mold particles can cause allergies and other health problems, so keeping them away from your living spaces by regularly cleaning and repairing any damage to your textured ceiling is important.
5. Lower Maintenance Costs
Finally, repairing a textured ceiling can help save money on maintenance costs in the long run by reducing the need for frequent repairs or replacements due to wear and tear over time. Textures are usually much less expensive than other types of ceilings, such as drywall, so repairing them when needed rather than replacing them entirely can save you money in the long run while still providing you with an aesthetically pleasing finished product.
4 Common Mistakes People Make When Trying to Repair a Textured Ceiling
1. Not Wearing the Proper Safety Gear

One of the most common mistakes people make when trying to repair a textured ceiling is not wearing the proper safety gear. Textured ceilings can contain hazardous materials, such as asbestos and lead paint. Therefore, it is important to wear a respirator, goggles, gloves, and other protective clothing while working on the ceiling. Additionally, it is important to ensure that any debris created during the repair process is disposed of properly.
2. Not Preparing the Surface
Another mistake people often make when repairing a textured ceiling is not properly preparing the surface before beginning work. It is important to remove any loose material from the area before applying new texture or paint. Additionally, it may be necessary to sand or scrape down any existing texture to create a smooth surface for the new texture or paint to adhere to.
3. Not Using the Right Materials
Using the wrong materials when repairing a textured ceiling can also lead to problems down the line. For example, using an oil-based product on a water-based texture can cause peeling and cracking over time. Therefore, it is important to use only products that are specifically designed for use on textured ceilings to ensure that they will last for years without needing additional repairs.
4. Not Testing Before Applying
Finally, another mistake people often make when repairing a textured ceiling is not testing out their chosen materials before applying them to the surface of the ceiling. It is important to test out any new textures or paints on a small section of your ceiling before applying them all over to ensure that you are happy with how they look and feel once dry. Additionally, this allows you to adjust your technique if necessary to achieve better results.
Conclusion
Repairing a textured ceiling doesn’t need to be a daunting or expensive task. By following the above steps, you can fix your ceiling yourself and end up with a professional-looking finish. Remember, take it one step at a time, and your ceiling will look great again in no time! Thanks for reading our post about how to repair a textured ceiling.