
Are you looking to remove a floor leveler that’s become old and outdated in your home? Several options are available for tackling this task, but the most successful results come from a patient and thorough approach.
Whether you’re working with a self-leveling compound or another type of floor leveler, the process can be daunting if you need to know what you’re doing. However, removing the floor leveler can be a relatively simple task with a little bit of knowledge and some careful planning.
In this blog post, we’ll discuss how to remove floor leveler safely while protecting all other surfaces nearby. From grinding it away with a sander to following up with chemical removers, you’ll find everything you need here, so read on!
What Will You Need
Before you get started on removing floor levelers, make sure you have all of the necessary materials and tools. You should gather:
- Protective gear (gloves, goggles, mask)
- Sander or grinder with diamond cup wheel
- Chemical remover for floor leveler
- Scraper or putty knife
- Rags
- Bucket of water
Once you have everything you need, it’s time to get started on the process.
10 Easy Steps on How to Remove Floor Leveler
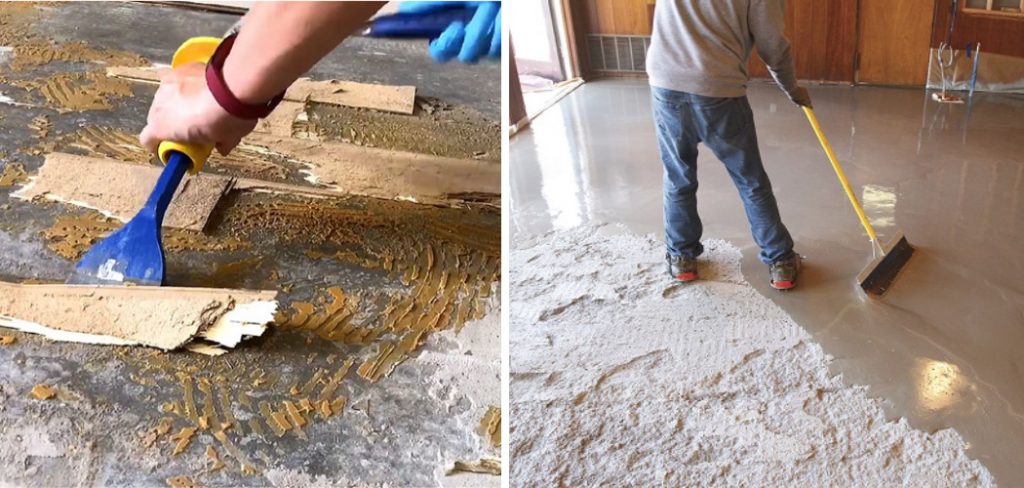
Step 1. Clear the Area:

Remove any furniture, rugs, or other items from the area where you will be working. This will prevent them from getting damaged and give you ample space to work. Cover any vents or openings to prevent dust from spreading throughout your home.
Step 2. Put on Protective Gear:
Safety is paramount when working on home improvement tasks like this. Start by putting on your protective gear – gloves to protect your hands, goggles to shield your eyes from dust and debris, and a mask to prevent inhalation of potentially harmful particles. This step ensures your safety throughout the process of removing the floor leveler.
Step 3. Start Grinding:
Remove the floor leveler using a sander or grinder with a diamond cup wheel with your protective gear in place. This tool is particularly effective for grinding down the surface. Remember to start at one corner and systematically work across the room. Remember to be patient, as rushing through the process can lead to uneven surfaces or damage.
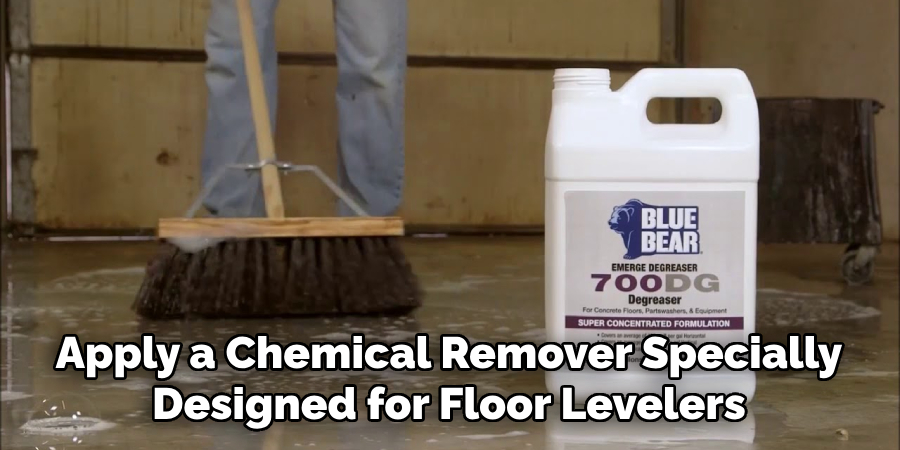
Step 4. Apply Chemical Remover:
After grinding down the surface, the next step is to apply a chemical remover specially designed for floor levelers. Ensure to follow the manufacturer’s instructions carefully. Typically, you would spread the chemical remover evenly across the surface, then wait for the specified time to allow it to penetrate the floor leveler. This process helps to soften the remaining leveler for easier removal.
Step 5. Scrape Away the Leveler:
Once the chemical remover has had time to act, you can start to scrape away the softened floor leveler. Using a scraper or a putty knife, begin at one edge of the room and work methodically towards the opposite side. Apply steady pressure to lift the leveler effectively without damaging the underlying floor. Remember that this process can take some time, so patience is key.
Step 6. Clean Up:
After you’ve removed all of the floor levelers, it’s essential to clean the area thoroughly. Use a wet rag to wipe down the floor, ensuring that you remove any residual chemicals or dust. For larger debris, consider using a vacuum cleaner. Be meticulous during this step; cleanliness will play a significant role in the effectiveness of any new flooring you plan to install.
Step 7. Check for Residual Leveler:
After cleaning, inspect the surface for any leftover floor leveler. If you discover any patches, repeat the process of applying the chemical remover, scraping, and cleaning until the floor is completely free of any leveler. It’s essential to ensure the complete removal of the floor leveler to prevent issues with your new flooring later on.
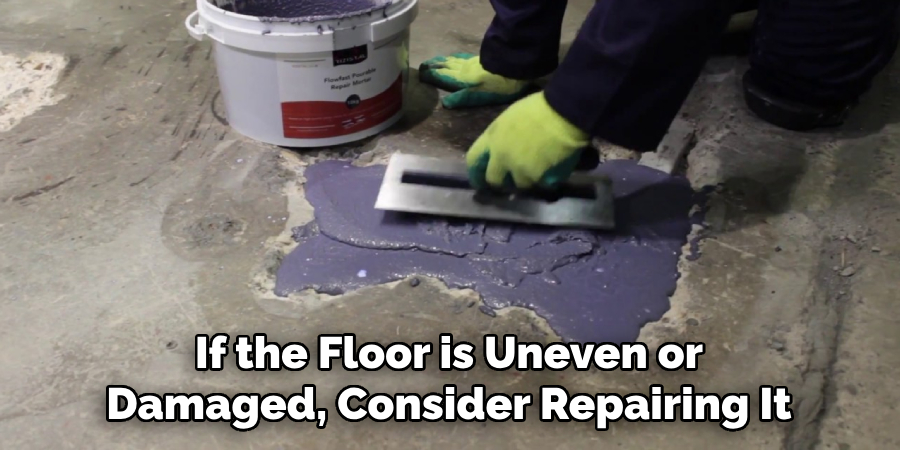
Step 8. Inspect and Prepare the Floor:
Once you are confident that the floor is completely free of any remaining leveler, it’s time to inspect the area for any damage or imperfections. If the floor is uneven or damaged, consider repairing it before you can install new flooring. Fill in cracks and crevices with a suitable filler, and sand down any raised areas for the best results. Preparing the floor ensures a smooth and stable surface for your new flooring material. Remember, the better the preparation, the better the end result.
Step 9. Install New Flooring:
With a clean and well-prepared surface, you can install your new flooring. Depending on your choice of flooring material, the installation process will vary. Make sure to follow the manufacturer’s instructions for best results. Whether you choose hardwood, tile, carpet, or laminate, a well-prepared surface will ensure a smooth installation process and a beautiful result.
Step 10. Clean and Maintain:
Once your new floor is installed, cleaning and maintaining it correctly is essential to ensure its longevity. Regular cleaning, using appropriate products for your flooring type, will keep your floor looking fresh and new. Don’t forget to use rugs and mats in high-traffic areas to reduce wear and tear. Following these simple maintenance tips will keep your floor looking great for years to come.
And that’s it! By following these ten steps, you should be able to successfully remove old floor leveler and replace it with new flooring. Remember, patience and preparation are key to a successful flooring project.
5 Additional Tips and Tricks

- Safety First: Always wear suitable protective gear, such as gloves, goggles, and a dust mask, when removing the floor leveler. This will protect you from dust and debris.
- Use the Right Tools: A heavy-duty scraper is a must-have tool. It makes the task of removing the floor leveler easier and more efficient.
- Start Small: Don’t try to remove a large area of floor leveler at once. Start by working on a small area and gradually expand your work zone.
- Clean as You Go: Regularly clean up the scraped-off material. This prevents it from hardening again, making your work easier.
- Stay Patient: Removing the floor leveler is a time-consuming task. Don’t rush the process; patience will ensure a cleaner finish.
With these additional tips and tricks, you can remove the floor leveler more effectively.
5 Things You Should Avoid
- Ignoring Safety Guidelines: Pay attention to the importance of safety while performing this task. Not wearing protective gear can lead to unwanted accidents.
- Using the Wrong Tools: Avoid using inappropriate tools that can lead to inefficient work and damage your floor.
- Overworking a Single Area: Focus on more than one spot. This could lead to an uneven floor surface.
- Leaving Excess Material Lying Around: Never let the scraped material accumulate for too long. It can harden again, causing additional work.
- Rushing the Process: Avoid rushing the job to finish quickly. This could lead to a messy outcome and possibly require you to redo the work.
By avoiding these common mistakes, you can ensure a smoother and more successful removal of the floor leveler. Remember to stay patient and follow all safety guidelines for best results.
Can You Grind Down Self-leveler
Yes, you can grind down self-leveler if needed. This technique is often used when the leveler has not been applied evenly, and there are high spots or bumps on the floor surface.
To grind down self-leveler, you will need a concrete grinder with diamond grinding pads. Start by attaching a 30-40 grit diamond pad to the grinder and slowly work your way over the high spots until they are level with the rest of the floor. Then, switch to an 80-120 grit pad to smooth out any rough areas. Wear protective gear and follow all safety guidelines while using a concrete grinder.
Once you have finished grinding down the self-leveler, clean up any dust and debris before proceeding with your flooring installation. It is important to note that grinding down self-leveler can be a messy and time-consuming, so it is best to use this technique as a last resort.
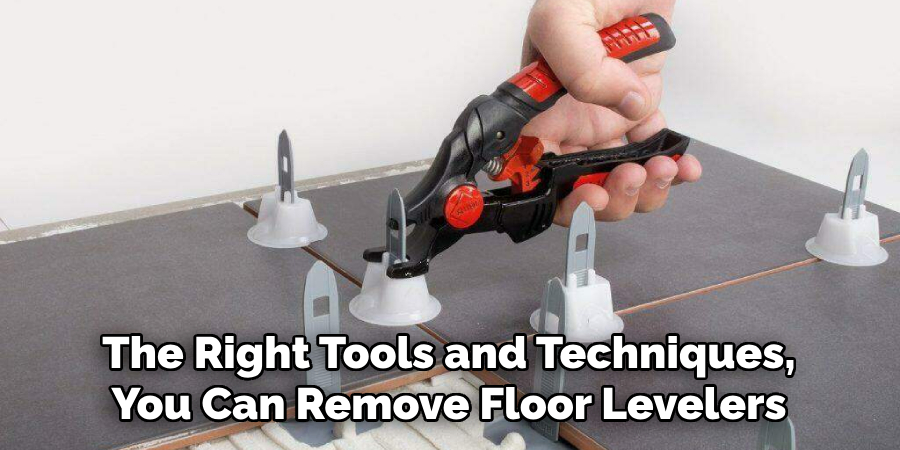
In conclusion, with the right tools and techniques, you can remove floor levelers effectively and efficiently. Remember to prioritize safety and be patient throughout the process for the best results.
Is Leveler Stronger Than Concrete
The floor leveler is not necessarily stronger than concrete. It is designed to create a smooth and level surface for flooring installation, but it is not meant to substitute for concrete.
Floor leveler typically has lower compressive strength compared to concrete. This means that it may not be able to withstand heavy loads or pressure as well as concrete can.
However, floor leveler does have its benefits, such as being self-leveling and easy to work with. Just be sure to use it for its intended purpose and not as a replacement for concrete in high-stress areas. The bottom line is that while floor leveler can be a useful product, it should not be considered as a stronger alternative to concrete.
So, always make sure to use the right product for the job at hand and follow proper installation instructions for the best results.
What Happens if Leveler is Too Wet
If the floor leveler is too wet, it can lead to several issues that may affect the overall quality and durability of your flooring. The most common problems include:
- Poor Adhesion: When the leveler is too wet, it may not properly bond with the subfloor or adhere to the flooring material. This can result in uneven or unstable floors.
- Shrinkage: If the leveler is too wet, it may shrink excessively as it dries, causing cracks and unevenness.
- Extended Drying Time: Wet floor leveler takes longer to dry, which can delay your flooring installation and cause inconvenience.
To avoid these problems, always follow the manufacturer’s instructions for mixing and applying floor levelers. And if you do end up with a wet leveler, be patient and allow it to dry completely before proceeding with flooring installation.
Conclusion
In conclusion, how to remove floor leveler is an important step in producing a quality floor surface. It requires the correct mixture of ingredients and consists of multiple steps. For those who are new to this process, it might be overwhelming at first, but it’s not impossible. It all comes down to having the right knowledge, tools, and supplies to do the job correctly. If you follow our guide carefully, you will surely attain satisfactory results.
Finally, with any important DIY task, a professional touch may be necessary and advisable for the best results – we encourage you to seek qualified support if that suits your needs better!
So pull on your work gloves and begin achieving a smoother classroom, gym, or other type of leveled floor. Good luck!