Are you looking to give your kitchen a new look without spending a fortune on all-new cabinets? Refinishing maple cabinets is a great way to update the appearance of your kitchen without breaking the bank.

How to refinish maple cabinets is a rewarding project that can breathe new life into your kitchen or bathroom without the expense of a complete remodel. Whether your cabinets have become worn over time or you’re simply yearning for a change in style, taking on a refinishing project allows you to customize the look of your cabinets to fit your aesthetic preferences. The process involves cleaning, sanding, staining or painting, and sealing the wood to achieve a durable and attractive finish.
With the right tools, materials, and a bit of patience, you can transform your maple cabinets and enhance the overall appeal of your space.
What Will You Need?
Before diving into the refinishing process, gathering all the necessary tools and materials is important. Here’s a list of items you will need:
- Screwdriver
- Drop cloths or plastic sheeting
- Painter’s tape
- Sandpaper (150-grit and 220-grit)
- Wood stain or paint
- Paintbrushes or foam rollers
- Foam applicator for stain (optional)
- Protective gloves and eyewear
Once you have all the necessary supplies, you can move on to the refinishing process.
10 Easy Steps on How to Refinish Maple Cabinets
Step 1: Prepare the Area
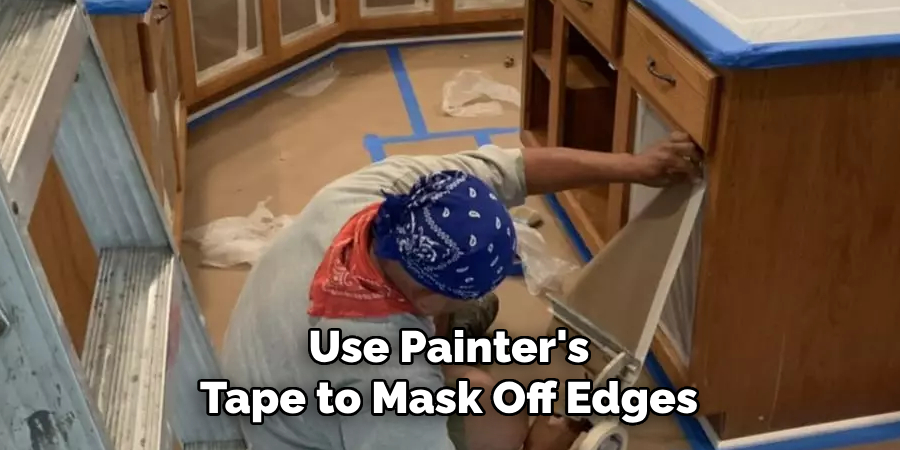
Before starting the refinishing process, preparing the workspace to protect surrounding surfaces and ensure a smooth, efficient workflow is essential. Begin by removing all items from inside the cabinets and clearing the countertops. Cover the countertops, floors, and any nearby appliances with drop cloths or plastic sheeting to safeguard them from dust and splatters. Use painter’s tape to mask off edges and areas where the cabinets meet the walls to prevent unintentional marks or smudges from the refinishing materials.
Next, use a screwdriver to remove the cabinet doors, drawers, and any hardware such as handles and hinges. This step will make it easier to fully access all surfaces and ensure a more uniform finish. Place the hardware in labeled bags to avoid any mix-ups during reinstallation. If you’re working with many cabinets, consider numbering the doors and their corresponding locations with painter’s tape for easy reassembly.
Step 2: Clean the Surfaces
With your area prepared, the next step is thoroughly cleaning the cabinet surfaces. Use a gentle degreaser or a mild soap and water solution to wipe down all surfaces, removing any grease, dirt, or grime that may have accumulated over time. Pay particular attention to areas around handles and hinges where buildup is common. A clean surface ensures that the sanding process is more effective and that the stain or paint adheres properly. Once cleaned, allow the surfaces to dry completely before moving on to the next step.
Step 3: Sand the Surfaces
Sanding is a critical part of refinishing as it helps remove the old finish and roughens the surface for better adhesion of the new stain or paint. Start with 150-grit sandpaper to remove the existing finish and smooth out any imperfections. Be sure to sand in the direction of the wood grain to prevent scratches. Once you’ve completed the initial sanding, switch to finer 220-grit sandpaper for a smoother finish. After sanding, wipe down the surfaces with a tack cloth to remove any dust and debris.
Step 4: Apply the Stain or Paint
Now that the surfaces are prepped and sanded, it’s time to apply your chosen stain or paint. If you’re staining the cabinets, use a foam applicator or brush to apply an even coat of the wood stain, following the direction of the grain. Allow the stain to penetrate the wood for the recommended time, then wipe away any excess with a clean cloth.
If painting, use a high-quality paintbrush or foam roller to apply an even coat of paint. Depending on the desired finish, you may need to apply multiple coats, allowing each one to dry fully before applying the next.
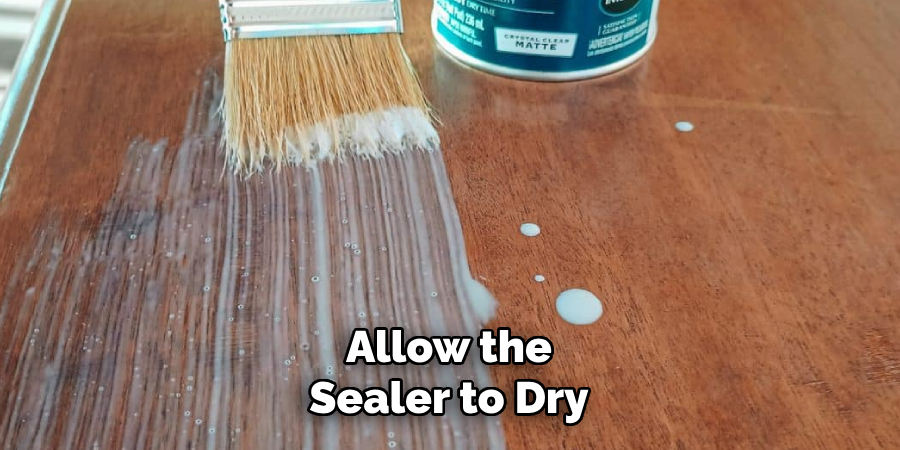
Step 5: Seal the Cabinets
After the stain or paint has completely dried, the final step is to seal the cabinets to protect the new finish. Apply a clear polyurethane sealer or a protective topcoat according to the manufacturer’s instructions. Use a clean brush to apply a thin, even layer, ensuring complete coverage. This step enhances the durability of the finish and makes it easier to clean the cabinets in the future. Allow the sealer to dry thoroughly before reassembling the hardware and reattaching the doors and drawers.
Step 6: Reassemble the Cabinets
Once the sealer has dried completely, it’s time to reassemble your cabinets. Begin by carefully reinstalling the hardware, including hinges and handles, ensuring each piece fits snugly and securely fastened. If you labeled the doors and drawers earlier, reattach them according to the corresponding labels to ensure everything aligns perfectly.
Check that each door and drawer opens and closes smoothly, making any necessary adjustments to the hinge placements. Taking a few extra minutes to ensure proper alignment and secure fittings will help maintain the functionality and aesthetic of your refinished cabinets.
Step 7: Final Touches
With your cabinets reassembled, inspect each one for any needed touch-ups. Look for areas where the paint or stain needs an additional coat and spots that may require a bit more sealer. Address any minor imperfections promptly to ensure the best possible finish.
Step 8: Clean Up
Now that your refinishing project is complete cleaning up your workspace is important. Remove any painter’s tape, plastic sheeting, or drop cloths, and dispose of any used sandpaper, brushes, or applicators. Return any tools to their proper places and ensure the area is free of dust and debris.
Step 9: Enjoy Your New Cabinets
Take a step back and admire the transformation you’ve accomplished. Your refinished maple cabinets should now have a refreshed and modern look, enhancing the overall appeal of your kitchen or bathroom. Enjoy your space’s improved aesthetic and functionality, knowing that you successfully carried out a cost-effective and rewarding home improvement project.
Step 10: Maintain the Finish
To ensure the longevity and beauty of your refinished cabinets, properly maintain the finish. Clean the surfaces regularly with a soft cloth and mild cleaner to prevent the build-up of grease or dirt. Avoid using harsh chemicals or abrasives that could damage the finish. Periodically inspect the cabinets for any signs of wear and apply touch-ups as needed to keep them looking their best.
By avoiding costly and time-consuming cabinet replacements, refinishing your maple cabinets can provide a budget-friendly way to update and revitalize the look of your home.

5 Additional Tips and Tricks
- Sand Thoroughly: Sand the cabinets thoroughly to remove any old finish or imperfections. Use fine-grit sandpaper for a smooth surface ready to accept new stain or paint.
- Select the Right Stain or Paint: Choose a high-quality stain or paint that complements the natural beauty of maple wood. If you want to highlight the wood grain, opt for a stain or go with paint for a completely new look.
- Apply a Wood Conditioner: Before staining, apply a wood conditioner to the cabinets to ensure even stain absorption and minimize blotchiness. This is especially important with maple’s natural tight grain.
- Check for Drips and Runs: When applying stain or paint, look for drips or runs. Use a clean cloth to quickly wipe them away before they dry and ruin the finish.
- Don’t Forget the Details: When refinishing maple cabinets, remember the smaller details, such as hardware and trim pieces. Consider painting or staining these elements to match the new finish of your cabinets for a cohesive look.
5 Things You Should Avoid
- Skipping the Sanding Step: Avoid skipping the sanding process as it creates a smooth surface that helps the new stain or paint adhere properly. Without proper sanding, the finish may peel or look uneven.
- Ignoring Safety Precautions: Don’t neglect safety measures such as wearing a mask and gloves and working in a well-ventilated area. Stains and paints contain chemicals that can be harmful if inhaled or come in contact with your skin.
- Rushing the Drying Process: Avoid rushing through the drying stages between applications of stain or paint. Allow ample time for each coat to dry thoroughly to prevent smudging and ensure a solid, durable finish.
- Using Low-Quality Supplies: Do not use low-quality brushes, rollers, or staining products, as these can lead to streaks, uneven application, and a less professional result. Invest in quality supplies for the best outcome.
- Neglecting to Test the Finish: Avoid applying the stain or paint directly to your cabinets without testing it on a small area first. Testing allows you to see the actual color and finish, ensuring it is the desired result before committing to the entire project.

Conclusion
How to refinish maple cabinets can elevate the aesthetic of your kitchen or other spaces, providing a fresh and updated look.
You can achieve professional results by following the detailed steps outlined, including thorough sanding, selecting the right stain or paint, and applying a wood conditioner. Remember to consider small details and avoid common pitfalls such as skipping preparation steps or using low-quality materials.
With patience and the right approach, your refinished maple cabinets will look beautiful and stand the test of time. Whether you’re a DIY enthusiast or a first-time renovator, these tips and tricks will help ensure your project succeeds.