
Laminate flooring is a popular choice for homeowners due to its durability, affordability, and ease of installation. While it is commonly installed on top of plywood or other subflooring materials, it is also possible to install laminate flooring on concrete.
This DIY project can be a great way to update the look of a room without breaking the bank. In this article, we will discuss the benefits of installing laminate flooring on concrete, the importance of proper installation, and provide a step-by-step guide for how to put laminate flooring on concrete.
One of the biggest benefits of installing laminate flooring on concrete is its durability. Concrete is a strong and stable surface that can withstand heavy foot traffic, making it an ideal base for laminate flooring. Additionally, laminate flooring is resistant to scratches, stains, and fading, making it a great choice for high-traffic areas such as living rooms, hallways, and kitchens. Another benefit of laminate flooring is its affordability.
Preparing the Concrete Surface for Laminate Flooring
Before installing laminate flooring on concrete, it is important to properly prepare the surface. This includes cleaning the surface, filling in cracks and holes, leveling the surface, and applying a moisture barrier.
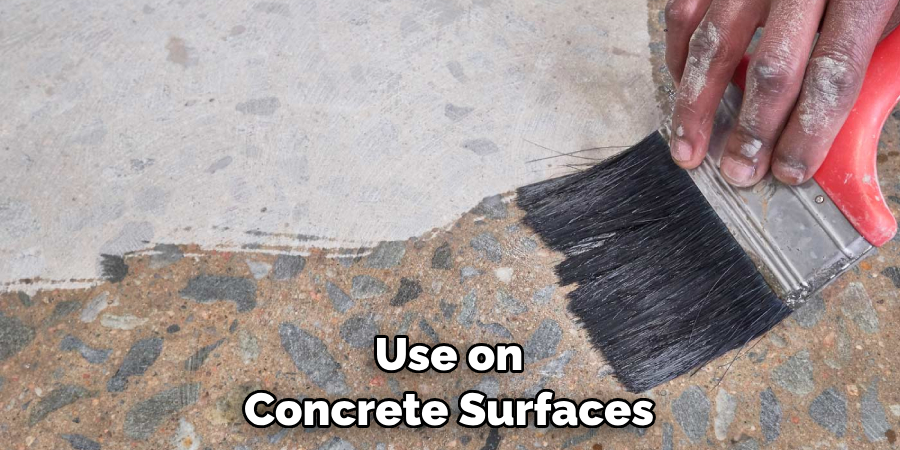
Cleaning the surface: The first step in preparing the concrete surface is to clean it thoroughly. This can be done using a broom, vacuum, or mop. Any dirt, dust, or debris should be removed to ensure a smooth surface for the laminate flooring.
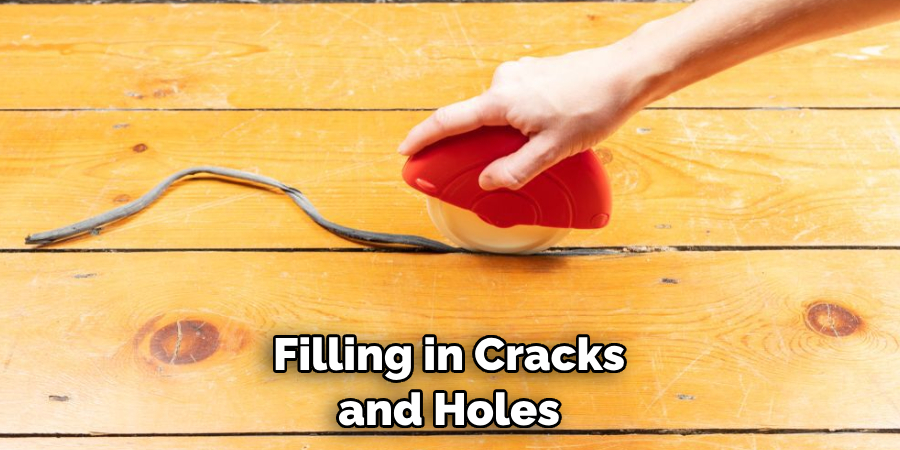
Filling in cracks and holes: Next, any cracks or holes in the concrete should be filled in. This can be done using a concrete patching compound. The compound should be applied to the crack or hole and smoothed out using a trowel. Once the compound has dried, it can be sanded down to create a smooth surface.
Leveling the surface: If the concrete surface is uneven, it will need to be leveled before installing the laminate flooring. This can be done using a self-leveling compound. The compound should be poured onto the surface and spread out using a trowel. Once the compound has dried, it can be sanded down to create a smooth surface.
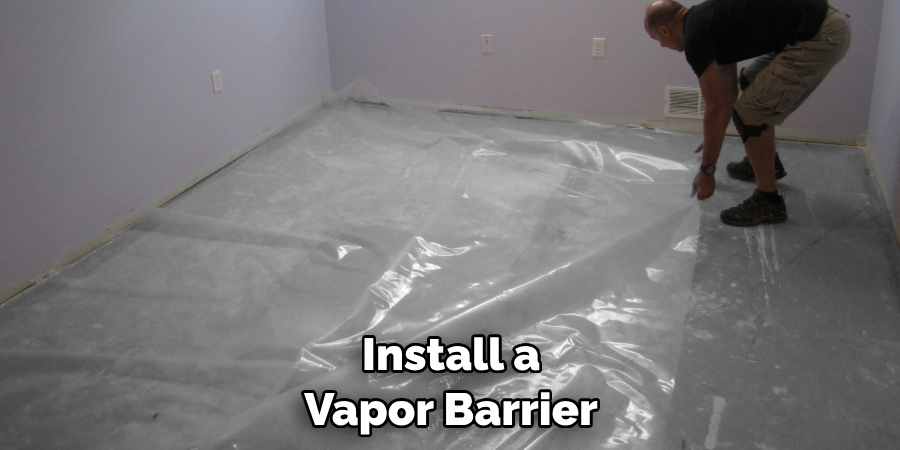
Applying a moisture barrier: Finally, a moisture barrier should be applied to the concrete surface. This will help prevent moisture from seeping up through the concrete and damaging the laminate flooring. A plastic sheeting or moisture barrier paint can be used for this step.
Choosing the Right Laminate Flooring for Concrete
When choosing laminate flooring for concrete, there are several factors to consider. These include the type of laminate flooring, the thickness of the flooring, and the quality of the product.
Types of laminate flooring: There are several types of laminate flooring available, including glueless, pre-glued, and glued laminate flooring.
Glueless laminate flooring is the easiest to install, as it simply snaps together. Pre-glued laminate flooring has adhesive already applied to the planks, making installation easier. Glued laminate flooring requires the use of adhesive to attach the planks to the concrete surface.
Thickness of the flooring: The thickness of the laminate flooring is also an important factor to consider. Thicker flooring is generally more durable and can withstand heavier foot traffic. However, thicker flooring can also be more expensive.
Quality of the product: Finally, the quality of the laminate flooring should be considered. Higher quality laminate flooring will be more durable and resistant to scratches, stains, and fading. It is important to choose a product that is designed for use on concrete surfaces.
Recommended brands and products: Some recommended brands for laminate flooring on concrete include Pergo, Shaw, and Armstrong. These brands offer a variety of laminate flooring options that are designed for use on concrete surfaces.
Tools and Materials Required for DIY Laminate Flooring on Concrete
Before beginning the DIY project, it is important to gather all necessary tools and materials. These include:
- Laminate flooring
- Moisture barrier
- Underlayment
- Tape measure
- Chalk line
- Circular saw
- Jigsaw
- Hammer
- Pry bar
- Spacers
- Tapping block
- Pull bar
- Knee pads
- Safety glasses
It is important to purchase or rent high-quality tools to ensure a successful installation. Home improvement stores often offer tool rental services for a reasonable price.
10 Methods How to Put Laminate Flooring on Concrete
Method 1: Gather the Necessary Tools and Materials
Before you start the installation, gather all the tools and materials required, including laminate flooring planks, underlayment, spacers, a tape measure, a circular saw, a tapping block, a pull bar, and a utility knife.
Having everything on hand will flowline the process. While laying laminate flooring on concrete is a relatively easy job, you’ll still need to take some time to calculate the size of the room and ensure you have the right amount of flooring planks.
Method 2: Prepare the Subfloor
Inspect the concrete subfloor for any cracks, moisture issues, or unevenness. Repair any damages and ensure the surface is clean and dry. Install a vapor barrier or underlayment to protect the laminate from moisture and provide cushioning. Make sure to overlap and secure all seams.
Next, test the slab with a moisture meter to make sure no excess water is present. Follow the manufacturer’s instructions for installing the flooring on top of a slab.
Method 3: Acclimate the Laminate Flooring
Allow the laminate flooring planks to acclimate to the room’s temperature and humidity for at least 48 hours. This step helps prevent expansion or contraction issues after installation.
Lay the planks in the room, leaving a gap of at least ¼ inch between the walls and planks. Place cardboard or a foam underlayment between the planks and the concrete to help reduce noise, provide insulation, and make it easier to walk on the planks.
Method 4: Measure and Plan the Layout
Measure the room’s dimensions and plan the layout of the laminate flooring. Start by determining the direction of the planks and ensuring the first row is parallel to the longest wall. Use spacers to create an expansion gap around the perimeter.
Method 5: Install the Underlayment
Roll out the underlayment over the prepared subfloor, ensuring it covers the entire area. Trim any excess and secure the underlayment using tape or adhesive as recommended by the manufacturer. The underlayment will provide additional sound and thermal insulation and cushioning for the laminate. Next, use a level to make sure the subfloor is even before moving on to the next step.
Method 6: Cut the Laminate Planks
Measure and cut the laminate planks to fit the edges of the room, leaving the appropriate expansion gap. Use a circular saw or a laminate cutter for precise cuts. Remember to wear protective eyewear and follow safety precautions.
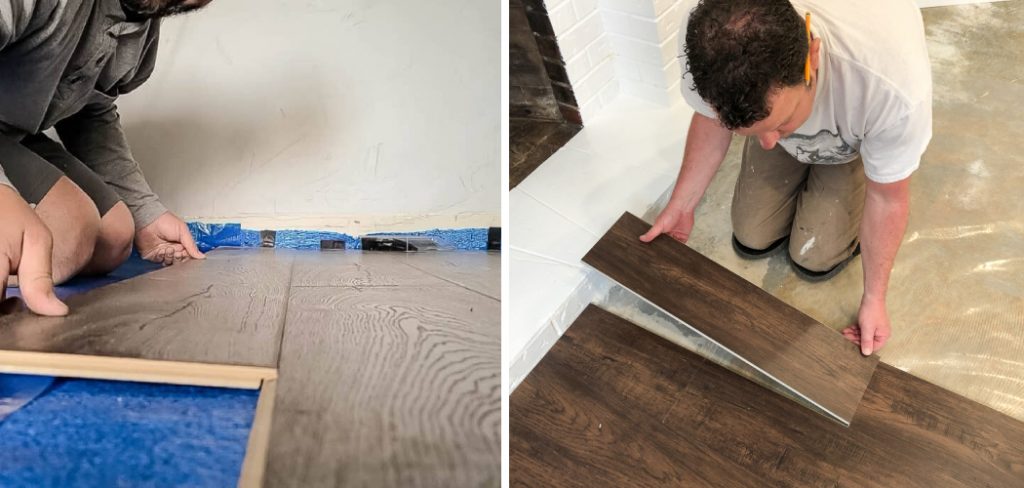
Method 7: Install the First Row
Begin installing the first row of laminate planks, using the manufacturer’s recommended installation method. Use a tapping block and a mallet to ensure a snug fit between the planks. Continue installing subsequent rows, interlocking the planks according to the manufacturer’s instructions.
Method 8: Continue the Installation
Work row by row, staggering the seams between planks for stability and aesthetic appeal. Use the tapping block and pull bar to engage the planks securely. Trim the last row, if needed, to fit against the wall. Apply adhesive to the tongue-and-groove joints, if desired. Use a damp cloth to clean off any glue that oozes out.
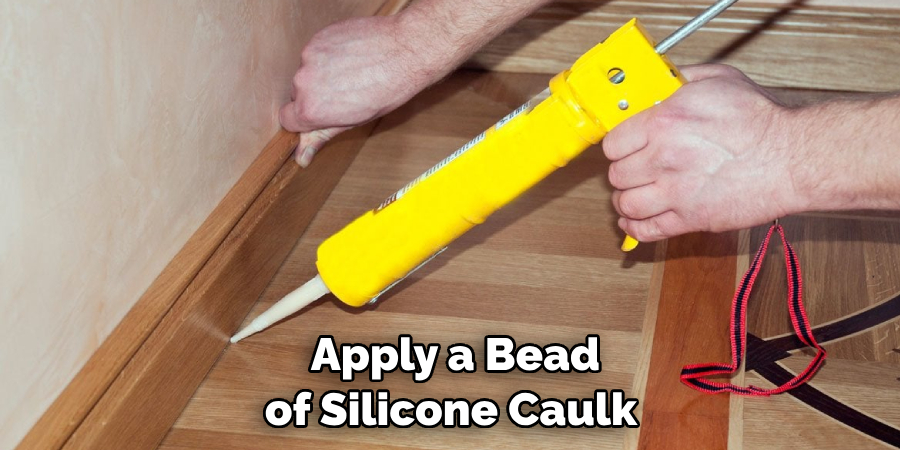
Once the laminate flooring is laid, install any quarter-round molding at the edge of the room to give it a finished look. Be sure to apply a bead of silicone caulk along the edge where the quarter-round meets both wall and floor for waterproof protection.
Method 9: Install Transition Pieces and Trim
Install transition pieces, such as thresholds or reducers, at doorways or where the laminate meets other flooring surfaces. Install baseboards or quarter round trim to cover the expansion gap around the perimeter, using finishing nails or adhesive.
Method 10: Clean and Inspect the Finished Floor
Once the installation is complete, thoroughly clean the laminate floor to remove any debris or residue. Inspect the floor for any visible gaps, unevenness, or damaged planks. Make any necessary adjustments or replacements for a flawless final result.
Tips for Achieving a Professional Finish on Laminate Flooring
To achieve a professional finish on laminate flooring, there are several finishing touches that can be added. These include:
- Installing baseboards or quarter round molding to cover the gaps between the flooring and the walls.
- Using transition strips to create a seamless transition between different types of flooring.
- Using a laminate flooring repair kit to hide any imperfections or scratches.
- Applying a laminate flooring sealant to enhance the durability of the flooring.
Tricks for hiding imperfections: To hide imperfections in the laminate flooring, it is important to use a laminate flooring repair kit. This kit can be used to fill in scratches or dents in the flooring, creating a seamless finish.
Enhancing the durability of the flooring: To enhance the durability of the laminate flooring, it is important to apply a laminate flooring sealant. This sealant will help protect the flooring from scratches, stains, and fading.
Troubleshooting Common Issues with Laminate Flooring on Concrete
While laminate flooring on concrete is a relatively easy DIY project, there are some common issues that can arise. These include:
- Buckling or warping of the flooring due to moisture.
- Gaps between the planks due to improper installation.
- Scratches or dents in the flooring due to heavy foot traffic.
To prevent these issues, it is important to properly prepare the concrete surface, use the right type of laminate flooring, and follow the installation instructions carefully.
Maintaining and Cleaning Laminate Flooring on Concrete
To maintain and clean laminate flooring on concrete, it is important to use the right cleaning products and methods. These include:

- Sweeping or vacuuming the flooring regularly to remove dirt and debris.
- Using a damp mop to clean the flooring, being careful not to use too much water.
- Using a laminate flooring cleaner to remove stains or spills.
- Avoiding the use of abrasive cleaners or tools that can scratch the flooring.
Tips for maintaining the flooring’s appearance and longevity: To maintain the appearance and longevity of the laminate flooring, it is important to avoid dragging heavy furniture across the flooring, as this can cause scratches or dents.
Additionally, it is important to avoid exposing the flooring to excessive moisture, as this can cause warping or buckling.
Conclusion
In conclusion, learning how to put laminate flooring on concrete opens up a world of possibilities for transforming your space with a durable and attractive flooring option. By following the ten step-by-step methods outlined in this article, you can confidently tackle the installation process and achieve professional-looking results.
From preparing the subfloor to acclimating the laminate planks, planning the layout, and installing each piece with precision, each step plays a crucial role in creating a beautiful and functional laminate floor.
Remember to use the proper tools, take accurate measurements, and pay attention to details such as expansion gaps and trim installation. Follow these simple instructions outlined in this blog post about how to put laminate flooring on concrete and you’ll be able to get the job done with ease.