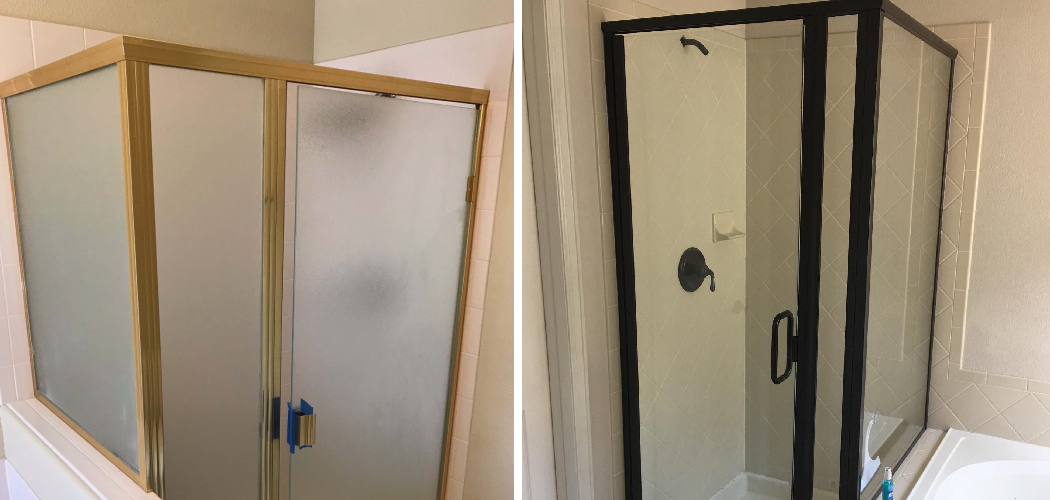
Painting your shower door frame is an easy and inexpensive way to add a touch of class or color to your bathroom. It also allows you to match the finish of your door frame with any other fixtures in the bathroom, such as the toilet, bathtub, and sink. Plus, it’s a great way to give your shower extra protection from water damage.
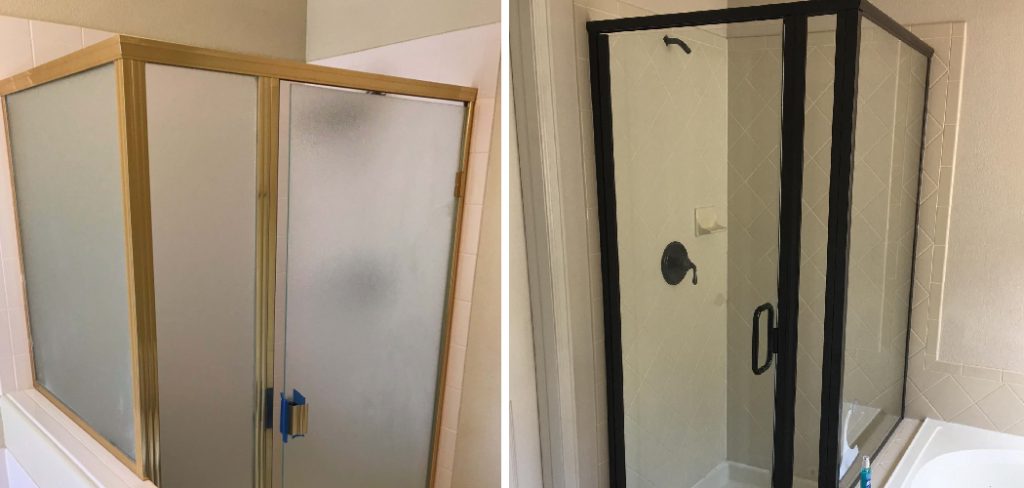
Painting a shower door frame is a great way to freshen up the look of your bathroom. It can also be a cost-effective way to make it look new again. You can easily achieve an even, professional finish on your door with proper preparation and careful application. In this blog post, You will learn in detail how to paint shower door frame.
Step-by-step Instructions for How to Paint Shower Door Frame
Step 1: Inspect Your Shower Door Frame
Before beginning, examine the door frame you are planning to paint. Look for any areas of damage, such as rust or flaking paint, and ensure they’re repaired before continuing with the project.
Step 2: Prepare the Surface
Start by cleaning and sanding your shower door frame. Make sure the surface is smooth and dust-free before applying primer. Using a brush or roller, apply a coat of primer to the frame. Make sure you get into all the nooks and crannies. Allow the first coat to fully dry before applying a second coat.
Step 3: Apply Paint
Now it’s time to apply the paint. Start with a thin coat, then add additional coats for full coverage. Let each coat dry completely before applying another one. Once you’ve achieved the desired look, finish your project by sealing your work. Apply an appropriate sealant to protect against moisture and maintain the paint job for years.
Step 4: Clean Up
After you’ve completed the project, take a few minutes to clean up any mess you may have made. Vacuum or sweep away dust and wipe down surfaces with a damp cloth. Once you’ve finished cleaning up, take a moment to inspect your work. Ensure the door frame looks even and smooth before taking a step back to admire your handiwork.

Step 5: Put Everything Back Together
Reattach any hardware that was removed while painting. Use the correct screws and other necessary pieces for a secure fit. You have successfully painted your shower door frame. Sit back, relax, and enjoy the beautiful results of your hard work. Now that you’ve finished painting, keeping up with regular maintenance is important. Clean the frame regularly and reapply a sealant if necessary to ensure your paint job lasts for years.
By following these steps, you should now have a beautifully painted shower door frame that will be the envy of all your friends! With proper care and attention, your new project should last for years.
Precautions for How to Paint Shower Door Frame
- Put on a respirator mask when painting near any ventilation systems.
- Wear gloves and goggles to protect your skin and eyes from paint fumes or particles.
- Ensure the area is well-ventilated by opening windows and turning on fans if appropriate.
- Remove all shower fixtures, including handles, locks, and any other hardware that may be attached to the frame.
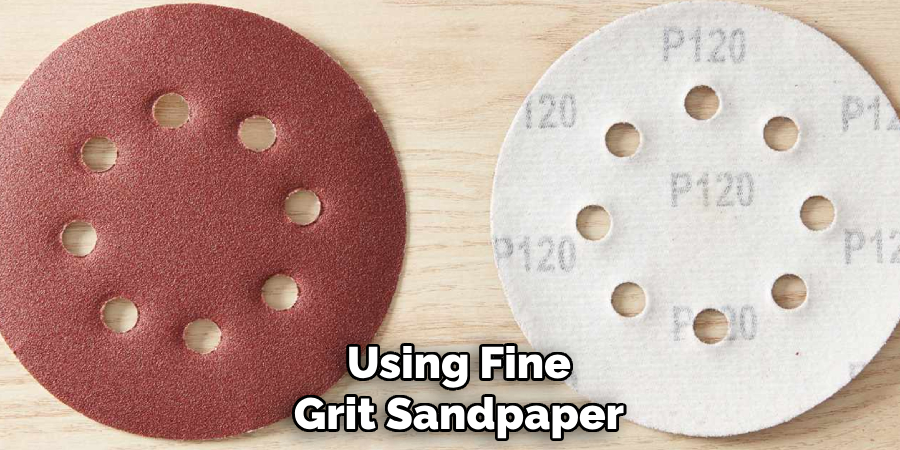
- Clean the surfaces of the door frames with a degreaser and gently sand them using fine-grit sandpaper; this will help ensure good adhesion for the primer and paint.
- Use a high-quality primer on all surfaces before painting to prevent chipping and peeling.
- Apply 2-3 coats of paint, allowing adequate drying time between each coat. This will ensure an even finish with no streaks or visible brush strokes.
Once the paint is dry, reattach all hardware and fixtures to the frame before reinstalling the door. Take your time throughout this process; a well-prepped and painted frame will make your shower look new and last for years.
How Do You Prepare the Surface Before Painting?
Before you start painting, the surface of your shower door frame needs to be thoroughly prepared. First, wash the frame with a cleaner and lightly sand it to remove any loose paint or dirt. Make sure you get into all the hard-to-reach spots like corners and crevices. Rinse off any residue and let it dry completely before proceeding with the next step.
Next, apply a primer coat to the frame using a brush or roller. This will help the paint adhere better and provide an even finish. Allow at least 24 hours of drying time before painting your frame with oil-based paint. If you are using latex paint, a minimum of four hours should suffice for it to dry completely. To get a smoother finish, use fine-grit sandpaper between coats. Wipe off any dust with a damp cloth and let the frame dry completely before you start painting again.
What Techniques Should You Use to Get a Smooth Finish?
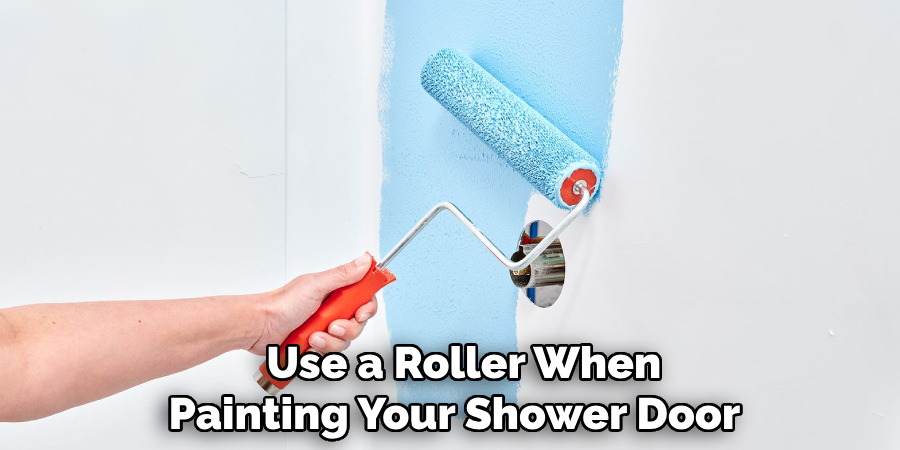
It is best to use a roller when painting your shower door frame to get the smoothest and most professional-looking finish. This will help you achieve an even coat without any drips or runs. Another trick that can help reduce brush marks is lightly wetting the bristles before loading them with paint. This allows for a smoother application as well. Also, always use long, even strokes, and brush in the same direction as you apply the paint.
Is There a Way to Protect the Paint From Water Damage?
Applying a sealant is one way to protect the paint on your shower door frame. A sealant will help keep water from seeping into the paint and causing it to wear down or chip. It’s important to choose a sealant designed for metal surfaces since this type of material is most commonly used in shower door frames.
Additionally, you can opt for a sealant specifically designed for use on aluminum or other metals, as this will provide the best protection against moisture. After applying the sealant, allow it to dry completely before using the shower. Doing so will help ensure your paint job lasts longer and looks great.
How Long Does It Take for the Paint to Dry and Cure?
The time it takes for the paint to dry and cure depends on several factors. The temperature and humidity of the room, the type of paint used, and how many coats are applied all affect the drying time. Generally, it is recommended that you wait 24-48 hours between coats of paint to ensure that each coat has fully dried before applying another.
Additionally, you should wait at least two weeks after painting before using the shower frame to allow the paint to cure completely. This will ensure that it will have a long-lasting finish that resists chipping and fading over time.
How Do You Clean Up Any Excess Paint or Spills on the Frame?
If you accidentally spill or drip paint on the frame, it’s important to clean it up quickly before the paint dries. Using a damp cloth or sponge and some warm, soapy water is best. To prevent scratches and damage, be sure to avoid using any abrasive materials such as steel wool. Rinse off the area with cool, clean water and let it air dry.
If there is still paint residue after cleaning, you can use a mild solvent such as mineral spirits to remove it. Wear gloves when handling any chemicals and work in a well-ventilated area.

Once the frame has been fully cleaned, check for any other areas that may need to be touched up with paint. To do this, inspect the entire frame and look for chips or cracks that may have been exposed during cleaning. Touch up any areas as needed and allow it to dry before reattaching the shower door.
Conclusion
The main disadvantage of painting a shower door frame is that getting a professional-looking finish can take time and effort. It’s also important to make sure you use the right type of paint and allow plenty of drying time between coats to achieve a long-lasting result.
In conclusion, painting your shower door frame is a quick and easy DIY project that will give you an updated look and help protect the metal from corrosion. All you need to know is what paint to use, how to prepare the surface, and which tools are necessary for the job. Reading this post has helped you learn how to paint shower door frame. Make sure the safety precautions are carried out in the order listed.