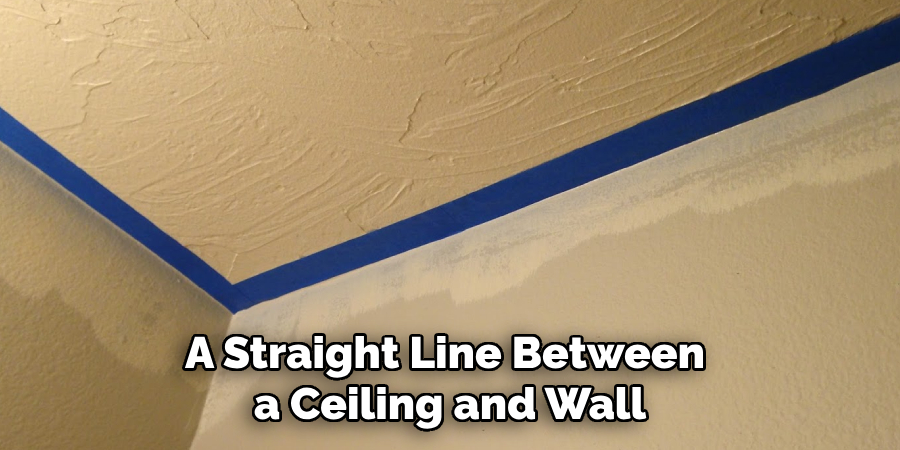
Painting a straight line between the ceiling and wall may seem like an easy task, but it can be challenging for many people. However, learning how to do it properly can greatly improve the overall look of your painted walls and make your home feel more polished and professional.

The main advantage of knowing how to paint a straight line between the ceiling and wall is that it can greatly enhance the overall look and feel of a room. A perfectly straight line can give the illusion of higher ceilings, making the space appear larger and more open. It also creates a clean and polished finish, giving the room a more professional and put-together appearance. In this blog post, You will learn in detail how to paint a straight line between ceiling and wall.
Tools or Materials You Will Need
- Personal Computer or Laptop
- Text Editor Software (e.g. Notepad, Sublime Text)
- Web Browser (e.g. Google Chrome, Mozilla Firefox)
- Internet Connection
- Terminal or Command Prompt
- Version Control System (e.g. Git)
- Integrated Development Environment (IDE)
- Programming Language Compiler/Interpreter
- Debugging Tools
- Online Tutorials and Documentation
By now, you should have a clear understanding of the basic tools and materials needed when learning how to code. However, there are additional tools and resources that can greatly enhance your coding experience and help you become a more efficient programmer.
Overview Guidelines for How to Paint a Straight Line Between Ceiling and Wall

- Prepare the Room: Before you start painting, it’s important to prepare the room first. Move furniture away from walls and cover it with drop cloths. Use painter’s tape to protect areas that won’t be painted, such as trim or light fixtures.
- Gather Supplies: Make sure you have all the necessary supplies before starting the project. This includes paint, a paintbrush, painter’s tape, and a ladder or step stool.
- Choose the Right Paint: When painting a ceiling and wall, it’s important to choose the right type of paint. For ceilings, use flat or matte paint as it helps to hide imperfections. For walls, use eggshell or satin finish for a durable and washable surface.
- Start with the Ceiling: Begin by painting the ceiling first. Use a paint roller for even coverage, starting from one corner and working your way across the room in small sections.
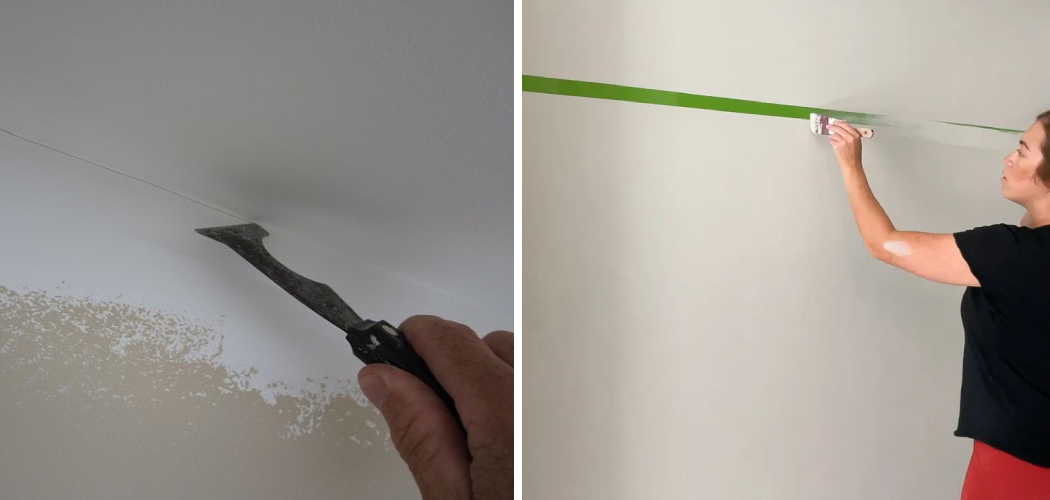
- Cut In the Edges: Once you have painted most of the ceiling, use a smaller brush to cut in around the edges where walls meet the ceiling. This will help create a clean and straight line.
- Paint the Walls: Next, move on to painting the walls. Use a paint roller for larger areas and switch to a smaller brush for corners and edges.
- Let the Paint Dry: Allow the paint to dry completely before moving onto the next step. This will ensure that your lines remain crisp and clean.
- Use Painter’s Tape: Once the paint is dry, use painter’s tape to create a straight line along the edge where the ceiling and wall meet. Make sure to press down firmly on the tape to prevent any bleeding.
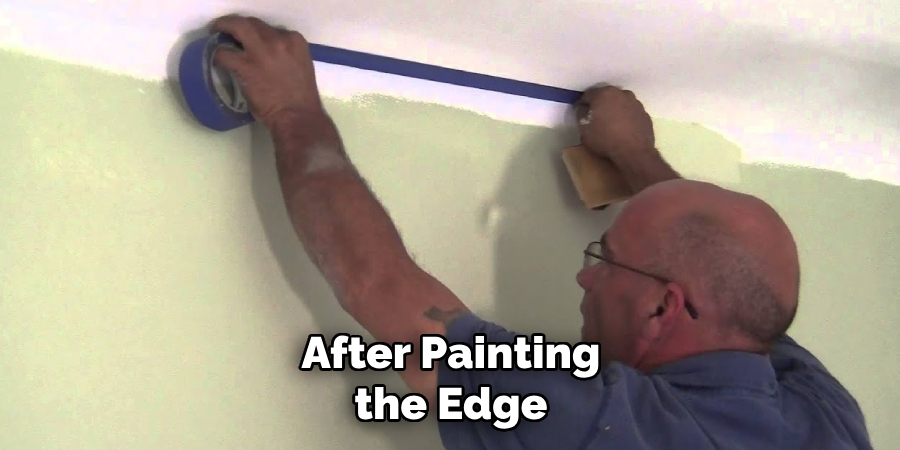
- Paint the Edge: With the painter’s tape in place, use a small brush to carefully paint along the edge where the two surfaces meet. This will ensure a clean and straight line.
- Remove the Tape: After painting the edge, carefully remove the painter’s tape while the paint is still wet. This will prevent any peeling or damage to the wall and ceiling.
By following these step-by-step guidelines, you can easily paint a straight line between your ceiling and wall. Remember to take your time and be patient for the best results. Also, don’t forget to clean up any messes or spills as you go along to avoid any unwanted permanent marks on your walls or floors.
Safety Tips for How to Paint a Straight Line Between Ceiling and Wall
- Always use a sturdy ladder or scaffolding when painting high areas. Do not attempt to stand on chairs, tables, or other unstable surfaces.
- Cover and protect the floor and furniture with drop cloths to prevent stains and spills. Remove all unnecessary objects from the area before beginning to paint.
- Wear protective gear such as gloves, goggles, and a face mask to avoid any accidental contact with paint or fumes.
- Start by applying painter’s tape along the edge of the ceiling and wall, making sure it is straight and firmly pressed down to prevent any bleeding or smudging.
- Use a high-quality angled brush for precision when painting along the taped edge. Hold the brush at a slight angle and use smooth strokes to create a straight line.
- For larger areas, consider using a paint edger tool to ensure a straight and even line. These tools can be purchased at most hardware or home improvement stores.
- Take breaks when necessary to avoid fatigue and maintain focus. Painting accurately requires steady hands and concentration.
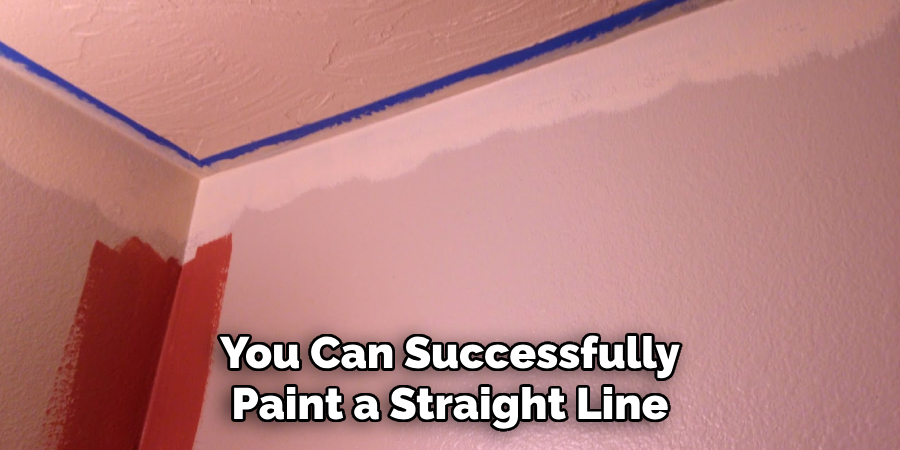
By following these safety tips, you can successfully paint a straight line between your ceiling and wall while also keeping yourself and your surroundings safe. Remember to always prioritize safety when undertaking any home improvement project.
Importance of Clean and Straight Lines in Painting a Straight Line Between Ceiling and Wall
- Clean and straight lines are essential in painting as they provide a professional look to the finished work. When done correctly, it can make a significant difference in the overall appearance of any room or space.
- Painting clean and straight lines can also give an illusion of larger space, making the room appear more spacious and airy.
- A poorly painted line can disrupt the harmony of a room, making it look messy and unappealing. On the other hand, clean and straight lines can bring balance and order to a space.
- In addition to aesthetics, painting straight lines also have practical benefits. Straight lines between walls and ceilings create a defined boundary that prevents dust or debris from accumulating in the corners, making cleaning easier.
- Clean and straight lines can also help with lighting. When painting a room, light can reflect differently on uneven lines, causing shadows and uneven lighting. Painting straight lines ensures the light is evenly distributed, providing a brighter and more welcoming space.
- Finally, clean and straight lines portray attention to detail and professionalism. It shows that the painter took their time and effort to ensure a flawless finish, which can add value to a property and leave a lasting impression on guests or potential buyers.
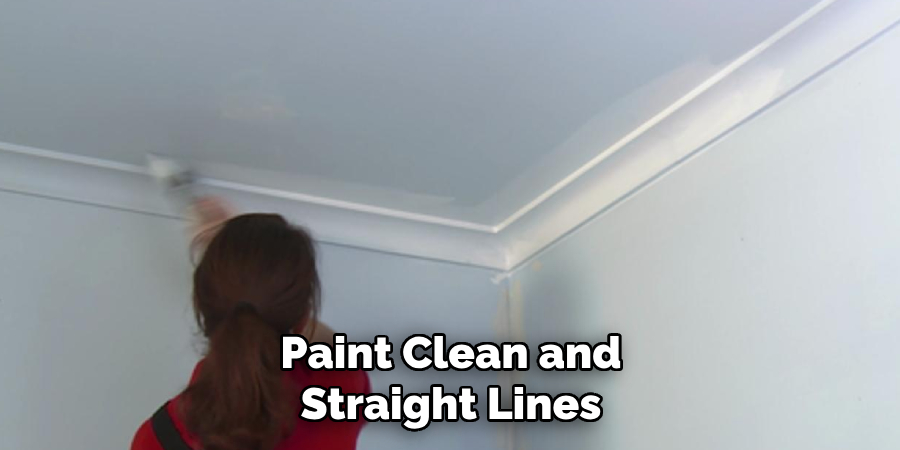
By taking the time to paint clean and straight lines, you not only enhance the appearance of a space but also create a sense of order and cleanliness. It may seem like a small detail, but it can make a significant impact on the overall look and feel of any room.
The Impact of Well-executed Painting on Overall Room Aesthetics
- Clean and straight lines are just a small part of the bigger picture when it comes to painting a room. However, their impact on the overall aesthetics cannot be underestimated.
- By having clean and straight lines, you create a sense of cohesion in the room where all elements come together seamlessly. This allows for a more harmonious and visually appealing space.
- A well-executed paint job can also highlight other architectural features in a room, such as moldings or trim. When combined with clean and straight lines, these details can elevate the overall elegance and sophistication of a room.
- Furthermore, painting clean and straight lines can help create a focal point in the room. For example, by adding an accent wall with perfectly painted lines, you can draw attention to a particular area and add visual interest to the space.
- In addition, painting straight lines can also give the illusion of height or depth in a room. By choosing the right colors and using precise techniques, you can create an optical illusion that can make a small room look more spacious or a low ceiling appear higher.
- Overall, a well-executed paint job with clean and straight lines can transform a room and enhance its aesthetics. It not only adds to the overall appearance but also creates a sense of balance, harmony, and visual appeal.
By understanding the importance of clean and straight lines in painting, you can achieve a more professional and polished look in any space. With proper techniques and attention to detail, you can create stunning effects that can make a significant impact on the overall aesthetics of a room.

5 Cleaning Tips for Straightening Lines in Painting
- Use Painter’s Tape – This is an essential tool when painting clean and straight lines. Make sure to apply it carefully along the edges of where you want the line to be, and press it firmly to avoid paint bleeding.
- Start With a Smooth and Clean Surface – Before painting, make sure to sand down any rough or uneven areas on the wall or ceiling. This will ensure a smooth surface for the paint to adhere to and help create clean lines.
- Use a High-quality Paintbrush – The type of brush used can make a significant difference in achieving clean and straight lines. Invest in a high-quality brush with straight, even bristles to achieve precise lines.
- Take Your Time – Painting clean and straight lines requires patience and attention to detail. Rushing through the process can result in uneven or messy lines. Take your time, work slowly and carefully, and don’t be afraid to go back and touch up any imperfections.
- Practice on a Scrap Piece of Paper – If you’re new to painting straight lines, it may be helpful to practice on a scrap piece of paper first. This will allow you to get a feel for the brush and technique before tackling the walls or ceiling.
By following these tips, you can improve your skills in painting clean and straight lines and achieve a professional finish in any room. With practice and patience, anyone can master this technique and elevate the overall appearance of their space.
Troubleshooting and Common Challenges for Painting a Straight Line Between Ceiling and Wall
One of the most daunting tasks for any DIY painter is achieving a straight line between the ceiling and wall. It may seem like a simple task, but it can quickly become frustrating when the paint bleeds or smudges onto either surface. Don’t worry – you’re not alone! Here are some common challenges that painters face when trying to achieve a crisp and clean edge between the ceiling and wall, along with some troubleshooting tips to help you overcome them.
1. Uneven Surfaces
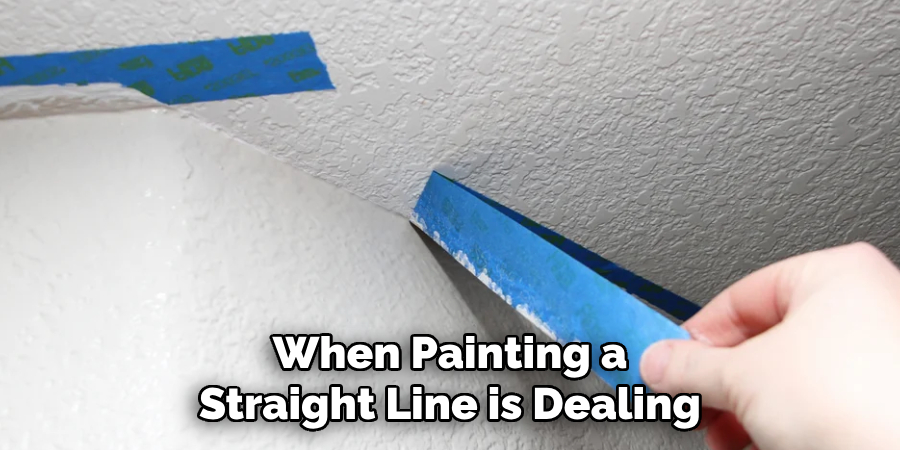
One of the biggest challenges when painting a straight line is dealing with uneven surfaces. This can result from an imperfectly installed ceiling or a slightly bumpy wall. When this happens, it’s nearly impossible to achieve a perfectly smooth line. So what can you do?
First, make sure to properly prep the surface by sanding down any bumps or ridges. This will create a smoother and more even surface for you to paint on. If the unevenness is severe, you may need to apply a thin layer of spackling paste before painting.
Another solution is to invest in high-quality painter’s tape that can easily mold and adhere to uneven surfaces. This will help create a barrier between the ceiling and wall, preventing any paint from bleeding through.
2. Paint Bleeding
Paint bleeding is one of the most common challenges when painting a straight line, and it can happen for a variety of reasons. One possible cause is using too much paint on your brush or roller. When this happens, excess paint may drip down onto the surface and create an uneven line.
To avoid this, make sure to properly load your brush or roller with paint and then lightly tap off any excess before starting. You may also want to consider using a small foam brush for more precise control when painting near edges.
Another cause of paint bleeding is not allowing enough time for the first coat of paint to dry before applying a second coat. If you rush this step, the wet paint can mix with the dry paint and create an uneven line. Always refer to the recommended drying time on your paint can.
3. Uneven Colors
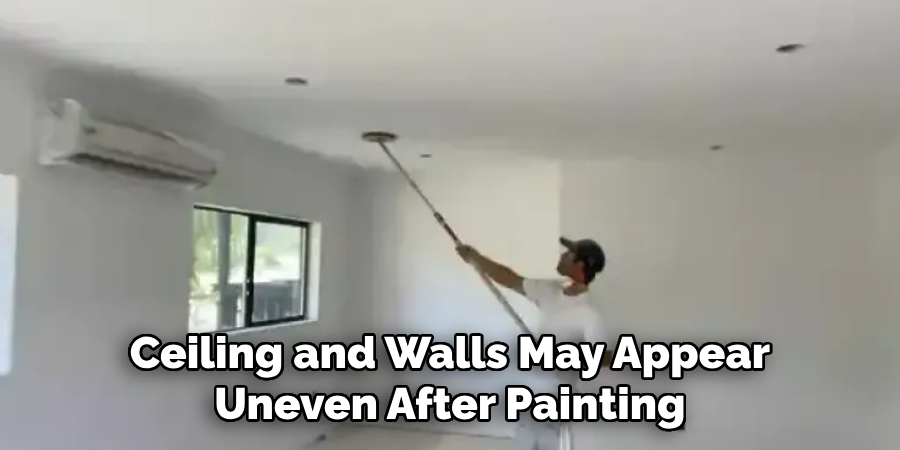
Sometimes, despite your best efforts, the color of your ceiling and walls may appear uneven after painting. This can be caused by several factors such as lighting, paint quality, or even technique.
To troubleshoot this issue, try looking at the room from different angles and in various lighting conditions to see if the color appears more even. If it does, then the issue may be with the lighting in the room.
If the unevenness persists, try using a high-quality paint with good coverage or consider using a primer before painting. You may also want to experiment with different techniques such as using a roller for larger surfaces and a brush for smaller details. Painting a straight line between the ceiling and wall may seem like a daunting task, but with the right techniques and troubleshooting tips, you can achieve a clean and professional-looking finish.
Alternative Techniques for Straight Lines Between Ceiling and Wall
There are many traditional methods for creating straight lines between a ceiling and wall, such as using painter’s tape or a chalk line. However, there are also several alternative techniques that can achieve the same result. In this section, we will discuss six of these alternative techniques.
- Laser Level: A laser level is a tool that projects a perfectly straight beam of light onto a surface. This beam can be used as a guide for creating straight lines on walls and ceilings. Simply position the laser level at one end of the wall or ceiling, turn it on, and trace along the projected line with a pencil or marker.
- Hanging Plumb Line: Similar to a chalk line, a hanging plumb line is a weighted string that can create a straight line between two points. In this case, the string is attached to the ceiling and allowed to hang down towards the wall. Once it settles into a vertical position, you can mark along its length to create a perfectly straight line.
- Laser Measuring Tool: Another tool that utilizes laser technology is a laser measuring tool. This device uses lasers to accurately measure distances and angles, making it perfect for creating straight lines between two surfaces. Simply measure the distance from the ceiling to the wall at multiple points and connect them with a pencil or marker.
- Drywall T-Square: A drywall T-square is a tool specifically designed for creating straight lines on walls and ceilings. It consists of a long ruler with a 90-degree angle at one end. Place the T-square against the ceiling and use it as a guide to draw straight lines with a pencil or marker.
- Straight Edge: A straight edge, such as a level or ruler, can also be used to create straight lines between a ceiling and wall. Simply place the straight edge against the two surfaces and trace along its edge with a pencil or marker. This method may require more precision and stability, but can still produce accurate results.
- String Method: For a simple and low-cost option, you can use a string to create a straight line between a ceiling and wall. Tie one end of the string to a nail or pin on the ceiling, stretch it taut towards the wall, and secure the other end with a nail or pin. Use the string as a guide to draw a straight line with a pencil or marker.
These alternative techniques may require some practice and adjustments, but they can provide precise and professional-looking results. Experiment with different methods to find which one works best for your project. Remember to always properly measure and mark before beginning any task for the most accurate lines.
Conclusion
In conclusion, painting a straight line between the ceiling and wall can be challenging, but with proper techniques and tools, anyone can achieve a professional-looking result.
It is important to take your time and properly prepare the area before beginning, as well as using quality paint and painter’s tape. Using a steady hand and following the steps outlined in this blog can help you achieve a crisp, clean line that will enhance the overall look of your room.
However, despite its benefits, there are some disadvantages to consider when painting a straight line between ceiling and wall. First and foremost, it can be time-consuming and tedious to get the line perfectly straight.
This may require multiple coats of paint and touch-ups, which can add to the overall time spent on the project. I hope reading this post has helped you learn how to paint a straight line between ceiling and wall. Make sure the safety precautions are carried out in the order listed.