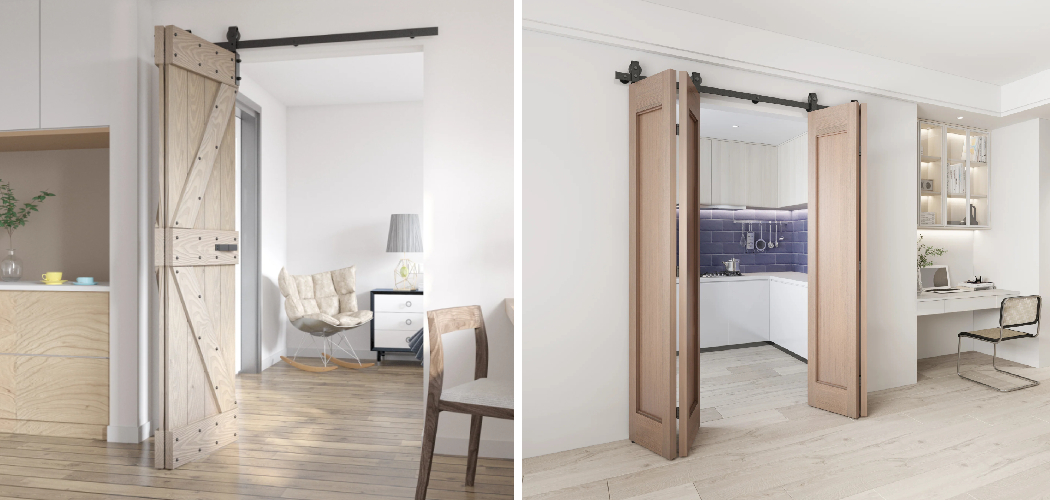
Crafting bifold barn doors offers a captivating blend of rustic charm and space-saving ingenuity, making them a compelling addition to both contemporary and traditional interiors. These doors combine the timeless aesthetics of barn doors with the practicality of bifold functionality, allowing you to partition spaces efficiently while adding a touch of countryside allure.
If you’re captivated by the idea of infusing your home with a dose of warmth and character, this DIY project might be the perfect endeavor for you. In this comprehensive guide, we’ll navigate you through the process of how to make bifold barn doors step by step.
From selecting the right materials that exude authenticity to assembling the doors with seamless folding mechanisms, you’ll gain the insights needed to embark on this creative journey. Unleash your inner craftsman as you transform ordinary spaces into extraordinary showcases of design and utility, all while relishing the satisfaction of crafting something both functional and visually striking.
The Concept of Bifold Barn Doors as a Stylish and Space-Saving Solution
Do you want to add a touch of modern flair and versatility to your home? Bifold barn doors are the perfect way to do just that. Not only can they give any room an instant style upgrade, but they can also be folded up or slid open when needed—making them the ideal space-saving solution for small spaces. However, before you hang your new bifold barn doors, it’s important to understand how to make them.
The first step to making a set of bifold barn doors is to purchase the necessary materials and tools required for the project. You’ll need wood (such as pine or oak), door hinges and rollers, screws, drill and saws. You’ll also need a router, sandpaper, and wood glue to finish the doors.
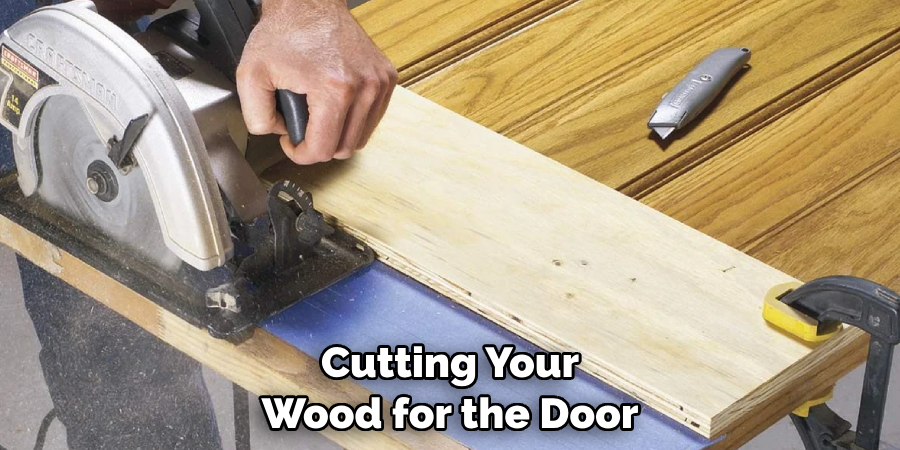
Next, it’s time to cut the wood for your bifold barn doors. The size of the door will depend on your particular space; make sure it fits in the doorway before cutting. Once you have the dimensions figured out, use a jigsaw or circular saw to cut the wood down to size.
The Rustic Charm and Versatility They Bring to Interior Design
Bifold barn doors are quickly becoming a favorite among interior designers. Their unique blend of rustic charm and modern style makes them an excellent choice for adding character to any home.
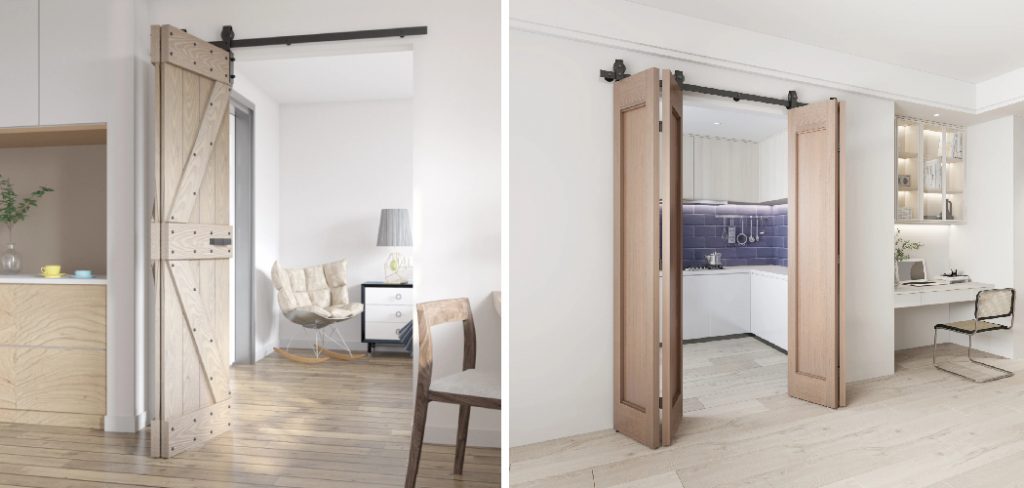
Not only do they provide a beautiful design element, but their versatility also allows them to be adapted into almost any setting. Whether you’re looking for a farmhouse aesthetic or something more contemporary, these doors are a great way to make a statement.
These doors come in all shapes and sizes, so finding the perfect fit for your home is easy. You can even customize them with different colors, textures, and hardware to give them just the right look. Best of all, you can install them yourself with some basic tools and knowledge – no need to hire an expensive professional.

The installation process is straightforward and an ideal DIY project for anyone with a little know-how. All you’ll need are some basic tools like a circular saw, drill, and level to get started. Once you have the frame installed, attaching the panels and hardware will be easy – just follow the manufacturer’s instructions carefully.
10 Steps on How to Make Bifold Barn Doors
1. Measure the Opening
The first step in making bifold barn doors is to measure the opening of the space that you want to install them in. Be sure to measure both the width and height of the opening, as this will determine the size of your doors. Additionally, you should also take into account any trim or molding that may be around the opening, as this will affect how your doors fit.
2. Cut Your Wood
Once you have measured the opening, you can begin cutting your wood for the door frames and panels. The type of wood that you use is up to you, but it is important to choose a strong and durable wood such as pine or oak. You will need to cut two side pieces for each door frame and four panels for each door panel.
3. Assemble Door Frames
Once all of your wood has been cut, you can begin assembling your door frames. Start by attaching one side piece to each end of both door frames using screws or nails. Then attach the remaining side pieces in between these two pieces using more screws or nails. Make sure that all of your pieces are securely attached before moving on to the next step.
4. Attach Hinges
Next, attach hinges to both sides of each door frame so that they can swing open and close easily when installed in your space. Be sure to use heavy-duty hinges that are rated for outdoor use if installed outside, as this will ensure maximum durability over time.
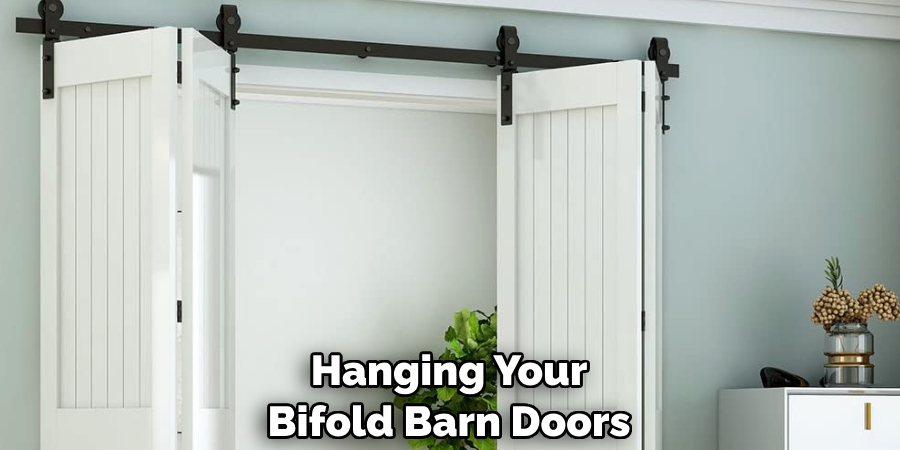
5. Install Tracks
Now it’s time to install tracks for your bifold barn doors so they can slide open and close smoothly when installed in your space. For best results, use a heavy-duty track system with adjustable rollers so that you can adjust it if needed after installation is complete.
6. Attach Panels
After installing tracks for your bifold barn doors, attach each panel onto its respective frame using screws or nails along with some wood glue for extra strength and stability if desired. Make sure that all panels are securely attached before moving on to the next step so they don’t come loose over time due to wear and tear from regular use.
7. Hang Doors
Once all panels have been securely attached to their respective frames, it’s time to hang them on their tracks. Start by lifting one end of each door onto its track, then secure it into place using bolts, nuts, washers, etc. Once both ends are secured into place, test out how smoothly they open and close before continuing to the next step.
8. Secure Doors
After hanging your bifold barn doors onto their tracks, secure them into place by adding additional bolts, nuts, washers, etc, along with some wood glue if desired. This will help ensure maximum stability over time while also preventing any accidental sliding when opened or closed.
9. Add Finishing Touches
Now it’s time to add some finishing touches, such as knobs or handles, onto your bifold barn doors so they look great once installed in your space. Choose knobs or handles that match with other features in your home, such as cabinet hardware or furniture styles, for a cohesive look throughout.
10. Install Doors
Finally, it’s time to install your bifold barn doors! Start by positioning them into place within their designated opening area, then secure them into place using screws or nails along with some wood glue if desired for extra strength and stability over time. Test out how smoothly they open and close once fully installed before enjoying their beauty within your home!
Some Common Mistakes to Avoid When Making Barn Doors
Making barn doors can be a rewarding and fun DIY project. However, there are some mistakes that you should try to avoid in order for your bifold doors to look their best. Here are some common mistakes to watch out for when making bifold barn doors:
- Not measuring correctly – Before beginning any project, it is important to make sure that you measure correctly. This way, your barn doors will fit the opening perfectly and look great when finished.
- Choosing the wrong hardware – When it comes to barn door hardware, quality matters. Selecting good quality hinges, handles, and locks will ensure that your barn doors don’t sag or become loose over time.
- Not installing a header or threshold – Installing a header and threshold will help to keep your barn doors from sagging or becoming uneven over time. It is also important for safety reasons, as it prevents people from tripping on the door when opening and closing it.
- Not installing trim around the doors – Adding trim around the edges of your bifold barn doors will give them a polished, finished look. Consider using a complementary trim color for extra visual interest.
- Not protecting your barn doors – Applying a protective finish to your bifold barn doors will help to keep them looking their best over time. A polyurethane or exterior paint are both great options that will protect the wood from wear and tear.
By avoiding these common mistakes, you can ensure that your bifold barn doors look great and function properly for many years to come. With a little bit of knowledge and careful attention to detail, making bifold barn doors is an enjoyable and rewarding project!

Conclusion
There you have a comprehensive guide on how to make bifold barn doors. This project may look intimidating but, as demonstrated here, don’t let it deter you from building beautiful and unique doors for your home.
Of course, if you ever get stuck or feel overwhelmed during the process just call in professional help – carpentry specialists are more than capable of completing the job with quality results. Remember: when the installation of your bifold barn door is complete, be sure to take pictures to show off your hard work!