
When it comes to upgrading the functionality of your kitchen, many homeowners often overlook the importance of installing a range hood vent. Not only does a range hood improve air circulation, but it can also have a drastic effect on how your kitchen looks and functions.
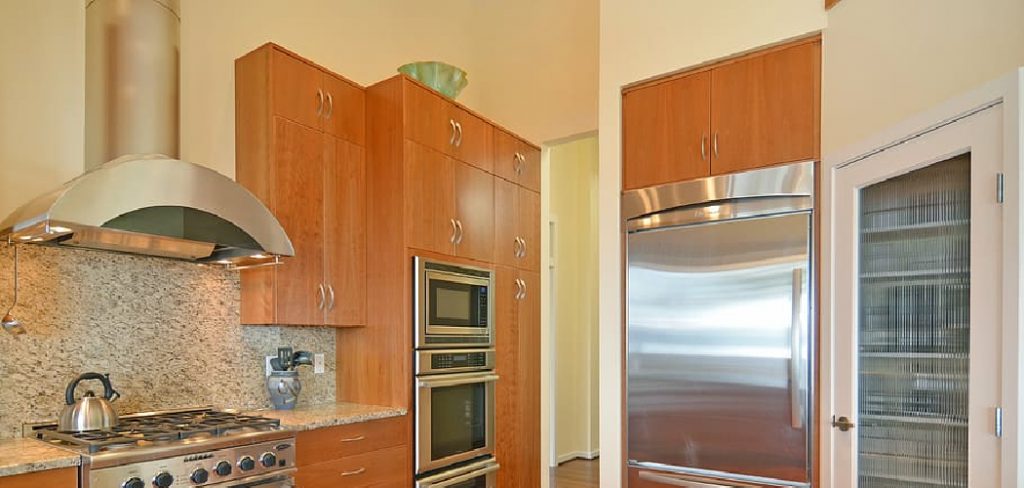
Not sure where to start? Installing a range hood vent through your ceiling may seem like an intimidating process, but this guide on how to install a range hood vent through ceiling will help make the installation process easier so you can soon enjoy all the perks that come with having one in place!
What is a Range Hood Vent?
Before we dive into the installation process, let’s first understand what a range hood vent is and why it is essential. A range hood vent, also known as an exhaust hood or extractor hood, is a kitchen appliance that helps to filter out smoke, fumes, and odors from cooking. It typically hangs above your stovetop or cooktop and works by either recycling the air or venting it outside.
There are various types of range hoods, including under-cabinet range hoods, wall-mounted chimney hoods, and island range hoods. In this guide, we will focus on installing a wall-mounted chimney hood through the ceiling.
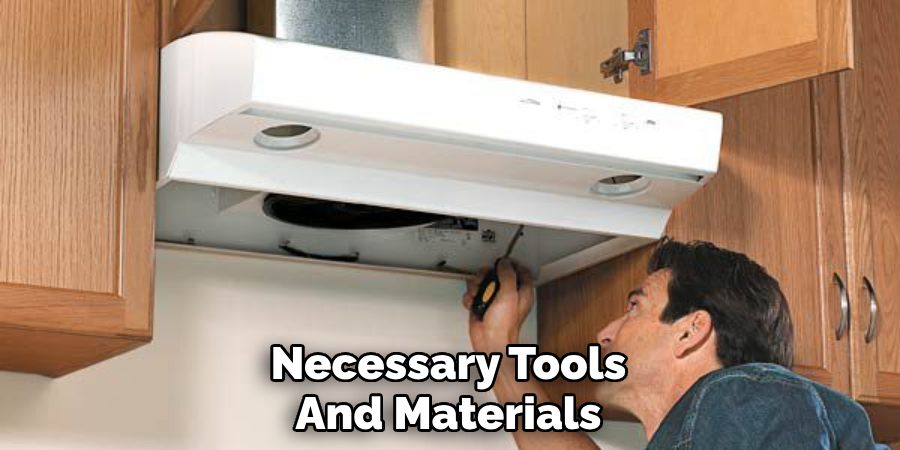
What You Will Need
Before starting with the installation process, ensure you have all the necessary tools and materials. Below is a list of things you will need:
- Range Hood Vent
- Ductwork and Duct Tape
- Drill
- Measuring Tape
- Screws and Screwdriver
- Stud Finder
- Wire Nuts
- Electrical Cable or Wire
10 Step-by-step Guidelines on How to Install a Range Hood Vent Through Ceiling
Step 1: Choose the Location
The first step is to determine the best location to install your range hood vent. It should be positioned directly above your cooktop or stovetop for maximum efficiency. Avoid placing it too high or too low as it may affect its performance. It’s also essential to check for any potential obstructions, such as electrical wires or pipes, in the chosen location before proceeding. You may need to relocate them before installing the vent.
Step 2: Measure and Mark
Using a measuring tape, mark the spot where you want the range hood vent to be installed on the ceiling and then mark the same spot on the wall. Use a pencil to make these marks as they can easily be erased later. It’s crucial to ensure the marks are level and accurately placed. But before you move on to the next step, make sure your hood vent comes with a template for drilling holes.
Step 3: Locate and Mark Studs
Using a stud finder, locate and mark the studs in the ceiling. This is where you will be attaching the range hood vent, so it’s essential to have proper support. If your vent does not come with a template, you can use the stud marks as a guide for drilling the holes for mounting the vent.
Step 4: Drill Holes
Using a drill, make holes in the marked spots on both the ceiling and wall. Be sure to use appropriate drill bits depending on your ceiling material. For example, if you have a plaster ceiling, use a masonry bit, and if you have a drywall ceiling, use a regular drill bit. It’s essential to drill holes through both the ceiling and wall so you can run the electrical cable or wire through.

Step 5: Mount Bracket
Next, install the bracket that came with your range hood vent. Use screws to secure it onto the studs in the ceiling. If your vent did not come with a bracket, use toggle bolts to attach it to the ceiling. Make sure the bracket is level and secure. Otherwise, your hood vent may not be stable. You can also use duct tape to reinforce the bracket.
Step 6: Install Ductwork
Now it’s time to install the ductwork. It’s essential to follow the manufacturer’s instructions for this step as they may differ depending on your specific range hood model. Generally, you will need to attach the ductwork to the vent using screws and then run it through the ceiling and out the nearest exterior wall or roof.
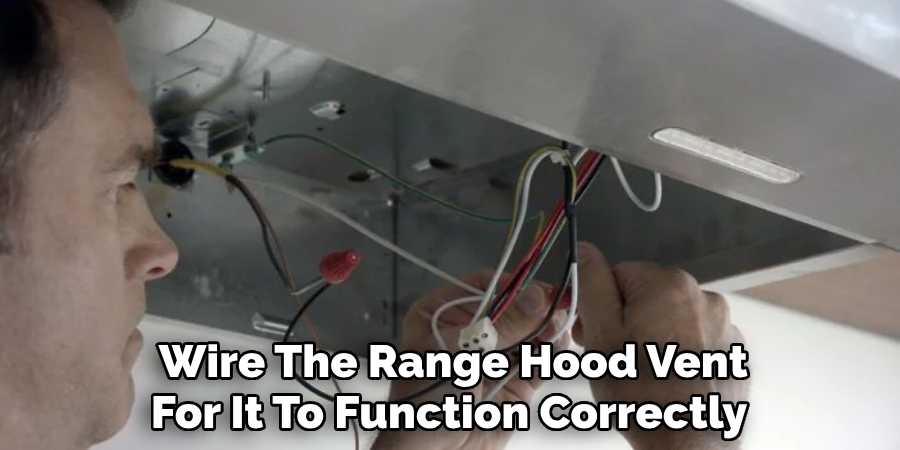
Step 7: Wire the Range Hood Vent
Next, you will need to wire the range hood vent for it to function correctly. Turn off the power supply to your kitchen before proceeding. Run an electrical cable or wire through the holes you drilled in step four and connect it to the hood vent following the manufacturer’s instructions. Use wire nuts to secure the connections.
Step 8: Secure Range Hood Vent
Once your ductwork and wiring are in place, it’s time to secure your range hood vent onto the bracket. Ensure that all screws are tight, and the hood is stable before moving on to the next step. You can also use duct tape to reinforce the connection between your vent and the ductwork. But be sure to use heat-resistant tape.
Step 9: Test the Range Hood Vent
Before you call it a day, it’s essential to test your newly installed range hood vent. Turn on the power supply and switch on the fan and lights to ensure they are working correctly. You can also run some water in your sink and turn on the vent to make sure it effectively removes steam and odors. It’s also a good idea to check for any leaks in the ductwork.
Step 10: Finish Up
Once you’re satisfied that your range hood vent is working correctly, it’s time to finish up. You can cover the exposed ductwork with insulation or drywall and then paint over it to blend it in with your ceiling. Remember to clean up any construction debris and tools used during the installation process. And voila! You now have a functional range hood vent!
Following these step-by-step guidelines on how to install a range hood vent through ceiling will help you successfully install a range hood vent through the ceiling. However, if you are not confident in your DIY skills, it’s always best to seek professional help for installation.
And with that, we hope you enjoy cooking without any lingering smells or steam in your kitchen! So go ahead and cook up a storm knowing that your range hood vent is efficiently removing all the unwanted fumes. Happy cooking!
Do You Need to Hire Professionals?
Installing a range hood vent through the ceiling may seem like an easy task. However, it involves electrical wiring and working at heights, which can be dangerous for those without experience. If you are not confident in your DIY skills or do not have the necessary tools and materials, it’s best to hire professionals for installation.
It may cost more upfront, but it will ensure that your range hood vent is installed correctly and safely. Plus, you won’t have to worry about any potential damages or accidents during the installation process. So weigh your options carefully and make the best decision for yourself.
Frequently Asked Questions
Q1: Can I Install a Range Hood Vent Through the Ceiling by Myself?
A1: Yes, you can, but it’s important to have experience in DIY projects and electrical wiring. If not, it’s best to hire professionals for installation. It’s always better to be safe than sorry. But if you do decide to install it yourself, make sure to follow all safety precautions and instructions carefully.
Q2: Can I Install a Range Hood Vent Through the Ceiling if I Don’t Have an Exterior Wall?
A2: Yes, you can still install a range hood vent through the ceiling even if you don’t have an exterior wall. You will need to run the ductwork through your attic and out your roof instead. It’s essential to follow proper ventilation guidelines to avoid any potential hazards.
Q3: How Often Do I Need to Clean and Maintain My Range Hood Vent?
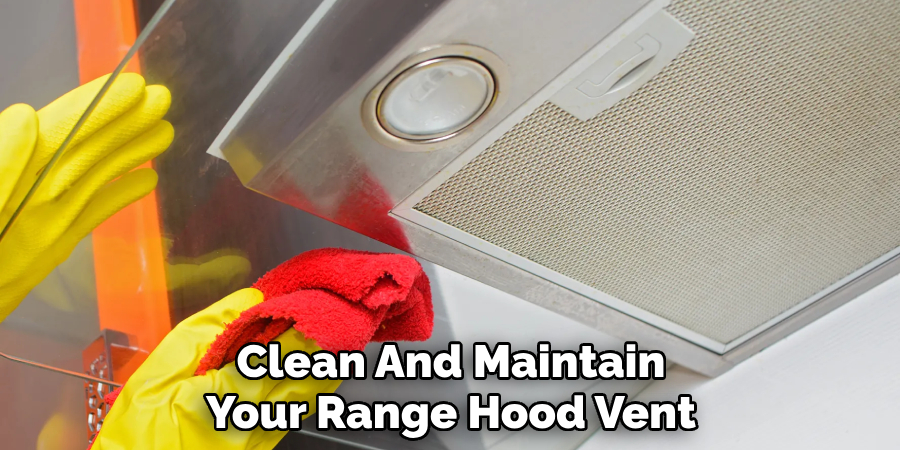
A3: It’s recommended to clean and maintain your range hood vent every three to six months, depending on usage. This includes cleaning the filters, removing any built-up grease or debris, and checking for any blockages in the ductwork. Regular maintenance will ensure your range hood vent functions efficiently and prolongs its lifespan. So don’t neglect this essential task!
Q4: Can I Install a Range Hood Vent Through the Ceiling Without Ductwork?
A4: Yes, you can opt for ductless range hood vents that use charcoal filters to remove odors and smoke. However, they are not as effective as ducted range hood vents in removing steam and grease from your kitchen. Plus, they require more frequent filter replacements and may not be suitable for heavy cooking. Consider your needs before deciding on the type of range hood vent to install. So keep these factors in mind!
Conclusion
The installation of a range hood vent through your ceiling may seem complicated, but this guide has walked you through the key steps. If you have followed all of the steps outlined in this article, then you should now be ready to enjoy your range hood vent! By taking this project on yourself, you can save time and money and reap the benefits of a safe and efficient ventilation system.
Don’t forget to check your local building codes before beginning a project like this one. Now that you know how to install a range hood vent through ceiling, go ahead and enjoy the improved ventilation along with with peace of mind that comes with doing it correctly.