Discovering bubbles in your vinyl flooring can be disheartening, but fear not – resolving this issue is entirely feasible with the right approach. Whether caused by installation issues, adhesive problems, or changes in temperature and humidity, fixing vinyl flooring bubbles is a straightforward process that can breathe new life into your space. In this comprehensive guide, we will delve into the art of remedying vinyl flooring bubbles, offering a step-by-step approach to identify the root cause, eliminate unsightly bubbles, and ensure a smooth, flawless floor surface.
From assessing the severity of the problem to employing effective repair techniques, this guide is designed to empower homeowners and DIY enthusiasts with the knowledge and skills needed to restore the aesthetic appeal and functionality of their vinyl flooring. Let’s embark on a journey to banish those bubbles and rejuvenate your vinyl floors for a polished and pristine look.
What Is Vinyl Flooring Bubbles?
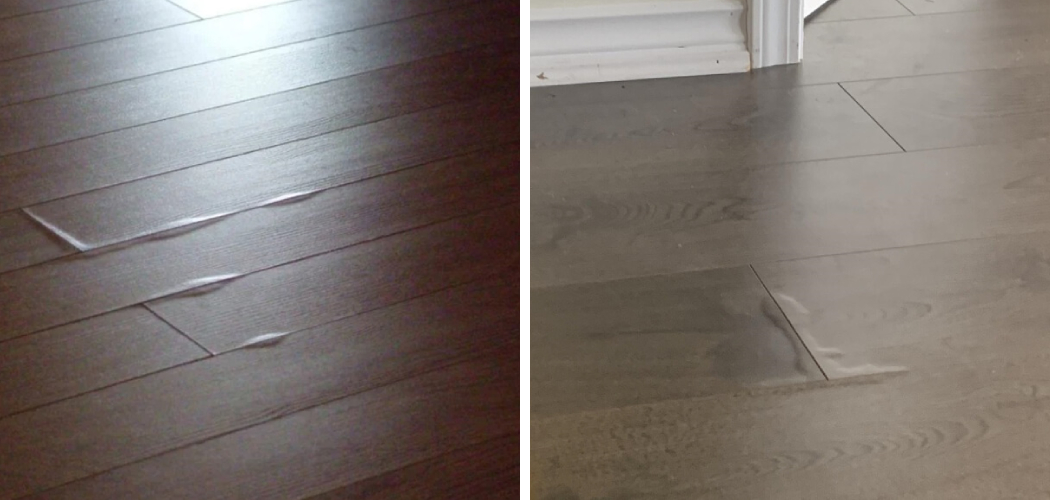
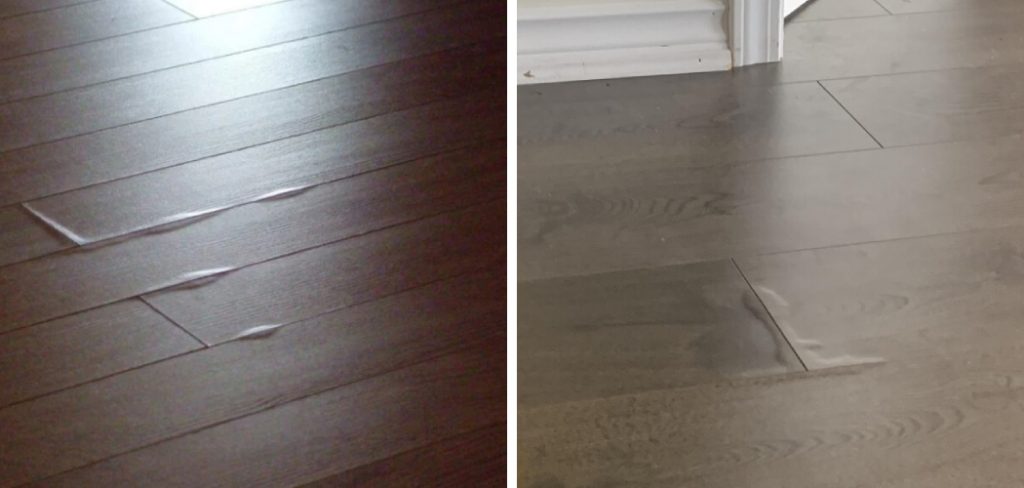
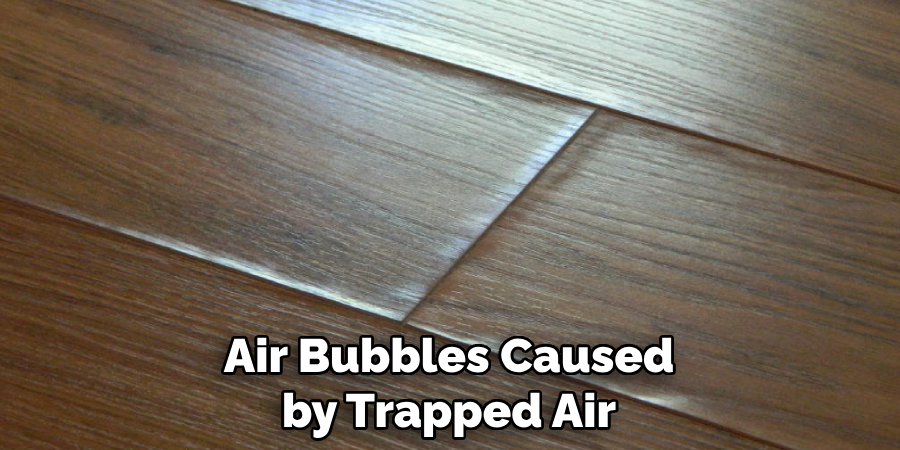
Vinyl flooring bubbles are essentially air pockets that form between the vinyl flooring material and the subfloor beneath it. These bubbles can vary in size, from small, almost imperceptible bumps to larger, more noticeable bulges underfoot. Typically, they result from trapped air, moisture intrusion, or inadequate adhesive during the installation process, but they can also emerge over time due to environmental changes or physical pressure on the flooring.
Bubbles not only detract from the visual appeal of the floor but also signal underlying issues that, if left unaddressed, could lead to further damage or necessitate more extensive repairs. Identifying and addressing these bubbles early on is crucial in maintaining the longevity and appearance of vinyl flooring.
Causes of Vinyl Flooring Bubbles
Vinyl flooring bubbles often originate from a range of factors that impact the integrity and appearance of the material. One primary cause is improper installation, where vinyl sheets or tiles are not correctly adhered to the subfloor, allowing air to be trapped underneath. Moisture plays a significant role as well; excessive humidity or spills that seep beneath the surface can compromise the adhesive, leading to bubble formation.
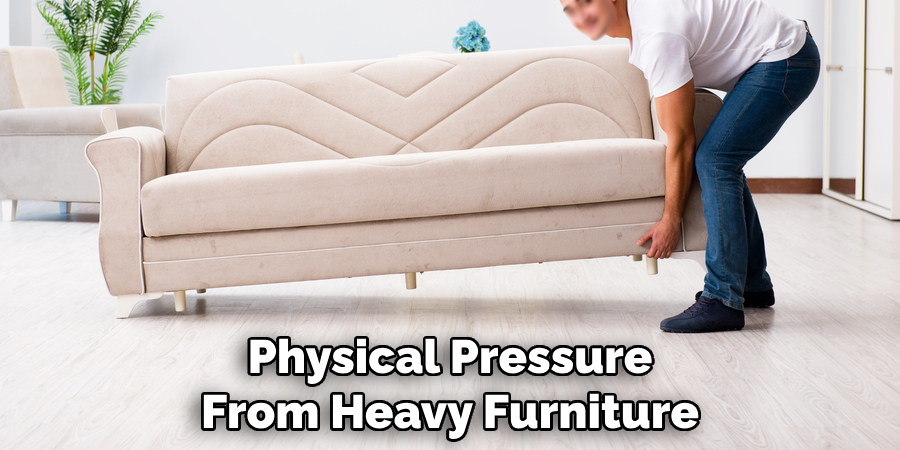
Temperature fluctuations also contribute to this problem, as vinyl expands and contracts with changes in heat, potentially creating gaps that trap air. Additionally, physical pressure from heavy furniture or high foot traffic can stress the vinyl’s surface, exacerbating or creating bubbles. Understanding these common causes is the first step toward effectively addressing and preventing vinyl flooring bubbles, ensuring a durable and visually appealing floor.
Early Signs and Symptoms of Vinyl Flooring Bubbles
Identifying the early signs of vinyl flooring bubbles is key to preventing further damage. Initially, these manifestations may be subtle, appearing as small, raised areas on the floor’s surface. Over time, however, these can expand into more noticeable bulges that may affect the floor’s overall appearance and functionality.
Homeowners might also observe that certain areas of the floor feel softer or more pliable underfoot, indicating the presence of air pockets beneath the surface. In some cases, the edges of vinyl tiles or sheets may start to curl or lift, particularly in areas with high moisture exposure or temperature fluctuations. Early detection and intervention can save considerable effort and expense in repairs, underscoring the importance of regularly inspecting vinyl flooring for any signs of distress.
Inspection and Identification of Bubbles
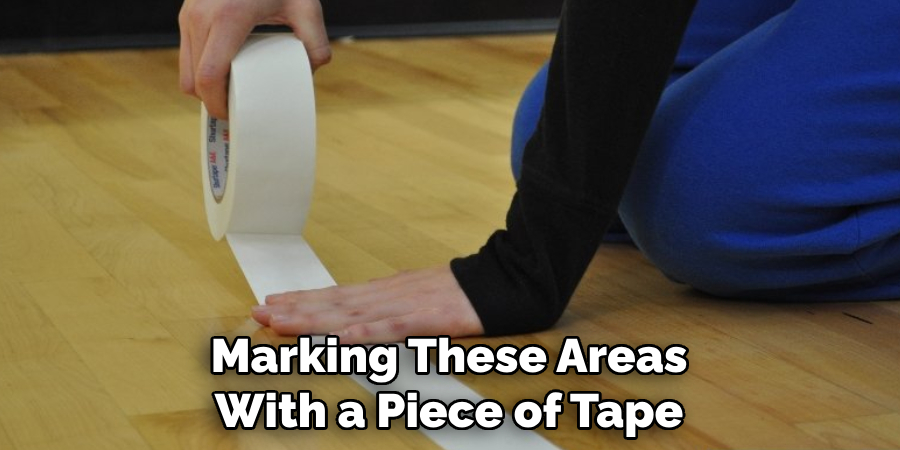
The process of identifying bubbles in vinyl flooring requires a meticulous approach, starting with a thorough inspection of the entire floor area. Look for visible signs of bubbling, such as irregularities on the surface that may indicate trapped air underneath. These can often be spotted by observing the flooring from different angles or by gently pressing down on suspect areas to feel for inconsistencies. It’s also beneficial to inspect areas near windows or doors where moisture or temperature fluctuations are more likely to affect the flooring.
For a more detailed examination, use a straight edge or level to highlight any deviations from the floor’s flat profile, which can reveal smaller, less noticeable bubbles. Marking these areas with a piece of tape can help keep track of them for the following repair steps. Taking the time for a careful inspection will ensure that all problem areas are identified before proceeding with repairs, setting the stage for a successful restoration of your vinyl flooring.
Recognizing Different Types of Bubbles
When addressing vinyl flooring bubbles, it’s crucial to recognize that not all bubbles are the same; they can vary significantly in terms of size, location, and underlying cause. Generally, bubbles can be categorized into two main types: small localized bubbles and large, widespread bubbles.
Small localized bubbles are usually found in specific areas where there might have been a minor error in installation or where a small amount of moisture or air has managed to penetrate the adhesive layer. These bubbles typically do not cover a large area and can often be dealt with individually without the need for extensive repairs.
On the other hand, large, widespread bubbles suggest a more systemic issue with the flooring installation or a significant exposure to moisture or environmental changes. These bubbles are usually indicative of a failure in the adhesive across a larger area and may require more involved repair strategies, potentially including the partial or complete replacement of the vinyl flooring in the affected area.
Understanding the type of bubbles you’re dealing with is essential, as this knowledge directly influences the choice of repair method and the materials required for the task. Next, we will explore effective techniques for repairing both small and large vinyl flooring bubbles, ensuring your flooring returns to its optimal appearance and functionality.
10 Methods How to Fix Vinyl Flooring Bubbles
1. Identify the Cause:
Before diving into repairs, it’s crucial to understand what caused the bubbles. Common culprits include trapped air during installation, adhesive failure, or changes in temperature and humidity. Identifying the root cause will guide you in choosing the most appropriate repair method. For example, air bubbles caused by trapped air can be easily fixed by creating a small puncture with a needle and smoothing out the bubble. However, if the adhesive has failed, you may need to completely replace the affected area. To prevent future bubbles, make sure to properly clean and prepare the area before installation, and avoid exposing the surface to extreme temperature or humidity changes.
2. Loosen the Affected Area:
Carefully lift the edges of the bubbled vinyl using a utility knife or a putty knife. Gently peel back the flooring to expose the substrate underneath. Be cautious not to damage the surrounding flooring during this process.
Once you have exposed the substrate, clean it thoroughly to remove any debris or adhesive residue. This will ensure a smooth and even surface for reinstallation.
If there are any remaining bubbles after cleaning, use a needle or pin to gently pierce them and release any trapped air. Press down on the affected area to flatten it as much as possible.
3. Release Trapped Air:
Once the vinyl is lifted, release trapped air by using a needle or a small pin. Insert the needle into the center of the bubble and slowly press out the air towards the edges. Take your time to ensure thorough removal of air pockets.
To continue ensuring a smooth and professional-looking vinyl installation, it’s important to release any trapped air that may have been created during the lifting process. This step is crucial in preventing unsightly bubbles or wrinkles from forming on your vinyl.
To release trapped air, you can use a needle or small pin. Gently insert the sharp end into the center of the bubble and slowly press out the air towards the edges. You may need to repeat this process multiple times, depending on the size and severity of the bubble.
4. Reapply Adhesive:
If the bubbles were caused by adhesive failure, apply a fresh layer of vinyl flooring adhesive to the substrate using a putty knife. Smooth out the adhesive evenly, ensuring full coverage beneath the vinyl. Press the vinyl back into place, starting from the center and working towards the edges. Use a roller to firmly press down the vinyl and remove any air bubbles. Allow the adhesive to dry completely before walking on the floor.
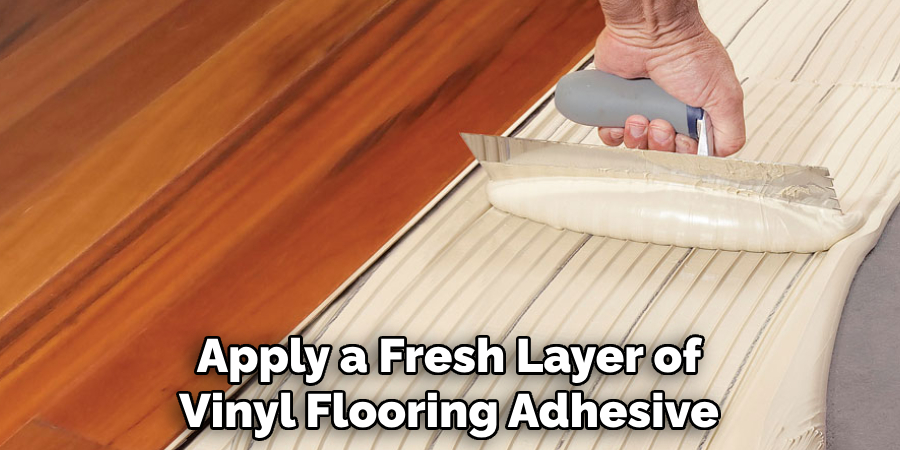
In addition to reapplying adhesive, it is also important to properly clean and prepare the substrate before applying a new layer. This will ensure better adhesion and prevent future bubbling issues. Make sure to remove any old adhesive residue or debris, and clean the surface with a mild soap and water solution. Allow the substrate to dry completely before proceeding with the application of new adhesive.
5. Apply Weight and Pressure:
To ensure proper adhesion, place a heavy object or a stack of books over the repaired area. Leave it in place for at least 24 hours, allowing the adhesive to bond securely with the substrate and the vinyl. This will help prevent any future peeling or lifting of the vinyl.
Also, make sure to apply pressure evenly over the entire surface. This will help spread out the adhesive and create a strong bond between the vinyl and the substrate. You can use a roller or even your hands to gently press down on the repaired area, making sure there are no air bubbles trapped underneath.
In addition to weight and pressure, it is important to allow the repaired vinyl to cure properly. This means avoiding any excess moisture or extreme temperatures for at least 48 hours after the repair has been completed.
6. Use a Hair Dryer or Heat Gun:
For bubbles caused by temperature and humidity changes, use a hair dryer or heat gun to warm the affected area. Apply heat evenly, and as the vinyl becomes pliable, smooth out the bubble by pressing it down with a clean, dry cloth. The heat will reactivate the adhesive, allowing you to fix the problem without having to reapply the entire decal.
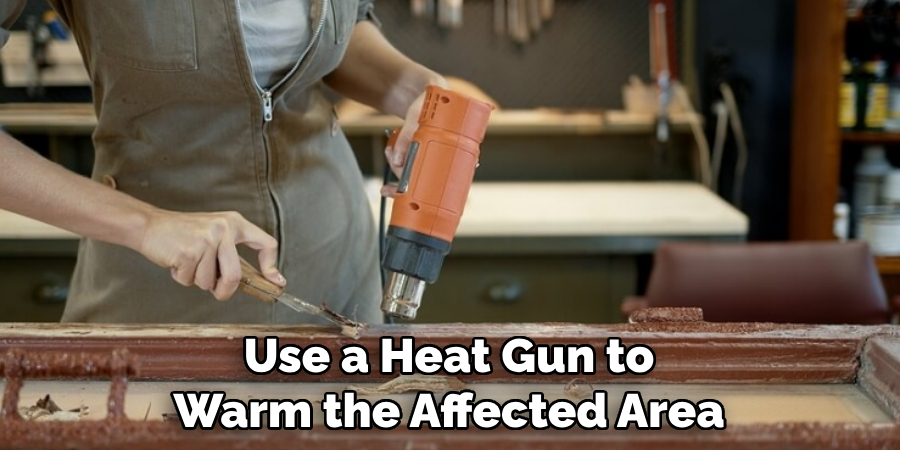
There are a few things to keep in mind when using a hair dryer or heat gun. First, make sure to set it on a low or medium heat setting to avoid damaging the vinyl. You can also use a piece of cardboard behind the vinyl as a buffer to prevent any direct heat from damaging the surface.
Additionally, be patient and take your time when using heat to fix bubbles. Rushing the process can lead to further damage or create more bubbles. Once you have successfully smoothed out the bubble, allow the vinyl to cool down before applying pressure on it.
7. Install Additional Adhesive:
In cases where the existing adhesive has failed, you may need to inject additional adhesive under the vinyl. Lift the edges of the flooring, apply the adhesive with a syringe or squeeze bottle, and press the vinyl back into place. Make sure to wipe away any excess adhesive with a damp cloth and allow it to dry completely.
Once the adhesive has dried, trim off any excess vinyl with a sharp utility knife. This will ensure that the edges are flush and prevent any tripping hazards.
Additionally, you can also use double-sided tape or carpet tape as an alternative method of securing loose vinyl flooring. Simply apply the tape along the edges of the vinyl and press it firmly into place. This is a quick and easy solution that can provide temporary stability until you are able to properly install new adhesive.
8. Replace Damaged Sections:
If the bubble is in a severely damaged area, consider replacing that section of the vinyl. Use a utility knife to cut along the seams or patterns, and install a new piece of vinyl. Ensure proper alignment and adhesion with the surrounding flooring. Again, be sure to thoroughly clean the area before installation.
There are a few options when it comes to replacing damaged sections of vinyl flooring. One option is to buy a replacement piece from the same manufacturer and pattern as your current vinyl flooring. This will ensure a seamless repair that matches the rest of your floor.
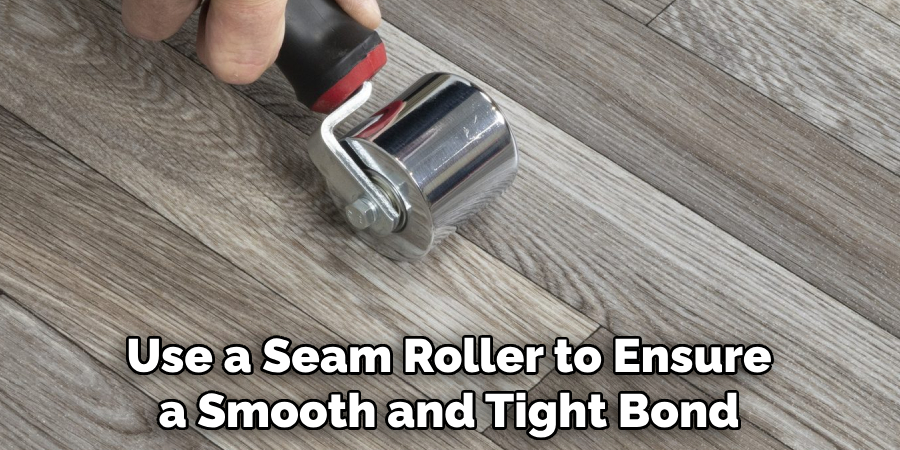
9. Use a Seam Roller:
After repositioning the vinyl, use a seam roller to ensure a smooth and tight bond between the flooring and the substrate. Roll the affected area in different directions to eliminate any potential air pockets or unevenness. This will create a strong bond and prevent any future lifting or shifting of the vinyl. Although you can use a rolling pin as an alternative, a seam roller is specifically designed for this purpose and will provide better results. Additionally, a seam roller can also be used to push out any excess adhesive that may have oozed out during installation.
10. Prevent Future Bubbles:
Implement preventive measures to avoid future bubbles. Ensure proper acclimatization of the vinyl before installation, follow manufacturer recommendations for adhesives and installation methods, and maintain consistent temperature and humidity levels in the space. Consider using underlayment or moisture barriers to protect vinyl from moisture and prevent expansion and contraction. Regularly inspect the flooring for any signs of damage or wear and replace as needed.
When it comes to preventing future bubbles in vinyl flooring, there are a few key steps that should be taken. These include proper acclimatization, following manufacturer recommendations, maintaining consistent temperature and humidity levels, and regularly inspecting the flooring for signs of damage or wear.
Things to Consider When Installing Vinyl Flooring
Along with the above-mentioned steps, here are some additional things to consider when installing vinyl flooring:
- Make sure to properly prepare the subfloor by cleaning and leveling it before installation. Any imperfections or debris on the subfloor can affect the adhesive bond and lead to bubbles.
- Follow manufacturer instructions for handling and storing your vinyl flooring. Improper storage can also affect the adhesive and lead to bubbling.
- When installing, use a high-quality vinyl adhesive that is recommended by the manufacturer. This will ensure a strong bond and prevent any potential issues with bubbles or lifting in the future.
- Take care when moving heavy furniture or appliances onto your new vinyl flooring. Using protective pads or sliders can help prevent damage to the flooring and maintain its integrity.
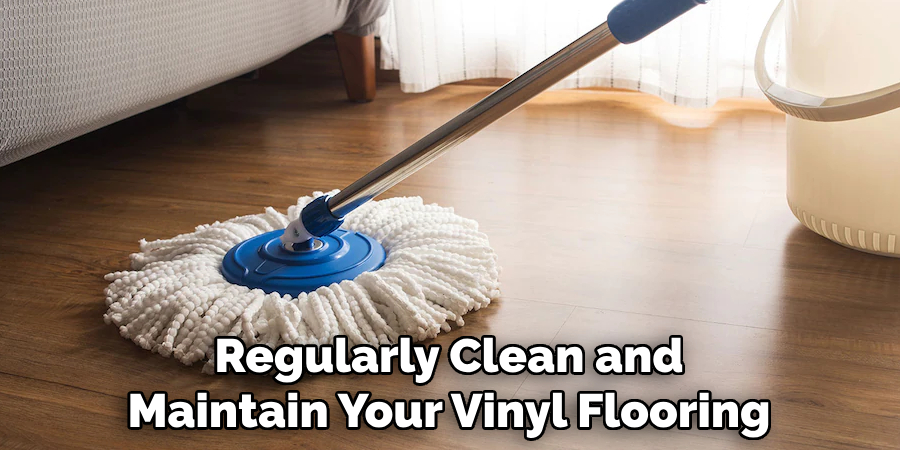
- Regularly clean and maintain your vinyl flooring to keep it in good condition. Avoid using harsh chemicals or abrasive materials that can damage the surface of the vinyl.
By following these steps and considering these additional factors, you can ensure a successful installation of vinyl flooring without any bubbles.
Conclusion
In conclusion, tackling vinyl flooring bubbles is crucial to maintaining the integrity and appearance of your floors. By understanding the causes and types of bubbles, homeowners can effectively address the issue and prevent further damage. Whether it’s small bubbles or larger ones along seams, proper repair techniques involve careful attention to detail and the use of appropriate adhesives and tools.
Moreover, implementing preventative measures such as acclimating flooring properly and ensuring a smooth, moisture-free subfloor can help minimize the risk of bubbles forming in the first place. While some repairs can be done independently, seeking professional assistance may be necessary for extensive damage or installation issues. Hopefully, this article gave you some helpful tips about how to fix vinyl flooring bubbles successfully, so now that you have the proper knowledge on how to get the job done, why not give it a try today?