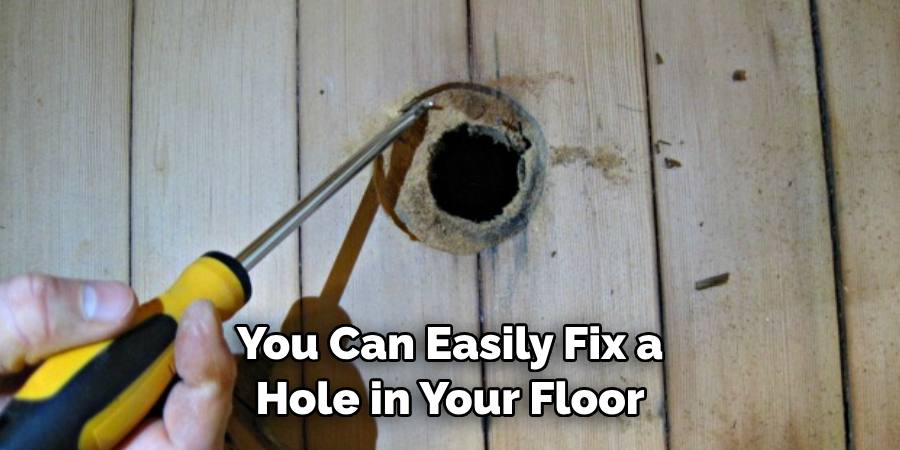
Are you dealing with a hole in your floor and feeling overwhelmed by the repair job ahead? Don’t worry—fixing holes is easier than you think! With some simple tools, materials, and instructions, anyone can patch up their floor to look almost as good as new. In this post, we’ll provide all the information you need to get started on fixing that pesky hole in your floor. Keep reading on how to fix a hole in the floor to learn tips for how to assess and prevent future damage as well as how to properly fix the current issue at hand.

Why Do Holes Form in Floors?
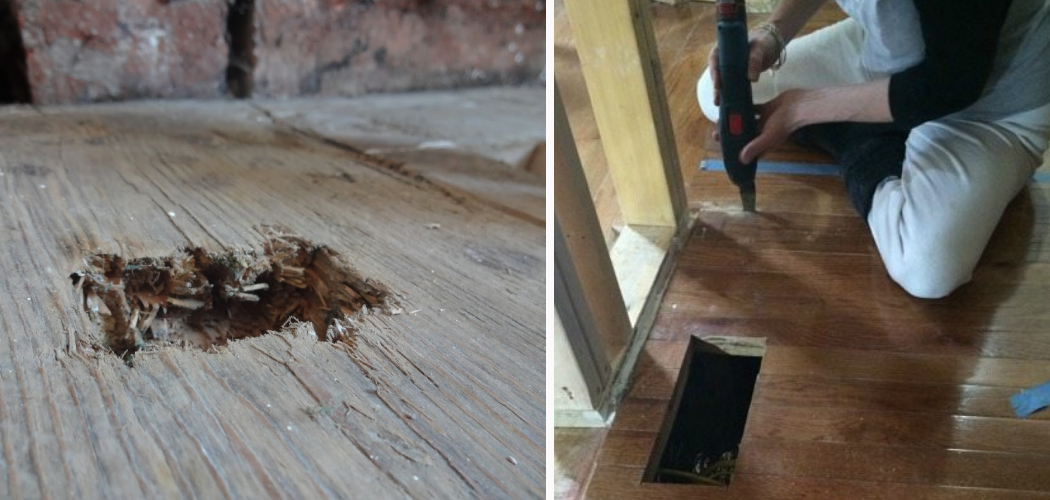
Before we dive into the how-to of fixing a hole in the floor, it’s important to understand why these holes form in the first place. There are several reasons why this may happen, including wear and tear over time, water damage, or even pests. In some cases, the underlying issue isn’t immediately apparent, so it’s important to thoroughly inspect the area before proceeding with the repair.
Needed Tools and Materials
To fix a hole in the floor, you will need some basic tools and materials:
- Utility Knife
- Hammer
- Screwdriver
- Wood Putty or Filler
- Sandpaper
- Replacement Flooring Material (if Necessary)
- Floor Adhesive
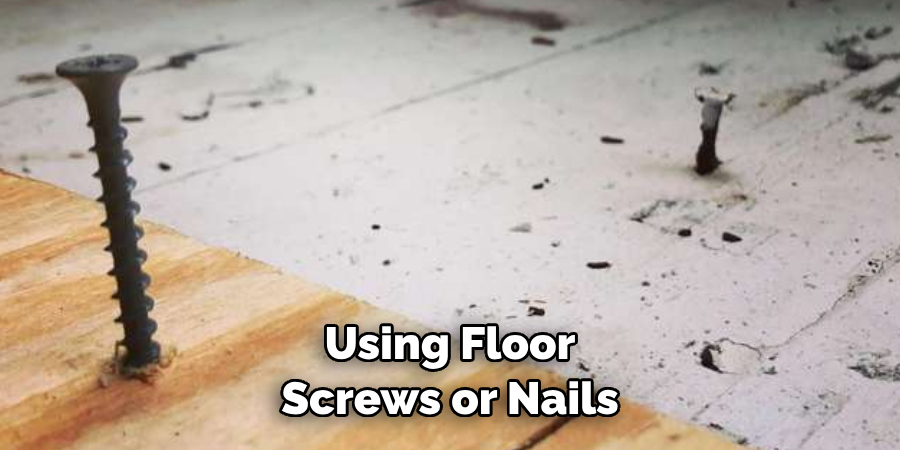
- Floor Screws or Nails
- Measuring Tape
- Protective Gear (gloves, eye protection)
10 Simple Step-by-step Guidelines on How to Fix a Hole in the Floor
Step 1: Prepare the Area
Before starting any repairs, make sure to clear the area of any furniture or objects that may get in your way. If necessary, cover nearby surfaces with a drop cloth to protect them from any potential mess or debris. You may also want to wear protective gear, such as gloves and eye protection. It’s better to be safe than sorry!

Step 2: Remove Any Damaged Flooring
Using a utility knife, cut away any damaged flooring around the hole. Be sure to cut all the way through until you reach the subfloor. Otherwise, the patch you add may not have a stable base to adhere to. If the hole is particularly large, you may need to use a hammer and chisel to remove the damaged section. You want to make sure the hole is clean and smooth before proceeding to the next step.
Step 3: Inspect the Subfloor
Once you’ve removed the damaged flooring, it’s time to inspect the subfloor. Look for any signs of water damage or rotting wood. If you find any issues, such as mold or mildew growth, you will need to address them before proceeding with the patching process. It’s important to have a solid and stable subfloor for the patch to properly adhere to.
Step 4: Cut the Replacement Flooring
If you are using replacement flooring, now is the time to measure and cut it to fit the hole. Use a measuring tape and a utility knife to ensure an accurate cut. If you are using wood flooring, make sure the grain direction matches the existing floor for a seamless repair. But if you are able to salvage the damaged flooring, skip this step and proceed to the next one.
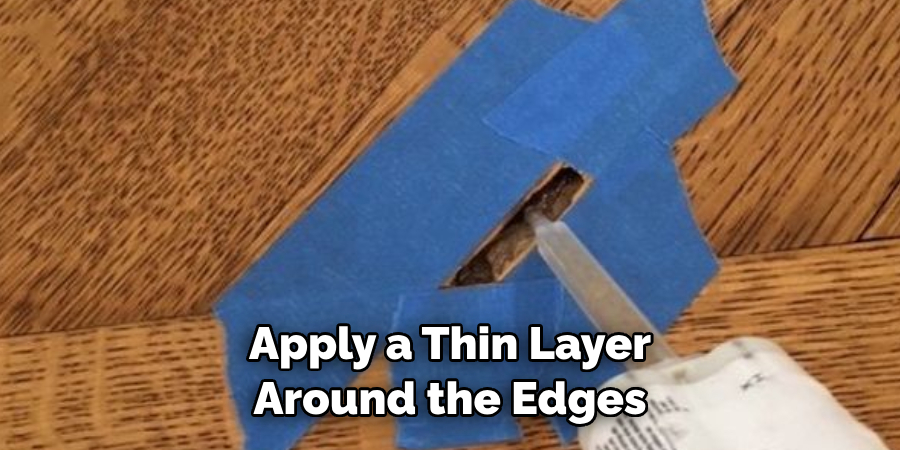
Step 5: Apply Adhesive
Using a floor adhesive, apply a thin layer around the edges of the hole. Make sure to cover all areas where the replacement material will be placed. This will ensure a strong bond between the patch and the existing flooring. You can also apply adhesive to the back of the replacement material for extra stability. It’s important to use a high-quality adhesive that is specifically designed for flooring repairs.
Step 6: Place the Replacement Material
Carefully place the replacement material into the hole, making sure it fits snugly. Use a hammer or a rubber mallet to gently tap it into place. If there are any gaps, fill them in with small pieces of the same material to create a smooth surface. However, if you are using wood putty or filler, apply it at this stage to fill in any gaps and create a seamless appearance.
Step 7: Secure the Patch
Using floor screws or nails, secure the patch in place. Make sure to space them out evenly for maximum stability. If you are using wood flooring, make sure to pre-drill the holes to prevent splitting. You can also use a floor adhesive for added reinforcement. But remember to wipe away any excess adhesive before it dries. It’s important to properly secure the patch to prevent any future issues.
Step 8: Sand the Patch
Once everything is secure, use sandpaper to smooth out any rough edges and make sure the patch is level with the rest of the floor. If you are using wood putty or filler, sand it down to create a smooth and seamless appearance. Take your time with this step to ensure a professional-looking finish. It’s also a good idea to vacuum up any dust and debris before proceeding. You want a clean surface to work on for the next step.
Step 9: Apply Finishing Touches
To make the patch blend in with the rest of the floor, you may need to apply some finishing touches. If you are using wood flooring, stain or paint the patch to match the existing color. You can also use a floor sealant to protect the patch and prevent future damage. If you are using carpet, make sure to properly secure the edges with adhesive or a tack strip. But if you are using tile flooring, apply grout and sealant to ensure a waterproof finish.
Step 10: Let it Dry
Finally, let the patch dry completely before walking on it or placing any furniture back in the area. This may take a few hours or even overnight depending on the materials and adhesive used. It’s important to follow the manufacturer’s instructions for drying times to ensure a strong and lasting repair. It’s also a good idea to avoid getting the area wet for at least 24 hours after the repair is completed.
Following these simple steps on how to fix a hole in the floor, you can easily fix a hole in your floor and restore it to its original condition. Remember to take your time and properly prepare the area before starting any repairs. Always wear protective gear to ensure your safety. With a little bit of effort, you can save yourself the hassle and expense of hiring a professional for this type of repair. So next time you encounter a hole in your floor, don’t panic – you now have the knowledge and skills to fix it yourself! Happy repairing!
Frequently Asked Questions
Q: Do I Need to Hire a Professional for This Type of Repair?
A: It depends on the size and complexity of the hole. If it is a small and simple repair, you can easily do it yourself with the proper tools and materials. However, if it is a larger or more complicated issue, it may be best to consult a professional. They have the experience and knowledge to handle any potential challenges that may arise during the repair process.
Q: What if I Can’t Match the Original Flooring?
A: If you are unable to find an exact match for your existing flooring, consider using a complementary material or creating a unique design. For example, if you have hardwood flooring but can only find laminate as a replacement, you can use a decorative border or create a pattern to make the patch stand out as a deliberate design choice.
Q: How Do I Prevent Future Holes in My Floor?
A: To prevent future damage to your floor, it’s important to identify the cause of the hole. If it was due to water damage, make sure to fix any leaks and properly seal the area. If it was caused by heavy furniture or foot traffic, consider using rugs or furniture pads to protect your flooring. Regular maintenance, such as cleaning and inspecting for any signs of damage, can also help avoid future holes.
Conclusion
In conclusion on how to fix a hole in the floor, repairing a floor can be a daunting process, but it doesn’t have to be. With the right preparation and knowledge, you can make fixing a hole in your floor an easy task. From assessing the damage to choosing the right materials for the job, following these steps will help restore your floor in no time.
Keep these tips handy should a hole ever appear on your floor again and see how quickly and effortless you can make those repairs! And if all else fails, don’t forget that there’s always professional help available too – so don’t give up hope just yet! So go ahead and fix that hole -you’ll be amazed at how quickly and efficiently you can do it with some patience and careful planning. Now get to work and save yourself some money by doing the job yourself!