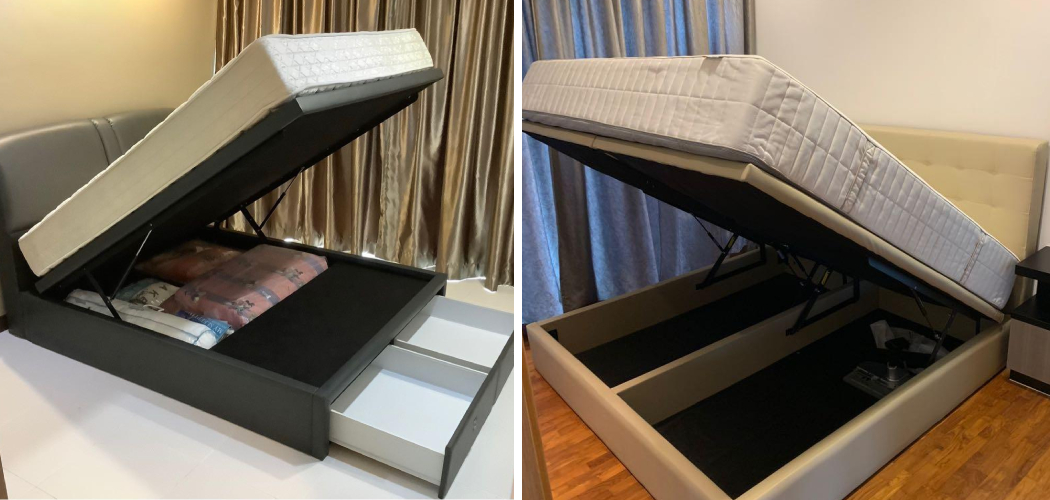
Are you planning to move or redecorate your bedroom? Disassembling a storage bed may seem like a daunting task, but with the right approach, it can be a straightforward and manageable process. A storage bed, with its integrated drawers or compartments, provides excellent space-saving solutions.

However, when it comes time to disassemble it, you need to ensure that you take the necessary steps to prevent any damage and make reassembly easier. In this article, we will guide you through the process of how to disassemble a storage bed.
Providing you with practical tips and techniques to ensure a smooth and efficient dismantling experience. Whether you’re relocating or simply looking to reorganize your bedroom, these step-by-step instructions will help you disassemble your storage bed with confidence and ease.
Importance of Disassembling a Storage Bed
Disassembling a storage bed is an important process that should not be overlooked. Taking the time to properly disassemble your bed will ensure that all of its components remain in good condition, making it easier to reassemble later.
Furthermore, safely taking apart your storage bed will help prevent any unnecessary damage or injuries during the process. With the right tools and guidance, you can easily take apart your storage bed without any issues. By following the steps below, you can quickly and safely disassemble your storage bed in no time.
Furthermore, by disassembling your storage bed, you can easily relocate it to another room or even move it out of the house whenever needed. This is especially helpful if you are looking to move out of your current residence and want to transport your bed with you. Disassembling it beforehand will make this process much easier and simpler than trying to carry a bulky storage bed without taking it apart first.

Additionally, disassembling a storage bed is also helpful for cleaning purposes. Taking the bed apart allows you to easily clean each component separately without having to worry about reaching difficult areas that would otherwise stay dirty if you were unable to access them. This way, you can be sure that your entire storage bed is completely cleaned and free from any dirt or dust buildup.
Benefits of Disassembling a Storage Bed
Disassembling a storage bed can provide several benefits. For one, it makes the bed easier to move. Particularly if you intend to transport the bed or bring it into a new room, disassembling can make the job much simpler than having to lug around large pieces of furniture.
Additionally, disassembling the storage bed may allow for better access to any items stored in the drawers and other compartments under the mattress. Rather than reaching around awkwardly while attempting to find what you need, taking apart the bed can give you full visibility and an easy way to grab your belongings.
Finally, disassembling a storage bed is frequently necessary when trying to repair any issues that might arise over time– such as broken drawer slides, loose support beams or weak points in the frame. Working on a disassembled bed allows you to better inspect each part of it and make necessary repairs that can ensure its long-term durability.

10 Methods How to Disassemble a Storage Bed
Method 1: Gather Necessary Tools
Before you begin disassembling your storage bed, gather the necessary tools to ensure a smooth process. Common tools required may include a screwdriver (both Phillips and flathead), an Allen wrench or hex key set, pliers, a rubber mallet, and possibly a power drill with appropriate bits.
Having these tools on hand will make disassembly easier and more efficient. While you are gathering your tools, also lay out a carpeted or cushioned area where the pieces of bed can be laid out and organized for easier reassembly.
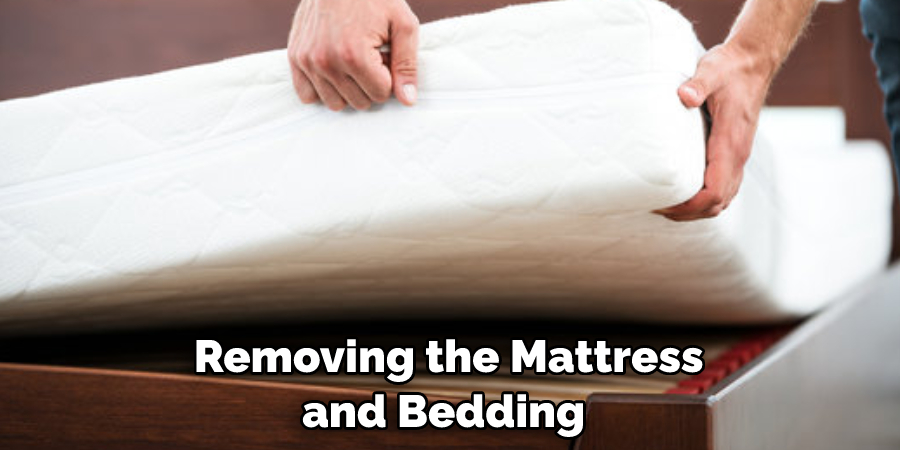
Method 2: Remove the Mattress and Bedding
Start by removing the mattress and bedding from the storage bed. This will provide you with better access to the bed frame and make it easier to disassemble. Set the mattress and bedding aside in a safe and clean area.
Next, use a screwdriver to remove the screws securing the bed frame to the headboard and footboard. Unscrew each one and place the screws in a nearby container. This will ensure that all the screws are maintained together and easier to locate once reassembling time arrives.
Method 3: Empty Storage Compartments
If your storage bed has drawers or compartments, empty them before proceeding with disassembly. Remove any items stored inside and place them in labeled boxes or bags for easy organization and retrieval later. Also, check for any items that may have been left behind by previous owners.
After the compartments are empty, remove the drawer faces if necessary and unscrew or unclip them from the bed frame. While you have the drawers out, inspect them for any worn or damaged pieces that may need to be replaced.
Method 4: Locate and Remove Bed Slats or Support System
Next, locate the bed slats or support system that provides the foundation for the mattress. In most cases, these slats can be easily lifted or removed by releasing the locking mechanisms or lifting them out of their designated slots.
Carefully set the slats aside for reassembly later. After the slats are removed, you will likely be able to see the support structure for the bed frame. If necessary, use a screwdriver or other tools to remove the bolts, screws, and other fasteners that secure this structure in place.
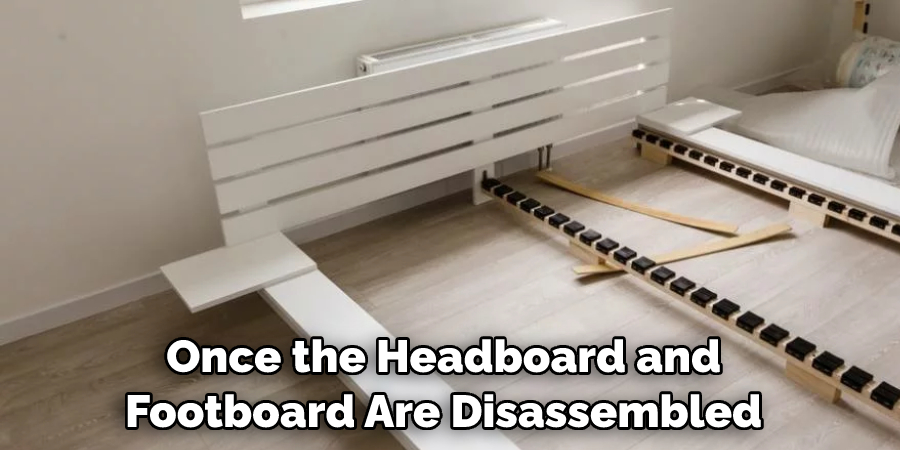
Method 5: Disassemble Headboard and Footboard
Depending on the design of your storage bed, the headboard and footboard may need to be disassembled separately.
Look for any visible screws, bolts, or connectors that hold these components together. Use the appropriate tools to remove them, ensuring that you keep track of the hardware for reassembly. Once the screws, bolts, or connectors have been removed, carefully lift the headboard and footboard away from the bed frame.
Method 6: Detach Side Rails or Panels
Once the headboard and footboard are disassembled, focus on detaching the side rails or panels. Examine the joints where they connect to the headboard and footboard, and locate any screws, bolts, or connectors that hold them in place.
Remove the hardware and gently separate the side rails or panels from the rest of the bed frame. Depending on the model, you may need to detach additional hardware like support beams or crossbars.
Method 7: Take Apart Storage Mechanisms
If your storage bed features specialized mechanisms for accessing the storage compartments, such as hydraulic lifts or sliding panels, you may need to disassemble these components individually.
Follow the manufacturer’s instructions or consult the bed’s manual to properly disengage and remove these mechanisms. To avoid breaking or damaging any parts, take care when removing the components. Place them on a clean and flat surface to prevent misplacement or damage.
Method 8: Organize and Label Hardware
As you disassemble the storage bed, it is essential to keep track of all the screws, bolts, and connectors you remove. Place them in labeled bags or containers and clearly indicate which part of the bed they belong to. This organization will save you time and confusion during reassembly.
You may even want to take a picture of the bed in its original state and mark each piece with a sticker or number as you remove it. This way, when you are ready to reassemble the bed, you will have a handy visual guide to refer to. Doing this before you begin disassembling the bed will help you put it back together more quickly and easily.
Method 9: Protect Fragile or Delicate Components
If your storage bed has any delicate or fragile components, such as decorative moldings or glass panels, take extra care when disassembling them. Wrap them in protective materials, such as bubble wrap or blankets, to prevent any damage during the disassembly process. When possible, remove the components before attempting to disassemble the bed frame.
If you must take apart the frame first, be sure to lift and carry the components with both hands to avoid any accidental dropping. When reinstalling, make sure to secure these components in place before continuing on with the rest of the assembly. With a little extra care, these fragile components should remain in perfect condition.
Method 10: Store Disassembled Parts Securely
Finally, once all the components of your storage bed are disassembled, store them securely to avoid loss or damage. Place smaller parts in labeled bags or containers and stack larger pieces together in a designated area. Ideally, store the disassembled bed frame and components in a clean and dry space until you are ready for reassembly.
If you are taking apart a storage bed frame for relocation, wrap the pieces in bubble wrap and use packing tape to secure them before placing them in a box or other secure container. This will help keep the components in good condition during transport and make the reassembly process easier.
Conclusion
Now that you know the process of how to disassemble a storage bed, you can easily pack and move your bed if needed. With the tips provided, this task is not as difficult and intimidating as when you first began. Whether you plan to store it or transport it from location to location, breaking down your storage bed is possible in just a few steps!
Taking apart a storage bed may seem daunting at first but once done correctly, you will realize it’s quite simple. So don’t let this task intimidate! Grab yourself some tools and tackle the project with confidence knowing how to properly do it now. Once complete, you will not have to worry about feeling stressed or unsure of what needs to be done! Begin disassembling your storage bed for peace of mind today!