

Designing a radiant floor heating system may seem like an intimidating task, but with the right knowledge and expertise, it can be surprisingly simple. With this blog post on how to design radiant floor heating systems, we will cover all of the crucial steps you need to take in order to effectively design your own radiant floor heating system.
From deciding on the best type of heat source to installing the appropriate insulation and piping materials, we’ll make sure you have all of the information you need to create a safe, energy-efficient space for your home or office. Read on as we break down exactly what is essential for designing your own radiant floor heating system!
Necessary Tools and Materials
Given below are some of the necessary tools and materials that would be required while designing a radiant floor heating system.
• Heat Source:
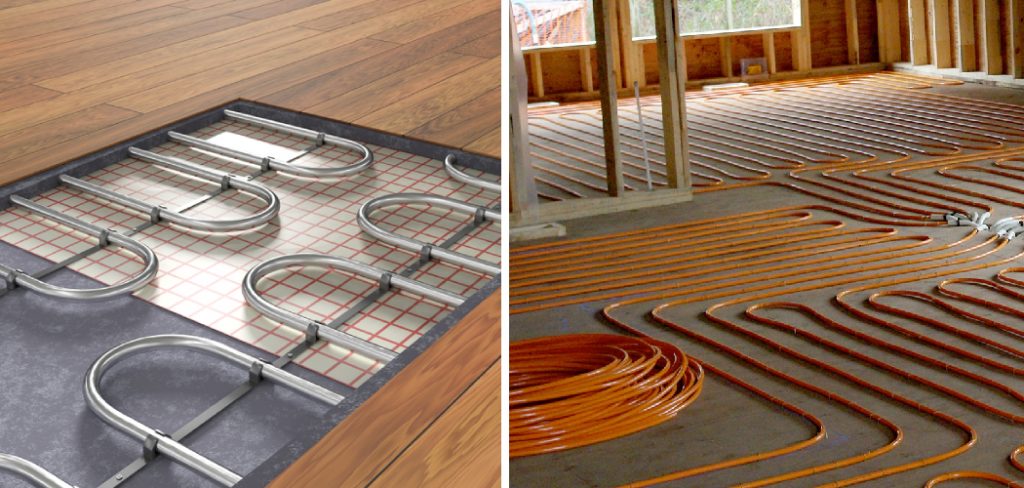
There are three types of heat sources typically used for radiant floor systems—electric, hydronic, and air-source. Each has its own set of advantages and disadvantages, so it’s important to do your research before deciding which is right for your space.
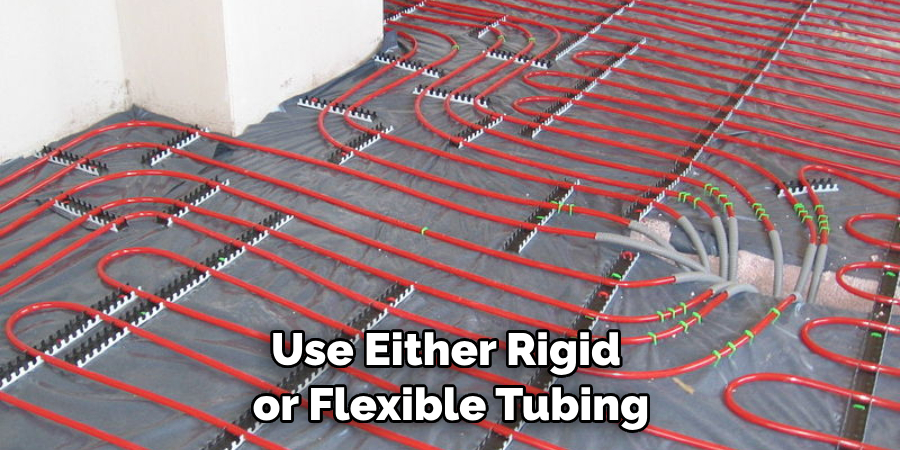
• Piping:
Radiant floor systems use either rigid or flexible tubing, depending on the type of heat source you choose. Flexible tubing is more forgiving in terms of installation, and its flexibility allows it to easily conform to the shape of your floor.
• Insulation:
Insulating your radiant floor system is essential for keeping energy costs low and maximizing efficiency. The type of insulation you use will depend on the type of heat source you’re using, but it is important to make sure that it is properly installed.
• Heat Distribution:
Once the heat source, piping, and insulation have been installed, you’ll need to decide on a method of distributing the heat throughout your space. This can be done using either a joist system or an in-slab system.
Step-by-step Guidelines on How to Design Radiant Floor Heating Systems
Step 1: Determine the Size
This will help you determine how much power is needed and how large of a radiant floor system you’ll need. This step is essential for designing a system that can efficiently heat your entire space. If you’re unsure of how to calculate this, your local HVAC expert will be able to assist.
But, as a general rule of thumb, you’ll want to select a heat source that is capable of providing 1-2 watts per square foot of floor space. This rule of thumb will help you ensure that your space is heated evenly and efficiently.
Step 2: Choose the Best Heat Source for Your Space
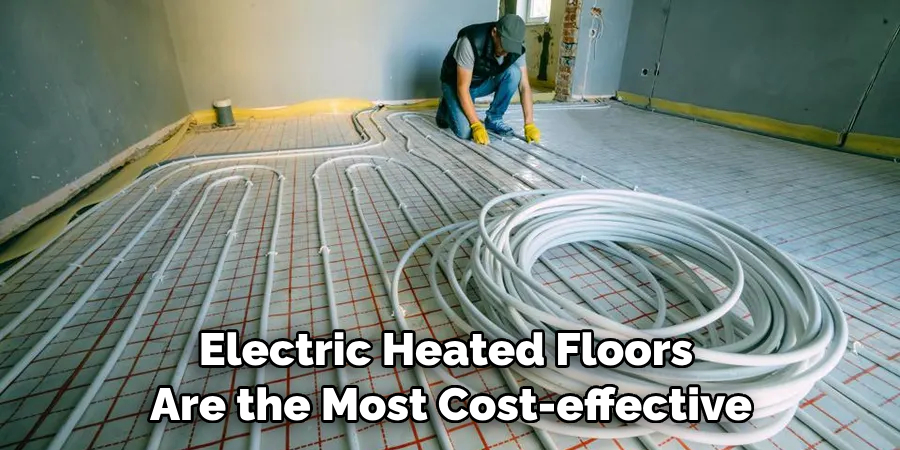
Once you know how much power is required, decide which type of heat source will work best for your space—electric, hydronic, or air-source. But, as a general rule of thumb,t electric heated floors are the most cost-effective option for smaller spaces.
This is due to the fact that electric systems can be installed without any additional pipework or ventilation. It’s also a good option for spaces that are prone to freezing temperatures as electric systems can be turned off when not in use.
Step 3: Calculate the Heat Loss
The heat loss of your space will need to be calculated in order to properly size your system and ensure that it provides enough warmth. But, since this requires a bit of math, you may want to consult a professional or use a heat loss calculator online.
The results of this calculation will be used to determine the size of your system and its power requirements. This is an important step in ensuring that your radiant floor system will provide enough heat to keep you warm and comfortable.
Step 4: Design the Piping Layout
Now that you have all of the necessary information about your space, use a CAD program or manual drawing tool to design a piping layout that suits your needs. This layout will include the main supply and return pipes, as well as any necessary branches to reach different areas or zones.
It’s important to make sure that you don’t take any shortcuts when designing your piping layout as this could affect the efficiency of your system.
Step 5: Select Insulation Materials
Choose insulation materials that are appropriate for the type of heat source you’ve chosen and ensure that they are properly installed. It’s important to make sure that you are using the right materials, as this can drastically affect how well your system performs. But, if you’re unsure of which type you should use, your local HVAC professional can help.
Step 6: Install the Heat Source
Carefully follow all manufacturer’s instructions when installing your desired heat source. It’s important to make sure that it is properly installed and working correctly in order for your system to function as intended. If you are unsure of how to install your heat source, consult a professional.
Step 7: Lay Out The Piping Layout
The pipe may be either rigid or flexible, depending on the type of heat source used. It is important to ensure that it is correctly laid out in order to get maximum efficiency from your system. But, if you are unsure of how to lay out the piping, consulting a professional is recommended.
This will help ensure that the pipe is installed in the most effective way possible. If you decide to go this route, make sure that the professional has experience in radiant floor systems. But, if you feel confident about your abilities, laying out the piping is not that difficult and can be done without professional assistance.
Step 8: Test For Leaks
Check for any leaks or air pockets in the piping layout using a pressure tester before proceeding with the installation. It’s important to make sure that the system is leak-free in order for it to work correctly.

If you find any leaks during your testing, it’s best to fix them before continuing. However, if you’re unable to do this yourself, it may be best to consult a professional. This will help ensure that your system is working correctly and efficiently. If everything checks out, you can move on to the next step.
Step 9: Connect the System to Power Supply
Make sure to connect the system to your power supply according to all safety guidelines. This is an important step, as it ensures that the system will have enough power to properly heat your space.
But, if you are unsure of how to connect the system to the power supply, consult a professional. It’s best to have an experienced electrician do this part as it can be dangerous if done incorrectly.
Step 10: Install the Insulation
Install insulation materials as per the manufacturer’s instructions and ensure that they are properly fitted. But, it’s important to make sure that the insulation is installed correctly in order for your system to be as efficient as possible. So, if you’re unsure of how to do this properly, consult a professional. It’s best to have an experienced HVAC expert do this part, as it can be dangerous if done incorrectly.
Step 11: Set the Heat Distribution System
Once everything is properly installed, you can now set up your heat distribution system using either a joist or in-slab design. This will help evenly distribute heat throughout the space. Always make sure to follow the manufacturer’s instructions when setting up your system. This will help ensure that your system is working properly and efficiently. But, if you’re unsure of how to do this, consulting a professional is recommended.
Creating a radiant floor heating system may sound complicated, but with these simple steps, it doesn’t have to be! With proper planning and research, designing a safe and energy efficient system is possible for any homeowner or business owner. If you follow this guide, you’ll have all the necessary information to create a successful radiant floor heating system. Good luck!
Frequently Asked Questions
Q1: What is the Best Type of Heat Source for a Radiant Floor Heating System?
A1: The best type of heat source will depend on the size of your space and your budget. Electric, hydronic, and air-source are all viable options for radiant floor heating systems.
Q2: What Insulation Should I Use?
A2: The type of insulation you use will depend on the type of heat source you choose. It’s important to make sure that the insulation is properly installed in order to maximize efficiency and keep energy costs down.
Q3: How Do I Set Up My Heat Distribution System?
A3: You can set up your heat distribution system either using a joist or an in-slab design. This will help evenly distribute heat throughout the space. By following this guide on how to design radiant floor heating systems, you’ll have all the necessary information for a successful installation.
Q4: Are There Any Safety Considerations to Keep in Mind?
A4: Yes, when designing a radiant floor heating system it is important to adhere to all safety guidelines and consult an expert if needed. Make sure to always use the correct tools and materials for installation and ensure that everything is properly connected to your power supply.

Conclusion
To sum up, on how to design radiant floor heating systems, designing radiant floor heating systems correctly requires careful planning and thought. Consideration of what type of flooring material is being used, the current insulation system in place, as well as space and cost constraints, are essential to ensure that your design can meet its goals.
To get a better idea of optimal designs for radiant heating systems, consult professionals with years of experience or research online resources. Cold floors should soon become a thing of the past! Design your radiant floor heating system today to enjoy the warmth all winter long.