
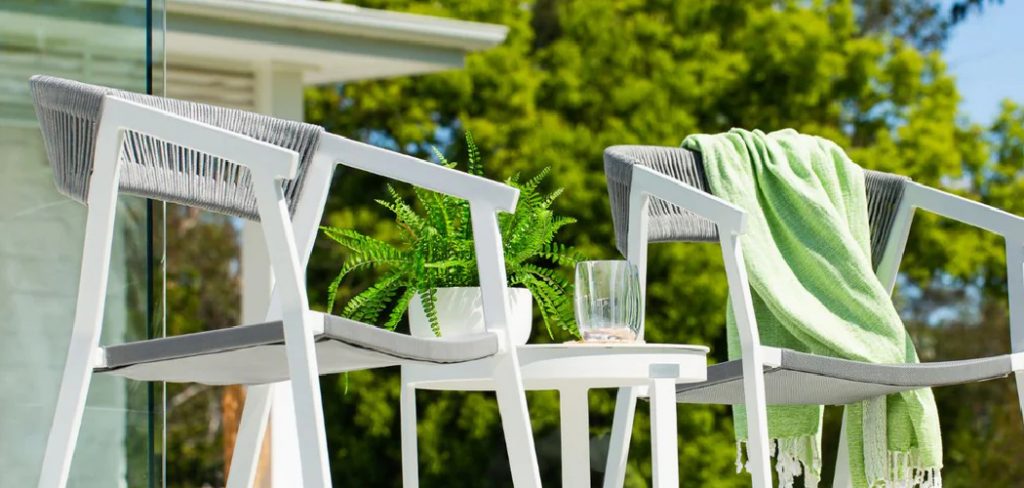
Are you tired of your old, boring-looking chairs? Are you hosting a party and want to spruce up your dining area without using chair covers? If so, then this guide is for you!
How to decorate chairs without chair covers can create a unique and personalized look for any space. Whether you’re preparing for a special event, updating your dining room decor, or looking to add a touch of creativity to your home, there are numerous stylish alternatives to consider. The possibilities are endless, from employing vibrant fabrics, ribbons, and sashes to adding floral decorations, cushions, and DIY embellishments. These alternatives allow for greater expression of personal style, reduce costs, and minimize waste.
Creativity and resourcefulness allow you to transform ordinary chairs into stunning centerpieces that complement your overall decor theme.
What Will You Need?
Before we get into the different ways to decorate chairs, let’s go over some of the essential supplies you’ll need for these DIY projects:
- Chairs: This may seem obvious, but it’s essential to choose sturdy, good-condition chairs.
- Fabrics: The type of fabric you choose will depend on your personal preference and the style you’re trying to achieve. Some popular options include satin, organza, tulle, lace, and burlap.
- Ribbons and Sashes: These can add a touch of elegance and color to any chair. Mix and match different textures, widths, and colors for a unique look.
- Florals: Adding flowers to your chairs can create a beautiful and natural feel. Depending on your budget and preference, you can use fresh or artificial flowers.
- Cushions: Cushions add an extra layer of comfort for your guests and can also be used as decorative elements. Choose cushions that complement your chosen fabrics and colors.
- Embellishments: This includes items like buttons, beads, sequins, feathers, and other decorative accessories that you can use to personalize your chairs.
Once you have these supplies, you’re ready to start decorating!
9 Easy Steps on How to Decorate Chairs Without Chair Covers
Step 1. Clean and Prepare the Chairs
Before diving into the decorating process, starting with clean and well-prepared chairs is crucial. Begin by inspecting each chair for any visible dirt, dust, or grime that could affect adhesion or the overall look of your decorations. Use a gentle cleaner appropriate for the material of your chairs—wood, metal, plastic, or fabric—and a soft cloth to wipe them down thoroughly. Make sure to reach into crevices and around chair legs to ensure all areas are spotless.

Consider using a mild soap solution followed by a clean rinse with water for any stubborn stains or buildup. Once cleaned, allow the chairs to dry completely to prevent any dampness that could compromise the success of your decorations. Proper preparation enhances the aesthetic appeal and extends the longevity of your decorations by providing a smooth and stable surface for embellishments to adhere to.
Step 2. Choose Your Decor Theme
Deciding on a decor theme is a crucial step that will guide the rest of your decorating process. Consider the event or setting where the chairs will be used, whether it’s a wedding, birthday party, or a simple gathering. Your theme can be inspired by the color palette, season, fabric textures, or even specific motifs or patterns. For instance, a rustic theme might incorporate burlap and lace, while a modern theme could utilize sleek ribbons in monochrome colors.
Once you have decided on a theme, select your materials accordingly, ensuring they complement each other and the overall ambiance you wish to create. Having a clear vision from the outset streamlines the decorating process and ensures that every element comes together to form a cohesive look.
Step 3. Measure and Cut Your Fabric or Ribbons
Once you have your theme in mind and the necessary materials gathered, the next step is to measure and cut your chosen fabric or ribbons to size. Start by determining how you plan to incorporate these materials onto the chairs. For example, if you’re draping fabric over the chair backs, measure the width and length you desire, allowing extra for any pleating or draping effects. Similarly, if you’re using ribbons to tie a decorative bow or wrap around chair legs, measure the sections needing embellishment and cut slightly longer pieces to ensure you have enough for tying or securing.
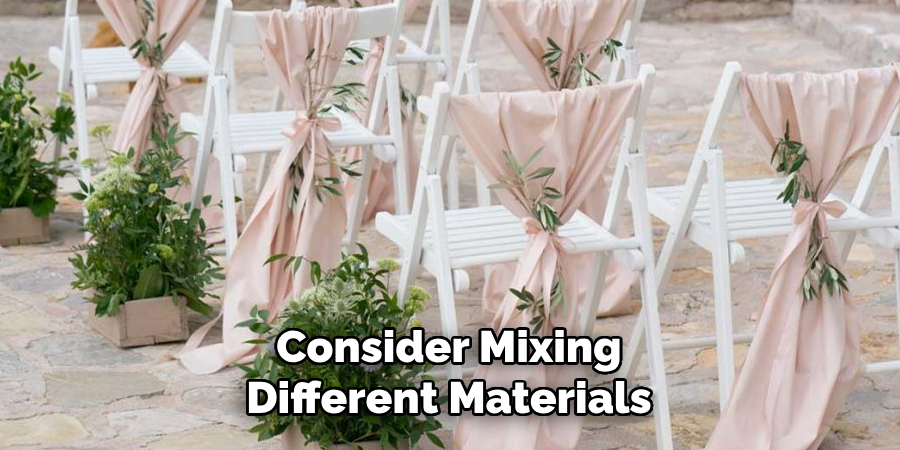
Consider mixing different materials or colors for added depth and texture to your design. Precise measurements and cuts will make the decorating process smoother and help achieve a polished and organized appearance, reinforcing the theme and style you’re aiming for.
Step 4. Attach Ribbons, Fabrics, or Other Materials
With your fabrics and ribbons cut to size, it’s time to attach them to your chairs. Start by draping your fabric over the chair back or wrapping around the seat or legs as desired. Secure them using safety pins, fabric glue, or discreet stitches, depending on the fabric type and intended use. If you’re using ribbons, tie them in bows or knots to hold the fabric in place, or use them as additional embellishments by wrapping them around the chair stems or backs.
Adjust and smooth the fabric and ribbons to avoid wrinkles and ensure they hang evenly. For added stability, consider using double-sided tape or small clips to keep everything securely in place. Stepping back periodically to assess the appearance from different angles will help you achieve a balanced and aesthetically pleasing result.
Step 5. Add Floral Accents
Incorporating floral accents into your chair decorations can add a fresh and elegant touch that complements a variety of themes. Decide whether you’d like to use fresh flowers, which offer a natural beauty and fragrance, or artificial ones that provide longevity and flexibility. Begin by selecting flowers that match your chosen color scheme or event theme. Using floral wire, ribbon, or adhesive hooks, you can attach small bouquets or individual blooms to the chair backs or sides.

For a more integrated look, weave flowers into the fabric or ribbons already attached to the chairs. Ensure each floral piece is securely fastened to avoid shifting during the event. Floral accents bring a vibrant and organic element to your chair decor, enhancing the overall ambiance and leaving a lasting impression on your guests.
Step 6. Incorporate Cushions
Adding cushions can elevate the comfort and style of your chair decorations, making them more inviting for guests. Choose cushions that fit the size and shape of your chairs, ensuring they do not overwhelm the seating area. Consider patterns, colors, and textures that align with your overall decor theme to complement the existing embellishments. Once selected, position the cushions securely on the seats. Use cushion ties or discreet stitching to fix them in place, particularly if there’s a risk of slippage or frequent movement during the event.
Step 7. Personalize with Name Tags or Initials
Adding personalized name tags or initials can give your chair decorations a custom and refined look, perfect for events such as weddings or formal dinners. Begin by choosing a style for your name tags—options include elegant calligraphy, embossed tags, or even wooden cutouts. Match the design choice with the overall theme of your decor to keep the aesthetic cohesive. Attach these tags to the top or side of the chair using ribbon, twine, or small clips. Ensure they are securely fastened and easily readable to enhance the seating arrangement. Personalizing each chair brings a thoughtful and unique touch to your event and assists guests in finding their designated seats, adding an element of organization and personalization to the occasion.
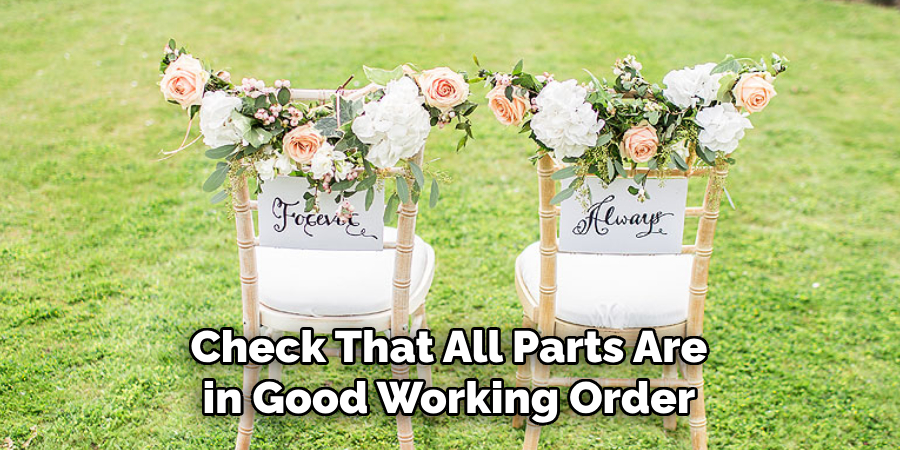
Step 8. Include Lighting Elements
Lighting can dramatically transform the ambiance of your event and enhance the overall aesthetics of your chair decorations. Consider incorporating elements like fairy lights, LED strips, or small lanterns. Begin by choosing lighting that complements your theme—soft, warm lights work well for intimate, romantic settings, while colorful LEDs may suit more vibrant celebrations. Attach the lights discreetly around the chair frames or loop them through the fabric or ribbons. Ensure that all lighting elements are securely fastened, and check that all parts are in good working order before the event begins.
Step 9. Final Touches and Adjustments
With all decorative elements in place, it’s time to assess the overall look and make any final adjustments. Walk around the venue to evaluate each chair from various angles and consider the flow of the setup. Smooth any wrinkles in the fabric, adjust ribbon ties for evenness, and ensure that floral accents and lighting are securely attached and positioned correctly. Pay attention to small details, such as providing the name tags face outward and are easily readable. This is also the moment to check for any safety concerns, such as ensuring there are no loose wires or sharp edges that could cause discomfort or harm to guests.
By following these steps and incorporating your creativity and personal touches, you can transform plain chairs into stunning decorative pieces that elevate the overall atmosphere of your event.
Conclusion
To conclude, how to decorate chairs without chair covers offers a wide range of creative possibilities that can suit any event style or theme.
By thoughtfully combining elements such as fabrics, ribbons, floral accents, cushions, personalized name tags, and lighting, you can transform standard seating into visually appealing features of your venue. The key is to maintain a cohesive look throughout by selecting complementary colors and materials and by ensuring each decorative element is securely attached and maintains its intended position during the event. This approach provides a unique aesthetic and showcases your personal touch, creating a memorable experience for your guests.
Embrace the opportunity to innovate and let your imagination guide the transformation of your chairs into captivating focal points.