Welcome, homeowners, to our latest blog post on water heater maintenance! Are you tired of dealing with a faulty or malfunctioning thermocouple in your water heater? Look no further because we have all the tips and tricks you need to know to keep this essential component running smoothly. Your water heater is a crucial appliance in your home, providing hot water for cooking, cleaning, and bathing.

However, many homeowners need to pay more attention to regular maintenance on their water heaters, which can lead to issues such as a dirty or damaged thermocouple. Don’t worry; we’ll guide you through how to clean thermocouple on water heater so that your water heater functions efficiently once again. Prepare for helpful information that will save you time and money in the long run!
Necessary Items for Cleaning Your Thermocouple
Before we dive into cleaning your thermocouple, let’s first gather all the necessary items you will need for this task. These items are easily accessible and inexpensive, making it a cost-effective solution to maintaining your water heater.
- Screwdriver (to remove the access panel)
- Fine-grit sandpaper or emery cloth
- A small brush (such as a toothbrush)
- White vinegar or lemon juice
- Clean cloth or paper towel
10 Steps on How to Clean Thermocouple on Water Heater
Now that we have all the necessary items, it’s time to roll up our sleeves and get to work! Follow these simple steps to clean your thermocouple effectively:
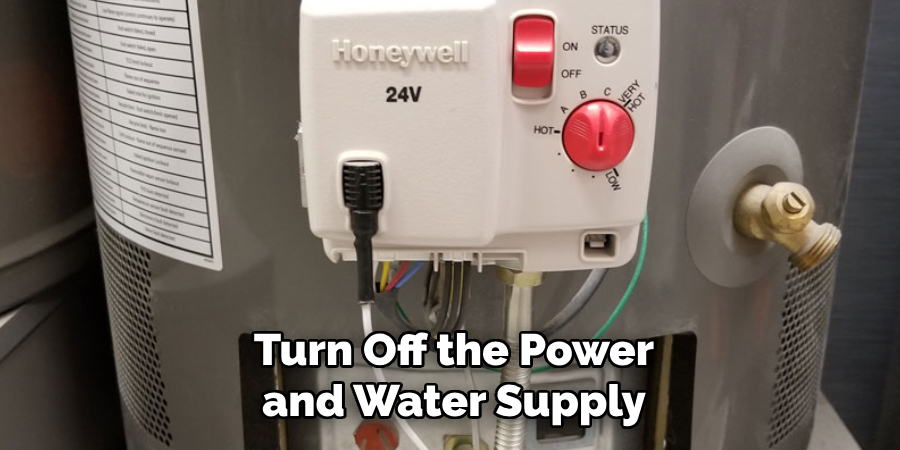
Step 1: Turn off the Power and Water Supply
Before starting maintenance work on your water heater, turn off the power and water supply. This will ensure your safety and prevent any potential accidents. The power supply can be turned off by switching the circuit breaker or unplugging the water heater.
Step 2: Locate the Access Panel
Locate the access panel on your water heater. It is usually located near the bottom of the tank and can be removed using a screwdriver. Keep all the screws in a safe place to avoid losing them.
Step 3: Remove the Thermocouple
Once the access panel is removed, you will see the thermocouple attached to the gas control valve. Gently remove it from its position by unscrewing it using an adjustable wrench or pliers. Be careful not to damage any other components while doing this.
Step 4: Clean the Thermocouple Tip
Using a fine-grit sandpaper or emery cloth, gently clean the thermocouple tip to remove any built-up residue. This residue can interfere with the thermocouple’s ability to detect temperature changes and send signals to the gas valve.
Step 5: Remove Any Debris
Check the surrounding area for any debris or particles that may have accumulated. Use a small brush, such as a toothbrush, to remove these particles and ensure the proper functioning of the thermocouple.
Step 6: Dip in Vinegar or Lemon Juice
To further clean the thermocouple tip and remove any stubborn residue, dip it in a bowl of white vinegar or lemon juice for 10-15 minutes. These acidic solutions will help dissolve any mineral deposits or buildup.
Step 7: Wipe Clean
After soaking, remove the thermocouple from the solution and wipe it clean using a cloth or paper towel. Dry it thoroughly before reattaching it to the gas control valve.
Step 8: Check for Any Damage

Now is an excellent time to inspect the thermocouple for any signs of damage. If you notice any cracks, bends, or other visible damage, it may be time to replace the thermocouple.
Step 9: Reattach the Thermocouple
Once the thermocouple is clean and dry, reattach it to the gas control valve by screwing it back in. Make sure it is securely attached and not loose.
Step 10: Turn on the Power and Water Supply
Finally, turn on the power and water supply to your water heater. Check for any leaks or malfunctions before using hot water again. Congratulations, you have successfully cleaned your thermocouple!
Congratulations! You have successfully cleaned your thermocouple and restored the efficient functioning of your water heater. Performing this maintenance task at least once a year is recommended to prevent any future issues. Additionally, regularly check for any signs of damage or malfunction and address them promptly.
8 Things to Avoid for a Clean and Functional Thermocouple
To avoid constantly having to clean your thermocouple, here are some tips to ensure its longevity and functionality:
1. Avoid Touching the Thermocouple Tip With Your Fingers
The oils and debris from your fingers can interfere with the thermocouple’s ability to detect temperature changes. Always use a cloth or paper towel when handling the tip.
2. Do Not Over-Tighten the Thermocouple
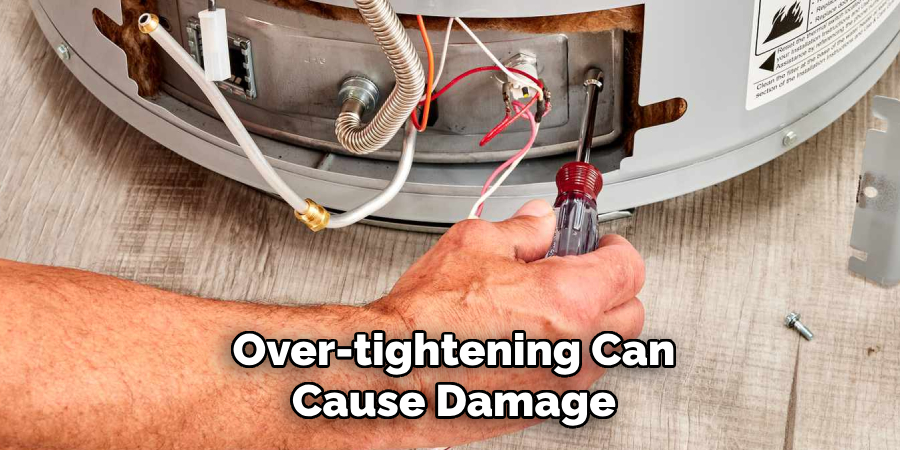
Over-tightening can cause damage to the thermocouple, leading to malfunctioning. Use just enough pressure to secure it in place.
3. Do Not Bend the Thermocouple
Bending the thermocouple can break its internal wiring, rendering it useless. Be careful when handling and avoid any bending.
4. Keep the Area Around the Thermocouple Clean
Regularly check and clean the area around the thermocouple to prevent any debris or buildup from affecting its function.
5. Avoid Excessive Heat Exposure
Exposing the thermocouple to excessive heat can damage it and reduce its efficiency. Keep it away from sources of heat such as flames or direct sunlight.
6. Do Not Expose the Thermocouple to Moisture
Water and moisture can corrode the thermocouple, leading to malfunctioning. Keep it dry at all times.
7. Avoid Using Abrasive Cleaners
Harsh chemicals and abrasive cleaners can damage the thermocouple’s material and affect its function. Stick to gentler cleaning solutions such as vinegar or lemon juice.
8. Do Not Ignore Signs of Damage
If you notice any signs of damage or malfunction, do not ignore them. Promptly address any issues to prevent further damage and ensure the safety and efficiency of your water heater. Regular maintenance and proper handling can go a long way in keeping your thermocouple clean and functional. Remember to follow these tips and perform the cleaning process at least once a year to ensure optimal water heater performance.
5 Additional Tips for Maintaining Your Water Heater
While cleaning the thermocouple is an essential maintenance task, there are a few other things you can do to ensure the longevity and efficient functioning of your water heater:
1. Set the Temperature Appropriately
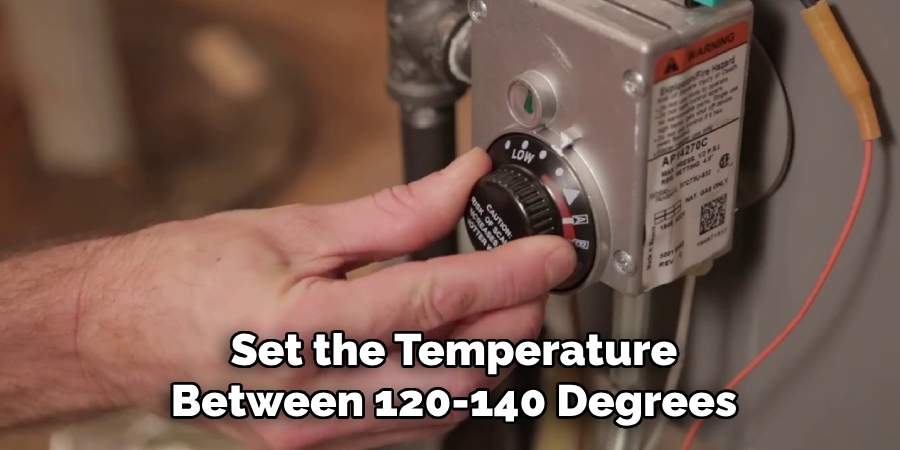
Setting your water heater’s temperature too high can increase energy costs and put unnecessary strain on its components. It is recommended to set the temperature between 120-140 degrees Fahrenheit.
2. Flush Out Sediment Regularly
Over time, sediment and debris can build up in your water heater’s tank, affecting its efficiency and lifespan. It is recommended to flush out this buildup at least once a year.
3. Inspect Your Anode Rod
The anode rod is responsible for protecting your water heater from corrosion. It is recommended to check and replace it every 3-5 years, depending on the quality of your water.
4. Keep the Area Around Your Water Heater Clear
Ensure there is enough space around your water heater for proper air circulation and easy access for maintenance tasks.
5. Address Any Issues Promptly
If you notice any strange noises, leaks, or other signs of malfunction, do not ignore them. Address these issues promptly to prevent further damage and ensure the safety of your water heater. Overall, regular maintenance and prompt action can prolong the lifespan and efficiency of your water heater, saving you time, money, and inconvenience in the long run.
Keep these tips in mind and enjoy a reliable hot water supply for years. So give your thermocouple some TLC and keep your water heater running smoothly!
Frequently Asked Questions
How Often Should I Clean My Thermocouple?
It is recommended to clean your thermocouple at least once a year. However, if you notice any signs of buildup or malfunction during regular use, it is best to address them promptly.
Can I Use Any Cleaning Solution?
Harsh chemicals and abrasive cleaners should be avoided as they can damage the thermocouple. Stick to gentler cleaning solutions such as vinegar or lemon juice.
What Should I Do If I Notice Signs of Damage?
If you notice any signs of damage, such as cracks or bends in the thermocouple, it is best to replace it altogether. Using a damaged thermocouple can lead to further issues and potential safety hazards.
Is Cleaning My Thermocouple Necessary?
Regular maintenance, including cleaning the thermocouple, is essential for optimal water heater functioning. This task is necessary to avoid malfunctions and potentially costly repairs or replacements in the future. So, yes, cleaning your thermocouple is needed. Proper maintenance can save you time and money in the long run.
Can I Clean My Thermocouple Myself?
Yes, cleaning the thermocouple is a simple task that can be done yourself. However, if you are uncomfortable or experienced with handling gas appliances and their components, hiring a professional for safety reasons is best. Always follow proper safety precautions and guidelines when cleaning your thermocouple.
Conclusion
In conclusion, correctly maintaining your water heater’s thermocouple is crucial for ensuring its efficient and long-lasting function. Following the steps on how to clean thermocouple on water heater outlined in this blog post, you can easily clean and maintain your thermocouple without needing professional help. Remember to turn off the gas or electricity before cleaning, and use a soft cloth or brush to remove debris.
Regularly checking and cleaning your thermocouple will save you money on energy bills and prevent potential dangers such as gas leaks. So take your time; include this simple step in your regular home maintenance routine. Your future self (and wallet) will thank you! Share this post with those who may benefit from these tips, and keep an eye out for our future posts on how to properly maintain other household appliances.