
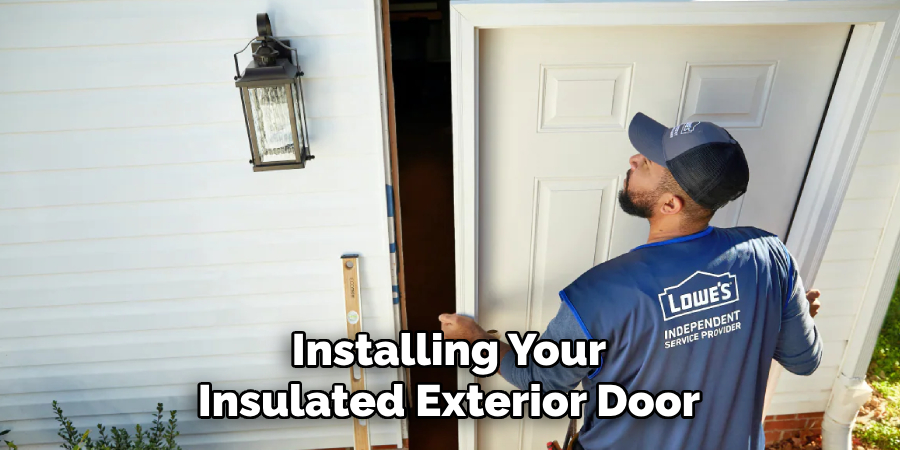
Are you looking to add more energy efficiency to your home? You can start right at the entrance with an insulated exterior door! Insulated doors help keep outdoor temperatures from entering and include great features like improved acoustics and a draft stopper.

Plus, they come in a variety of styles and designs so you can find one that fits the aesthetic of your existing front door setup. Read on for our guide on how to build an insulated exterior door.
Tools and Materials You Will Need to Build an Insulated Exterior Door
- Measuring tape
- Level
- Pencil
- Jigsaw or circular saw
- Router and router bits
- Insulated core door slab (prehung)
- Exterior trim boards
- Nail gun with nails/staples
Step-by-Step Guidelines on How to Build an Insulated Exterior Door
Step 1: Measure the Existing Opening
The first step in building an insulated exterior door is measuring the existing opening. This will help you determine what size of prehung door you need, so make sure to measure it accurately!
Use a measuring tape and pencil to mark out the dimensions for height and width on the wall. You’ll also want to measure any obstructions, like a window or existing trim, that are in the way.
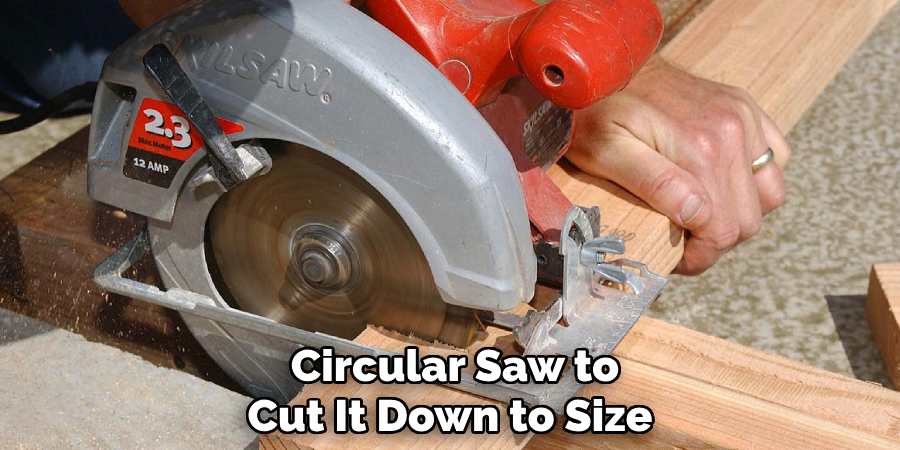
Step 2: Cut the Opening to Size
Once you’ve measured the opening, use a jigsaw or circular saw to cut it down to size. Take care when cutting, and work slowly to minimize mistakes! Be sure your cuts are straight and precise for a snug fit. While cutting, use a level to ensure your lines and straight.
Step 3: Add the Insulated Core Door Slab
Now that you’ve got an opening to work with, it’s time to put in the insulated core door slab. This type of door includes insulation between two metal or wood sheets and helps keep outdoor temperatures from entering your home.
It should fit snugly into the opening. If it doesn’t, use a router and router bits to trim down any excess material.
Step 4: Install Trim Boards
Next up, install some exterior trim boards around the door frame. These will not only give your finished project a neat, polished look but also help hide any gaps between the door slab and wall.
Use a nail gun to secure the trim boards in place. Some types of wood may require pre-drilling pilot holes before attaching the trim boards.
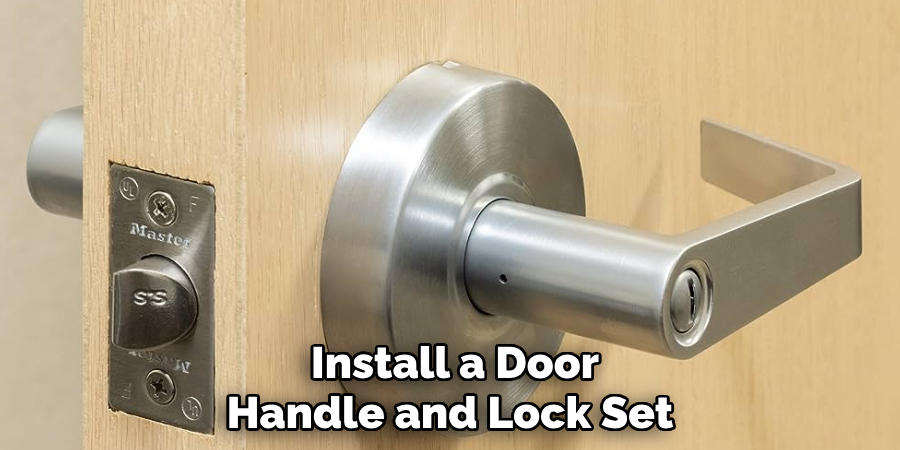
Step 5: Install the Door Handle and Lock Set
The last step is to install a door handle and lock set on your insulated exterior door. This will be what you use to open and close the door, so make sure it’s securely attached.
Use a screwdriver to attach the handle and latch set into place. For extra security, you can also add additional locks or a deadbolt.
And there you have it – your brand-new insulated exterior door! With these easy steps, you’ll be able to keep outdoor temperatures from entering your home while also improving acoustics and reducing drafts. Plus, you can enjoy the satisfaction of having built your own insulated door!
Additional Tips and Tricks to Build an Insulated Exterior Door
- Make sure that your door frame is perfectly square. If it isn’t, the insulation won’t be effective and you may cause damage to the surrounding structures.
- Use a high-quality weatherstripping material along all edges of the door frame to ensure efficient insulation.
- Employ interior corner blocks at each corner for added stability and insulation.
- Use an insulating foam or caulk between the walls and the door frame for additional insulation benefits.
- Consider using a trap to keep cold air from coming in through the bottom of your door.
- Ensure that all joints are sealed properly with caulking, screws, and other materials where applicable to prevent drafts from entering your home.
- If you are using a pre-hung door frame, make sure to seal around the edges with caulking for maximum insulation efficiency.
- After installation, regularly inspect your insulated exterior door for any drafts or damage that could compromise its insulation performance and correct them as necessary.
- Finally, check with your local building codes to ensure that your insulated exterior door meets all applicable standards.
These tips should help you build an effective and energy-efficient insulated exterior door. With the right materials and proper installation techniques, you can keep your home warm in winter and cool in summer while saving money on energy costs. It’s worth taking the time to invest in a quality exterior door that will last for years to come!
Things You Should Consider to Build an Insulated Exterior Door
1. Choose the Right Size – Ensure that the door you are installing is of adequate size and fits appropriately within the frame or opening.
2. Install a Door With Weatherstripping & Storm Door – Select a door with weatherstripping, and be sure to add an additional layer of protection with a storm door for added insulation.
3. Insulated Core For Low Conductivity – Choose a door with an insulated core, such as polyurethane foam or polystyrene, and make sure it has at least two layers of insulation to reduce heat transfer.
4. Use Thermal Breaks To Reduce Heat Loss – Use thermal breaks in your exterior doors for better insulating properties. A thermal break is a gap between the outside metal and the inside metal parts of the door where insulation material is inserted.
5. Choose Quality Materials – Utilize quality, durable materials such as high-density fiberglass core or aluminum panels when building your insulated exterior door.
6. Invest in High-Efficiency Glass – Consider installing double or triple-glazed glass on your insulated exterior doors to provide better insulation and reduce heat loss.
7. Reinforce the Door Frame – When installing your insulated exterior door, take the time to reinforce the frame with added nails or screws that will help keep it secure and in place.
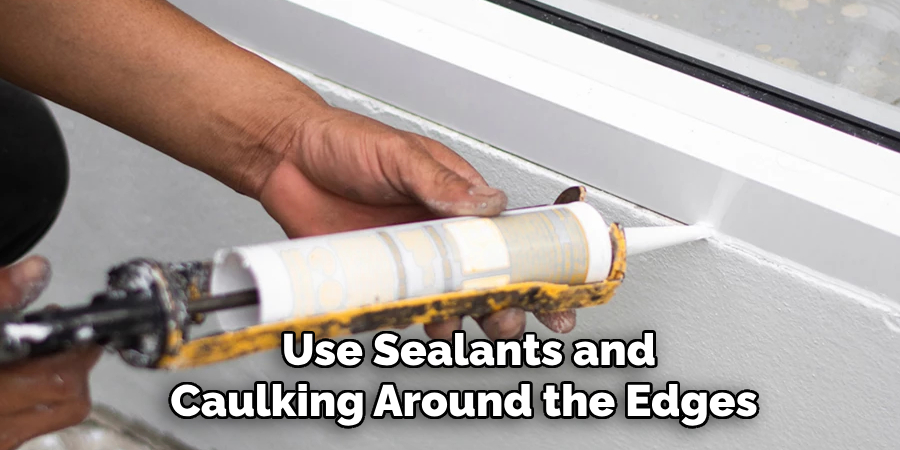
8. Add Seals & Caulks Around The Edges – To prevent air leakage, use sealants and caulking around the edges of your insulated exterior door for added protection.
9. Paint or Finish The Door – Once the installation is complete, finish the job with a protective sealant or paint to ensure that your insulated exterior door lasts long and looks great.
10. Consider Adding Security Features – Depending on your needs, you can also add security features such as locks and deadbolts for added protection.
Following these considerations will help you ensure that your insulated exterior door is built properly and provides the best insulation possible. With the right tools, materials, and knowledge, anyone can build an energy-efficient and secure door for their home or business.
Frequently Asked Questions
What Do I Need Before Starting?
Before building an insulated exterior door, gather the necessary materials and tools. You will need insulation, wooden boards, nails or screws, saws (power or hand), drill bits, a level, paintbrushes or rollers, a caulk gun, and sealant. Additionally, you may consider adding in weatherstripping for extra protection.
How Do I Measure the Door?
Measure the opening of your doorway with a tape measure before building an insulated exterior door. You should also note down any existing trim or framing that exists in order to make sure your door will fit properly. It is best to use measurements that are as precise as possible.
What Is The Best Type of Insulation To Use?
Depending on the climate, you may want to use a variety of insulation types when building an insulated exterior door. Generally speaking, polyurethane foam is great all-purpose insulation and offers good soundproofing properties. However, for extreme climates like very cold or hot areas, rigid foam board insulation would offer better protection.
Can I Paint The Door?
You can always add a layer of paint to your insulated exterior door once it’s finished if you’d like. It’s best to use water-resistant paint and make sure to apply two coats for maximum protection. Before painting, be sure the door is completely dry and free from dust or other debris.
What Are Some Tips For Installing My Door?
When installing your insulated exterior door, it is important to make sure the frame is properly secured first. Make sure to double-check all measurements and use shims when necessary in order for the door to fit securely. Finally, be sure to seal any gaps or cracks that may form around the edges of the door with caulk or sealant. Adding weatherstripping is also a great option for added protection.
Conclusion
All in all, knowing how to build an insulated exterior door can be a great way to save energy and money. With the right materials, tools, and techniques, you can easily construct an insulated exterior door that will help keep your home comfortable year-round. As always make sure you measure carefully and take necessary safety precautions when building your door. Following these steps will ensure a successful project!