

The installation of wood floors is a transformative endeavor that not only enhances the aesthetic appeal of a space but also adds a touch of timeless elegance. However, the success of this project lies in the meticulous and precise laying of the wood planks. In this comprehensive guide, we explore the essential considerations and step-by-step techniques on how should wood floors be laid.

From preparing the subfloor and selecting the right type of wood to the intricacies of the installation process, we cover every aspect to ensure a flawless outcome. Whether you are a seasoned DIY enthusiast or seeking professional guidance, understanding the nuances of wood floor installation is crucial for achieving durability, functionality, and an aesthetically pleasing result.
Join us as we navigate through the fundamentals of laying wood floors, providing you with the knowledge and confidence to transform your space with this classic flooring option.
Importance of Proper Installation for Aesthetics and Durability
Proper installation of wood floors is crucial for both aesthetics and durability. Whether you are installing solid hardwood, engineered wood, or laminate flooring, the proper installation technique will ensure that your floors not only look beautiful but also last for many years to come.
Aesthetics: When it comes to home decor, the flooring plays a significant role in creating an inviting and visually appealing space. Wood floors are known for their timeless beauty and can add warmth and character to any room. However, if not installed correctly, the flooring can look uneven, gaps may appear between the planks, or there may be visible signs of wear and tear. This can significantly affect the overall aesthetics of your home.
Durability: Proper installation of wood floors also impacts its durability. When installed correctly, wood floors can last for decades, with minimal maintenance. However, if the installation is not done properly, it can lead to premature wear and tear, resulting in costly repairs or replacement.
For example, if the flooring is not leveled correctly or if moisture seeps into the planks during installation, it can cause warping or cupping of the wood, ultimately leading to damage and decreased durability.
Choosing the Appropriate Type for the Installation
When it comes to installing wood floors, there are a few factors that need to be considered before making a decision on the type of wood and installation method. These factors include the location of where the flooring will be installed, the level of foot traffic in that area, and personal preferences.
One important factor is the location of the installation. Is it on the ground level or above? Is it in a humid or dry climate? These factors can affect the type of wood used as well as the installation method. For example, solid wood flooring may not be suitable for below-grade installations due to potential moisture issues.
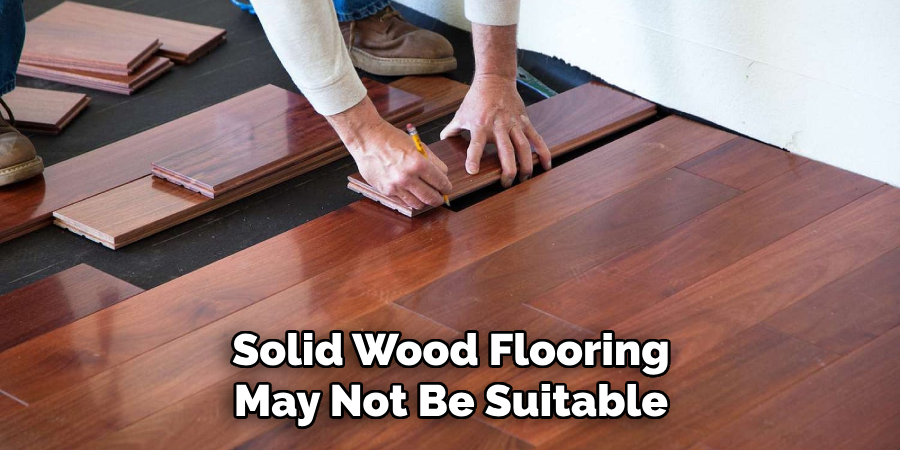
Another consideration is the amount of foot traffic in the area where the flooring will be installed. High-traffic areas such as hallways and entryways may require a more durable and resilient type of wood and installation method. On the other hand, low-traffic areas may allow for a wider range of options.
Personal preferences also play a role in choosing the appropriate type for installation. Some individuals may prefer the natural look and feel of solid wood flooring, while others may opt for the convenience and cost-effectiveness of engineered wood flooring.
Ultimately, it is important to carefully consider these factors in order to choose the most appropriate type for the installation. This will ensure that the wood floors not only look beautiful but also stand the test of time. Consult with a professional or do thorough research to make an informed decision and get the best results for your specific needs and preferences.
Additionally, regular maintenance and proper care can also greatly extend the lifespan of wood floors, regardless of the type and installation method chosen.
10 Methods How Should Wood Floors Be Laid
1. Start with a Flat Subfloor
Before laying any wood flooring, it is important to make sure that the subfloor is flat and even. This will ensure that the wood planks lay evenly and prevent any gaps or unevenness in the finished floor.
2. Acclimate the Wood
Wood flooring needs time to adjust to its new environment before being installed. It is recommended to let the wood acclimate for at least 72 hours in the room where it will be laid. This allows the wood to expand or contract based on temperature and humidity levels.
3. Choose the Right Direction
The direction in which you lay your wood flooring can have a significant impact on the overall appearance of your space. Generally, it is recommended to lay the planks parallel to the longest wall in the room for a more visually appealing look. However, there are a few factors to consider when determining the direction of your wood flooring.

4. Use a Moisture Barrier
To protect against moisture and prevent warping, it is important to use a moisture barrier between the subfloor and wood planks. This can be in the form of a plastic sheet or specialized underlayment. Before laying the barrier, ensure that the subfloor is clean and dry. If there are any areas with excess moisture, address them before proceeding.
5. Stagger Plank Lengths
When laying out your planks, make sure to stagger their lengths for a more natural and visually appealing look. This also helps to prevent weak spots in your floor where all of the seams line up. By staggering plank lengths, you distribute the seams more evenly, creating a stronger and more durable floor overall.
6. Leave Expansion Gaps
Wood naturally expands and contracts with changes in temperature and humidity, so it is important to leave small gaps around the perimeter of your flooring installation to allow for this movement. These gaps can be covered with baseboards or quarter-rounds.
Expansion gaps should also be left between each individual plank or tile, regardless of the type of flooring you are installing. This allows for any movement that may occur within the wood itself.
7. Use Spacers
To ensure consistent spacing between each plank, use spacers along each edge as you lay down each row of flooring. These can be removed once everything has been installed. Spacers are also helpful in creating expansion gaps that allow the flooring to properly adjust and move with temperature changes.
8. Nail or Glue down Boards
There are two main methods for securing wood flooring: nailing or gluing down boards. Nailing provides a sturdier hold but may require professional installation, while gluing can be done by the average homeowner. Both methods have their pros and cons, so the best option will depend on your specific needs and preferences.
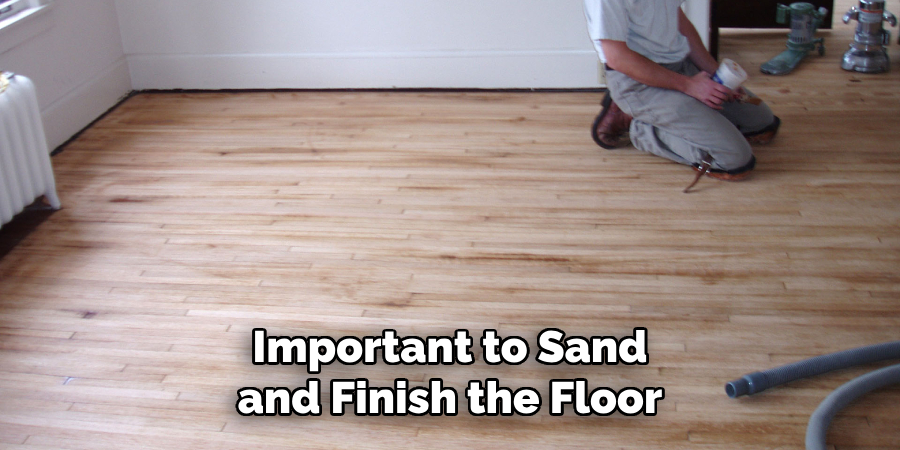
9. Sand and Finish
Once all of the planks are laid, it is important to sand and finish the floor to protect against wear and tear. This can be done with a rented floor sander and finishing products. To ensure an even finish, start with a coarse grit sandpaper and gradually move to finer grits. Once the floor is smooth, use a tack cloth to remove any dust or debris.
10. Maintain Regularly
To keep your wood floors looking their best, it is important to maintain them regularly. This includes sweeping or vacuuming regularly, using protective pads on furniture, and avoiding excessive exposure to moisture. These simple steps can help prevent scratches, dents, and other damage to your floors.
Inspecting the Subfloor for Evenness and Cleanliness
Before laying wood floors, it is important to ensure that the subfloor is both even and clean. The subfloor refers to the layer of material that lies directly beneath your wood flooring and is responsible for providing a stable, flat surface for the floorboards to rest on.
The process of inspecting the subfloor should be done after the old flooring has been removed, if applicable, and before any new flooring is installed. This will allow you to identify any potential issues that may need to be addressed in order to achieve a successful installation.
Here are some key things to look for when inspecting your subfloor:
Evenness
One of the most important factors in laying wood floors is ensuring that the subfloor is level and even. If the subfloor is not level, it can cause the wood floorboards to buckle or create uneven gaps between boards. To check for evenness, use a long level and run it across the entire surface of the subfloor. Look for any areas that are noticeably higher or lower than others.
If you do find uneven spots, they will need to be addressed before proceeding with installation. This may involve sanding down high spots or filling in low spots with a leveling compound.
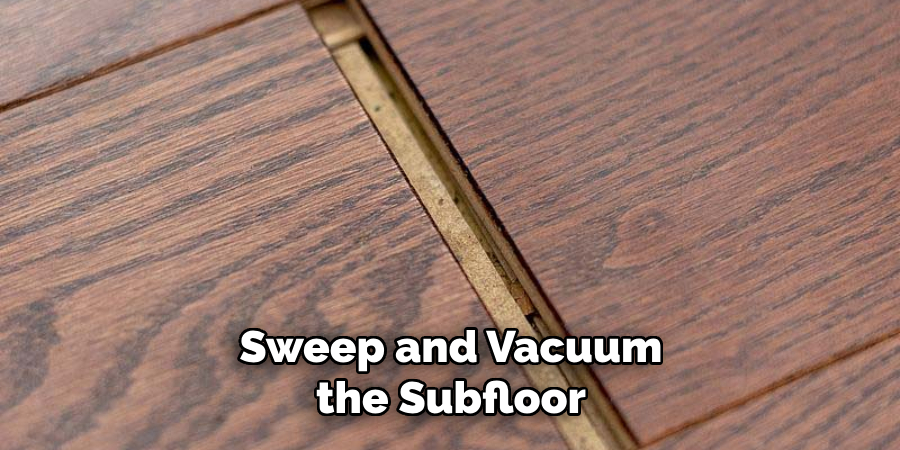
Cleanliness
In addition to being level, the subfloor should also be clean and free of any debris. Any dirt, dust, or other particles can cause imperfections in the wood floor installation, such as bumps or unevenness. It is important to thoroughly sweep and vacuum the subfloor to remove any loose debris.

If there are any stubborn or hard-to-remove stains on the subfloor, it may be necessary to use a cleaner specifically designed for wood floors. Be sure to follow the manufacturer’s instructions and allow adequate time for the subfloor to dry before proceeding with installation.
Checking for Moisture Levels
Another important factor to consider when laying wood floors is the moisture level of the subfloor. Excess moisture can cause the wood to warp or buckle, resulting in a failed installation.
To check for moisture levels, you can use a moisture meter specifically designed for wood flooring. Press the prongs into various areas of the subfloor and take multiple readings to get an accurate average. If the moisture levels are too high, it is important to address the issue before proceeding with installation.
Conclusion
In conclusion, laying wood floors may seem like a daunting task, but with the right understanding and techniques, it can be a rewarding experience. Remember to take your time and carefully plan out your layout before beginning installation. Don’t be afraid to consult professionals if you are unsure about any step of the process.
With the proper tools and precautions in place, you can ensure that your wood floors will stand the test of time and bring warmth and beauty to your home. So go ahead and give it a try – follow these tips on how to lay wood floors and transform your space into a cozy haven that will be cherished for years to come. And who knows, you may even discover a hidden talent for DIY projects! Save money while learning a new skill – now that’s something to consider when deciding on how should wood floors be laid.