
Transforming your home’s interior doesn’t require a complete overhaul. By focusing on the ceilings, you can add a touch of elegance and charm. Beadboard ceilings are becoming increasingly popular due to their aesthetic appeal and versatility.
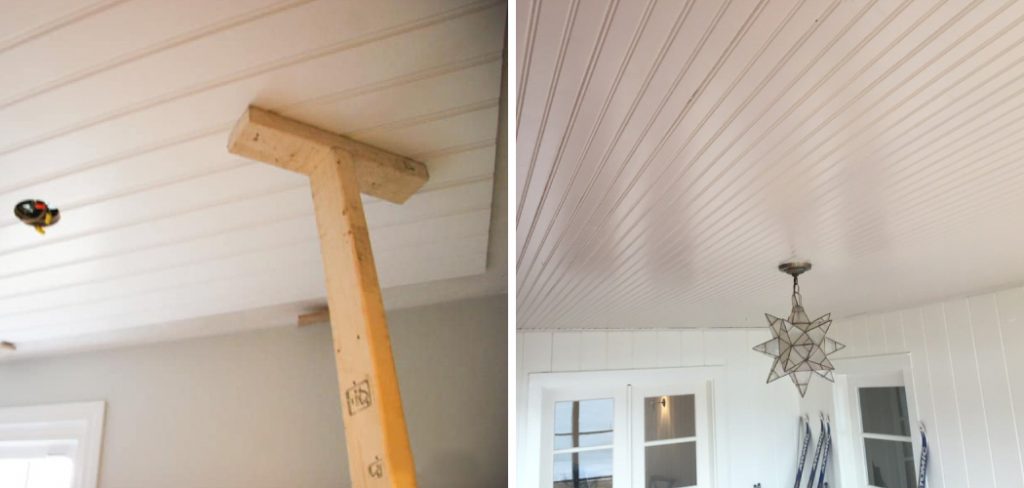
This architectural detail can complement various design styles, from traditional to modern. Installing beadboard on ceilings draws the eye upward, creating a feeling of spaciousness and adding character to any room.
Whether you’re aiming for a cozy, cottage-like atmosphere or a clean, modern vibe, beadboard ceilings can help achieve the desired look.
Knowing how to attach beadboard to ceiling surfaces correctly is critical to the success and longevity of your project. Proper installation techniques ensure that the beadboard remains securely in place, looks professional, and lasts for years to come.
Without the correct methods and tools, you risk compromising the beadboard’s appearance and durability. This section will cover everything from preparing the ceiling for installation to choosing the right adhesive and fasteners, highlighting the importance of precision and care.
Successful attachment of beadboard to your ceiling can transform a room, but achieving this requires attention to detail, the right materials, and a thorough understanding of the process.
Understanding Beadboard and Ceiling Compatibility
A. Overview of Beadboard Materials and Styles
Beadboard, a type of paneling that adds texture and dimension to a space, comes in various materials and styles, catering to different aesthetic preferences and practical requirements. Traditionally, beadboard was made from wood, offering a classic and warm appearance.
Today, however, homeowners can choose from wood, MDF (Medium Density Fiberboard), PVC, and even vinyl materials, each with its unique benefits and considerations.
Wood beadboard is prized for its natural beauty and durability. It can be painted or stained to match any decor but requires regular maintenance to prevent warping and moisture damage. MDF beadboard is a cost-effective alternative that offers a smooth finish and is easy to paint. It’s ideal for interiors but unsuitable for high-moisture areas due to its susceptibility to water damage.
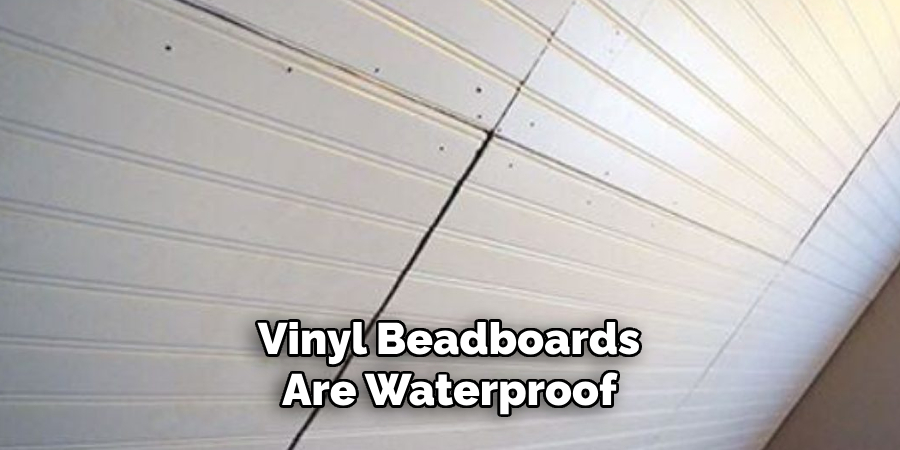
PVC and vinyl beadboards are waterproof and maintenance-free, making them suitable for bathrooms, kitchens, and outdoor ceilings. However, these synthetic materials may not imitate the authentic look and feel of wood as closely.
Styles of beadboard vary from traditional rows of vertical planks to more contemporary designs that feature wider or uniquely patterned panels. The classic beadboard looks—narrow planks with a tongue—and—groove system—is timeless, but modern innovations have introduced beadboard with varying widths, providing a fresh take on the traditional style.
This variety allows homeowners to achieve a look that ranges from rustic or cottage to sleek and modern, depending on the chosen material and style of beadboard.
B. Benefits of Beadboard for Ceilings
Incorporating beadboard into ceiling design offers numerous aesthetic and practical benefits, making it a popular choice among homeowners looking to enhance their living spaces. One of its primary advantages is the immediate transformation in the room’s appearance.
The beadboard adds architectural interest and depth, drawing the eye upward and making the space feel more open and inviting. It can also conceal imperfections in the ceiling, such as cracks or uneven surfaces, providing a smooth and finished look without extensive renovations.
Beadboard ceilings create an illusion of height in a room, making small or low-ceilinged spaces appear more spacious. This effect is particularly beneficial in older homes where ceiling heights are often lower than contemporary standards. Additionally, beadboard offers versatile design options, complementing various interior styles from traditional and country to modern and minimalist.
Whether it’s painted in a crisp white to brighten a room or stained to bring out the natural wood grain, beadboard can be customized to fit any color scheme or design aesthetic.

From a practical standpoint, beadboard is relatively easy to install and offers a durable surface that resists wear and tear. Certain materials like PVC and vinyl are moisture-resistant and ideal for use in humid environments or spaces like bathrooms and kitchens where ceilings might be exposed to steam and water splashes.
Furthermore, beadboard installation can be a cost-effective way to update a room, offering a significant visual impact without the expense of a complete remodel.
Through a combination of aesthetic appeal, versatility, and practicality, beadboard ceilings can significantly enhance the interior of a home, making it a worthwhile consideration for any renovation project.
How to Attach Beadboard to Ceiling: Planning and Preparation
A. Assessing Ceiling Structure and Surface
A critical first step before installing a beadboard on your ceiling is thoroughly assessing the ceiling structure and surface. This assessment ensures that the ceiling can support the beadboard and identifies any potential challenges that may arise during installation.
1. Identifying Joists and Studs
Identifying the location of joists and studs is paramount, as these will provide the support needed for the beadboard panels. Use a stud finder to locate and mark these structures.
Knowing where these supports are helps in planning the layout of the beadboard panels, ensuring they can be securely attached. It is also beneficial for planning seams’ placement between panels and determining the best points for securing the beadboard to the ceiling.
2. Measuring Ceiling Dimensions and Beadboard Quantity
Measuring the ceiling’s dimensions accurately is crucial for estimating how much beadboard you’ll need. Measure the length and width of the ceiling to calculate the total square footage.
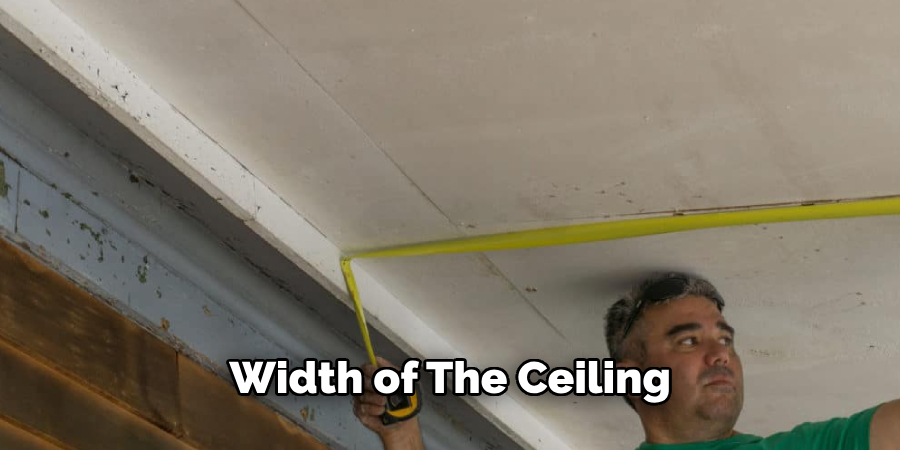
It’s advisable to purchase an additional 10% of the material to account for any errors or adjustments needed during installation. When measuring, also consider the direction in which you’ll run the beadboard planks, as this can affect the quantity needed and the overall look of the finished ceiling.
B. Gathering Necessary Tools and Materials
Having the right tools and materials on hand before beginning your project simplifies the installation process and helps ensure a smooth completion.
1. Beadboard Panels and Trim
Choose beadboard panels that best suit your aesthetic preference and the room’s moisture levels—select from wood, MDF, PVC, or vinyl based on earlier considerations. Remember to purchase panels with a bit of extra quantity to allow for cutting and fitting.
Additionally, decide on the type of trim or molding you’ll use to finish the edges of the beadboard ceiling for a polished look. Depending on the room’s style, this may include crown molding or a simpler, more straightforward trim.
2. Adhesive and Fasteners
Select the appropriate adhesive and fasteners for the type of beadboard material you’re using and your ceiling’s structure. Ensure the adhesive is waterproof for areas with potential moisture exposure, like bathrooms or kitchens. Fasteners should be chosen based on the beadboard material—longer screws or nails for thicker materials and shorter ones for lighter materials like PVC or vinyl.
The choice between nails and screws may also depend on the type of look you desire; screws provide a more secure fit, while nails can offer a cleaner appearance when countersunk and filled.
How to Attach Beadboard to Ceiling: Cutting and Fitting Beadboard Panels
A. Cutting Panels to Size
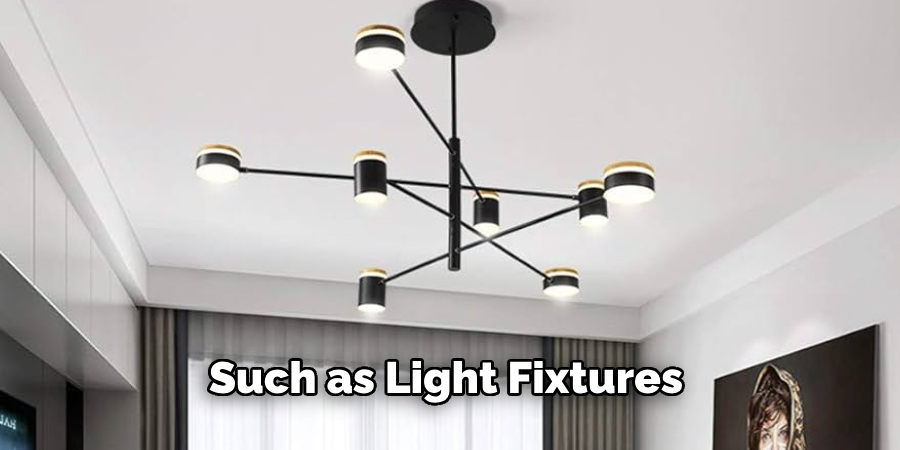
Cutting beadboard panels to the correct size is a crucial step in the installation process. It ensures that the panels fit perfectly against the edges of the ceiling and around any obstacles, such as light fixtures or vents. A circular saw and a jigsaw are two common tools for cutting beadboard panels.
1. Using a Circular Saw or Jigsaw
A circular saw is ideal for making straight cuts and is best used when you need to uniformly trim down the length or width of beadboard panels; for more intricate cuts, such as those required to fit panels around ceiling fixtures, a jigsaw with a fine-tooth blade offers the precision needed.
When using either tool, measuring and marking your cut lines clearly on the panel is important. To minimize splintering, you can apply painter’s tape along the cut line before sawing. Always wear safety glasses and follow the tool’s safety instructions when cutting.
2. Accounting for Ceiling Obstacles
Dealing with obstacles on the ceiling requires careful planning and precise cutting. Before installing the beadboard, identify all the fixtures, vents, and other elements that might interfere with a straightforward installation.
Create templates out of cardboard or paper to mark the exact size and location of the cuts needed on the beadboard panels. Transferring these measurements accurately onto the panels before cutting helps ensure a snug fit around obstacles, eliminating gaps and the need for excessive caulking or trim work to hide imperfections.
B. Test-Fitting Panels and Making Adjustments
After cutting the beadboard panels to size, the next step is to test fit each panel into its designated position on the ceiling. This process allows you to identify any minor adjustments that may be necessary before final installation.
Test fitting is more than just ensuring that each panel fits into its space; it’s about confirming the aesthetic alignment of the beadboards’ grooves and ensuring a uniform appearance across the ceiling. During this stage, you may find that some panels require additional trimming for a better fit, especially in older homes where walls and ceilings may not be perfectly square.
When adjusting panels, remember to account for expansion gaps. These small spaces allow the beadboard material to expand and contract with changes in humidity without warping or buckling. A general rule of thumb is to leave a gap about the thickness of a nickel (approximately 1.5mm) at the edges and where panels meet.
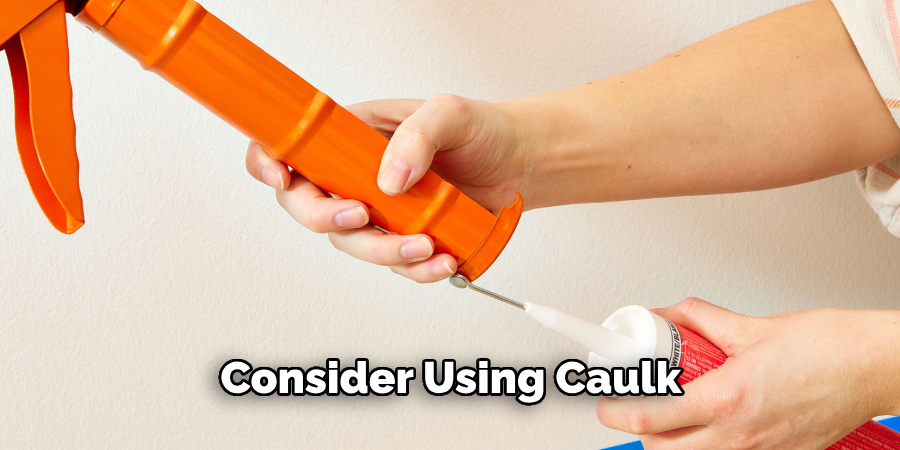
If you encounter any significant gaps between panels or between the panels and the surrounding trim, consider using caulk or moldings to conceal these spaces. However, it’s best to minimize the reliance on these fillers by ensuring the most accurate cuts and fittings possible from the start.
Once all the panels fit perfectly and any necessary adjustments have been made, you can proceed with the final installation, confident that the finished project will look professional and seamless. Attention to detail in the cutting and fitting stages can significantly impact the overall quality and aesthetics of the beadboard ceiling, making it a critical part of the installation process.
Attaching Beadboard Panels to the Ceiling
A. Using Adhesive for Installation
The careful application of adhesive can greatly enhance the installation of beadboard panels onto the ceiling. This step is pivotal in ensuring that panels remain securely affixed over time, particularly in environments subject to changes in temperature and humidity.
1. Applying Adhesive to Panels or Ceiling
To begin, select a construction adhesive that is suitable for the material of your beadboard panels and the surface of your ceiling. Starting with one panel at a time, apply a zigzag pattern of adhesive across the back of the panel or, alternatively, directly onto the specified area of the ceiling where the panel will be placed. This method allows for a direct, secure bond upon application.
2. Spreading Adhesive Evenly for Bonding
Once the adhesive is applied, spread evenly across the surface with a spatula or the back of a spoon. This ensures that every panel part will bond securely to the ceiling, preventing sagging or separation over time. Position the panel on the ceiling and press firmly across its surface to create a uniform bond.
Allow the adhesive to cure as per the manufacturer’s instructions before proceeding with additional panels. This adherence process is crucial for ensuring a lasting installation, particularly in areas where the panels end or meet trim and molding.
B. Securing Panels with Nails or Screws
For additional stability and to ensure the longevity of your beadboard ceiling, the attachment of the panels should be reinforced with nails or screws.
1. Ensuring Panels are Flush with Ceiling Surface
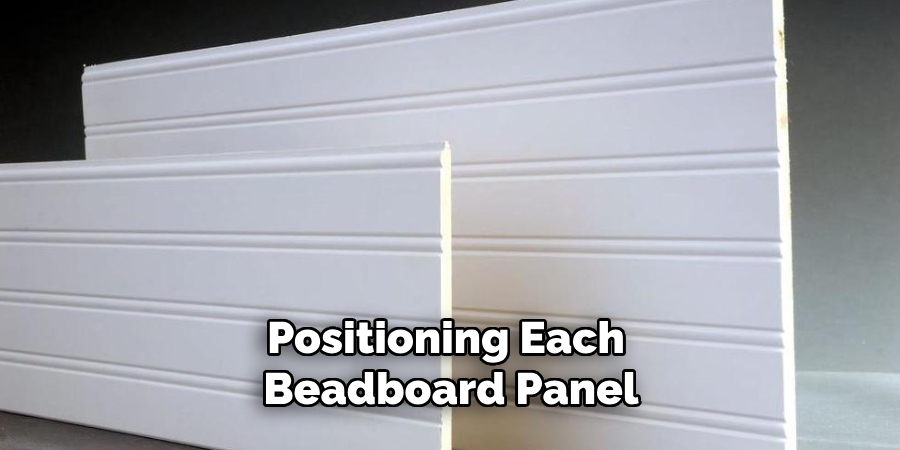
Begin by positioning each beadboard panel on the ceiling surface, ensuring it is perfectly aligned and flush with the adjoining panels. It’s important to start at one end of the room and work systematically to the other side to maintain alignment and spacing.
2. Using Appropriate Fasteners for Stability
Select fasteners that are appropriate for both the beadboard’s material and your ceiling’s substrate. Finishing nails or brads are often sufficient for wooden beadboard panels and can provide a clean, almost invisible finish. If using heavier materials or if the ceiling substrate is less secure, consider using screws for a stronger hold.
When driving nails or screws, aim for the support beams of the ceiling to enhance stability. Space the fasteners evenly, approximately every 6 to 8 inches along the perimeter of each panel and at intersections where beadboard panels meet.
It’s imperative to countersink nails or screws slightly below the surface of the beadboard to create a smooth final appearance that can be filled and painted over, leaving a seamless finish.
By combining adhesive with mechanical fasteners, you can ensure that your beadboard ceiling will remain secure and pristine for years, adding beauty and value to your space.
Dealing with Ceiling Obstructions and Irregularities
A. Cutting Around Light Fixtures and Vents
Installing beadboard ceilings around obstructions like light fixtures and vents requires precise cutting and careful planning to ensure a polished look. To begin, turn off the power on any electrical fixtures for safety.
Measure the dimensions of the obstruction and mark these on the panel where cuts will be made, considering any necessary clearance for ventilation or electrical components. Using a jigsaw or a hole saw attachment for your drill can make precise cuts easier to manage.
It’s crucial to dry fit each cut panel around its respective obstruction to verify accuracy before installation. Small gaps can be caulked, but strive for a snug fit to maintain a seamless appearance. Ensure the beadboard does not interfere with the electrical box or the fixture mounting bracket when cutting for electrical fixtures.
For vents, extending the duct slightly to mount flush against the beadboard may be necessary. These detailed cuts are vital for a professional finish and require a steady hand and an attentive eye.
B. Adapting Beadboard Installation to Sloped Ceilings
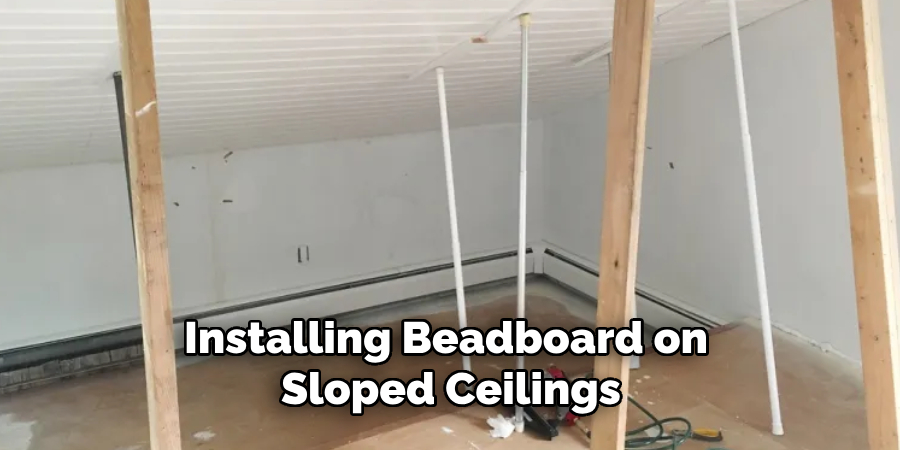
Installing beadboard on sloped ceilings adds a layer of complexity, as both the slope angle and the beadboard panels’ direction significantly impact the installation process.
Start by deciding whether the panels will run parallel or perpendicular to the slope. Running parallel panels can elongate the room’s appearance but may require more cuts at the top and bottom where the slope is most pronounced.
Conversely, placing panels perpendicular to the slope often produces a more uniform appearance but can necessitate numerous angled cuts to fit against the slope. Use a bevel tool to measure the exact angle of the slope and replicate this angle on the ends of each beadboard panel.
Cutting a few template pieces from scrap material can help perfect the angle before cutting the actual panels. Consider installing a series of furring strips across the slope at a consistent level to create a flat surface on which to mount the beadboard.
This step requires ensuring the strips are securely anchored, which may require finding the ceiling joists and using appropriate fasteners. Attention to detail during this phase will significantly affect the ease of panel installation and the overall appearance of the finished ceiling.
Remember, expanding adhesive and well-placed fasteners are crucial for securing beadboard panels to sloped ceilings, accommodating both the weight of the panels and the pull of gravity.
Finishing Touches and Trim Work
A. Installing Trim Around Edges and Corners
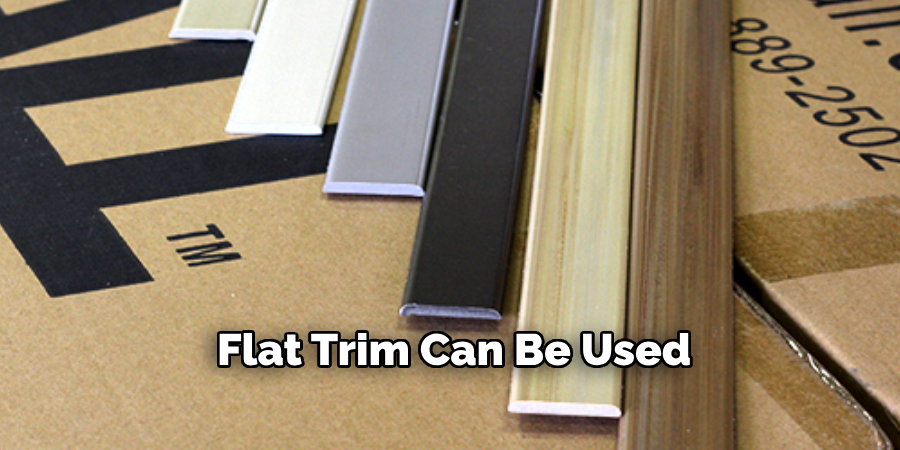
Installing trim around the edges and corners of your beadboard ceiling provides not only a finished look but also helps hide any minor discrepancies in the panel edges or gaps at the junctions. The trim selection should complement both the style of the beadboard and the room’s overall aesthetic. Crown molding, quarter-rounds, or simple flat trim can be used depending on the desired finish.
Start by measuring the perimeter of the ceiling to determine the amount of trim needed, adding a bit extra for miter cuts and potential mistakes.
When cutting trim, especially for corners, use a miter saw to make precise angled cuts that align perfectly, creating seamless joints. For inside corners, coping cuts may be necessary for a snug fit against the adjoining trim piece.
Install the trim by attaching it to the wall and ceiling edges with finish nails or adhesive, ensuring it’s securely fastened and leveled. For added durability, especially in high-moisture areas, consider using a construction adhesive in conjunction with mechanical fasteners.
B. Filling Nail Holes and Gaps
Filling nail holes and gaps is a crucial step in ensuring your beadboard ceiling looks seamless and professionally finished.
Begin by preparing a lightweight spackle or wood filler and applying it with a putty knife into any nail holes or gaps left from the installation process. For larger gaps, especially those between panels or at the trim, a caulk gun loaded with paintable acrylic latex caulk provides both flexibility and a smooth, easy-to-paint surface.
Once the filler is dry, sand the areas lightly with fine-grit sandpaper, blending the repairs into the surrounding surface.
This step is critical for avoiding visible patches after painting. If you are working with wood beadboard and trim, consider using a stainable wood filler that closely matches your ceiling’s finish. This will allow for a uniform appearance if you decide to stain rather than paint the ceiling.

After filling and sanding, remove all dust with a tack cloth to ensure a clean surface for painting or staining. When applying paint or stain, use a brush, roller, or sprayer suitable for the finish and material of your beadboard ceiling. This final touch protects the wood and enhances the ceiling’s aesthetic appeal, bringing out the texture and character of the beadboard.
By meticulously installing trim and attentively filling in nail holes and gaps, you can achieve a beadboard ceiling installation that looks seamless and sophisticated, adding charm and character to any space.
Conclusion
The installation process of a beadboard on a ceiling involves several critical steps to ensure a beautiful and lasting finish.
Initially, precise measurements and thorough planning are essential to account for any obstructions and the orientation of the panels. Cutting and fitting the beadboard around fixtures and into uniquely shaped spaces requires careful attention to detail and accuracy.
For installations involving sloped ceilings, determining the alignment of panels—whether parallel or perpendicular to the slope—and making exact angle cuts are crucial for achieving a uniform appearance.
When securing the panels, using expanding adhesive and appropriate fasteners provides the necessary support, accounting for the weight of the panels and the force of gravity.
Installing trim around the edges and corners further enhances the ceiling’s aesthetic, concealing any minor imperfections and providing a polished look. Filling in nail holes and gaps with spackle or caulk, followed by sanding, ensures a smooth, refined finish, ready for painting or staining.
Embarking on a DIY beadboard ceiling project can transform any room by adding elegance and character to your space. While the task might seem daunting at first, the satisfaction of completing a home improvement project yourself is incomparable.
Understanding how to attach beadboard to ceiling is a crucial part of the process, and with the right guidance, tools, and patience, it’s an entirely achievable goal for DIY enthusiasts. Each step, from measuring and cutting to the final touches of painting, offers an opportunity to learn and master new skills.
This guide aims to empower you, providing the knowledge and techniques to confidently approach your project. Remember, the beauty of DIY lies not only in the finished product but in the process of creating something uniquely yours.