Are you having a problem with your ceiling fan? If the blades are turning slowly – or not at all – it might be time to test the capacitor. The capacitor helps run the motor of a ceiling fan, so if you want to get your fan spinning again, testing this piece is essential.

Here, we will go in-depth into how to test a ceiling fan capacitor, covering key steps and explaining important technical terms along the way. Read on for an informative guide on how to test a ceiling fan capacitor that can help you diagnose and repair issues with your ceiling fans!
Testing a ceiling fan capacitor can provide an easy way of diagnosing whether it needs replacing and also help give you confidence that the replacement part is working correctly.
In this blog post, we will be discussing how to identify a failing capacitor in a ceiling fan as well as how to successfully test one and recognize any signs of failure. Read on if you want to learn more about testing your own ceiling fan capacitors for optimum performance!
Why May You Want to Test a Ceiling Fan Capacitor?
1. To Check for Proper Insulation Between the Fan’s Motor and Body
One of the most common reasons for testing a ceiling fan capacitor is to check for proper insulation between the fan’s motor and body. This is especially important if there has been any recent water or moisture exposure, as this can cause short circuits which can lead to electrical fires.
2. To Identify Faults in the Motor
If you hear strange noises coming from your ceiling fan, testing the capacitor may help you identify faults in the motor. These could be anything from a broken blade to an electrical issue. If there is an issue with the capacitor, it can indicate that there is something wrong with the wiring or connections of the fan’s motor.

3. To Check for Damage or Wear-and-Tear
Testing the capacitor of your ceiling fan can also be a good way to check for damage or wear-and-tear. This is especially important if the fan has been exposed to extreme temperatures, as this can cause it to overheat and lead to electrical issues. By testing the capacitor, you can identify any potential problems before they become catastrophic.
Knowing how to test a ceiling fan capacitor is essential for ensuring the safety and performance of your fan. With the right tools and knowledge, you can easily perform this task on your own and save yourself time and money in the long run.
How to Test a Ceiling Fan Capacitor in 5 Easy Steps
Step 1: Gather All The Tools You Will Need
The very first step is to make sure you have all the necessary tools and supplies to perform the job. You will need a multimeter, electrical tape, needle-nose pliers, a screwdriver, wire strippers and of course a replacement capacitor if needed.
Step 2: Turn off the Power to the Ceiling Fan
Before you begin any work on the ceiling fan, it is vitally important to make sure that all power to the ceiling fan is turned off. You can either shut of the circuit breaker or remove the fuse from its holder.
Step 3: Remove The Ceiling Fan Having Cover
Once you have made sure all power has been disconnected, you will need to take off the cover of your ceiling fan. Depending on your model, this may require the use of a screwdriver or other tool to release the screws holding it in place.

Step 4: Access The Capacitor
After you have removed the cover from your ceiling fan, you will now have access to the capacitor within its housing. Be careful not to touch any exposed wires or terminals as you are working.
Step 5: Testing The Capacitor
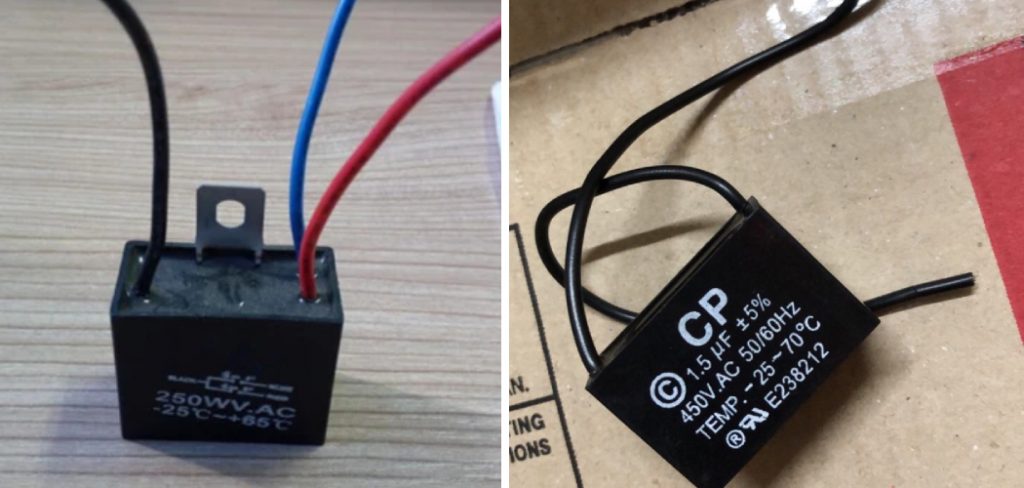
Now that you have access to the capacitor, it’s time to use your multimeter to measure its capacitance. Set the dial of your multimeter to read in microfarads and then place one of the probes on each terminal of the capacitor.
Read the capacitance value that appears on the display. If the capacitor is functioning correctly, it should read within 10% of its rated capacitance. If your reading falls outside this range, you will need to replace the capacitor with a new one.
Once you have tested and either replaced or reinstalled the existing capacitor, be sure to double check all wires are connected correctly and the cover is securely fastened back in place. You can then turn the power back on to test your ceiling fan.
Some Tips to Test a Ceiling Fan Capacitor
1. Do Not Touch the Wires
Make sure to turn off the power before testing a ceiling fan capacitor. To avoid electrocution, do not touch any of the exposed wires. Also you have to make sure that the fan is not switched on.

2. Check for Visible Damage
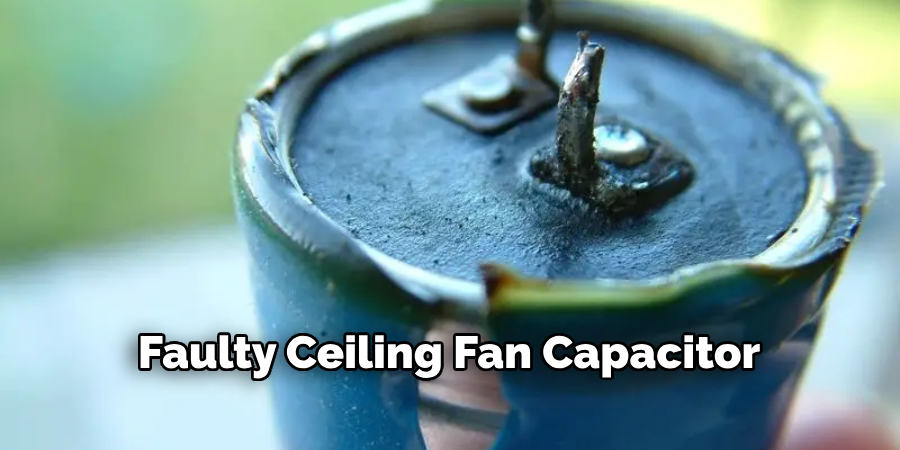
Before testing, you should check the capacitor for visible damage such as cracks or dents. If any of these are present, the capacitor is likely to be faulty and needs to be replaced. Also look for signs of leaking or corrosion.
3. Use a Multimeter
One way to test the capacitor is to use a multimeter. This tool can measure resistance and capacitance, making it ideal for testing a ceiling fan capacitor. Make sure your meter is set to capacitance mode before proceeding with the test.
4. Check the Voltage
If the voltage is lower than it should be, then you know the capacitor needs to be replaced. Make sure to check your fan’s manual for the correct voltage before testing with a multimeter.
5. Check for Open Circuits
Open circuits are another sign of a faulty capacitor. To test for this, connect one lead of the multimeter to each terminal of the capacitor. If there is an open circuit, the meter will not register any readings.
6. Check for Short Circuits
If your multimeter reads off-scale, then it’s likely that a short circuit exists in the capacitor and needs to be replaced. Also look for any loose or disconnected wires, as this could be a sign of a short circuit.
7. Replace the Capacitor
If any of these tests reveal that the capacitor is faulty, then it’s time to replace it. Make sure you get an exact replacement for your ceiling fan, and follow the manufacturer’s instructions to install it correctly.
With the right tools and knowledge, testing a ceiling fan capacitor can be done safely and quickly. Make sure to follow these tips for the best results and always turn off the power before working with electric components.
Frequently Asked Questions
What Precautions Should I Take Before Testing My Ceiling Fan Capacitor?
It’s important to take the necessary safety precautions when testing a ceiling fan capacitor. Make sure that you disconnect your ceiling fan from power before attempting any work on it. You should also wear rubber gloves and protective eye gear in order to protect yourself from electric shock or other hazards.

What Tools Do I Need To Test a Ceiling Fan Capacitor?
In order to test a ceiling fan capacitor, you will need a digital multimeter or an analog multimeter. A digital multimeter is preferred in this case due to its accuracy and ease of use. You may also need some wire cutters and screwdrivers.
How Do I Test My Ceiling Fan Capacitor?
Start by setting your multimeter to measure capacitance, then attach the probes of the multimeter to the capacitor terminals and make sure that they are securely attached. Once this is done, take a reading off your multimeter and compare it with the recommended values listed in your ceiling fan’s manual.
If the values differ, you may need to replace your ceiling fan capacitor. Finally, check for any shorts or other electrical issues that could be preventing your ceiling fan from working properly.
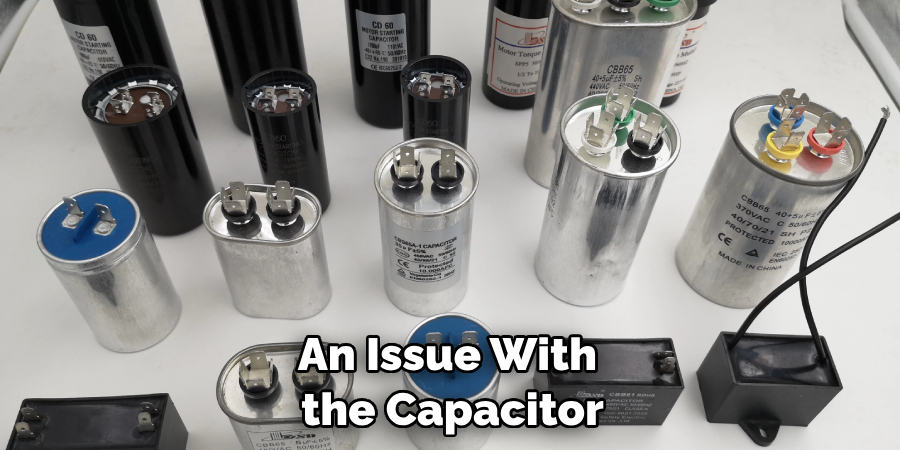
What Happens If I Find an Issue With My Ceiling Fan Capacitor?
If you find an issue with your ceiling fan capacitor, it is likely that you will need to replace the part. Be sure to purchase an appropriate replacement from a reputable vendor and follow any installation instructions carefully. If you’re unsure of how to install the new capacitor, consult a licensed electrician for assistance.
Can I Test a Ceiling Fan Capacitor By Myself?
Yes, you can test a ceiling fan capacitor by yourself if you have the necessary tools and knowledge. However, it’s important to take all appropriate safety precautions and use caution when working with electricity. If you are unsure of how to proceed or feel uncomfortable attempting the task, it’s best to consult an electrician for assistance.
Can A Faulty Ceiling Fan Capacitor Affect Other Parts of My Ceiling Fan?
Yes, a faulty ceiling fan capacitor can cause other parts of your ceiling fan to malfunction as well. If you notice any problems with your ceiling fan, be sure to inspect the capacitor for any signs of damage or wear and tear. If you find an issue, replace the part as soon as possible.

Do Ceiling Fans Have To Be Replaced Often?
No, ceiling fans don’t have to be replaced often if they are properly maintained on a regular basis. However, if your ceiling fan has been in use for a long time, it’s likely that the parts may need to be replaced eventually. Be sure to inspect your ceiling fan periodically and replace any worn or damaged parts as needed.
What Are The Benefits Of Testing My Ceiling Fan Capacitor?
Testing your ceiling fan capacitor can help you identify any issues that could be preventing your ceiling fan from working properly. This will ensure that your ceiling fan is running efficiently and effectively, saving you money on energy costs in the long run. Additionally, testing can help you catch any potential problems before they become major repair issues.
Conclusion
Finally, it’s important to remember that if you have done all the necessary steps to test the ceiling fan capacitor, and there is still a problem with your fan, it might be time to call in an electrician. Testing a ceiling fan capacitor can be a complex and time-consuming process, but if done correctly may save you from having to completely replace the fan.
Ultimately, having knowledge of electrical wiring is essential before attempting any type of home repairs—so always proceed with caution. It’s not worth risking your safety for a quick experiment! If you ever feel unsure of yourself when handling electrical components, please consult a professional first.
Follow these steps on how to test a ceiling fan capacitor for testing your ceiling fan capacitor and get back to spending time with family and friends by creating refreshing breezes in no time!
