
Staining a wood dresser is a fantastic way to enhance its natural beauty and give it a fresh, new look. Whether you want to revive an old dresser or personalize a new one, the process of staining wood can be both rewarding and transformative.
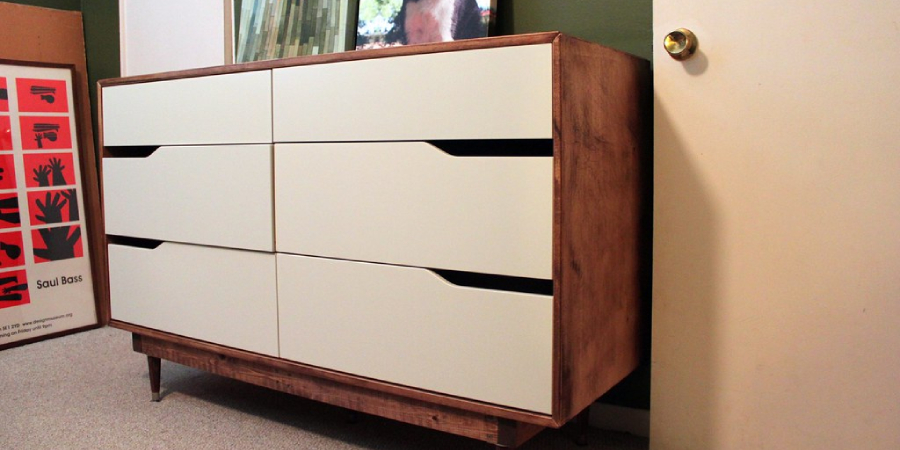
By applying a stain, you can deepen the color, highlight the grain, and protect the wood from damage. However, it’s essential to approach this task with proper preparation and technique to achieve the desired results.
In this article, we will guide you through the steps on how to stain wood dresser, from choosing the right stain to applying it evenly and smoothly. With the right tools, materials, and a little patience, you can transform your dresser into a stunning piece that complements your decor and adds warmth to your space.
Is It Better to Paint or Stain a Dresser?
Painting and staining a dresser are two viable options for giving it a new look. Before deciding whether to paint or stain, there are some factors to consider.
Staining wood can enhance the natural beauty of its grain while creating an attractive color that is easy to match with a range of décor styles. It also requires less upkeep and is often more cost-effective than painting. On the other hand, painting a dresser can completely transform it with a fresh color that suits your style preferences.
Plus, the process of priming and sealing can protect its surface from moisture damage and wear for an extended period of time.
Ultimately, whether you choose to paint or stain your dresser is up to you. Just make sure that you take into account the look that you are aiming for, as well as the amount of time and money you’re willing to invest in its upkeep. With these factors in mind, selecting between painting and staining should be a straightforward process.
Once you have made your decision, you can follow our guide to learn how to stain wood dressers. With its step-by-step instructions and helpful tips, you’ll be ready to give your furniture a new look in no time.
Can You Stain a Dresser without Sanding?
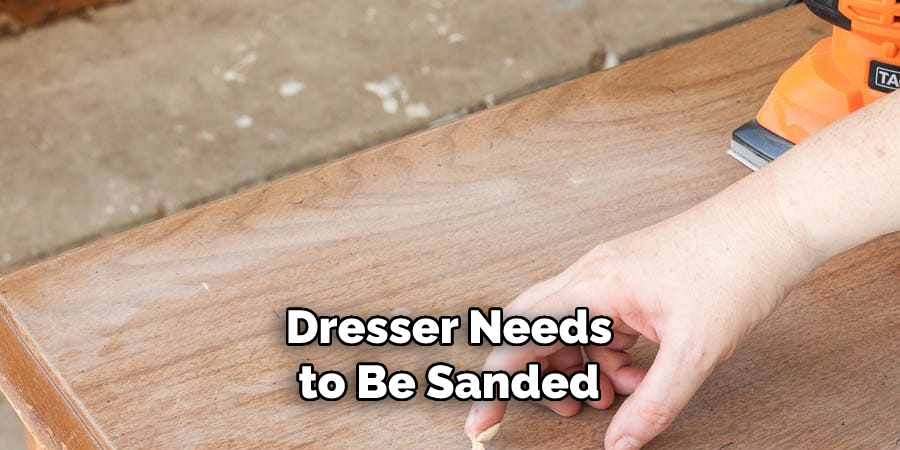
Yes! You can stain a wood dresser without sanding. Sanding is not entirely necessary when staining wood because the purpose of sanding is to remove the top layer of varnish or paint, and this is typically done prior to staining. If you do opt for sanding, use fine-grit sandpaper that won’t mar the surface of the dresser. It’s also important to wipe down the dresser after sanding with a damp cloth in order to remove any dust particles.
However, if you’re looking for an easier method, then there are alternatives. Before staining your wood dresser, make sure it is clean and free of dirt and debris by using a good quality furniture cleaner or wood cleaner. You should also make sure there is no varnish or paint on the dresser by testing an inconspicuous area with a damp cloth. If the color comes off onto the cloth, then your dresser needs to be sanded before staining.
Once you’ve determined that the dresser is ready for staining, it’s time to start applying the stain. Begin by applying a pre-stain conditioner, which helps even out any variations in resin and porosity of the grain so that each section absorbs the same amount of stain. Allow this to sit for as long as recommended on the product packaging.
10 Methods How to Stain Wood Dresser
1. Choose the Right Stain:
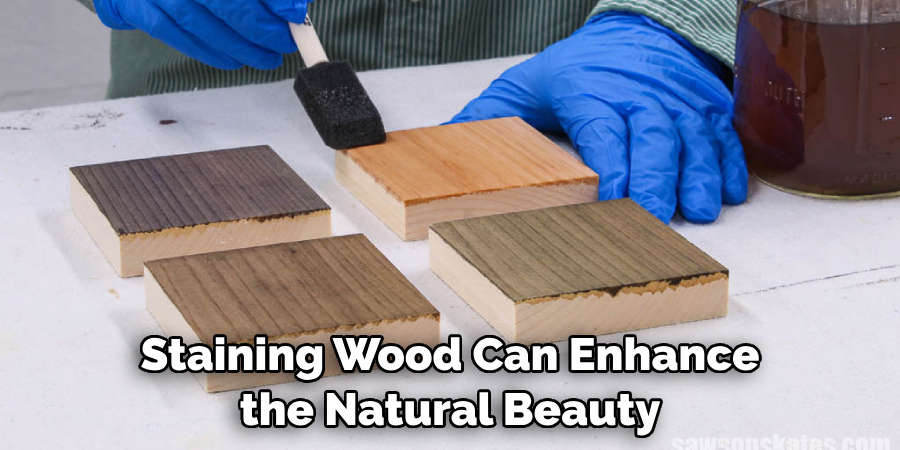
Before beginning the staining process, it is crucial to select the right stain for your dresser. Consider factors such as the desired color, transparency, and compatibility with the type of wood. Stains are available in a variety of options, including oil-based, water-based, gel, and penetrating stains.
Test the stain on a small, inconspicuous area of the dresser or a scrap piece of wood to ensure it achieves the desired effect. While some stains will darken the wood, others may lighten it. Try to select a stain that will enhance the wood’s natural color and grain.
2. Gather the Necessary Tools and Materials:
To stain a wood dresser effectively, gather the necessary tools and materials. These typically include sandpaper or a sanding block, tack cloth, wood conditioner (if applicable), stain, brushes or rags, protective gloves, and a well-ventilated workspace.
Having everything ready beforehand will ensure a smooth and efficient staining process. To ensure that all areas are covered, it’s best to use a variety of tools and materials. Although many products are available in stores, make sure to use the best quality materials and tools; this will help ensure a successful staining job.
3. Prepare the Dresser:
Start by preparing the dresser for staining. Remove any hardware, such as knobs or handles, and set them aside. Clean the dresser thoroughly with a mild wood cleaner to remove dirt, dust, and oils. Use sandpaper or a sanding block to smooth the wood surface and create a suitable base for the stain. Sand in the direction of the wood grain to prevent scratches.

Wipe the dresser down with a tack cloth or damp rag to remove any remaining dust particles. Though it’s not required, using a wood conditioner on the dresser before staining will help to create a more even finish. Make sure the dresser is completely dry before beginning the staining process.
4. Apply Wood Conditioner:
In some cases, especially when dealing with porous or uneven wood, applying a wood conditioner can help achieve a more uniform stain application. Follow the instructions on the conditioner’s packaging to apply it evenly across the dresser. This step is particularly important when working with softwoods or woods prone to blotching. Let the conditioner dry completely before moving on to the staining step.
5. Stir and Test the Stain:
Before applying the stain to the entire dresser, thoroughly stir it to ensure an even color distribution. Test the stain on a small, inconspicuous area or a scrap piece of wood to evaluate the color and penetration. Adjust the stain’s intensity or application technique if necessary.
6. Apply the Stain:
Using a brush or a clean, lint-free rag, apply the stain to the dresser, working in the direction of the wood grain. Start with a small section, ensuring even coverage, and immediately wipe off any excess stain with a clean cloth. Repeat this process section by section until the entire dresser is stained. Pay close attention to any drips, runs, or uneven areas to maintain a consistent appearance.
7. Allow for Drying Time:
After applying the stain, allow sufficient drying time as per the manufacturer’s instructions. Ensure the dresser is placed in a well-ventilated area to facilitate the drying process and prevent the accumulation of fumes.
Avoid touching the stained surface during this time to prevent smudging or damage. However, for an even finish, it can be helpful to occasionally wipe off any excess stain with a clean cloth. Once the stain has completely dried, the dresser is now ready for a finishing coat of sealer.
8. Assess the Stain Color:
Once the stain has dried, assess the color and depth. If you desire a darker or richer shade, apply an additional coat of stain following the same application and wiping process as before. Take caution not to over-apply the stain, as it may result in an unnatural or uneven appearance.
If you’re happy with the color, allow the stain to dry completely before sealing it with a clear protective finish. While oil-based stains can dry in a few hours, water-based stains typically need 8-24 hours. When you’re sure that the stain has dried completely, you’re ready to finish your wood dresser.
9. Apply a Protective Finish:
To preserve the beauty of the stained dresser and protect it from scratches and moisture, apply a protective finish. Options include polyurethane, varnish, or lacquer. Choose the finish based on the level of sheen and durability you desire. Apply the finish according to the manufacturer’s instructions, using a brush or a clean cloth, and allow ample drying time between coats.

10. Reassemble and Enjoy:
Once the protective finish has dried completely, reattach the hardware to the dresser. Carefully inspect the dresser for any missed spots or imperfections and touch up as necessary. Finally, place the stained wood dresser in its designated location and enjoy the transformed piece that adds character and elegance to your space. With a little effort and the proper supplies, staining furniture can be an easy and satisfying project.
Conclusion
Now that you know how to stain wood dresser properly, you are set for success! Be sure to take your time to plan your project before you begin. Gather all the necessary supplies and tools for the job so that everything runs as smoothly as possible. Take a few extra steps with the sandpaper to make sure your finish is smooth and perfect.
Be patient throughout the process, as staining takes some time, but it will pay off in the end with a beautiful wood dresser full of natural character and class. Staining is a great way to transform older furniture into something gorgeous and you’ll have the satisfaction of knowing that you accomplished such great work yourself. So don’t wait any longer – get out there and stain your wood dresser today!