
Have you just recently bought a dresser but are feeling disappointed with the color? Or maybe you’ve had one for years and are looking to give it some new life? Whatever your reason, spray painting is an easy and cost-efficient solution that will instantly transform any dresser.
In this blog post on how to spray paint dresser, we’ll show you all the tips and tricks on how to spray paint a dresser so you can have the piece of furniture of your dreams in no time!
Needed Tools and Materials
Given below is the list of materials and tools you will require to spray paint a dresser:
- Painter’s Tape
- Drop Cloth
- Sandpaper (coarse grit)
- Primer Spray Paint
- Paint Sprayer or Spray Can
- Spray Paint for Finishing Touch (Optional)
11 Step-by-step Instructions on How to Spray Paint Dresser
Step 1: Clean the Dresser
Start by wiping down the entire dresser with a damp cloth to remove any dirt or dust. Take particular care t to pay attention to the handles and corners of the dresser that tends to accumulate more dirt.
It’s important that the surface of the dresser is clean before you start painting, as it will ensure more even coverage. It’s also good practice to use a degreaser on the dresser if it’s made of wood or metal before you begin painting.
Step 2: Sand the Dresser
Once the dresser is completely dry, use sandpaper to lightly sand its surface. This step helps create a roughened texture on the surface which in turn helps with better paint adhesion. Don’t forget to sand the handles of the dresser as well! But don’t use too much pressure or else you might end up damaging the dresser.
This step is important for a beautiful and even finished product. If you’re using a paint sprayer, it’s recommended to sand the dresser until it is completely smooth.
Step 3: Tape off Areas you don’t want to be Painted
Once you have finished sanding, use painter’s tape to cover up the areas you do not want painted such as hinges and drawer pulls. Make sure all areas are sealed properly, and use a putty knife to press down on the edges of the tape for a tight seal.
You do not want any paint to seep in and ruin the look of your dresser. It’s also a good idea to use a drop cloth or newspaper to cover up the floor around the dresser.
Step 4: Prime the Dresser
Before actually applying any paint, make sure you prime the dresser using primer spray paint. This step helps prevent stain bleeding through your finished product and ensures better coverage of the top layer of paint. Apply the primer in light layers to make sure it’s evenly spread out.
But make sure to avoid getting primer onto the areas you taped off, as this can ruin the look of your dresser. It’s also important to remember that you should always prime in a well-ventilated area. You may have to apply multiple layers of primer before you start painting.
Step 5: Let Dry and Sand Again
Let the primer completely dry before you start painting, and sand again using finer grit sandpaper. This will ensure an even smoother surface for you to work with and give you better paint coverage when spray painting your dresser.
This step is important to get a beautiful, smooth finish on your dresser! It’s also a good idea to use a tack cloth to wipe away any dust particles that were created during the sanding process.
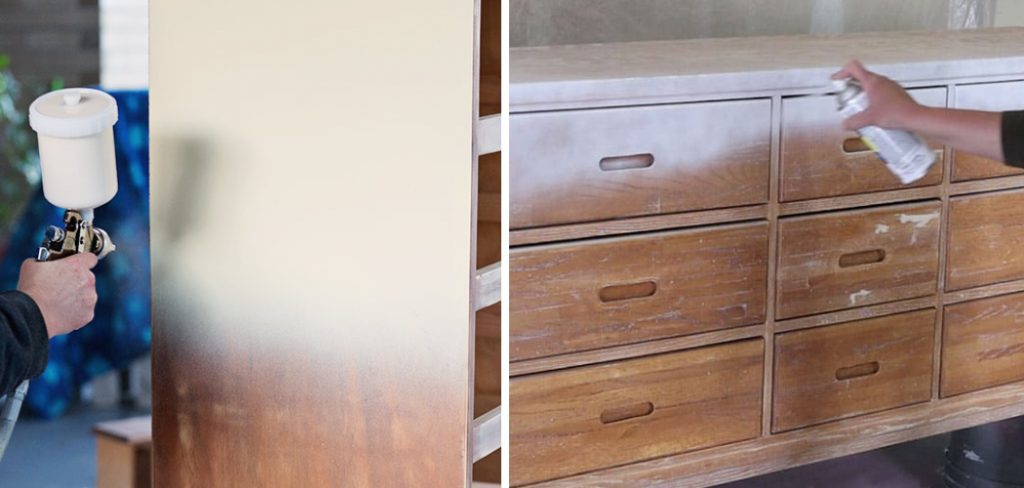
Step 6: Apply Paint
Now that the surface of the dresser is prepped and ready to go, it’s time to apply paint! You can either use a spray painter or a spray can for this step – whichever you are most comfortable with. Make sure to hold your sprayer at least 8 inches away from the surface and apply the paint evenly in light layers.
However, if you’re using a spray can, it’s best to apply the paint in circular motions to avoid drips. Allow each layer of paint to dry before spraying another one and make sure you don’t put too much pressure on the trigger!

Step 7: Allow Drying Time
Allow the dresser to dry completely before you move on to the next layer of spray paint, and make sure you’re in a well-ventilated area while doing this step. It’s better to take your time here as too much heat or sunlight can affect how the final product looks.
This step is also important to allow the paint to cure properly and prevent any discoloration or bubbling. It’s a good idea to let the dresser dry overnight before you continue. But make sure the area is still ventilated even after the paint has dried. It’s also important to avoid touching the dresser for at least 24 hours after you finish painting.
Step 8: Apply Additional Coats (Optional)
If you feel that the dresser needs additional coats of paint, go ahead and do it! Depending on how many layers you applied before, you may need to lightly sand and prime again before adding more paint. It’s best to wait at least 24 hours before adding more layers, as this will ensure that the paint is completely cured before you add any more.
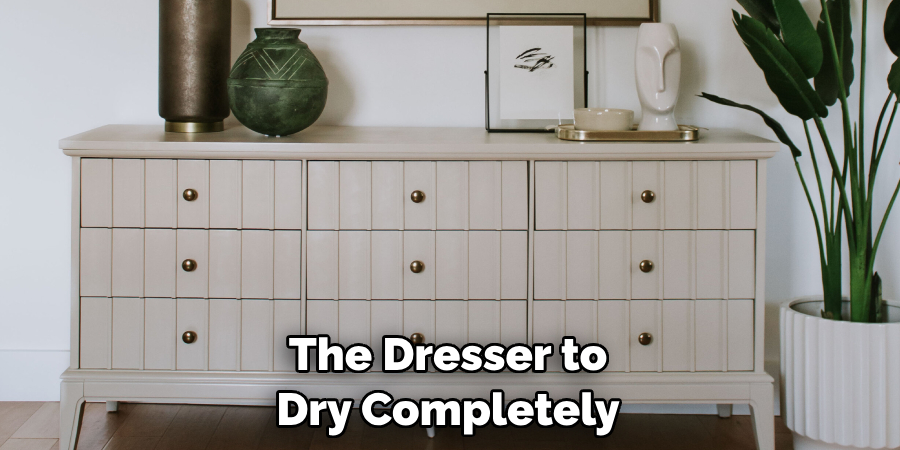
Step 9: Let Dry Completely
Let the dresser dry completely before you start to work on any additional details. This is a crucial step so don’t skip it! But make sure to use a fan or air conditioner to keep the area well-ventilated so that the paint can cure properly. This step also ensures that there are no rough edges and that the paint won’t start to peel after a while.
Step 10: Add Finishing Touches (Optional)
If desired, use spray paint for the finishing touches. You can choose either gold or silver, depending on your preferences. Do not apply the spray paint too close to the dresser and make sure you are in a well-ventilated area for this step. But make sure not to overdo it, as too much spray paint can ruin the look of your dresser.
Step 11: Add Dresser Handles
Once the dresser is completely dry, add back on any handles you had taken off before painting. It’s a good idea to use screws or bolts for this step – just make sure the size and type match your original hardware.
This will help ensure that the handles stay in place and won’t come off easily. And you’re done! Now you have a beautiful, newly painted dresser with new hardware to show off.
Following these steps on how to spray paint dresser should help you get the perfect finish on your dresser, but it’s always a good idea to practice on a test piece before actually starting to paint. Not only can this save you time and money by avoiding any mistakes, but it also gives you a better idea of how your finished product will look like. Happy painting!
Tips & Tricks for Spray Painting a Dresser
- Choose a Paint That is Specifically Designed for Furniture and Will Last Longer.
- Make Sure You Protect the Surrounding Area With a Drop Cloth or Newspapers While Spray Painting.
- Apply Several Coats of Light Paint Instead of One Thick Coat to Create an Even Finish.
- Always Let the Dresser Dry Completely Between Layers.
- To Prevent Streaks and Brush Strokes, Spray the Paint in One Direction.
- To Achieve a High-gloss Finish, Apply a Sealer After You Are Done Spray Painting.
Now that you know all the tips and tricks on how to spray paint a dresser, it’s time to get started! With just a few simple steps, you’ll have your dresser looking like new in no time. Just remember to be patient and take your time with each step for the best results. Good luck!
Do You Need to Use Professionals?
Spray painting a dresser is not a difficult task and can be done in the comfort of your own home. However, it is important to consider certain factors before starting: safety, the type of paint you’re using, and the size of your piece of furniture.
If you have any doubts or simply don’t feel comfortable with spray painting yourself, you can always hire professionals to do the job for you. They will be able to apply the paint evenly and ensure that it lasts for years to come.
Ultimately, whether you decide to do it yourself or use professionals – the choice is yours. As long as you take all necessary precautions and follow the steps outlined in this guide on how to spray paint a dresser, you will be able to achieve great results. So go ahead and start your DIY project today!
Frequently Asked Questions
Q: What’s the Best Way to Remove Paint From a Dresser?
A: For the best results, use sandpaper or a chemical stripper followed by a damp cloth for wiping away the paint. Make sure you wear gloves and work in a well-ventilated area when using any chemical stripper.
Q: Can I Spray Paint My Dresser Without Sanding?
A: It is not recommended to spray paint your dresser without sanding it first as this can cause uneven coverage of the top layer of paint. Sanding helps create a rougher texture which in turn helps with better adhesion of the primer and paint layers.
Q: What Kind of Paint Should I Use for My Dresser?
A: For best results, choose a high-quality paint specifically designed for furniture that will last longer. Always make sure to read the instructions on the paint can before applying. But if you’re unsure, it’s recommended to go for acrylic enamel paint as this type of paint typically works best on furniture.
Q: How Long Do I Need to Wait Before Adding the Finishing Touches?
A: Make sure that you are in a well-ventilated area and wait until the dresser is completely dry before adding any extra paint layers. It is not recommended to add any finishing touches if your dresser is still damp.
Conclusion
Painting a dresser is an easy and relatively low-cost way to give it a fresh look. With just a few supplies and basic instructions, anyone can achieve amazing results with minimal effort. By following the right steps on how to spray paint dresser, you can give your old dresser a brand-new shine in no time.
Of course, spray painting is only one of many possibilities for making over furniture. Depending on the materials you use and your desired look, you may opt to use traditional paints or even decals to customize your pieces.
No matter what style or color scheme you choose for your furniture makeover, experimenting with different techniques is a great way to breathe new life into old items and bring a unique taste into your home.