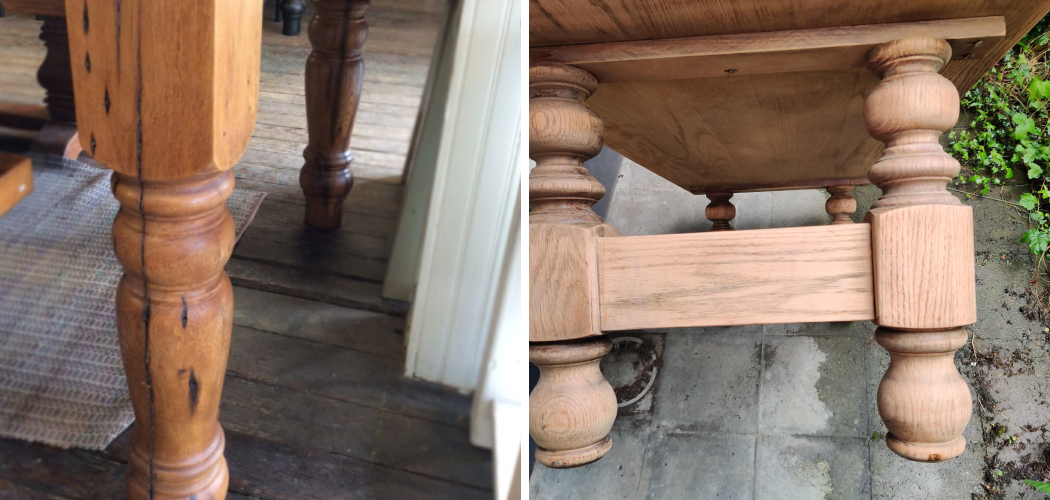
When it comes to furniture restoration or refinishing, learning how to sand round table legs is an essential skill. Proper sanding is crucial for achieving a smooth and professional finish, ensuring that your table legs not only look great but are also free of any imperfections that could mar the final result.

In this article, we will guide you through the process of sanding round table legs, outlining the necessary tools, effective techniques, and useful tips to make the job easier and more efficient. Whether you are a seasoned woodworker or a beginner looking to improve your DIY skills, this comprehensive guide will provide you with all the information you need to transform your round table legs into a stunning piece of furniture.
Understanding the Basics of Sanding
Why Sanding is Important
Sanding plays an integral role in woodworking, serving multiple purposes that ensure the final product is both aesthetically pleasing and functional. Primarily, sanding smooths out the wood’s surface, removing any rough spots, splinters, or imperfections that could negatively affect the finish.

This process creates a uniform surface that can evenly absorb finished materials such as paint, stain, or sealant. By sanding the wood, you are essentially preparing it to bond properly with these finishing products, ensuring a durable and long-lasting result. Additionally, thorough sanding helps highlight the natural grain of the wood, enhance its beauty, and make the final piece visually appealing.
Types of Sandpaper
Sandpaper comes in various grits, each designed for specific stages of the sanding process. Coarse grit sandpaper (40-60 grit) is used for initial heavy sanding, effectively removing old finishes, scratches, or significant imperfections. Transitioning to medium-grit sandpaper (80-120 grit) allows for finer shaping and smoothing of the wood’s surface after the rough sanding stage.
Fine grit sandpaper (150-180 grit) is used to achieve a smooth finish, preparing the wood for its final coat by eliminating any remaining minor blemishes. For the ultimate smoothness before finishing, extra-fine grit sandpaper (220-400 grit) is employed, ensuring that the wood is perfectly prepared to accept a finish. Understanding and appropriately using each type of sandpaper is crucial in achieving a professional and polished look for your round table legs.
Gathering Materials and Tools
Essential Materials
Having the right materials on hand is crucial to achieve a flawless sanding job on round table legs. You’ll need various grits of sandpaper, including coarse (40-60 grit), medium (80-120 grit), fine (150-180 grit), and extra-fine (220-400 grit) sandpaper. Sanding sponges are also useful, particularly for intricate areas and curved surfaces, as they can conform to the shape of the legs better than flat sandpaper. A tack cloth is essential for removing dust and debris from the surface between sanding stages and before applying finishes, ensuring a clean and smooth surface.

Additionally, there are optional materials that can aid in the sanding process. A wood cleaner can help prepare the surface by removing any dirt, grease, or old finishes, enabling better sanding results. Wood filler is another optional material that can be used to repair any dents, cracks, or imperfections in the wood, providing a seamless finish once sanded down.
Tools Needed
The right tools can make sanding round table legs more efficient and less labor-intensive. An electric sander is a primary tool for large or flat surfaces, as it can cover more area quickly and provide consistent results. A detail sander is particularly useful for reaching tight spots and complex curves typical of round table legs. For even more precision, especially in intricate areas, a rotary tool with sanding attachments can be incredibly effective.
Clamps are essential for securing the table or table legs in place while you work, ensuring safety and stability. Safety equipment like dust masks and safety goggles is crucial for protecting yourself from inhaling harmful dust particles and shielding your eyes from debris. Following these guidelines will help ensure you have all the necessary materials and tools to achieve a professional sanding result.
Preparing the Table Legs
Cleaning the Surface
Before you begin sanding, it’s essential to thoroughly clean the surface of the table legs. Cleaning is important because any dirt, grease, or remnants of an old finish can interfere with the sanding process, creating an uneven surface and preventing proper adhesion of new finishes. If these contaminants are not removed, they can clog the sandpaper, making it less effective and potentially leading to scratches or other imperfections.
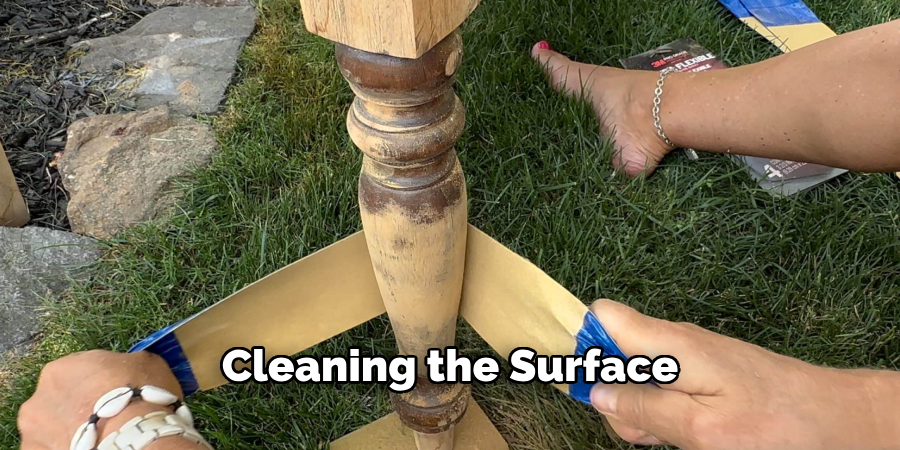
To clean the table legs, start by using a mild detergent or wood cleaner. Mix the detergent with water according to the product instructions, or apply the wood cleaner directly to the surface. Using a soft cloth or sponge, gently scrub the table legs to remove any surface dirt and grease. Pay special attention to intricate areas and curves where debris might accumulate. After scrubbing, rinse the surface with clean water and allow it to dry completely. If there are any remnants of an old finish, use a suitable stripper or a heavier-duty cleaner to ensure the legs are thoroughly prepped for sanding.
Securing the Table Legs
Stabilizing the table legs is a crucial step that makes the sanding process easier and more efficient. A stable work surface minimizes the risk of accidents and ensures even sanding. Depending on your preference and the design of your table, you can choose to either sand the legs while they are still attached to the table or remove them for easier handling.
If you decide to keep the legs attached, you’ll need to stabilize the entire table. Place the table on a workbench or a sturdy, flat surface, ensuring it doesn’t wobble. Use clamps to secure the table in place, preventing any movement while you sand.
If you choose to remove the legs, this can give you greater access and control over the sanding process, especially for intricate areas. Once removed, place each leg on a workbench and use clamps to hold them steady. This setup allows you to work on each leg individually, ensuring a thorough and even sanding job. Remember to wear safety equipment like dust masks and safety goggles throughout the process to protect yourself from wood particles and dust.
How to Sand Round Table Legs: Initial Sanding
1.Selecting the Right Sandpaper
To start the sanding process and remove any old finish or paint, begin with coarse-grit sandpaper, ideally in the range of 60 to 80 grit. Coarse grit sandpaper is designed to break through tough surfaces and strip away the old finish quickly and efficiently, laying the groundwork for subsequent finer sanding stages.

When selecting sandpaper, consider the type of wood you are working with. A slightly lower grit might be necessary for hardwoods like oak or maple, as these woods can withstand more aggressive sanding. For softer woods like pine or cedar, opt for the higher end of the coarse grit range to prevent over-sanding and damaging the wood.
2.Manual Sanding Techniques
Manual sanding requires a bit of patience and technique to achieve an even finish. To begin, wrap a sheet of coarse grit sandpaper around the leg of the table. Be sure to cover the entire surface area that will be sanded, ensuring there is enough overlap for a secure grip. Use a consistent, even motion to sand the surface, always following the direction of the wood grain.
This technique helps prevent scratches and ensures a smooth, even removal of the old finish. Maintain consistent pressure throughout the sanding process; applying too much pressure can create divots and uneven surfaces, whereas too little pressure may result in a patchy finish.
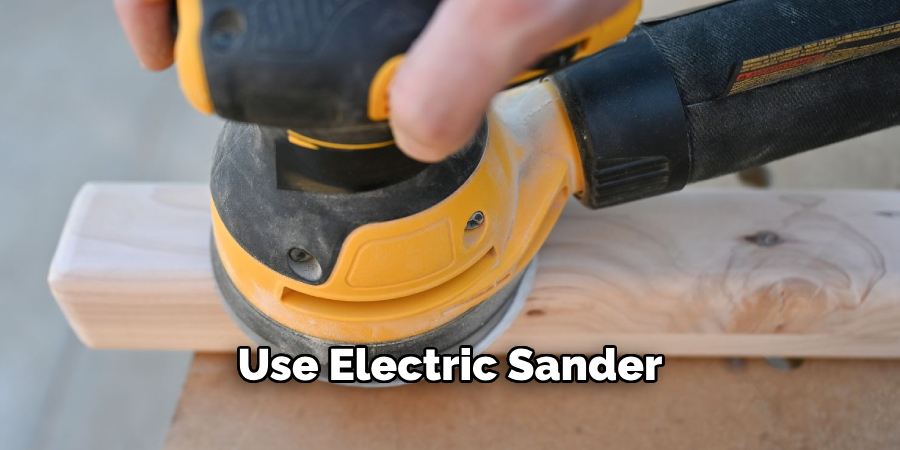
3.Using an Electric Sander
Using an electric sander can significantly expedite the initial sanding process, especially for larger areas. An orbital sander or a detail sander can be effective tools for this stage, but they must be used judiciously to avoid damaging the wood. First, equip your sander with coarse-grit sandpaper (60-80 grit). When starting the sander, make sure to place it gently on the wood surface to avoid gouging the material. Move the sander in smooth, even strokes following the wood grain, ensuring you do not hold it in one spot for too long, which can create uneven wear.
Safety is paramount when using electric sanders, particularly on round surfaces like table legs. Always use protective gear, including safety goggles and dust masks, to shield yourself from dust and debris. Additionally, ensure the table or legs are securely clamped in place to prevent accidents or unwanted movement during sanding.
Intermediate Sanding: Smoothing the Surface
Transition to Medium Grit Sanding
After the initial sanding phase, the next step is to focus on smoothing the surface of the table legs using medium-grit sandpaper, typically in the range of 120 to 150 grit. Medium-grit sandpaper is less abrasive than coarse grit, making it ideal for eliminating rough areas left by the initial sanding and creating a more uniform surface.
When transitioning to medium-grit sandpaper, it is crucial to maintain a consistent sanding technique and always move in the direction of the wood grain. This approach ensures that the wood surface is evenly sanded and helps prevent the occurrence of flat spots or other uneven areas.
To achieve an even finish, start by wrapping the medium grit sandpaper around the table leg, covering the entire sanding area. Use gentle, steady pressure to move the sandpaper back and forth along the grain. This technique helps to smoothly blend any discrepancies left by the coarse sandpaper and prepares the wood for fine sanding. Be patient and allow the sandpaper to do the work; pressing too hard can create new imperfections that will need to be addressed later.
Addressing Spindles and Intricate Areas
Additional attention and specialized tools are necessary for table legs with spindles or intricate designs. Sanding sponges or foam pads are excellent choices for handling detailed work, as they can conform to curves and irregular surfaces, ensuring that these areas receive proper attention. Sanding sponges are especially useful for spindles, as they can be manipulated to fit into grooves and around curves, delivering even sand without damaging the wood.
Consider using a detail sander or a rotary tool equipped with appropriate sanding attachments for carvings and intricate designs. These tools are designed for precision work and can reach areas that might be difficult to access with traditional sandpaper or sponges. When using these tools, operate them at a low to medium speed to avoid over-sanding delicate areas. The goal is to gently smooth these intricate parts without altering their original shapes and details.
Periodic Checks
Throughout the intermediate sanding process, it’s important to periodically check the smoothness of the surface to ensure that you are progressing correctly. One effective way to do this is by lightly running your hand over the sanded area; smooth surfaces should feel even and free of rough patches or scratches. Another method is to wipe the table legs with a damp cloth. Moistening the wood temporarily raises the grain and highlights any remaining imperfections or areas that may require additional attention.

Using a damp cloth also helps to remove dust and sanding debris, allowing you to clearly see the surface you are working on. Regularly removing dust is essential, as buildup can obscure imperfections and hinder the sanding process. By conducting these periodic checks, you can ensure that each stage of sanding is completed thoroughly, setting the foundation for the final sanding and finishing stages.
Conclusion
Sanding round table legs involves several key steps, each crucial for achieving a professional finish. Begin with coarse grit sandpaper to remove the old finish, using either manual techniques or an electric sander while always moving along the wood grain. Transition to medium-grit sandpaper (120 to 150 grit) to smooth the surface, paying extra attention to intricate areas such as spindles and carvings
Use specialized tools like sanding sponges or detail sanders for detailed work. It’s essential to conduct periodic checks by running your hand over the sanded surface or using a damp cloth to highlight any imperfections.
Taking the time to sand properly ensures a smooth, even surface that looks professional and extends the life of your furniture. By following this guide on how to sand round table legs, you’ll achieve a satisfying and visually appealing result, transforming your furniture into a piece that will be admired for years to come.