
Whether sprucing up an older home or updating a room’s aesthetic, replacing interlocking ceiling tiles can dramatically alter a space’s look and feel. This comprehensive guide will walk you through the process step by step on how to replace interlocking ceiling tiles, ensuring your home improvement project is as smooth and efficient as possible.
Interlocking ceiling tiles have been a staple in home design for decades, valued for their ease of installation and classic appearance. However, damage over time or simply a desire for a refresh can necessitate their replacement. Fear not — with the right tools and a bit of patience, you can transform your ceiling on your own.
Understanding Interlocking Ceiling Tiles
Interlocking ceiling tiles are unique in their design and installation method, setting them apart from other ceiling finishes. These tiles are designed to fit together in a precise manner without the need for visible nails or adhesive, creating a seamless and attractive finish.
Typically made from materials such as fiberboard, plastic, tin, or even polystyrene foam, these tiles offer both aesthetic appeal and functional benefits, including noise reduction and insulation.
Their design not only aids in a faster, cleaner installation process but also makes them relatively easy to remove or replace individually, should the need arise. Understanding the specific type of interlocking tile you are working with is crucial before beginning your project, as this will influence the tools and techniques used during the replacement process.
Why Replace Interlocking Ceiling Tiles?
There are several reasons why you may need to replace interlocking ceiling tiles, such as:
Damage:

Over time, ceiling tiles can become damaged from various factors such as water leaks, mold, or physical wear and tear.
Aesthetic Update:
Perhaps you simply want to update the look of your space by changing the style or color of your ceiling tiles.
Functionality:
Some interlocking ceiling tiles may no longer be effective at reducing noise or insulating the room, and replacing them can improve their efficiency.
Regardless of the reason for replacement, following these steps will ensure a successful and smooth project.
Necessary Tools and Materials
Gather the necessary tools and materials before you start to ensure a smooth process. Here’s what you’ll need:
- New ceiling tiles
- Utility knife
- Pry bar or hammer
- Nail gun or hammer and nails
- Safety glasses
- Dust mask
- Measuring tape
- Saw (hand saw or power saw, depending on preference)
- Straightedge or T-square
10 Step-by-step Guides on How to Replace Interlocking Ceiling Tiles
Step 1: Preparation

Before replacing any tiles, make sure to cover the floor and furniture with a drop cloth or plastic sheeting to protect them from debris. Additionally, wear safety glasses and a dust mask to protect yourself during the removal process.
But before removing any tiles, it’s important to first identify the type of interlocking tile you’re working with. This will determine how the tiles are held in place and what tools are needed for removal.
Step 2: Measuring and Cutting New Tiles
Measure the space where the new tiles will go. Remember, accuracy is key — measure twice, cut once. Transfer these measurements to your new tiles, using a straightedge or T-square for straight lines if you need to cut them to fit. When cutting, work slowly and carefully to ensure clean edges.
The most common way to cut interlocking ceiling tiles is with a utility knife, scoring the tile multiple times until it snaps along the line. However, if you are working with thicker or more rigid materials, a saw may be necessary. Consider using a hand saw or power saw, depending on the type of tile you are working with.
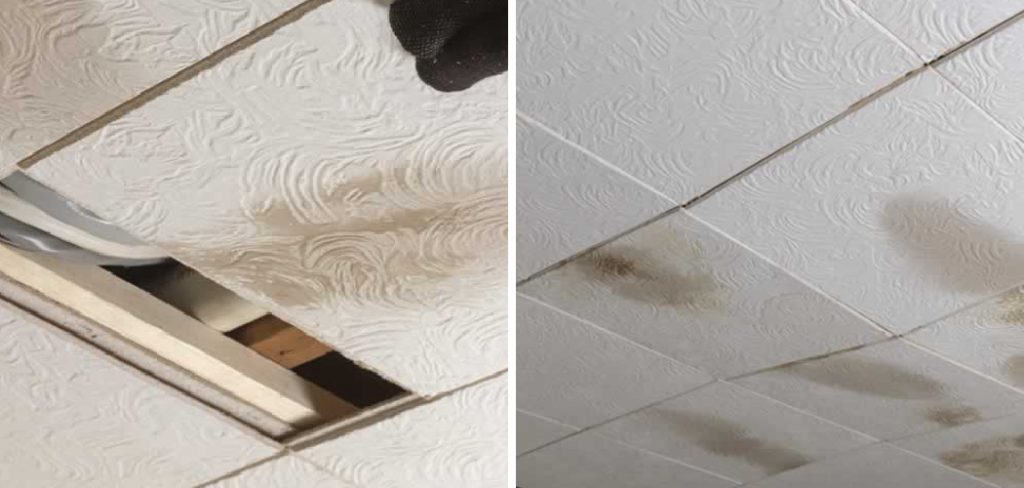
Step 3: Removing Damaged Tiles
Once you’ve prepared your workspace and have all your measurements and materials ready, it’s time to start removing the damaged tiles. Begin by gently lifting the edge of a damaged tile using a pry bar or the claw end of a hammer. Work slowly to avoid damaging adjacent tiles. For tiles that interlock tightly, it may be necessary to wiggle the pry bar gently back and forth to create enough space to lift the tile out.
If the tile doesn’t come loose easily, check for nails or adhesive that might be holding it in place and carefully remove these obstacles. Always move from the damaged area toward the undamaged tiles; this approach helps prevent further damage to the surrounding tiles. Once removed, clear any debris or old adhesive from the area to prepare for the installation of new tiles.
Step 4: Replacing Tiles
After the damaged tiles have been removed and the area is clean, you’re ready to begin installing the new tiles. Start by positioning your new tile at the angle required for it to fit into the existing framework of interlocking tiles. It might be helpful to slightly lift adjacent tiles to allow the new tile to slide into place more easily.

Once properly aligned, press down gently yet firmly to lock it into position with the surrounding tiles. If your tiles require it, use a nail gun or hammer and nails at this stage to secure the tile further. However, ensure that the nails are inserted at locations that will be hidden by the interlocking design to maintain the seamless appearance of the ceiling.
Repeat this process for each tile you need to replace, always working carefully so as not to damage adjacent tiles. Ensure each new tile is interlocked properly with its neighbors for a uniform and stable installation. After all the new tiles are in place, take a moment to inspect the ceiling for any gaps or unevenness, adjusting as necessary to achieve a consistent, attractive finish.
Step 5: Fitting Tiles Around Fixtures
Installing ceiling tiles around fixtures such as lights, vents, or smoke detectors requires special attention to detail. Begin by measuring the dimensions of the fixture and the location of its placement on the tile.
It’s important to ensure that these measurements are precise to avoid any gaps that could detract from the finished look of your ceiling.
Mark the area to be cut out on the new tile using a pencil and a straightedge or T-square.
For circular cuts, a compass can help achieve a perfect circle. To cut the tile, use a utility knife for smaller, more precise cuts or a jigsaw for larger or intricately shaped cuts. Always cut slowly to ensure accuracy and prevent damage to the tile.
Before installing the tile, dry-fit it around the fixture to ensure a snug and accurate fit. If adjustments are needed, trim the tile as necessary.
Once satisfied with the fit, install the tile as previously described, making sure it securely interlocks with the surrounding tiles. Carefully work around the fixture, ensuring that it is not damaged during installation. This attention to detail will ensure a professional and polished look upon completion.
Step 6: Installing Edge Tiles
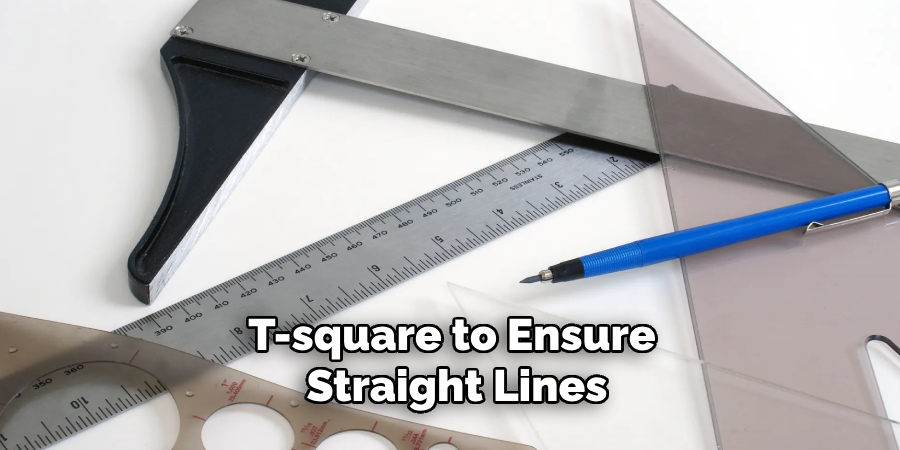
Edge tiles often require special cuts to fit snugly against the perimeter walls or around the room’s corners. To begin installing edge tiles, first, measure the distance between the wall and the last full tile in the row, subtracting the gap needed for expansion. Mark these measurements on your new tile, using a straightedge or T-square to ensure straight lines.
Cut the tile to size, following the same methods outlined in previous steps for cutting tiles. If the edge tile needs to wrap around corners or fit irregularly shaped areas, measure carefully and adjust your cuts to accommodate these unique shapes.
Once cut to the correct size and shape, check the fit of the edge tile by dry-fitting it into the space. This step not only helps in ensuring a precise fit but also in identifying any necessary adjustments before the final installation. If additional trimming is needed, make the adjustments carefully.
Step 7: Painting Tiles (Optional)
Should you decide to paint your ceiling tiles for aesthetic enhancement or to match your interior decor, ensure that the tiles are completely clean and free from dust or debris? Begin by applying a primer suitable for your tile material, providing a smooth base for the topcoat of paint. It’s essential to use a primer and paint that are compatible with the tile surface to avoid peeling or flaking over time.
Choose a paint that offers good coverage and is appropriate for the tile’s surface. Acrylic latex paint is a popular choice due to its durability and ease of cleaning. Apply the paint with a roller designed for smooth surfaces to achieve an even coat, using a brush to reach any edges or intricate details.
Depending on the original color and the paint’s opacity, you may require multiple coats to achieve your desired finish. Allow each coat to dry thoroughly before applying the next.
Step 8: Installing Trim
After all the ceiling tiles have been successfully installed and painted (if desired), the final step to achieve a polished and cohesive look is to install trim around the perimeter of the room. Trim not only adds a decorative finish but also conceals any uneven edges or gaps between the tiles and the walls, ensuring a neat and professional appearance.
Begin by measuring the perimeter of the room to determine the total length of trim required. When selecting trim, consider the room’s aesthetic and the style of the ceiling tiles to ensure a harmonious design. Trim comes in various materials, including wood, PVC, and MDF, each offering different benefits in terms of appearance and ease of installation.

Cut the trim to the required lengths, taking into account any corner angles to ensure snug fits and seamless joins. Miter saws are ideal for cutting precise angles, especially for corners that are not a perfect 90 degrees. Dry fit the trim pieces to check for accuracy before proceeding to installation.
Step 9: Cleaning Up
After completing the installation, take the time to clean up any debris or scraps left behind. Dispose of them properly and wipe down all surfaces with a damp cloth to remove any dust or residue.
Admire your finished ceiling and enjoy the satisfaction of a job well done! Remember to follow any maintenance instructions provided by the manufacturer to ensure your new ceiling tiles remain in top condition for years to come.
So there you have it, a step-by-step guide on how to install ceiling tiles! With proper planning and careful execution, installing ceiling tiles can be a rewarding and cost-effective way to upgrade your home’s interior.
Whether as a DIY project or with the help of a professional, this process can add beauty and value to any room in your home. Now go forth and tackle those ceilings with confidence!
Step 10: Enjoy Your New Ceiling!
With the installation complete and the cleanup concluded, it’s time for the most gratifying step – enjoying your newly installed ceiling. Stand back and take a moment to appreciate the transformed space. The fresh appearance of your ceiling tiles can dramatically alter the room’s ambiance, making it feel brighter, larger, or more inviting.
Whether you’ve chosen to paint your tiles or leave them in their original state, the new ceiling will undoubtedly enhance your home’s aesthetic appeal. Remember, this project not only represents an improvement in your living environment but also an investment in your property’s value.
Sit back, relax, and bask in the achievement of adding beauty and character to your home through your hard work and creativity.
Following these steps on how to replace interlocking ceiling tiles carefully will ensure a successful and efficient process, allowing you to enjoy the benefits of your newly refreshed ceiling. With the right tools and techniques, replacing interlocking ceiling tiles can be an easy and rewarding DIY project. So why wait? Start planning your project today!
Additional Tips

- When measuring for new tiles, always add a few extra inches in case of mistakes or uneven edges.
- If the ceiling is high, consider using a ladder or scaffolding for safety and ease of installation.
- Take breaks if needed to avoid fatigue and maintain accuracy during the project.
- Consider enlisting the help of a friend or family member for larger areas or if this is your first time replacing interlocking ceiling tiles.
- When removing damaged tiles, take care not to damage any surrounding tiles as this can add additional costs and time to the project.
- To prevent future damage or wear, regularly inspect your ceiling for issues and address them promptly. Ultimately, a well-maintained ceiling will last longer and save you from having to replace tiles frequently.
- Always follow manufacturer instructions for the specific type of tiles you are using, as different materials may have different installation methods.
- If you encounter any difficulties during the project or have questions, don’t hesitate to reach out to a professional for assistance.
Frequently Asked Questions
Q: Can Ceiling Tiles Be Installed Over an Existing Ceiling?
A: Yes, as long as the existing ceiling is in good condition and free from any moisture or damage. However, it is recommended to remove any old tiles before installing new ones for a cleaner and more secure fit.
Q: How Do I Determine the Number of Tiles Needed for My Project?
A: Measure the length and width of your ceiling in feet, then multiply the two numbers to determine the square footage. Next, check the product specifications of your chosen tiles to determine how many square feet each box covers. Finally, divide the total square footage by the coverage per box to determine the number of boxes needed for your project.
Q: Can I Paint My Ceiling Tiles?

A: Yes, most ceiling tiles can be painted with high-quality latex paint. Be sure to clean and prime the tiles before painting to ensure better adhesion and longevity. A roller is also recommended for a smooth and even finish. You can also consider using spray paint for a more efficient application.
Q: How Do I Clean My Ceiling Tiles?
A: Use a damp cloth or sponge with a mild detergent to gently wipe off any dirt or residue. Avoid harsh chemicals or abrasive materials that can damage the tiles’ surface. Also, never soak ceiling tiles in water as this can cause them to warp or disintegrate. But if they do get wet, allow them to dry completely before reinstalling or discarding.
Conclusion
Replacing interlocking ceiling tiles might seem daunting, but with the correct preparation and a little effort, it’s a task well within the capabilities of most DIY enthusiasts. Not only can this project significantly impact the look and feel of a room, but it also offers a satisfying sense of achievement upon completion.
Whether repairing damage or updating your home’s design, remember that patience and precision are your best tools. With this guide on how to replace interlocking ceiling tiles, you’re well on your way to revamping your space with beautiful new ceiling tiles.