Have you ever noticed that the flooring under your cabinets is looking a bit shabby and worn? Are you considering replacing it but feel daunted by the task ahead of you? If so, then this blog post is for you! Learning how to replace flooring under cabinets can help extend the life of your floors and increase the value of your home.
We will cover all aspects involved in a successful project, from assessing damage to finding supplies – so by the end of this article, you’ll have everything needed to select an appropriate material and complete a high-quality job!
Replacing the old flooring under your cabinets can be a daunting task. However, with some planning and preparation, it doesn’t have to be overwhelming. Here we will outline the steps needed to replace your kitchen or bathroom flooring from under the cabinets.
We’ll explore which materials are best suited for durability and show you how to prepare each area before removing the old floors and installing new ones. Get ready for beautiful, practical results!
Why May You Want to Replace Flooring Under Cabinets?
1. To Improve the Insulation
One of the key reasons people decide to replace flooring under cabinets is to improve the insulation of the area. The gaps between the cabinet and the floor can create a draft, leading to uncomfortable temperatures. Installing new flooring helps seal these gaps and provides better insulation for your home.
2. To Increase Aesthetic Appeal
The appearance of old or worn-out flooring can detract from the overall look of your kitchen. Replacing it with new flooring is a great way to give your home a fresh and updated look.
3. To Match New Flooring
If you’ve recently had new flooring installed in other parts of your home, replacing the old flooring under cabinets helps maintain consistency throughout your house. It also makes cleaning easier since you’ll just need to use one type of cleaner.
4. To Make Room for New Cabinets
If you want to install new cabinets in your kitchen, replacing the flooring under them is a must. It helps ensure that the cabinets are securely fastened to the ground and can support the weight of whatever you’ll be storing inside.

How to Replace Flooring Under Cabinets in 5 Easy Steps
Now that we know why you might want to replace the flooring under your cabinets, let’s look at how you can do it.
Step 1: Remove Cabinets and Appliances
The first step is to remove all the cabinets and other appliances from the area that needs new flooring. If possible, take these items outdoors to an area where you can safely work on them without damaging the rest of your home.
Step 2: Prepare the Floor
Once all cabinets and appliances have been removed, it’s time to prepare the floor for installation. Start by sweeping and vacuuming any debris and dirt from the area before using a floor scraper or sander to remove any old adhesive.
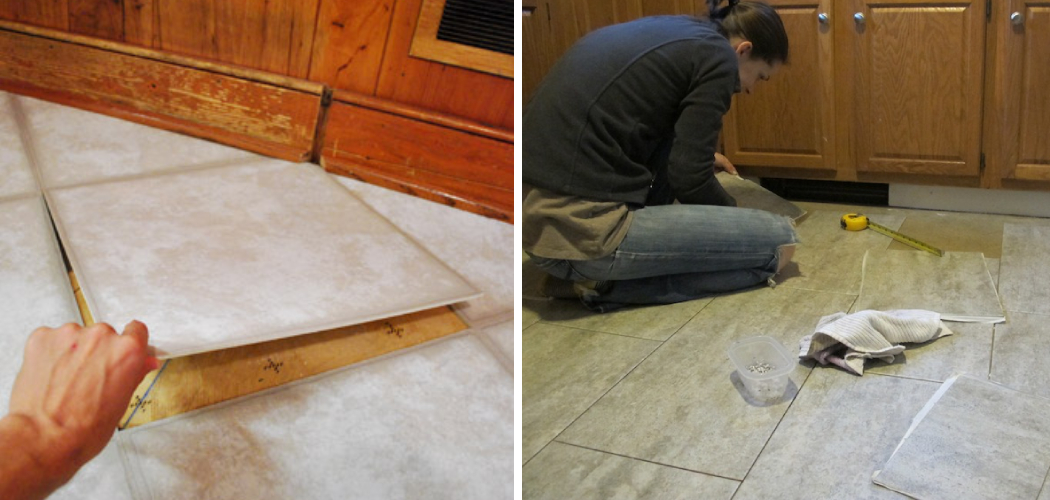
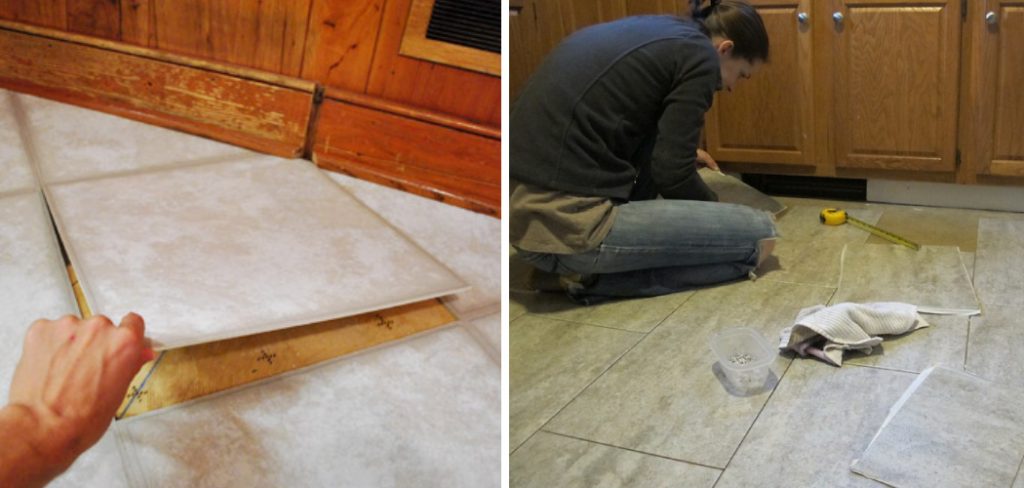
Step 3: Install New Flooring
Now that the area is prepped, it’s time to install the new flooring. Depending on your chosen material, you may need to use an adhesive when laying down the new tile or planks. Make sure you follow the instructions for your specific type to ensure the best results.
Step 4: Reinstall Cabinets and Appliances
Once the new flooring is installed, you can start reinstalling your cabinets and appliances. Make sure that they are securely fastened in place to avoid any future damage or repair needs.
Step 5: Check Your Work
The last step is to check your work. Make sure that everything is installed correctly and securely, and that there are no gaps between the flooring pieces or cabinets. Once you’re satisfied with your work, you’re done!
By following these five easy steps, you can quickly and easily replace the flooring under cabinets in your home. With just a few hours of work, you’ll have beautiful new floors and cabinets that will last for years to come. Good luck!
Some Extra Tips to Replace Flooring Under Cabinets
1. Do Not Over-tighten
When installing the new boards, be sure to not over-tighten them. This can cause damage to the cabinets and put extra strain on the floorboards. Also, make sure to use screws that are long enough to penetrate the subfloor and secure the boards in place.
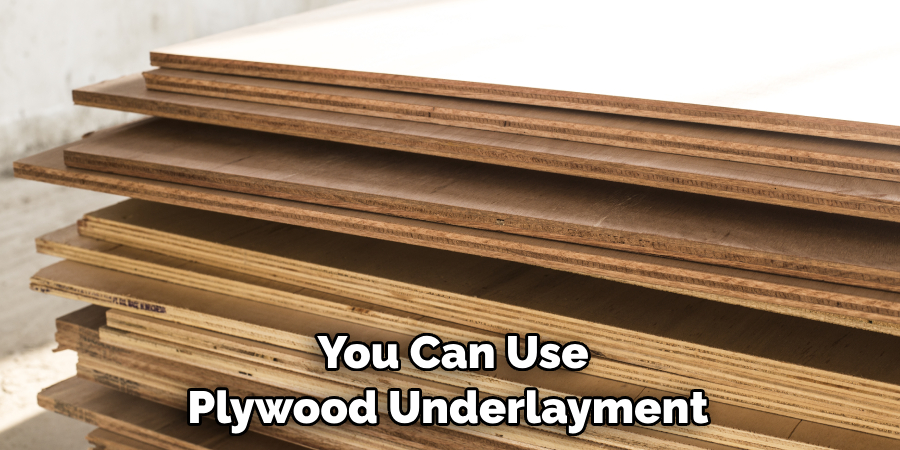
2. Use Plywood Underlayment
To help ensure a tight fit, you can use plywood underlayment when laying down new flooring under cabinets. This will help keep the planks in place and make them less likely to shift over time. Also, when laying the new flooring, use a construction adhesive to help secure it in place. This will add an extra layer of stability and prevent any shifting or warping as time goes on.
3. Fill In Gaps with Caulk
Once the new flooring is laid, be sure to fill in any gaps between the boards and the cabinets with caulk. This will help keep out dust and moisture, as well as prevent any creaking or movement of the boards over time.
4. Sand and Finish
Finally, before you put the cabinets back in place, be sure to sand down the edges of the new flooring so they are smooth. Then apply a sealant or finish to protect it from wear and tear. This will help ensure your new flooring looks great and lasts longer.
Following these tips will help you successfully replace the flooring under cabinets. Be sure to take your time and use caution when working around the cabinets so that the job is done correctly. With proper care, your new flooring should look beautiful and last for many years to come.
Frequently Asked Questions
What Precautions Should I Take Before Replacing the Flooring Under Cabinets?
Before replacing flooring under cabinets, make sure to take necessary safety precautions. This includes turning off the power supply at the breaker box and wearing protective gear such as gloves, goggles, and a face mask. Additionally, if you will be removing any existing cabinetry or furniture during this process, be sure that it is securely supported.
How Do I Prepare the Flooring for Installation?
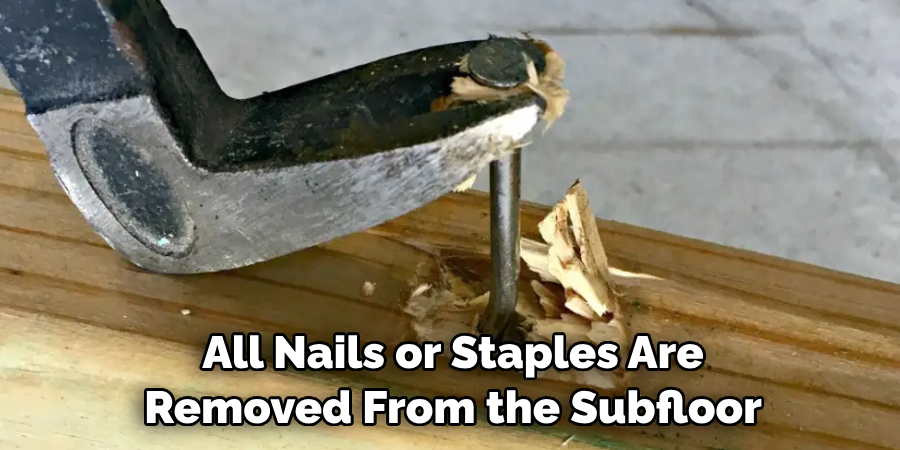
Before installing new flooring under cabinets, you will need to prepare the existing surface. This includes removing any old flooring that may be present and ensuring that all nails or staples are removed from the subfloor. Additionally, ensure that the subfloor is even and level so that your new flooring can be installed properly.
What Are Some Tips for Installing Flooring Under Cabinets?
When installing new flooring under cabinets, it is important to ensure that the boards are straight and flush with the edges of the cabinet. Additionally, use spacers between the floorboard and cabinetry to create a gap for expansion during temperature changes.
It is also helpful to use a circular saw or jigsaw to make any necessary cuts for precise fitting. Finally, when nailing the boards in place, ensure that you are using the correct type of nails and fastening them securely.
After installation is complete, finish off the flooring by applying sealant or varnish to create a protective barrier against water and scratches. Depending on the type of flooring, you may also need to fill in any gaps or cracks with a sealant material.
Can I Replace the Flooring Under the Cabinets Without Professional Help?
Replacing the flooring under cabinets is a task that can be completed with minimal tools and some DIY knowledge. With the right preparation and patience, it is possible to replace your flooring without professional help. However, if you are unsure of how to complete this project or do not have the necessary tools, it may be best to consult with a professional installer.
How Much Does It Cost to Replace Flooring Under Cabinets?
The total cost of replacing flooring under cabinets will depend on the type of flooring you choose, as well as any additional materials and labor required for installation. Generally speaking, the average cost can range from a few hundred dollars up to several thousand depending on the scope of the project.
It is important to note that replacing flooring under cabinets can be a time-consuming task. Be sure to set aside enough time and materials in order to complete the project properly. Additionally, if you are unsure of how to properly install new flooring, it is always best practice to consult with a professional for guidance.

Conclusion
Now you know how to replace flooring under cabinets! Making sure that you have the right tools for structural support and flooring replacement is important, as it can affect the longevity of the life of your new flooring. With those considerations in mind, replacing flooring under cabinets is undoubtedly a cost-effective and worthwhile project if done correctly.
Not only will this improve the safety of your home but it will also add to its aesthetic appeal. It’s fair to say that anyone with some knowledge or help from a handyman can easily tackle this simple job with great results. A beautiful new floor can quickly turn even an outdated kitchen into a functional and stylish place to be – making all the careful measuring and replacing absolutely worth it!