
Maintaining the structural integrity of ceiling tiles is crucial for both aesthetic and safety reasons. Sagging ceiling tiles can detract from a room’s overall appearance, giving it a neglected and worn-out look.
More importantly, they can also pose a safety hazard if left unaddressed, potentially leading to further damage or even collapse. Understanding how to repair sagging ceiling tiles is essential for homeowners and facility managers alike to ensure a sound and visually pleasing environment.
The repair process for sagging ceiling tiles involves several key steps. First, identifying the root cause of the sagging is necessary to determine the most effective repair method. Common causes include moisture damage, improper installation, or deteriorated materials.
Once the underlying issues are identified, the appropriate tools and materials must be gathered. The actual repair process can range from simply re-securing tiles to replacing damaged sections entirely. Techniques may vary depending on the type of ceiling tile and the extent of the damage.
This comprehensive guide will provide detailed instructions on how to repair sagging ceiling tiles, ensuring that the repaired ceiling is both durable and attractive. By following these steps, you can restore your ceiling tiles to their original state and prevent future issues.
Understanding the Causes of Sagging
Sagging ceiling tiles can be a persistent issue in many homes and buildings, detracting from both aesthetic appeal and structural integrity. Understanding the common reasons for ceiling tile sagging is the first step toward effective repair and prevention.
One of the most prevalent causes of sagging ceiling tiles is moisture damage. Water leaks from roofs, plumbing systems, or HVAC units can seep into the ceiling materials, causing them to swell and lose their rigidity. Over time, this moisture leads to deterioration and eventual sagging.
Another frequent cause is improper installation. Ceiling tiles that are not installed correctly, whether due to an amateur installation or shortcuts taken during construction, are more prone to sagging. Insufficient support structures can also exacerbate this issue, resulting in tiles that cannot maintain their position.
Material deterioration is another factor that contributes to sagging ceiling tiles. Over time, the materials used in ceiling tiles can degrade, especially in environments with fluctuating temperatures or high humidity.
Acoustic tiles, for example, may lose their firmness and begin to droop. Age and wear inevitably weaken the structural integrity of ceiling tiles, making them more susceptible to sagging.
To effectively address the issue of sagging ceiling tiles, it is essential to identify the underlying issues contributing to the problem.
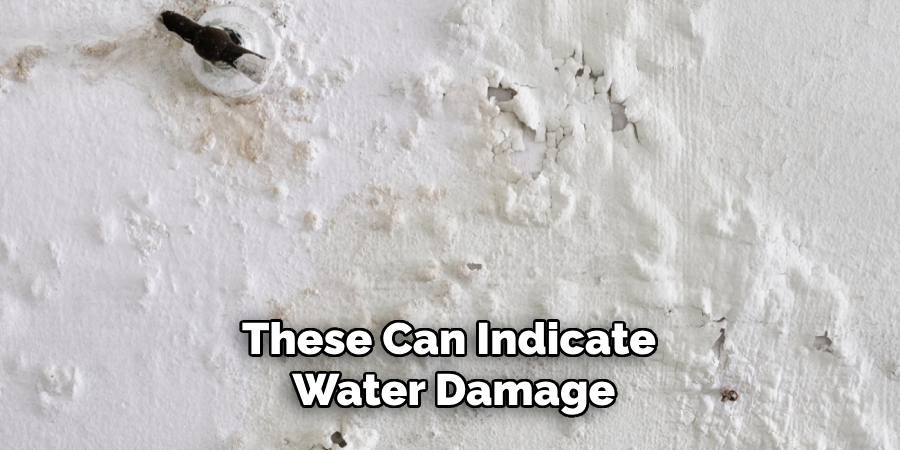
Begin with a comprehensive visual inspection of the affected areas, looking for telltale signs such as discoloration, cracks, or bulges. These can indicate water damage or compromised materials. If moisture is suspected, investigate potential sources, such as leaks from above, to ensure the problem is not recurring.
Examining the installation quality is equally important. Check if the ceiling tiles are properly aligned and securely fastened to the support structure. Loose or misaligned tiles could point to an installation issue that needs correcting.
Additionally, assess the condition of the support framework itself. Weak or insufficient support bars can fail to hold the tiles in place, necessitating reinforcement or replacement.
In conclusion, understanding the causes of sagging ceiling tiles is vital for determining the most appropriate repair strategies. Common reasons include moisture damage, improper installation, and material deterioration.
By thoroughly identifying and addressing these underlying issues, one can develop an effective plan to restore and maintain the integrity of ceiling tiles, ensuring a safe and visually appealing environment.
Assessing the Damage
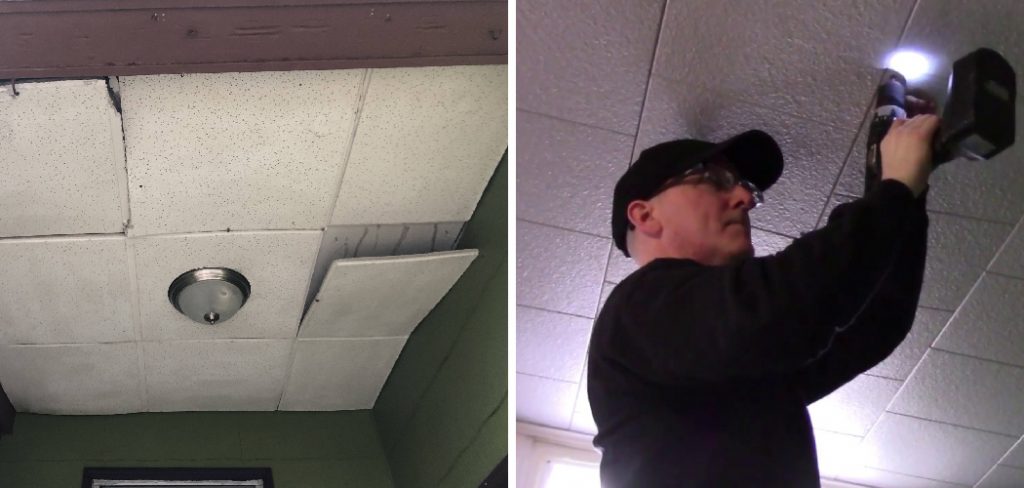
Before initiating repair work on sagging ceiling tiles, it is crucial to accurately assess the extent of the damage. The first step in this process is a thorough visual inspection of the affected area, which helps to identify immediate issues and potential underlying causes.
Begin the inspection by carefully examining the entire ceiling, focusing particularly on areas where sagging is most noticeable. Look for signs such as uneven surfaces, bulging, or gaps between the tiles and the support structure.
Discoloration or staining can indicate underlying problems, such as mold damage or mold growth. Using a flashlight or other focused light source can help to highlight these issues more clearly.
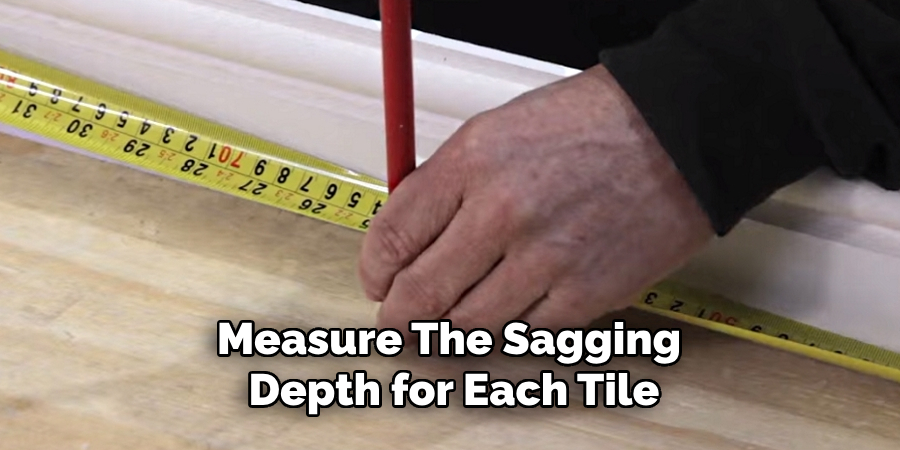
Next, determine the extent of the sagging. This involves evaluating how many tiles are affected and the severity of their displacement.
It is useful to sketch out a rough diagram of the ceiling to mark the locations and extent of the sagging areas. Measure the sagging depth for each tile with a ruler or measuring tape, noting areas with significant drooping, as these might require more extensive repairs.
Another critical part of assessing ceiling tile damage is checking for moisture damage. Look and feel for dampness or signs of water infiltration, such as water stains, soft spots, or mildew odors. If available, use a moisture meter to measure the moisture content of the tiles and underlying structure.
Pay particular attention to areas beneath plumbing fixtures, HVAC units, or roof sections, as these are common sources of leaks.
Beyond visual and moisture checks, examining other potential underlying issues is important. Investigate the ceiling’s support framework to ensure it is intact and capable of holding the weight of the tiles.
Loose or missing support bars, brackets, or fasteners can lead to sagging and must be addressed. Additionally, evaluate whether improper installation techniques or outdated materials might contribute to the problem.
By conducting a detailed damage assessment, you can identify the root causes and determine the most effective approach to repairing sagging ceiling tiles. This systematic evaluation ensures that all issues are addressed, preventing further damage and restoring the ceiling to a safe and aesthetically pleasing condition.
Gathering Necessary Tools and Materials
Before you begin repairing sagging ceiling tiles, it’s important to gather all required tools and materials to ensure the task is completed efficiently and safely. Having everything at hand will help you avoid unnecessary delays and ensure you get the job done right.
Tools Required for the Repair Process
The first item category you’ll need is the tools for performing the repair work. These include:
- Utility Knife or Box Cutter: This is used for trimming and removing damaged tiles.
- Measuring Tape: To measure the dimensions of tiles and the areas that need repair.
- Straightedge or Carpenter’s Level: To ensure your tiles are aligned and level.
- Pry Bar or Putty Knife: To carefully remove old tiles without damaging adjacent ones.
- Screwdriver or Drill: For securing tiles to the support structure.
- Staple Gun: Useful for fastening tiles to their supports, especially in drop ceiling systems.
- Moisture Meter: To detect the moisture levels in the tiles and structure, identify and address any issues.
- Pencil and Notepad: This is used for making notes, measurements, and sketches.
Materials Needed for Reinforcement or Replacement
Next, gather the materials required for reinforcing or replacing the ceiling tiles:

- Replacement Ceiling Tiles: Choose tiles that match the existing ones in both material and design.
- Support Bars or Tracks: For reinforcing the structure that holds the tiles.
- Sealant or Adhesive: Make sure to use a moisture-resistant variant for added durability.
- Insulation Material: If moisture or temperature changes have been issues, consider adding or replacing insulation.
- Drywall Screws or Fasteners: Choose screws that are specifically designed for the weight and type of your ceiling tiles.
- Anti-Mold Treatment: To prevent any future mold growth if moisture is an issue.
Safety Equipment and Precautions
Safety is a priority when performing any repair work, so make sure to have the following safety equipment:
- Safety Glasses: To protect your eyes from dust, debris, and falling particles.
- Work Gloves: For hand protection when handling tools and materials.
- Dust Mask or Respirator: To avoid inhaling dust, mold spores, or other harmful particles.
- Ladder or Step Stool: Ensure it is sturdy and stable for reaching the ceiling safely.
- Drop Cloths: To protect the floor and furniture from debris and dust.
Ensure you have all necessary tools, materials, and safety equipment before starting the repair. This will better prepare you to restore your ceiling tiles to their original condition. Taking these precautions will help ensure the repair process runs smoothly and safely, resulting in a long-lasting and visually appealing ceiling.
Repair Techniques for Different Types of Ceiling Tiles
Methods for Repairing Sagging Acoustic Tiles
Acoustic tiles, commonly used for their sound-absorbing properties, can occasionally start to sag due to moisture or the deterioration of the adhesive. To repair sagging acoustic tiles, first ensure the area is dry.
Use a utility knife or box cutter to carefully remove the sagging tile, ensuring that it does not damage the surrounding tiles. Clean the area where the tile was removed using a damp cloth to remove any adhesive residue.
For reinstallation, apply a new layer of adhesive—preferably a water-resistant variety—on the back of the tile. If the support framework beneath is compromised, add additional support bars to reinforce the structure.
Position the tile back onto the ceiling, pressing firmly to ensure it sticks well. You can use a staple gun for extra support, especially if the tile is heavy. Allow the adhesive to dry thoroughly before continuing with any other ceiling work to prevent further sagging.
Reinforcement Strategies for Vinyl Ceiling Tiles
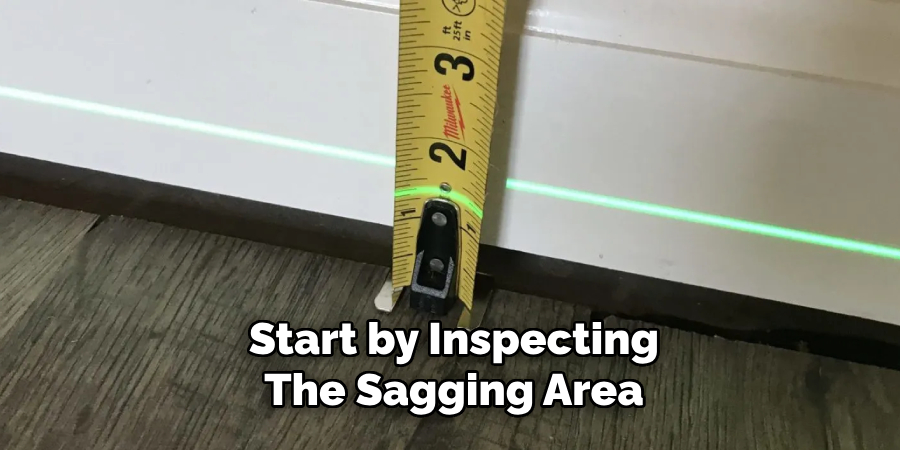
Vinyl ceiling tiles, known for their durability and ease of maintenance, can also suffer from sagging or detachment over time. Start by inspecting the sagging area to identify whether the issue is with the tile itself or the support structure. If the issue is a weakened structure, add supplementary support bars.
When reinforcing vinyl tiles, you need a sturdy adhesive or a mixture of screws and adhesive. Remove the affected tile using a pry bar to avoid damage. Clean both the tile and the surrounding area of any old adhesive and dirt.
Apply a robust, water-resistant adhesive specifically designed for vinyl. If using screws for extra reinforcement, ensure they are evenly spaced and driven into the support structure at a slight angle for maximum hold.
Replace the vinyl tile, pressing firmly to ensure the adhesive bonds well. Use a carpenter’s level to ensure the tile is even with the surrounding tiles. Allow adequate drying time, as recommended by the adhesive manufacturer, before completing any further tasks.
Replacement Procedures for Damaged Tiles Beyond Repair
Certain ceiling tiles might be beyond repair due to extensive damage from moisture, mold, or physical impacts. Replacing these tiles is essential to maintaining your ceiling’s aesthetic and functional qualities. Begin by removing the damaged tiles using a utility knife, taking care not to damage adjacent tiles.

Cut the new replacement tiles to match the exact dimensions of the old ones. For tiles that need precise cutting, use a straightedge for better accuracy. Apply an appropriate adhesive to the back of the new tile.
If you’re also using a staple gun for additional support, make sure the staples are placed along the edges of the tile. Press the new tile into place and use a straightedge or level to ensure it aligns properly with the surrounding tiles.
In cases where moisture is an issue, treat the underlying structure with an anti-mold spray before placing the new tile to prevent future problems. This preventive measure can considerably enhance the longevity of the new installation.
Special Considerations for Metal or Fiberglass Tiles
Due to their unique properties, metal and fiberglass ceiling tiles require specific techniques. Metal tiles can corrode over time, and fiberglass tiles may deteriorate with exposure to moisture. For metal tiles, inspect for rust or corrosion. If only a small area is affected, consider sanding the rust off and applying a rust-inhibiting primer before painting.
For sagging metal tiles, ensure the support framework can handle the weight. Reinforce the structure with additional metal bars if needed. Use an adhesive suitable for metal, and consider using screws to securely fasten the tile to the support structure.
Fiberglass tiles necessitate moisture control. If sagging occurs, check the support bars for rust or weakening and reinforce them as needed.
Clean the surrounding area and edges of the tile to remove any build-up that may have caused the sagging. Apply a moisture-resistant adhesive to the back of the tile, pressing it into place until it is secure. Use a level to ensure it is correctly aligned.
By understanding and employing these specific repair techniques for different types of ceiling tiles, you can effectively restore the functionality and appearance of your ceiling. Each type of tile presents unique challenges, but with the right approach, you can ensure a durable and visually pleasing result.
How to Repair Sagging Ceiling Tiles: Step-by-Step Repair Guide
1. Clearing the Area and Ensuring Safety
Before beginning any repair work, clearing the area and ensuring safety is crucial. Move any furniture and personal items out of the way to prevent dust and debris from settling on them. Lay down drop cloths to protect the floor and any remaining furniture.
Make sure the working area is well-ventilated and that you wear appropriate safety gear, including goggles, gloves, and a dust mask. Check that your ladder is stable and that all tools are within easy reach to avoid unnecessary movements that could lead to accidents.
2. Securing the Sagging Tiles Temporarily
When dealing with sagging tiles, your first step should be to secure them temporarily to prevent further damage. Use painter’s tape or lightweight clamps to hold the sagging tiles in place. Ensure the tape or clamps do not damage the surface of the tile.
This temporary measure is especially important if you need to inspect or repair the underlying support structure before fully reattaching the tiles. Gently remove any loose debris around the sagging area to facilitate a cleaner reattachment later on.
3. Applying Adhesive or Reinforcement
Once the sagging tiles are secured, you can begin the process of applying adhesive or reinforcement.
For acoustic and vinyl tiles, a water-resistant adhesive works well. Apply a generous layer of adhesive on the back of the tile and press it firmly against the ceiling. In the case of metal tiles, consider using a combination of screws and adhesive to ensure a sturdy hold.
For additional reinforcement, especially with heavier tiles, use a staple gun or screws to secure the tiles to the support framework, making sure to distribute the weight evenly.
4. Replacing Damaged Tiles if Necessary
In some cases, tiles may be too damaged to repair and must be replaced. Carefully remove the damaged tiles using a utility knife, ensuring that they do not harm the surrounding tiles.
Measure and cut the new tiles to fit the existing space perfectly. Apply the same adhesive used for securing sagging tiles, and if needed, reinforce with staples or screws.
Treat the support structure with an anti-mold spray for areas previously affected by moisture before placing the new tiles to prevent recurrence. Press the new tiles into place and check for level alignment with adjacent tiles.
5. Finishing Touches and Cleanup
After the adhesive and reinforcements have been properly applied and allowed to dry, the final steps involve finishing touches and cleanup.
Check all the tiles to ensure they are securely fixed and aligned properly. If you’ve added reinforcement, make sure no screws or staples are protruding. Touch up any areas where the ceiling may show signs of wear or previous damage, including repainting if necessary. Remove all temporary tapes or clamps.

Finally, clean up the area by removing drop cloths and vacuuming any dust or debris that may have accumulated. Reposition furniture and personal items and conduct a final inspection to ensure all repairs are visually and structurally sound.
By following these step-by-step instructions, you can ensure a safe, effective, and aesthetically pleasing repair of your ceiling tiles. Detailed preparation and careful execution at each stage will result in a durable and polished outcome.
Preventive Measures to Avoid Future Sagging
Addressing Underlying Structural Issues
Preventing future sagging starts with addressing any underlying structural issues that may contribute to the problem. Assess the condition of your ceiling’s support framework, ensuring it is robust and damage-free.
Over time, wooden beams or metal bars may weaken due to factors such as age, water damage, or pests. Regularly inspect these structural components and replace or reinforce them as necessary.
If moisture is a recurring issue, identify and eliminate the source of leaks, whether from the roof, plumbing, or condensation, to protect the integrity of your ceiling framework.
Implementing Regular Inspections and Maintenance
Regular inspections and maintenance are vital to catching potential issues before they lead to sagging tiles.

Schedule periodic checks of your ceiling tiles and support structures, paying close attention to signs of wear, moisture damage, or any bowing in the tiles. Clean the tiles regularly to prevent the build-up of dust and debris, which can add unnecessary weight.
Additionally, check for any indications of mold or mildew, especially in areas prone to humidity. Early detection allows for prompt intervention, reducing the risk of more severe damage and costly repairs.
Reinforcement Techniques for Vulnerable Areas
Reinforcement of vulnerable areas can significantly extend the lifespan of your ceiling tiles and prevent sagging. Focus on areas prone to high humidity or heavy use, such as bathrooms, kitchens, and basements.
Consider reinforcing the edges with additional adhesive or corner brackets for acoustic and vinyl tiles to provide extra support. Due to their weight, metal tiles may benefit from supplementary metal bars or cross-bracing in the support framework.
Where possible, use moisture-resistant materials and adhesives to combat the effects of humidity. Implementing these reinforcement techniques not only bolsters the immediate areas of concern but also enhances the overall stability of your ceiling.

By taking these preventive measures into account—addressing structural issues, maintaining regular inspections and maintenance, and reinforcing vulnerable areas—you can ensure a longer-lasting, aesthetically pleasing ceiling.
Prevention is always more cost-effective and less disruptive than repairing extensive damage, making these steps crucial for maintaining the beauty and functionality of your ceiling tiles.
Conclusion
Addressing sagging ceiling tiles promptly is crucial for maintaining the structural integrity and aesthetic appeal of any space. Neglecting this issue can lead to more severe damage, such as mold growth, compromised support structures, and potential health hazards.
By understanding how to repair sagging ceiling tiles, you not only restore the appearance of your ceiling but also prevent further deterioration.
For successful repairs, ensure that you follow each step diligently. Begin by securing the sagging tiles with temporary supports to allow for a thorough inspection and a safe working environment.
Apply appropriate adhesives or reinforcements to ensure a sturdy hold, and don’t hesitate to replace any excessively damaged tiles. Always use water-resistant materials and anti-mold treatments, particularly in moisture-prone areas, to enhance the durability of your repairs.
Proactive maintenance is key to avoiding future problems with your ceiling tiles. Conduct regular inspections to catch early signs of wear or damage, clean the tiles frequently to prevent dust and debris buildup, and address any moisture issues immediately.
Reinforcing vulnerable areas with additional support will help sustain the ceiling’s integrity over time, offering added protection against sagging.
By incorporating these tips and being vigilant with proactive care, you can ensure long-lasting, beautifully maintained ceiling tiles.
These preventive measures ultimately save time, money, and effort, promoting a safe and aesthetically pleasing living or working environment. Remember, knowing how to repair sagging ceiling tiles is an invaluable skill that serves both immediate needs and future upkeep.