
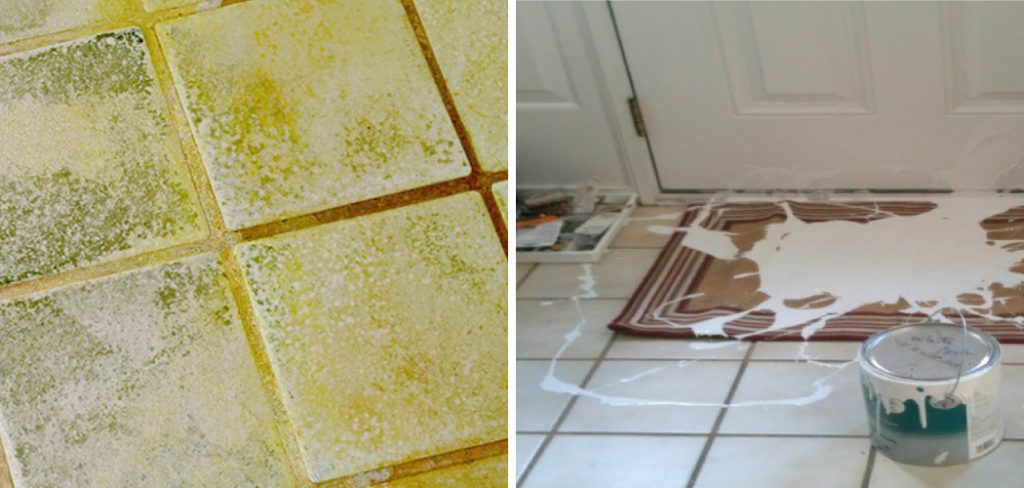
Accidentally splashed some paint on your bathroom tiles or inherited a tile paint job that’s just not your style? Removing paint from bathroom tiles might seem like a daunting task, but with the right tools and techniques, you can restore your tiles to their former glory.
This guide on how to remove tile paint from bathroom tiles will walk you through why it’s important to remove that paint, the materials you’ll need, and a step-by-step process to get those tiles looking brand new again.
What Is Tile Paint Removal?
Tile paint removal involves stripping away layers of paint that have been applied to the tiles. Whether the paint is old and chipping or recently added but not to your taste, removing it can refresh the look of your bathroom without the need for a full renovation.
You may also want to remove tile paint if it’s starting to peel or discolor, which can happen when the wrong type of paint is used or if the tiles were not properly prepared before painting. Removing the old paint allows you to start fresh and ensure that your new coat of paint adheres properly.
Why Remove Paint from Bathroom Tiles?
Aesthetic Appeal:
Unwanted paint can make your bathroom look cluttered and outdated. Removing it can brighten your space and create a cleaner, more modern look.
Tile Longevity:
Paint can sometimes trap moisture against the tile, leading to mold and mildew. Removing the paint can help your tiles last longer and remain in good condition.
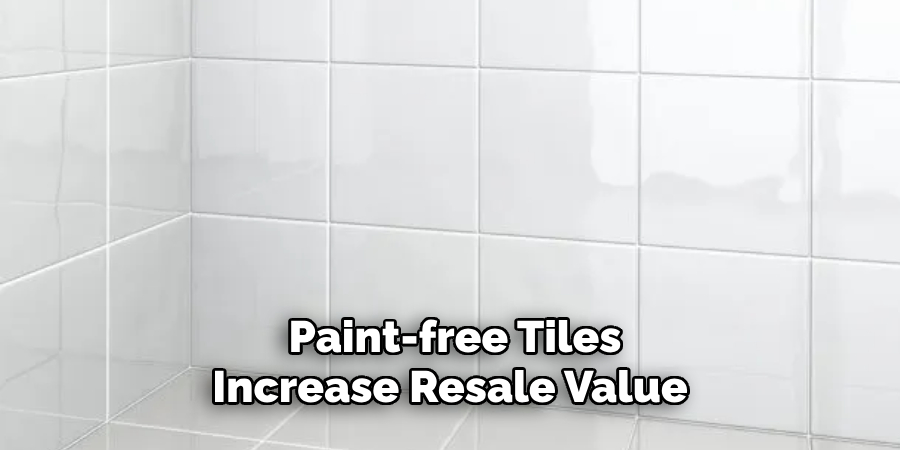
Resale Value:
If you’re planning to sell your home, clean, paint-free tiles can make your bathroom more attractive to potential buyers.
In this blog post, you’ll learn a detailed, step-by-step process to remove paint from bathroom tiles, as well as additional tips and answers to frequently asked questions.
Needed Materials
Before you start, gather these essential materials:
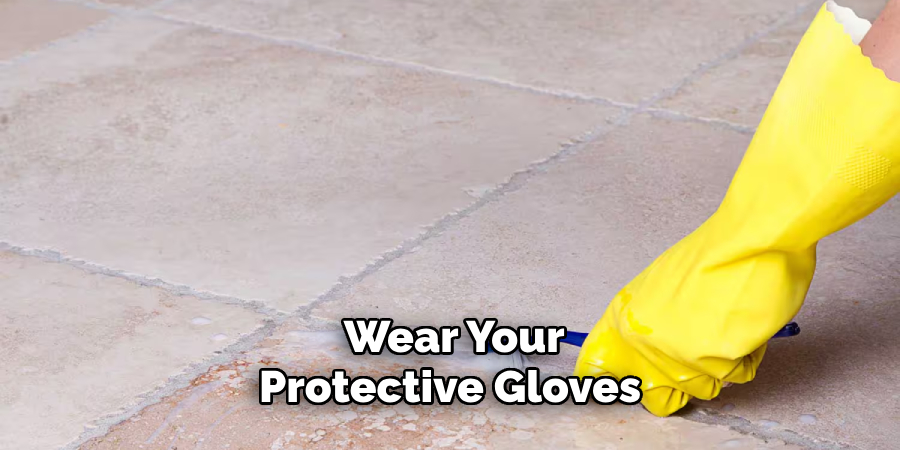
Protective Gloves:
Paint stripper can be harsh on the skin, so make sure to wear protective gloves.
Respirator Mask:
To avoid inhaling fumes from the paint stripper, a respirator mask is necessary.
Paint Stripper:
Choose a paint stripper specifically designed for tiles. There are different options available depending on the type of tile and paint you’re removing, so read the labels carefully.
Scraper:
A scraper will help remove any loose or peeling paint without damaging the tiles.
Steel Wool or Sandpaper:
Use steel wool or fine-grit sandpaper to gently sand away any remaining bits of paint.
Clean Cloth:
Wipe down the tiles with a clean, damp cloth to remove any remaining residue after stripping.
Step-by-step Guidelines on How to Remove Tile Paint From Bathroom Tiles
Step 1: Prepare the Area
Before you begin the paint removal process, it’s important to prepare the area to ensure safety and efficiency. Start by removing any movable items from the bathroom, such as rugs, toiletries, and decorations, to prevent them from getting damaged or contaminated by paint stripper. Next, ventilate the room by opening windows or turning on an exhaust fan to allow fumes to escape and reduce the risk of inhaling harmful chemicals.
Lay down protective sheets or old towels over surfaces such as bathtubs, countertops, or floors to catch any drips or splashes. Lastly, put on your protective gloves and respirator mask. Proper preparation of the area will make the paint removal process smoother and safer.
Step 2: Safety First
Before you proceed with applying any chemicals, it’s crucial to prioritize safety. Make sure you are wearing your protective gloves and a respirator mask to shield yourself from the harsh chemicals found in many paint strippers. Additionally, it’s wise to wear long sleeves and goggles to protect your skin and eyes from potential splashes.
Always read the manufacturer’s instructions on the paint stripper’s label carefully, paying close attention to any specific safety warnings or additional protective measures recommended. By taking these safety precautions, you can minimize health risks and ensure a safer paint removal process.
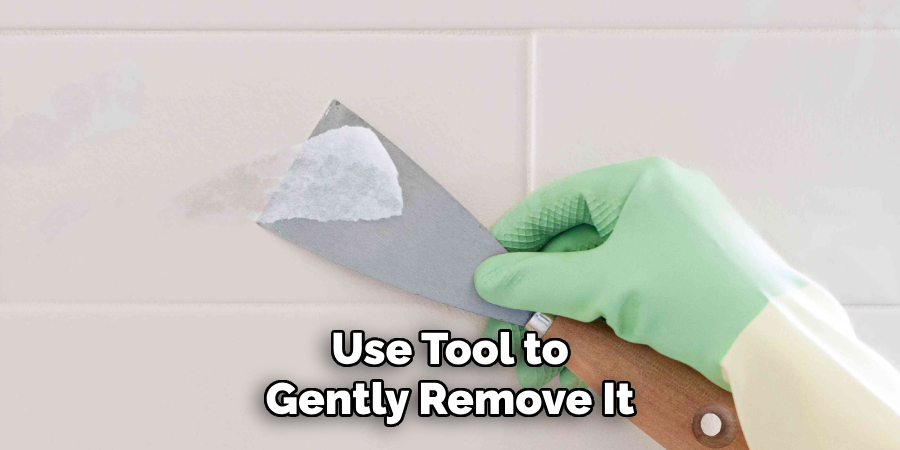
Step 3: Scrape Off Loose Paint
Once you have prepared the area and ensured your safety, it’s time to start removing the paint. Begin by using a scraper to gently lift and scrape off any loose or peeling paint on the tiles. Hold the scraper at a slight angle and apply even pressure to avoid scratching or damaging the tile surface. It’s important to be patient and methodical, removing small sections of paint at a time.
If you encounter stubborn areas that are difficult to scrape off, you can apply a small amount of paint stripper to soften the paint and make it easier to remove. Continue scraping until you’ve removed as much loose paint as possible, preparing the tiles for the next step in the paint removal process.
Step 4: Sanding
After removing the loose paint with a scraper, the next step is to sand the tiles to eliminate any lingering paint and smooth out the surface. Use a piece of fine-grit sandpaper or steel wool for this task. Gently sand the painted areas in a circular motion, taking care not to damage the tile itself. Ensure uniform sanding across the entire surface for consistent results.
If you’re dealing with particularly stubborn paint, you may need to reapply the paint stripper and allow it to sit for a few minutes before continuing to sand. Once you’ve finished sanding, wipe down the tiles with a clean, damp cloth to remove any dust and debris. This step ensures that the tiles are properly prepared for either repainting or leaving them in their natural state.
Step 5: Apply Heat
For particularly stubborn paint that neither scraping nor sanding can remove, applying heat can be an effective solution. Using a heat gun or a hairdryer, carefully apply heat to the painted areas of your tiles. Hold the heat source a few inches away from the tile and move it in a circular motion to evenly distribute the heat. As the paint warms up, it will begin to soften and loosen from the tile surface. Be cautious not to hold the heat source too close or in one spot for too long, as this can damage the tiles.
Once the paint has softened, use your scraper to gently peel away the remaining paint. Repeat this process in sections until you have removed all of the stubborn paint. After applying heat and scraping, wipe down the tiles with a clean, damp cloth to remove any residue. Proper use of heat in the paint removal process can significantly ease the task and lead to a cleaner, paint-free surface.
Step 6: Use a Paint Remover
Apply a paint remover or stripper specifically designed for the type of paint on your tiles. Follow the manufacturer’s instructions for the application and wait times. Usually, you’ll need to let it sit for several minutes.
The remover will begin to bubble and loosen the paint, making it easier to remove. Use a scraper to gently lift away the loosened paint. Be sure to wear your protective gloves and mask when working with chemical removers.
Step 7: Scrub the Tiles
After the paint remover has done its job, use an old toothbrush to scrub away the softened paint. Dip the toothbrush in warm, soapy water to help remove the paint. You may need to dip and scrub several times before all of the paint is removed. Rinse the tiles with warm water when finished.
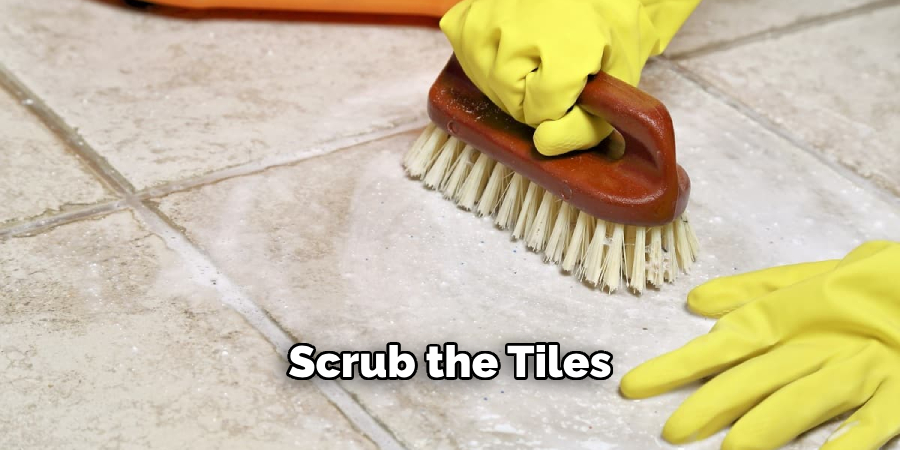
It’s essential to scrub the tiles using a soft-bristled brush or cloth, as tougher bristles may scratch or damage the tile surface. Using warm soapy water will also help remove any remaining residue and chemicals from the paint stripper.
Step 8: Clean the Residue
Once the paint is removed, clean the tiles with a sponge and warm soapy water to remove any remaining paint remover residue. Rinse thoroughly and dry with a towel. If there is still residue remaining, you can use a mild cleaner or solvent recommended for the type of tile you have. Be sure to follow all safety precautions and instructions when using solvents.
After cleaning, wipe down the tiles with a clean cloth and allow them to dry completely before repainting or applying any new finish. Properly removing paint from your tiles will ensure a smooth surface and help prolong the life of your tiles.
Step 9: Spot Clean with Alcohol or Acetone
For any stubborn paint spots that remain, use rubbing alcohol or acetone. Apply a small amount to a cloth and rub the spots until the paint is gone. Be careful not to use too much or leave it on the tiles for an extended period, as this can damage the tile’s finish. After spot cleaning, wipe down the tiles with a clean cloth and allow them to dry completely before proceeding.
You can also use fine-grit sandpaper or steel wool to gently scrub away any remaining spots, taking care not to damage the tile surface. Once all paint has been removed and the tiles are clean and dry, you can proceed with repainting or re-finishing your tiles as desired.
Step 10: Final Clean Up
Give the entire area one last clean with warm, soapy water and a sponge. Dry the tiles completely with a towel. Remove the painter’s tape from the grout lines. If there are any areas where the paint has seeped into the grout, you can use a grout cleaner or tool to gently remove it.
Once your tiles are completely clean and dry, they’re ready to be repainted or left in their natural state. Remember to properly dispose of any chemical removers or waste from the paint removal process according to local regulations. With these steps on how to remove tile paint from bathroom tiles, you can successfully remove paint from your tiles and restore them to their original beauty.
Additional Tips
Test First
Before applying any paint remover or chemical, test it on a small, inconspicuous area to ensure it won’t damage your tiles.
Be Patient
Paint removal can be a time-consuming process. Take your time to avoid damaging your tiles, especially if they are delicate or vintage.
Protect Surrounding Areas
Use painter’s tape and drop cloths to protect other surfaces in your bathroom from accidental splashes or drips of paint remover.
With these tips on how to remove tile paint from bathroom tiles and a little bit of elbow grease, you can easily remove paint from your bathroom tiles and give your space a fresh new look. Remember to always read and follow the manufacturer’s instructions for any products used in the process. Happy painting!
Frequently Asked Questions
Q: Can I Use Vinegar to Remove Paint From Tiles?
A: While vinegar can help to soften paint, it is generally not strong enough to remove it entirely. It’s best used for minor touch-ups or in combination with other paint removal methods.
Q: Is It Safe to Use a Heat Gun on All Types of Tiles?
A: Most ceramic and porcelain tiles can withstand heat, but always check the manufacturer’s recommendations to ensure you don’t damage the tiles. Avoid using high heat on delicate or vintage tiles.
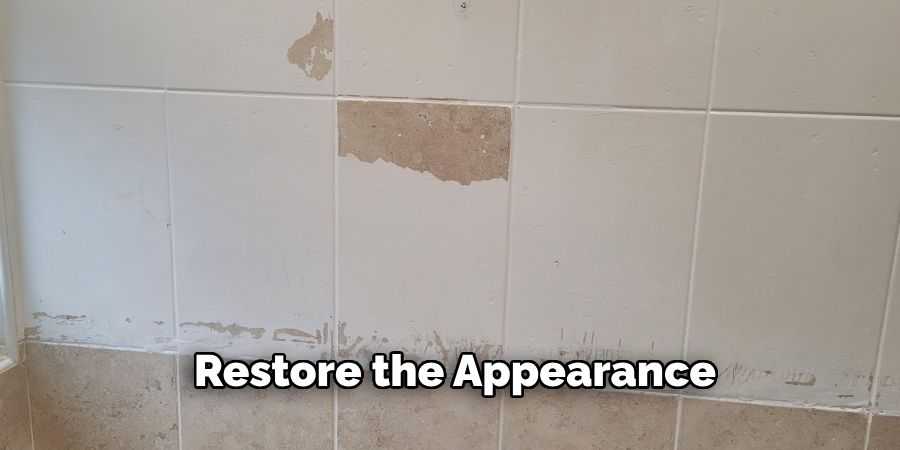
Q: What Should I Do if I Accidentally Damage My Tiles?
A: If you scratch or chip a tile, repair kits are available at most home improvement stores. These kits can fill in minor damages and restore the appearance of your tiles.
Conclusion
Removing paint from bathroom tiles doesn’t have to be a daunting task. By following these steps on how to remove tile paint from bathroom tiles and using the right tools, you can restore your tiles to their original beauty.
Not only will this refresh the look of your bathroom, but it will also help maintain the longevity of your tiles. Remember, patience and precision are key. If you have any additional questions or need further assistance, feel free to reach out for more resources. Happy renovating!