Are you having difficulty removing floor mat clips? Floor mats are great for protecting your vehicle’s interior against dirt and damage, but when it comes time to remove them, struggling with the clips can be an aggravating experience. Fortunately, we have some tips and tricks to help you take those pesky floor mat clips off quickly and easily! Read on to learn all about how to remove floor mat clips.

Changing a car’s floor mats often requires the removal of these quick-release clips. These seemingly indestructible pieces can be tricky to remove, but with the right tools and instructions, you can be done in no time! In this blog post, we’ll go over some techniques on how to successfully remove those tough floor mat clips so your interior is good as new.
Why May You Want to Remove Floor Mat Clips?
1. To Replace Worn or Broken Clips
One of the most common reasons you may need to remove floor mat clips is that the original ones are worn or broken. This can be due to natural wear and tear, or from someone accidentally bumping into them. Whatever the reason, replacing these clips with new ones can help keep your floor mats in place and looking their best.
2. To Change the Style of Your Floor Mat
Another reason you may want to remove floor mat clips is if you want to change the look of your floor mats. For example, perhaps you’d like to switch from a traditional style of floor mat clip to something more modern or decorative. Taking out the old clips and replacing them with new ones can help give your room an entirely new look!
3. To Clean the Area More Thoroughly
Finally, it is sometimes necessary to remove floor mat clips in order to thoroughly clean the area beneath them. Depending on how long your floor mats have been in place, there can be a lot of dirt and debris underneath that needs to be removed for proper cleaning. Removing the clips will give you access to this area, allowing you to properly clean and sanitize the floor mats.

No matter why you need to remove your floor mat clips, it’s important to do so in a safe and effective manner that won’t damage them or cause any harm. Read on for some tips on how to successfully remove floor mat clips!
How to Remove Floor Mat Clips in 6 Easy Steps
Step 1: Gather All The Tools
The very first step is to make sure that you have all the necessary tools for removing the floor mat clips. The toolkit should include a flathead screwdriver, needle-nose pliers, and some type of lubricant such as WD-40 or silicone spray.
Step 2: Locate The Clips
Once the correct tools are assembled, it is time to locate the clips. The clips are usually located in the seams of the floor mat, so look closely to find them.
Step 3: Prepare To Remove The Clips
Before removing any clip from the floor mat, make sure that you have a firm grip on it with your pliers. This will prevent the clip from slipping or spinning while it is being removed. Also, make sure to spray the clip down with the lubricant before attempting to remove it. This will help loosen it up and make the removal process easier.
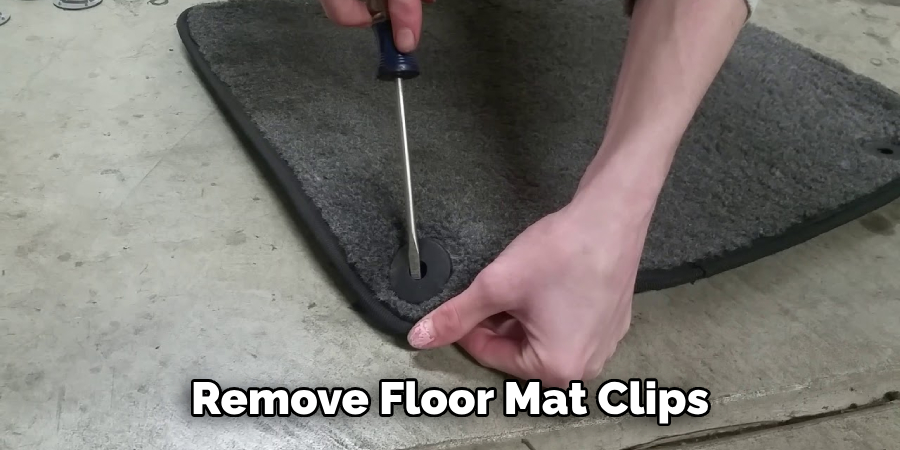
Step 4: Remove The Clip
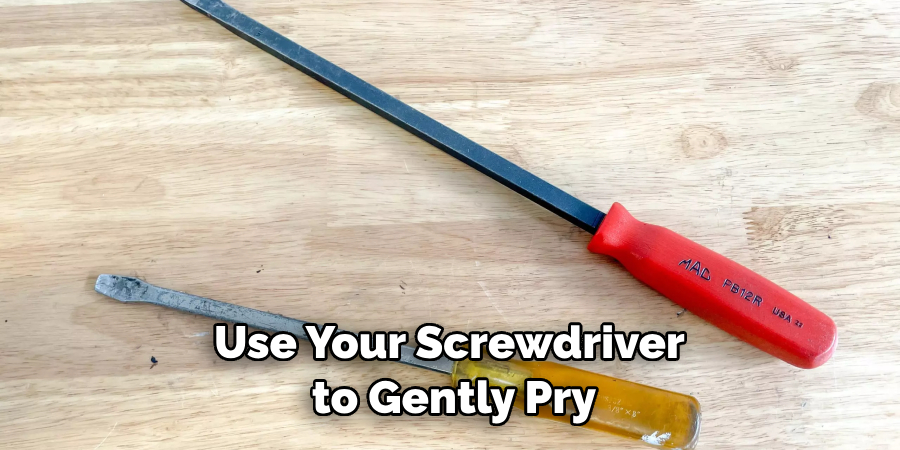
Once you have a firm grip on the clip, use your screwdriver to gently pry it out of its groove. Be careful not to apply too much pressure as this could damage the clip or the floor mat.
Step 5: Clean The Groove
Once all of the clips are removed, use a small cloth to clean out any dirt or debris from the grooves where the clips were located. This will help ensure that no new clips will be damaged when they are reinstalled.
Step 6: Reinstall The Clips
After cleaning out the grooves, it is time to reinstall the clips. Make sure that they are properly aligned and that they are secure before moving on to the next step.
Once all of the clips have been reinstalled, you can now enjoy your newly updated floor mats! Removing floor mat clips is an easy process if done correctly and with the right tools. With these 6 easy steps, you can quickly and easily remove any floor mat clips from your vehicle!
Some Additional Tips to Remove Floor Mat Clips
1. Do Not Force the Removal
Attempting to remove floor mat clips with too much force can cause damage and break the clip. It is best to work slowly and gently when removing floor mat clips. Also, always make sure the area is clear and free of obstacles before starting.
2. Have the Right Tools on Hand
Having the right tools on hand can make removing floor mat clips much easier and smoother. It is best to use a flat-head screwdriver as it will provide enough leverage without damaging the clip or surrounding material. Additionally, have some pliers and a pair of safety goggles ready, just in case.
3. Starting from the Outside In
When removing floor mat clips, start with the outermost clip and work your way in. This will provide more surface area to grab onto when pulling the clips out as well as give you an idea of how tight the remaining clips are.
4. Take Your Time
Never rush when removing floor mat clips. Be patient and take your time to ensure it is done safely and correctly. With the right tools and a little bit of patience, you should have no problem removing your floor mat clips.
Following these tips can help make the process of removing floor mat clips much easier. Always use caution and remember to take your time; rushing can cause more harm than good. With the right tools and a bit of patience, you’ll be able to remove those clips with no problem.
Frequently Asked Questions
What Precautions Should Be Taken Before Removing Floor Mat Clips?
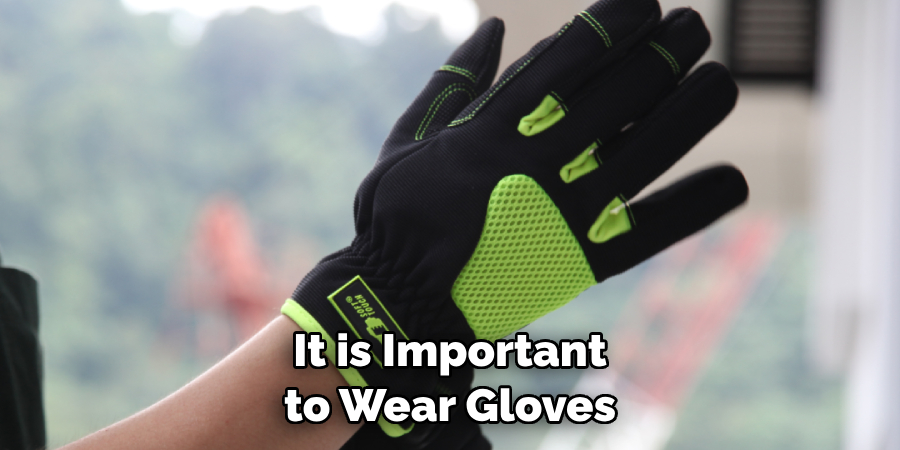
Before removing floor mat clips, it is important to wear gloves and work in a well-ventilated area. Make sure that the area around the clip is free of dirt or debris so that you can identify the clip easily. Additionally, inspect the clip for rust or corrosion prior to removal as these conditions may require specialized tools or techniques.
What Tools Will I Need to Remove Floor Mat Clips?
The most common tool used to remove floor mat clips is a flathead screwdriver, although some cars may require special removal tools. If you are using a screwdriver, make sure it fits the head of the clip snugly for optimal leverage. Additionally, you will need an adjustable wrench or pliers to twist the clip off once it has been loosened.
How Do I Remove Floor Mat Clips?
Once you have identified and prepared the clip, use a screwdriver to loosen the screw at the top of the clip. Next, turn the screw counterclockwise until it is completely loose. Once loose, use an adjustable wrench or pliers to twist the clip off of the floor mat. If necessary, use a rag or cloth to protect your hands while working with the metal clip. Finally, be sure to dispose of any old clips appropriately.
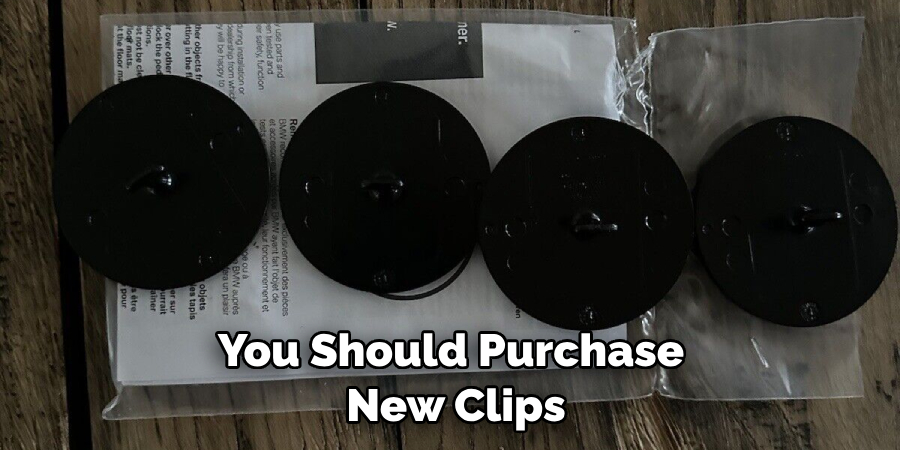
Can I Reuse Floor Mat Clips?
In most cases, it is best not to reuse original floor mat clips as they may have been weakened by corrosion or wear. Instead, you should purchase new clips from an automotive store or online retailer. New clips will provide the secure hold needed to ensure that your floor mats stay in place and provide optimal protection for your vehicle’s interior.
Is It Difficult To Remove Floor Mat Clips?
Removing floor mat clips can be a straightforward process with the right tools and precautions in place. It is important to take your time and use caution while working with the metal clips for optimal safety. If you have any questions or concerns, it is best to consult an automotive specialist for further advice.
Can I Install New Floor Mat Clips?
Yes, it is possible to install new floor mat clips. Most automotive stores and online retailers sell replacement clips that are designed to fit standard vehicles. Make sure to verify the size of the clip prior to purchase in order to ensure a proper fit for your vehicle’s floor mats.
Additionally, be sure to use caution while working with metal hardware and wear gloves for protection. Following the instructions provided with your new clips, you should be able to install them quickly and securely.
Can I Use Other Hardware To Secure Floor Mats?
In some cases, it is possible to use other hardware such as nails or screws to secure floor mats. However, this method is not recommended as it can result in damage to the vehicle’s interior and may prove ineffective against dirt and debris. For optimal safety and protection, it is best to use specifically designed floor mat clips.
Once the Clips Are Removed, What Should I Do With Them?
Once you have removed the floor mat clips, be sure to dispose of them safely and responsibly. You can recycle or reuse old clips if possible, but it is better to purchase new ones for optimal protection. Additionally, check with your local waste management service provider to ensure that they accept metal hardware for disposal.
Can I Clean the Floor Mats Before Reinstalling Them?
Yes, it is a good idea to clean floor mats before reinstalling them. If necessary, you can use a vacuum cleaner and mild soap and water solution to remove dirt and debris. Be sure to allow the mats to dry completely before reinstalling them with new clips for optimal protection. Also, inspect the clips for rust or corrosion prior to reinstalling them.
Conclusion
It’s essential that you take the time and effort to properly remove car floor mat clips, especially if you plan to install new ones. In the end, taking out the old ones first can save you a lot of headaches and ensure they’re securely held in place once they’ve been replaced.
Furthermore, don’t forget to pick up matching sizes and model-specific fasteners; this will ensure your car floor mats are firmly locked into position for years to come. And finally, make sure you wear gloves when removing the clips so you avoid cuts and scrapes on your fingers or hands.
Hopefully, these tips have given you a greater understanding of how to remove floor mat clips safely and effectively – now it’s time to put them back in again!