
Are you tired of your old, cracked, and stained epoxy floor? Removing an epoxy floor may seem like a daunting task, but with the right tools and techniques, it can be done easily. In this guide, we will take you through the step-by-step process on how to remove epoxy floor.
Removing epoxy floors can feel daunting, especially given epoxy’s tough and durable nature. But don’t worry – getting rid of that unwanted flooring in your home or office is entirely possible. With the right knowledge and tools, you’ll be able to safely and effectively remove an old epoxy floor without taking extreme measures.
In this blog post, we’ll provide you with all the information needed to tackle this job quickly so you can move on with whatever other projects are waiting for you!
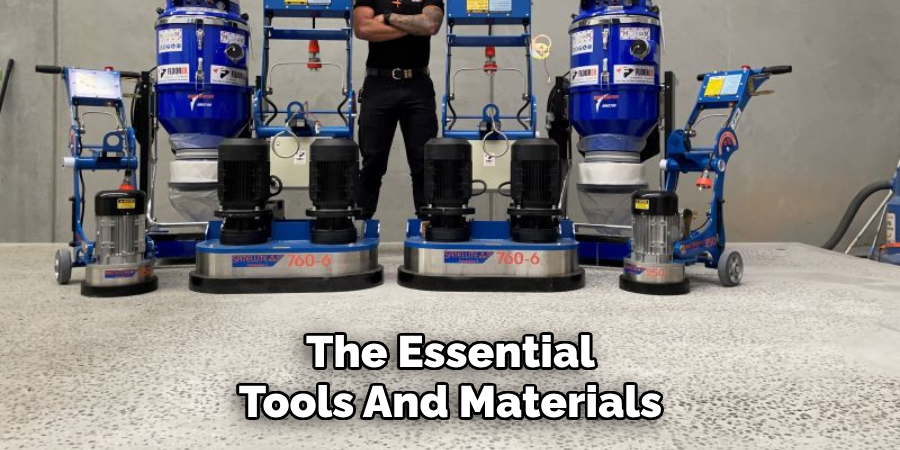
What Will You Need?
Before we dive into the process, let’s take a quick look at some of the essential tools and materials you’ll need to remove an epoxy floor successfully. These include:
- Chemical stripper or solvent
- Floor scraper or putty knife
- Sander or grinder (optional)
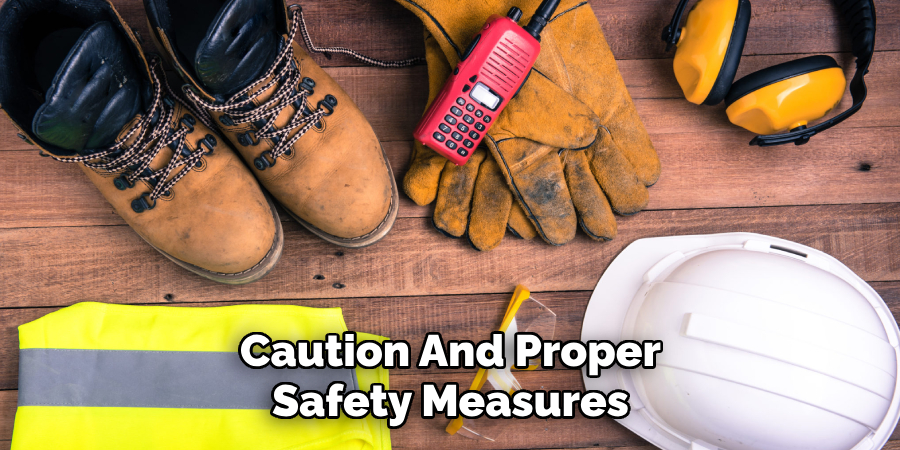
- Protective gear (gloves, goggles, mask)
Once you have all these things ready, it’s time to get down to the actual process of removing your epoxy floor.
10 Easy Steps on How to Remove Epoxy Floor
Step 1: Prepare the Area
Start by clearing out the room and ensuring proper ventilation by opening windows and doors. Epoxy floors release strong fumes during removal, so you want to avoid inhaling them as much as possible. Additionally, cover any surrounding furniture or items with plastic sheets to protect them from spills or splatters.
Step 2: Test the Stripper
Before applying the stripper on the entire floor, testing it in a small, inconspicuous area is crucial. This will help you determine its effectiveness and make any necessary adjustments before proceeding with the rest of the floor. This will also help gauge how long the stripper will take to dissolve the epoxy.
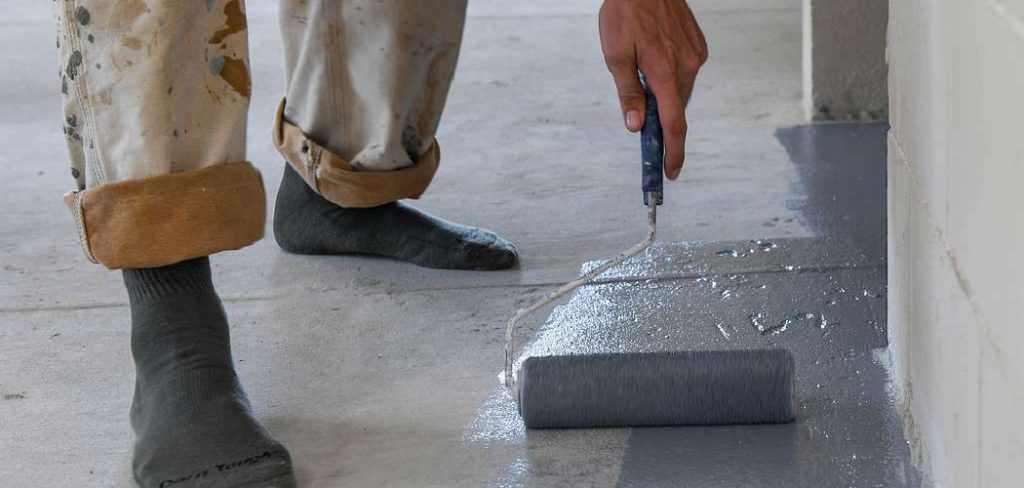
Step 3: Apply the Stripper
Now it’s time to apply the stripper. Pour it onto the epoxy floor, covering the surface evenly. Using a long-handled roller or a brush, spread the stripper across the floor. Remember to wear protective gear during this process to avoid direct contact with the chemical stripper. Allow the stripper to sit on the epoxy for the time you determined during your test. This allows the stripper to penetrate and loosen the epoxy coating.
Step 4: Scrape Off the Epoxy
After the stripper has had enough time to work its magic, the epoxy should be soft and ready to scrape off. Using a floor scraper or a putty knife, remove the epoxy coating—work in small sections, starting from one end of the room to the other.
Be careful not to damage the floor underneath. If you encounter any stubborn spots that resist scraping, reapply the stripper and give it a few more minutes to loosen the epoxy.
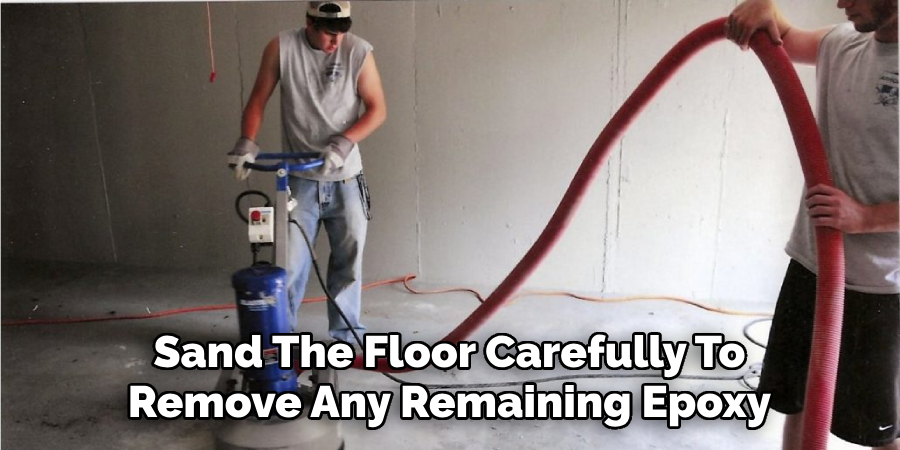
Step 5: Sand the Floor
Once all the epoxy is removed, you may still have some residue. This is where the sander or grinder comes in. Sand the floor carefully to remove any remaining epoxy and smooth the surface. Wear your protective gear while doing this to protect yourself from any airborne particles.
Step 6: Clean Up
After the sanding process, you will likely be left with dust and debris on your floor. Sweep up the larger pieces and then use a vacuum to remove any remaining dust. Removing all residue is critical, as it can interfere with applying a new floor covering. Once you’ve vacuumed, mop the floor with warm water and a mild detergent to ensure it’s spotless. Allow the floor to dry thoroughly before moving on to the next step.
Step 7: Inspect the Floor
After the floor is arid, take the time to inspect it thoroughly. Look for any remaining epoxy spots or patches that may have been missed in the initial scraping or sanding process. If you find any, repeat the stripper, scraping, and sanding process for those areas. Ensuring all the epoxy has been removed is crucial for the success of your new floor installation.
Step 8: Neutralize the Floor
After ensuring that all the epoxy has been successfully removed, it’s essential to neutralize the floor. This process involves using a neutralizer, a simple mixture of water and baking soda. The neutralizer helps to balance the floor’s pH after using strong chemical strippers. Apply this solution to the floor and mop it up after a few minutes. Once done, rinse the floor with clean water and let it dry completely.
Step 9: Final Cleaning
Once the floor is dry, carry out a final cleaning. Vacuum the floor once more to remove any remaining dust or debris that may have been left behind from the previous steps. Then, mop the floor again with a mild detergent to ensure it’s spotlessly clean and ready for a new coating or flooring.
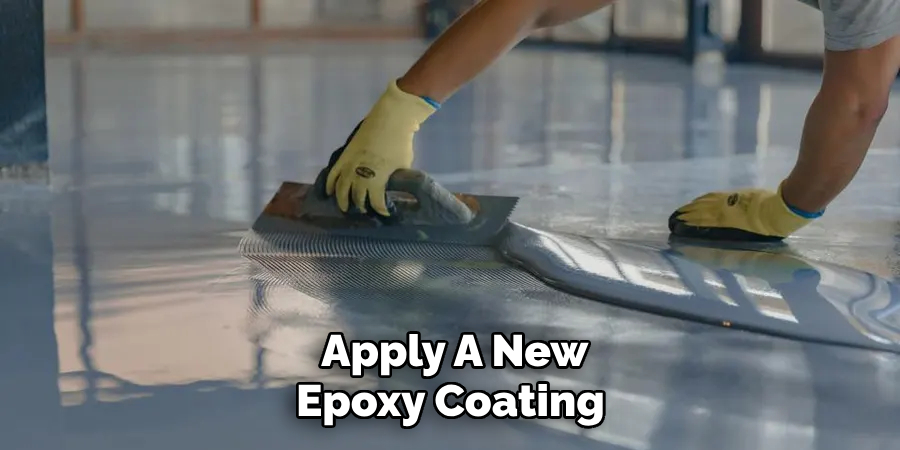
Step 10: Apply New Floor Coating
Your floor is clean and free from residues, so it’s ready for a new floor coating. Depending on your choice and purpose, you can apply a new epoxy coating or choose a different flooring type. Just ensure that the floor is arid before applying any new coatings to prevent any issues with adhesion.
Following these ten steps, you can successfully remove an epoxy floor and get your desired results. Remember always to practice safety measures and use protective gear during the entire process. With patience and diligence, your old epoxy floor will be gone in no time, leaving you with a clean surface ready for whatever new flooring option you choose!
5 Additional Tips and Tricks
- Use a Floor Grinder: A floor grinder is a handy tool for removing epoxy flooring. It works by grinding away the top layer of the floor, revealing the concrete underneath.
- Apply Heat: Epoxy becomes more pliable and easier to remove when heated. Use a heat gun to soften the epoxy before scraping it off.
- Safety First: Always wear protective gear such as gloves, safety glasses, and a respirator when removing epoxy flooring to protect yourself from harmful fumes and debris.
- Chemical Strippers: These are a last resort and should be used cautiously due to their harmful fumes. They work by breaking down the epoxy, making it easier to scrape off.
- Clean Thoroughly: Once the epoxy is removed, clean the floor thoroughly to remove any remaining epoxy residue. This will also prepare the floor for any new flooring you wish to install.
With these additional tips and tricks, you should be well-equipped to remove epoxy flooring effectively. Remember to take your time and work carefully, as removing epoxy can be tedious.
5 Things You Should Avoid
- Avoid Rushing the Process: Removing epoxy flooring is a time-consuming task. Trying to rush the process may lead to mistakes or incomplete epoxy removal.
- Avoid Ignoring Safety Measures: Neglecting personal protection equipment is a big no. Always ensure you wear the necessary safety gear – it’s not worth risking your health.
- Avoid Inadequate Ventilation: Working in a well-ventilated area is crucial when dealing with epoxy, especially when using chemical strippers. Make sure your workspace is adequately ventilated to avoid inhaling harmful fumes.
- Avoid Forceful Scrapping: Overly aggressive scraping can damage the underlying concrete. Be patient and apply consistent, even pressure when scraping.
- Avoid Skipping the Cleaning Stage: Moving on to the next task can be tempting after removing the epoxy. However, failing to clean the floor thoroughly can result in issues down the line, particularly if you plan to install new flooring.
Avoiding these common mistakes can save you time, money, and frustration. By following the tips mentioned above and avoiding these pitfalls, you can easily remove epoxy flooring.
What Acid Will Dissolve Epoxy?
Epoxy is a tough and durable material that can be challenging to remove, especially when it has fully cured. However, certain acids can dissolve epoxy, making the removal process easier. Here are three commonly used acids to consider:
- Acetic Acid (Vinegar): Vinegar is a mild acid commonly used in households as a cleaning agent. It can also dissolve epoxy by soaking a cloth in vinegar and placing it on the affected area for several hours.
- Citric Acid: Another mild acid that can dissolve epoxy is citric acid. This can be found in many household cleaning products or purchased as a powder to mix with water.
- Phosphoric Acid: A stronger acid, phosphoric acid, can also be used to dissolve epoxy. This is commonly found in rust removers and can be effective in breaking down the epoxy’s chemical bonds.
It’s essential to note that these acids should be used with caution and proper safety measures, as they can be harmful if not handled properly. Additionally, always rinse the affected area thoroughly after using these acids to remove any remaining residue.
Conclusion
Overall, how to remove epoxy floor can be a long and difficult process. It requires special skills, tools, and knowledge to ensure that the job is done safely and correctly. Moreover, choosing the right type of chemicals for the exact kind or brand of epoxy coating you’re dealing with is important. Always remember to take safety measures when dealing with powerful and hazardous cleaning chemicals when attempting to remove epoxy floor covering.
Ultimately, it is recommended that you seek out professional help if you cannot confidently take on this task yourself. Professional contractors are available who specialize in removing epoxy coatings and who will have access to the best tools, supplies, and treatments to get your job done right.
So don’t delay any longer—contact a local contractor for reliable assistance with your epoxy flooring removal project today!