
Are you tired of sitting in an uncomfortable chair while gaming or working? Well, you’re not alone. Many people struggle to find the perfect balance between comfort and functionality, especially when it comes to chairs. But fear not—we have a solution for you—the X Rocker Chair.
How to raise X Rocker Chair can significantly enhance your gaming or relaxation experience by optimizing your comfort and improving your posture. Whether you’re looking to gain better viewing angles, alleviate strain on your legs, or simply customize your seating arrangement, adjusting the height of your X Rocker Chair is a straightforward process.

This guide will walk you through the necessary steps, ensuring that you can make the adjustments with ease and precision. By following these instructions, you’ll be able to achieve the perfect seating height tailored to your personal preferences.
What Will You Need?
Before you begin, gather the following materials:
- X Rocker Chair
- Adjustable wrench or pliers
- Measuring tape
- Optional: chair risers or blocks for extra height adjustment
Once you have all the necessary items, you’re ready to start raising your X Rocker Chair.
10 Easy Steps on How to Raise X Rocker Chair
Step 1: Preparing Your Chair
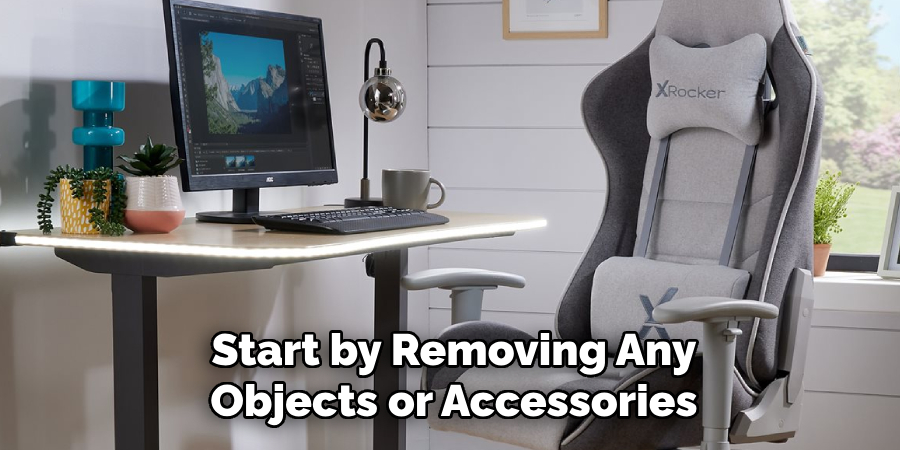
Before making any adjustments, ensure that your X Rocker Chair is on a stable and flat surface. This will prevent any accidents or instability during the height adjustment process. Start by removing any objects or accessories from the chair, such as cushions or blankets, to avoid interference while you work.
Next, take a few moments to inspect the chair for any noticeable damage or wear, particularly around the base and the adjusting mechanisms. Ensuring that all parts are in good condition will help prevent any issues during the adjustment process and will prolong the life of your chair.
Ensure you have ample lighting in your workspace to clearly see all the chair’s components, allowing for precise adjustments. This is especially important if you need to handle tools like an adjustable wrench or pliers. Proper lighting will also help you read any labels or instructions that might be present on the chair’s parts.
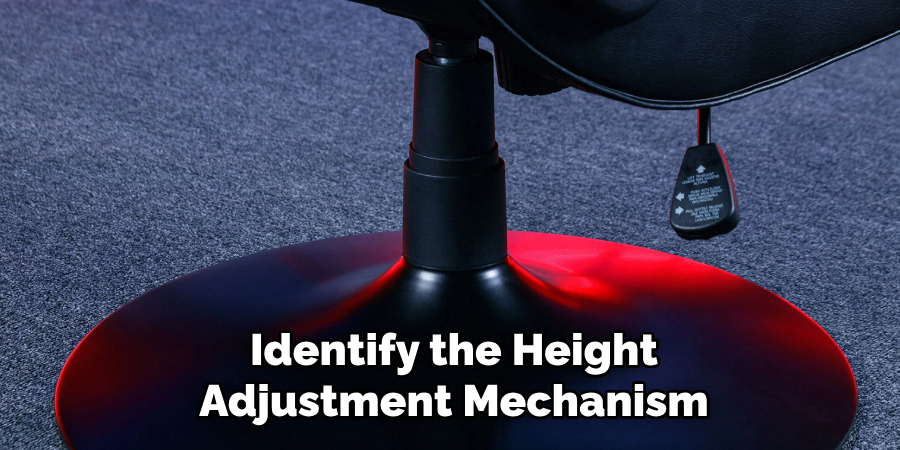
Step 2: Locate the Height Adjustment Mechanism
Identify the height adjustment mechanism on your X Rocker Chair. Depending on the model, this mechanism might be a lever located near the base of the chair or a series of screws and bolts that hold the seat at a specific height. If your chair utilizes a gas lift system, the lever will typically be underneath the seat and should be easily accessible.
For models with screws and bolts, you may need to look under the seat or around the base to find the appropriate adjustment points. Take your time to familiarize yourself with these components, as proper identification will facilitate a smoother adjustment process.
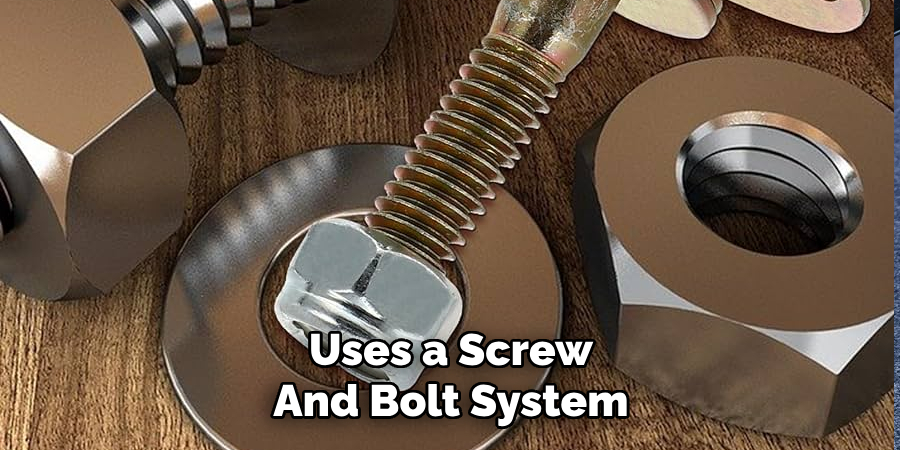
Step 3: Adjust the Lever or Bolts
For chairs with a lever-based height adjustment system, firmly grasp the lever and pull it upward while applying downward pressure on the seat. This action will release the locking mechanism, allowing you to adjust the seat height. Gradually let the lever return to its original position once you’ve reached the desired height. Make sure to test the stability of the chair at the new height to ensure that the mechanism is locked securely.
If your X Rocker Chair uses a screw and bolt system, use the adjustable wrench or pliers to loosen the bolts holding the seat at its current height. While loosening, you may need an additional person to hold the seat steady. Once the bolts are loose, carefully raise or lower the seat to your preferred height. After achieving the desired height, retighten the bolts thoroughly to ensure the chair is securely adjusted. Double-check each bolt to prevent any wobbling or instability when you sit down.
Step 4: Verify the New Height
Once you have adjusted the height of your X Rocker Chair, sit down and check if the new height feels comfortable and properly aligned. Your feet should rest flat on the floor, and your knees should be at a right angle. This position promotes good posture and reduces strain on your back and legs. Adjust again if necessary until you achieve the optimal seating height.
Step 5: Additional Adjustments
If you require more height than your chair can provide, you have a few options. One option is to purchase chair risers or blocks, which are specifically designed to raise chairs’ height. These risers usually come in sets of four and can be easily placed under each leg of the chair for additional height.
Another option is to replace the gas lift mechanism with a longer one. This process requires more technical expertise and may void your chair’s warranties, so proceed with caution.
Step 6: Maintaining Proper Posture
As mentioned earlier, having proper posture while sitting is crucial for overall comfort and health. Make sure to take breaks from your seated position every hour or so to stretch, walk around, and give your body a break. Additionally, ensure that you are sitting with proper posture even after adjusting the height of your X Rocker Chair.
Step 7: Storing Tools
Once you have completed the height adjustments and verified that your X Rocker Chair is now at an optimal level for your needs, it’s important to store your tools properly. Start by cleaning each tool you used during the adjustment process. Use a clean cloth to wipe away any dirt or grease that may have accumulated. This ensures that your tools remain in good condition for future use.
Store your adjustable wrench, pliers, and any other tools in a designated toolbox or storage area to keep them organized and easily accessible for any future adjustments or repairs. Proper storage not only helps extend the lifespan of your tools but also makes your workspace tidy and clutter-free.
Step 8: Conducting a Final Check
After storing your tools, perform a final check on your X Rocker Chair to confirm that all adjustments have been properly secured. Sit down and test the chair one more time to ensure that it maintains the desired height without any signs of slipping or instability. Check that all bolts are tight and the lever, if applicable, is functioning correctly. Performing this final check guarantees that your chair is safe and ready for use.
Step 9: Reflecting on the Adjustment Process
Consider keeping a record of the adjustment process, including the original and new heights of the chair and any particular tools or techniques that were especially useful. This can serve as a personal reference for any future adjustments and can be valuable information if you need to share the process with others who have similar chairs. Additionally, you can assess if there were any challenges or difficulties that could be addressed to make the process even smoother next time.
Step 10: Regular Maintenance
Lastly, regular maintenance of your X Rocker Chair can prolong its lifespan and keep it functioning optimally. Periodically check the height adjustment mechanism, bolts, and overall condition of the chair to ensure everything is in good order. Address any wear and tear immediately to prevent small issues from becoming larger problems.
Consider setting a reminder to inspect your chair every few months, especially if it undergoes heavy use. Proper maintenance will ensure that your X Rocker Chair continues to provide comfort and ergonomic support for years.
5 Things You Should Avoid
- Over-tightening Bolts and Screws: While securing the seat height, it’s crucial not to over-tighten the bolts and screws. Over-tightening can strip the threads or damage the components, leading to a compromised adjustment mechanism or even breakage.
- Forcing the Lever: If your X Rocker Chair uses a lever-based adjustment system, avoid forcing the lever if it feels stuck. Applying excessive force can break the lever or its internal mechanisms. Instead, check if there’s an obstruction or if the chair needs lubrication.
- Ignoring the User Manual: Skipping over the user manual can result in improper adjustments and potential damage to your chair. The manual contains specific instructions and warnings tailored to your X Rocker Chair model, so always refer to it for guidance.
- Using Incorrect Tools: Using tools that are not suited for the job can damage the bolts, screws, and overall structure of the chair. Ensure you use the correct size wrench, pliers, or other tools the manufacturer recommends.
- Neglecting Safety Precautions: Adjusting the height of your chair involves handling tools and mechanisms that can pose risks if not done carefully. Always ensure the chair is stable and avoid making adjustments on uneven surfaces.

Conclusion
How to raise X Rocker Chair is a straightforward process when approached methodically and with the right tools.
Following the steps outlined above can help you achieve a more ergonomic and comfortable seating position. Remember to maintain proper posture and take regular breaks to ensure your overall well-being. Additionally, regular maintenance and careful handling of your chair and its mechanisms will prolong its lifespan and functionality. Always consult the user manual for model-specific instructions and avoid common pitfalls such as over-tightening bolts or using inappropriate tools.
By taking these measures, you can enjoy your X Rocker Chair’s enhanced comfort and usability for years to come.