Are you tired of looking at your boring bookshelf? Are you in need of some home improvement? How to put a door on a bookshelf is the solution you are looking for.
Adding a door to a bookshelf is a simple yet effective way to enhance both its functionality and aesthetics. Whether you’re looking to protect your books from dust, create a secret storage space, or simply maintain a cleaner, more organized look, a door can work wonders for your bookshelf.

This guide will walk you through the essential steps and materials required for this DIY project, ensuring that even beginners can achieve a professional result. With a little time and effort, you can transform your open shelves into stylish pieces of furniture that perfectly complement your home decor.
What Will You Need?
To put a door on your bookshelf, you will need the following materials:
- A door (can be an old one, or you can purchase a new one)
- Hinges
- Screws and screwdriver
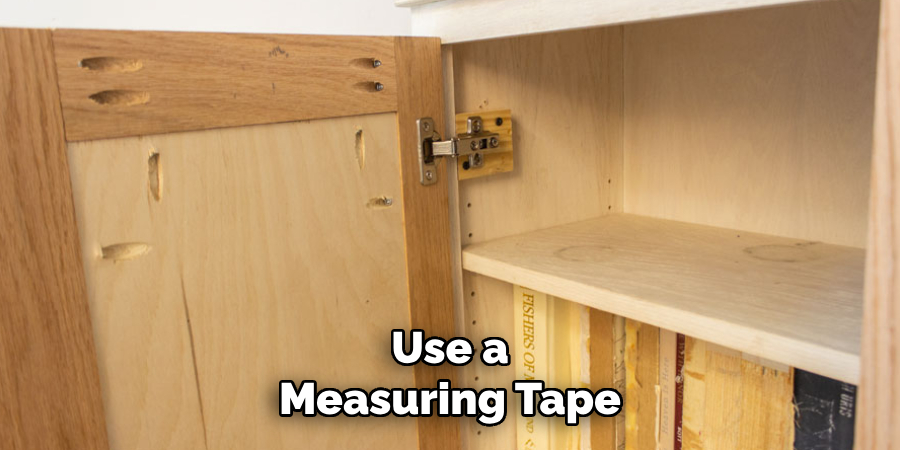
- Measuring tape
- Drill
- Level
- Wood glue
- Sandpaper
- Paint or stain (optional)
It’s important to note that the size and type of door you choose will depend on the dimensions of your bookshelf. Consider the style of your bookshelf and choose a door that complements it.
10 Easy Steps on How to Put a Door on a Bookshelf
Step 1. Measure Your Bookshelf:
Begin by taking accurate measurements of your bookshelf’s height and width. This ensures that the door you install will fit snugly and operate correctly. Use a measuring tape to measure the outer dimensions of the bookshelf frame where the door will be mounted. Remember to measure at multiple points along the height and width to account for any irregularities or warping in the wood. It’s a good idea to jot these measurements down and double-check them before proceeding to the next step. Also, leave a small margin for the door to open and close smoothly. This will prevent unwanted friction and ensure a long-lasting installation.
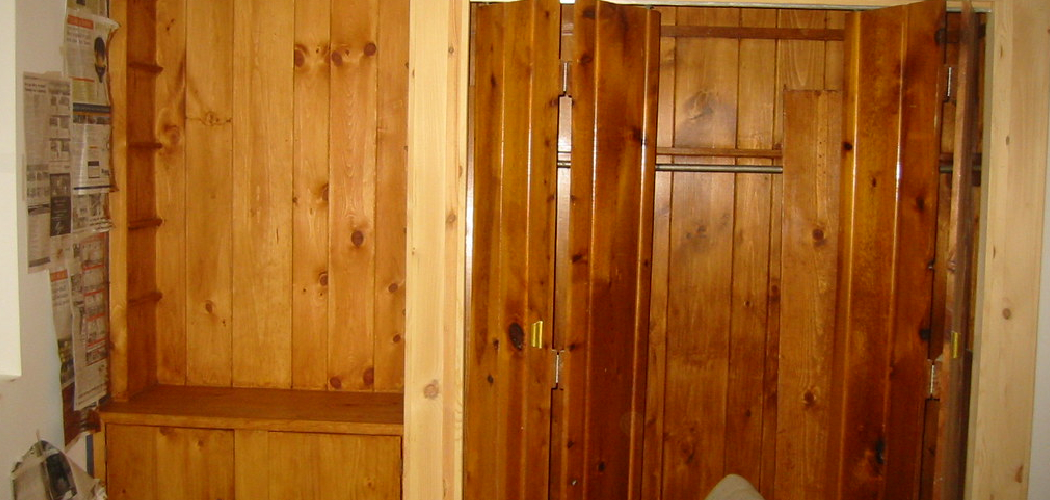
Step 2. Choose the Right Door
Select a door that matches the style and dimensions of your bookshelf and your overall decor. If you’re using an old door, ensure it is in good condition and can be resized if necessary. Alternatively, if you’re purchasing a new one, you might want to consult with store professionals or use online resources to find the perfect fit. Consider the door’s weight, as heavier doors may require more robust hinges for secure attachment.
Step 3. Prepare the Door
Once you have measured and selected the appropriate door, it’s time to prepare it for installation. If you plan to paint or stain the door, now is the perfect time to do so. Use sandpaper to achieve a smooth surface on the door’s exterior; this will help the paint or stain adhere better. Apply a coat of primer if you’re painting, and once it dries, proceed with your chosen color. Be sure to allow adequate drying time between coats to prevent smudging or uneven application. If staining, apply a wood conditioner first, then the stain, following the manufacturer’s instructions.
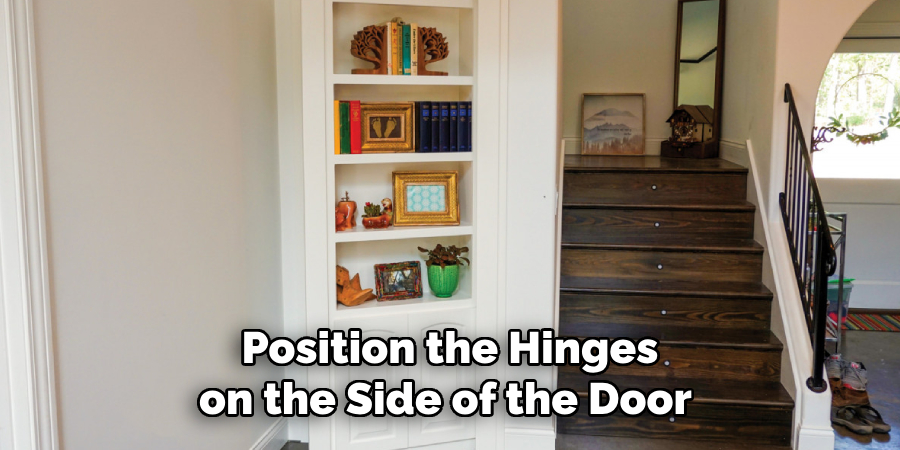
Step 4. Attach the Hinges to the Door
The next step involves attaching the hinges to your door, now prepared and ready. Begin by laying the door flat on a working surface, ensuring it is stable. Position the hinges on the side of the door that will be attached to the bookshelf. It’s best to place one hinge about 7 inches from the top of the door and another around 7 inches from the bottom.
If the door is particularly tall or heavy, you might consider adding a third hinge in the middle for extra support. Mark the positions of each hinge with a pencil. Followed by using a drill to create pilot holes for the screws. Once the pilot holes are in place, align the hinges again and secure them to the door with screws. Be careful not to overtighten to avoid damaging the door.
Step 5. Attach the Door to the Bookshelf
Now that the hinges are securely attached to the door, it’s time to mount the door onto the bookshelf. Stand the door beside the side of the bookshelf where it will be attached. Make sure the spacing is even, and the door aligns perfectly with the frame of the bookshelf. It’s helpful to have an extra pair of hands to hold the door steady during this step. Position the hinges against the bookshelf frame and mark the spots where the screws will go.
Drill pilot holes into the bookshelf frame at these marked spots, ensuring they are not too deep to avoid splitting the wood. Carefully attach the door by screwing the hinges into the prepared pilot holes.
Step 6. Adjust the Door
Once the door is attached, it’s crucial to ensure it operates smoothly. Check that the door swings open and closes without resistance or misalignment. If the door appears uneven or crooked, make minor adjustments to the positioning of the hinges. This can often involve loosening the screws slightly and repositioning the door until it hangs straight. Use a level to verify the horizontal and vertical alignment of the door. This step may take some patience, but adjusting the door now will save you from potential issues later on. Once satisfied with the alignment, ensure all screws are tightened sufficiently to keep the door secure.

Step 7. Secure the Door with Hardware
To ensure the door stays closed when not in use, installing some form of closure hardware is essential. Depending on your preference and the door’s style, options include magnetic catches, roller catches, or a simple latch mechanism. Begin by choosing a location for the hardware—typically, about halfway down the side of the door where it meets the bookshelf. Mark this spot with a pencil.
Follow the instructions provided with your chosen hardware to install it; this usually involves aligning the catch or latch with the corresponding piece on the bookshelf and securing it with screws. Once installed, test the door by closing it to ensure the hardware functions correctly and keeps it securely closed. Adjust as necessary to achieve the desired level of closure tension and ease of use. This step is crucial for maintaining the appearance of your bookshelf and protecting its contents.
Step 8. Add Final Touches
With the door securely in place and functioning smoothly, the final step is adding finishing touches to complete the look. Consider installing decorative handles or knobs that complement the overall design of your bookshelf and enhance ease of use. If desired, add trim or molding around the edges of the door to create a seamless transition between the door and the bookshelf. This can be painted or stained to match the existing decor. Lastly, ensure that any exposed edges or surfaces are smoothed and finished to prevent splinters or roughness. These final touches will enhance the aesthetic appeal of your bookshelf and contribute to its functional longevity and style.
Step 9. Maintenance and Care
Regular maintenance and care are essential to ensure that the door and attached hardware last for years to come. Periodically check the alignment and operation of the door, making manual adjustments as needed to prevent sagging or misalignment. Clean the door and hardware regularly with a soft cloth to remove dust and debris that could interfere with its operation. Inspect the finish for any signs of wear or damage, such as if the door is painted or stained.

Touch up paint or reapply stain as necessary to maintain a fresh appearance. Lubricate the hinges occasionally with a light oil to ensure they function smoothly without squeaking. This maintenance not only preserves the door’s functionality but also contributes to the overall appearance and longevity of your bookshelf.
Step 10. Enjoy Your Customized Bookshelf
With all the steps complete, your bookshelf with a custom door is ready to use and enjoy. Take a moment to appreciate the craftsmanship and effort that transformed a simple bookshelf into a functional, stylish piece that enhances your space. The added door serves a practical purpose by protecting your books and belongings and adds a personal touch to your interior decor. Arrange your favorite books and decorative items on the shelves confidently, knowing they are safe and secure. If guests comment on your bookshelf, proudly share how you customized and built it to suit your needs perfectly.
By following these steps, you can easily customize a bookshelf with a door to create a stylish and functional piece of furniture.
Conclusion
How to put a door on a bookshelf is not just a DIY project—it’s an opportunity to blend functionality and style into a piece of furniture that complements your living space.
Each process step, from selecting the materials to the final touches, requires careful consideration and precision to ensure your bookshelf is attractive and durable. By choosing the right type of door, providing accurate measurements, and employing the proper hinge installation technique, you minimize potential issues and maximize the efficiency of your new door. Additionally, customization plays a vital role in this project, allowing you to infuse your personality into the final product through hardware choices or decorative trim. Regular maintenance and care are crucial to preserving the functionality and aesthetic of your bookshelf.
This project enhances the utility of your bookshelf and serves as a rewarding creative endeavor. You will feel a satisfying sense of accomplishment as you enjoy the custom piece in your home.