Preparing furniture for chalk paint is a crucial step that ensures a smooth, durable, and aesthetically pleasing finish. Chalk paint, known for its matte, vintage look and ease of application, has become a popular choice for furniture makeovers. However, to achieve the best results, proper preparation of the furniture is essential. This article aims to provide a comprehensive guide on how to prepare furniture for chalk paint. This process starts with thoroughly cleaning the piece to remove any dirt, grease, or residue that could interfere with paint adhesion. Next, it’s important to address any surface imperfections by sanding rough areas and filling in cracks or dents.

Although chalk paint often boasts of requiring little to no sanding, lightly scuffing the surface can enhance its adherence. Additionally, applying a primer may be necessary for particularly glossy or dark-stained pieces to prevent bleed-through and ensure an even coat. This guide will provide detailed steps and tips on how to meticulously prepare your furniture, from cleaning and sanding to priming and repairing, setting the stage for a flawless chalk paint transformation.
10 Methods How to Prepare Furniture for Chalk Paint
1. Clean the Surface Thoroughly
The first step in preparing furniture for chalk paint is to clean the surface thoroughly. Dust, grease, and dirt can prevent the paint from adhering properly. Use a mild detergent mixed with warm water to scrub the furniture. Pay special attention to areas that accumulate grime, such as handles, corners, and edges. After washing, rinse the surface with clean water to remove any soap residue and allow it to dry completely. For heavily soiled or greasy surfaces, a stronger cleaner like TSP (trisodium phosphate) may be necessary. This cleaning step ensures a smooth, contaminant-free surface for painting.
2. Remove Old Paint or Varnish
If the furniture has old paint or varnish that is chipping or peeling, it’s essential to remove it before applying chalk paint. Use a paint stripper or sanding to remove the old finish. Apply the paint stripper according to the manufacturer’s instructions and scrape off the old paint or varnish with a putty knife or scraper. For sanding, use medium-grit sandpaper (around 120-150 grit) to remove the old finish. After removing the old paint or varnish, wipe down the surface with a damp cloth to remove any dust. This step creates a stable base for the new paint, ensuring better adhesion and a smoother finish.
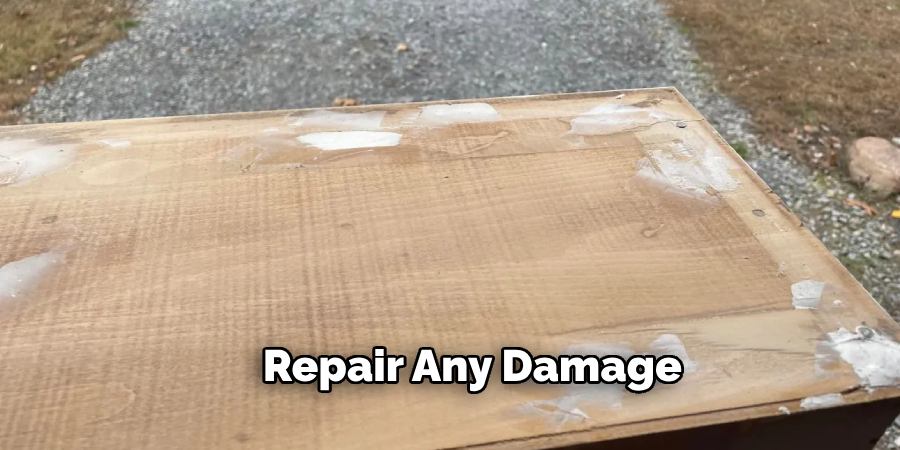
3. Repair Any Damage
Inspect the furniture for any damage, such as cracks, dents, or holes. Use wood filler or putty to repair these imperfections. Apply the filler with a putty knife, pressing it firmly into the damaged areas. Allow it to dry according to the manufacturer’s instructions, then sand the filled areas smooth with fine-grit sandpaper (around 220 grit). Repairing damage before painting ensures a flawless finish and prevents further deterioration of the furniture. This step is crucial for achieving a professional-looking result with your chalk paint project.
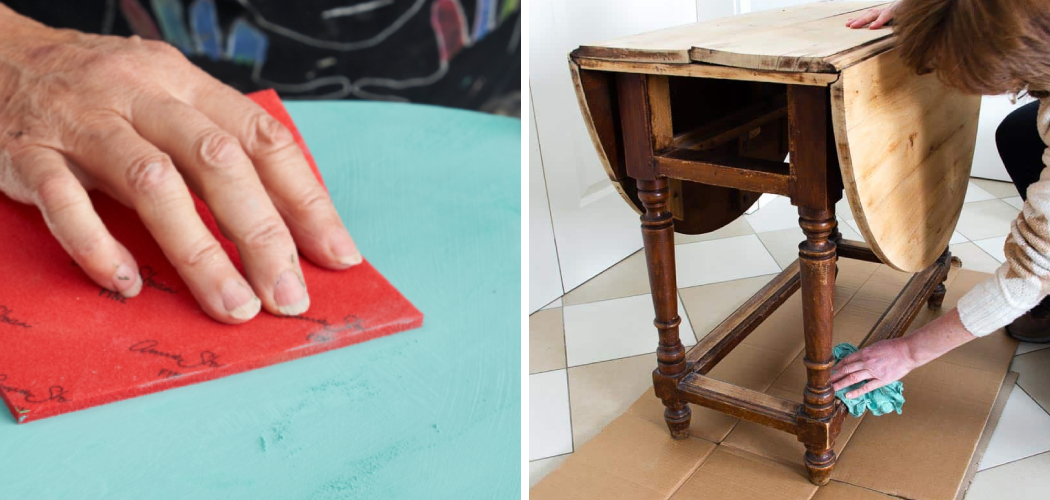
4. Sand the Surface
While chalk paint is known for its ability to adhere to most surfaces without sanding, lightly sanding the furniture can still improve the final finish. Use fine-grit sandpaper (around 220 grit) to lightly sand the entire surface. This helps to smooth out any rough areas and provides a slightly textured surface for the paint to grip onto. Be sure to sand in the direction of the wood grain to avoid creating scratches. After sanding, wipe down the surface with a tack cloth to remove any dust. This step enhances the adhesion of the chalk paint and contributes to a smoother, more professional finish.
5. Prime the Furniture
Priming is an optional step with chalk paint, but it can be beneficial, especially for dark or heavily stained wood. Applying a primer helps to block stains and provides a uniform base for the paint. Use a high-quality primer suitable for your furniture’s material. Apply it with a brush or roller, following the wood grain. Allow the primer to dry completely before sanding lightly with fine-grit sandpaper (around 220 grit) to smooth out any brush marks or drips. Wipe down the surface with a tack cloth to remove dust. Priming ensures even coverage and enhances the durability of the chalk paint.
6. Remove Hardware
Removing hardware such as knobs, handles, and hinges makes it easier to paint and ensures a cleaner finish. Use a screwdriver to carefully remove these pieces and store them in a labeled container for easy reattachment later. If you plan to replace the hardware, fill the old screw holes with wood filler and sand smooth once dry. This step prevents paint from accumulating on the hardware, which can interfere with their functionality and appearance. Additionally, removing hardware allows you to paint every part of the furniture evenly.
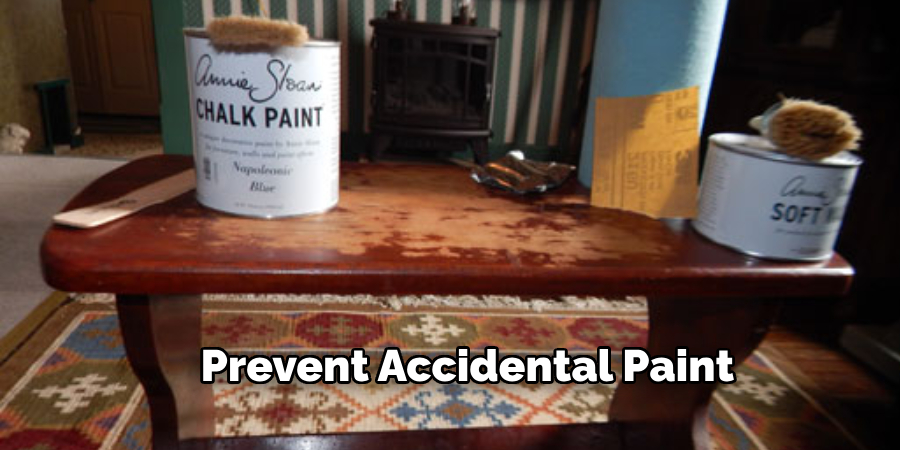
7. Protect Surrounding Areas
Protecting the areas around your workspace is crucial to prevent accidental paint splatters and drips. Lay down drop cloths or plastic sheeting to cover the floor and any nearby furniture. Use painter’s tape to mask off areas of the furniture that you don’t want to paint, such as glass panels, hinges, or intricate details. This preparation step keeps your workspace clean and ensures crisp, clean lines on your furniture. Properly protecting surrounding areas also saves time and effort in cleaning up after the painting process.
8. Degloss the Surface
If your furniture has a glossy finish, deglossing can help improve paint adhesion. Use a liquid deglosser or sanding to dull the glossy surface. Apply the deglosser with a cloth or brush, following the manufacturer’s instructions. Alternatively, use fine-grit sandpaper (around 220 grit) to lightly sand the surface until it no longer feels slick. Wipe down the furniture with a tack cloth to remove any residue or dust. Deglossing creates a surface that the chalk paint can adhere to more effectively, resulting in a durable and long-lasting finish.
9. Test for Compatibility
Before painting the entire piece, it’s a good idea to test the chalk paint on a small, inconspicuous area of the furniture. This allows you to check for any adverse reactions between the paint and the existing finish. Apply a small amount of paint and let it dry for the recommended time. Observe how well the paint adheres and if there are any issues such as peeling or bubbling. This test helps ensure that the paint will adhere properly and allows you to make any necessary adjustments before committing to the full project. Testing for compatibility ensures a successful painting experience and prevents potential issues later on.
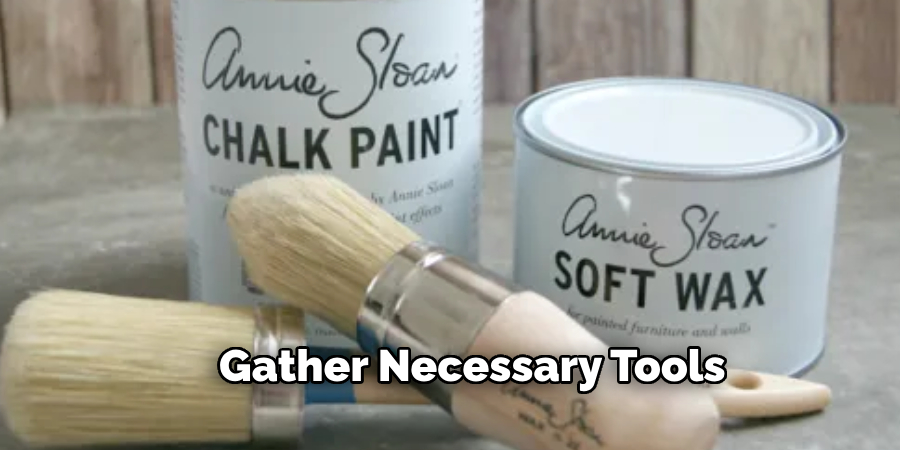
10. Gather Necessary Tools and Materials
Having all the necessary tools and materials on hand before you begin painting makes the process smoother and more efficient. Gather items such as brushes, rollers, paint trays, stir sticks, and drop cloths. Choose high-quality brushes and rollers designed for use with chalk paint to achieve a smooth finish. Additionally, ensure you have enough paint to complete the project, as running out midway can lead to an uneven finish. Having everything ready beforehand minimizes interruptions and helps you focus on achieving the best possible result with your chalk paint project. This preparation step ensures a seamless and professional painting experience.
Things to Consider When Painting Furniture with Chalk Paint
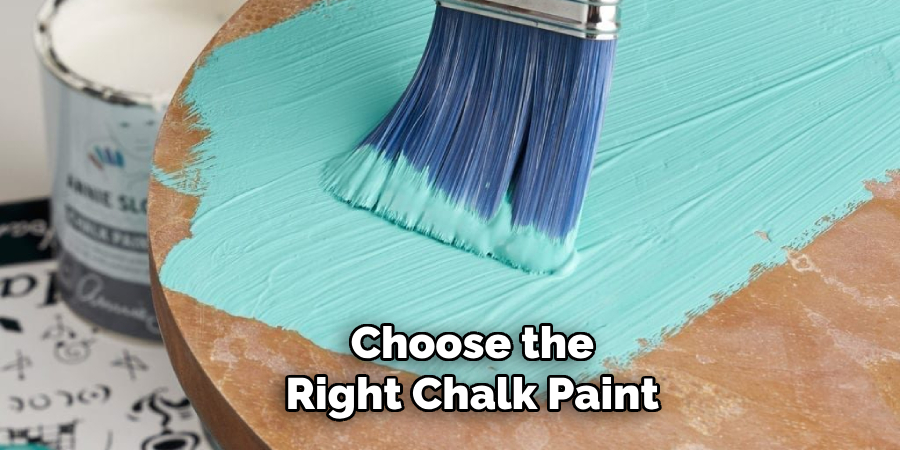
- Choose the Right Chalk Paint: Not all chalk paints are created equal. It’s important to select a high-quality brand known for its durability and ease of use. Look for reviews and recommendations to find a product that meets your needs.
- Proper Ventilation: Ensure that your workspace is well-ventilated. Chalk paint can release fumes, and good airflow will help you avoid inhaling any harmful chemicals. Open windows and doors, or use fans to keep the air moving.
- Weather Conditions: Consider the weather before starting your painting project. Extreme temperatures and high humidity can affect the drying process and the final finish. Ideally, work on a mild day with low humidity for the best results.
- Layering Techniques: Think about the finish you want to achieve. Applying multiple thin layers of paint, allowing each coat to dry completely before applying the next, can result in a smoother, more resilient surface. Avoid overloading your brush to prevent drips and streaks.
- Colour Choices: Keep the overall aesthetic of your space in mind when choosing paint colours. Light colours can brighten up a room, while darker shades add depth and richness. You can also experiment with two-tone effects or distressing techniques for a vintage look.
Conclusion
Properly preparing furniture for chalk paint is essential for achieving a beautiful, durable finish. The ten methods outlined—cleaning the surface thoroughly, removing old paint or varnish, repairing any damage, sanding the surface, priming the furniture, removing hardware, protecting surrounding areas, deglossing the surface, testing for compatibility, and gathering necessary tools and materials—provide comprehensive strategies for effective preparation. Each method addresses specific aspects of the preparation process, ensuring that your furniture is in the best condition for painting. Thanks for reading, and we hope this has given you some inspiration on how to prepare furniture for chalk paint!