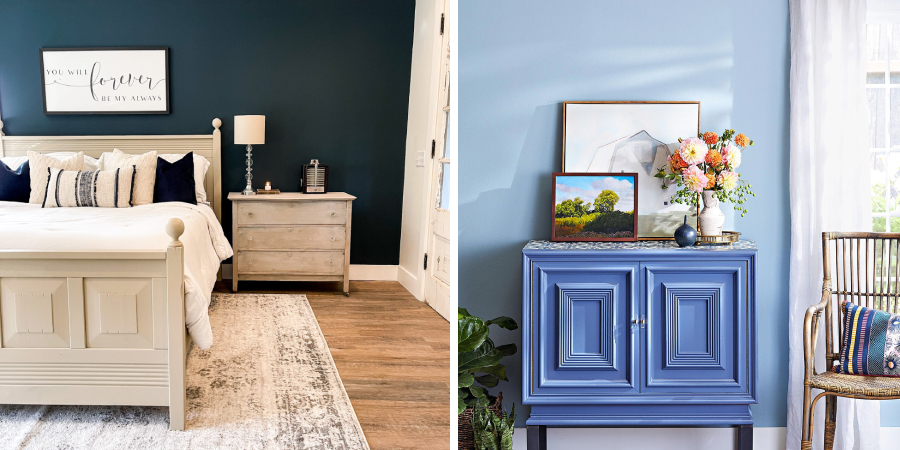
Are you getting ready to update your bedroom with a fresh coat of paint? Painting furniture can be a daunting task, but it doesn’t have to be! With the right supplies and techniques, transforming old pieces of furniture into something new and exciting can be both easy and fun.

In this blog post on how to paint my bedroom furniture, we’ll take you through all the steps necessary to create an amazing painted finish on all your bedroom furniture including any drawers or cabinets.
We’ll give you tips for choosing the best type of paint for wood surfaces as well as offer helpful advice on how to prevent common painting mistakes that may occur. Whether you’re giving everything in your room a brand-new look or just touching up some spots here and there, by following these simple guidelines you’ll be amazed at how much difference one weekend project can make!
Necessary Tools
Given below are some of the tools necessary for painting your bedroom furniture:
• Paint: Choose a paint that is suitable for the type of material you are painting, such as latex or oil-based paints for wood surfaces.
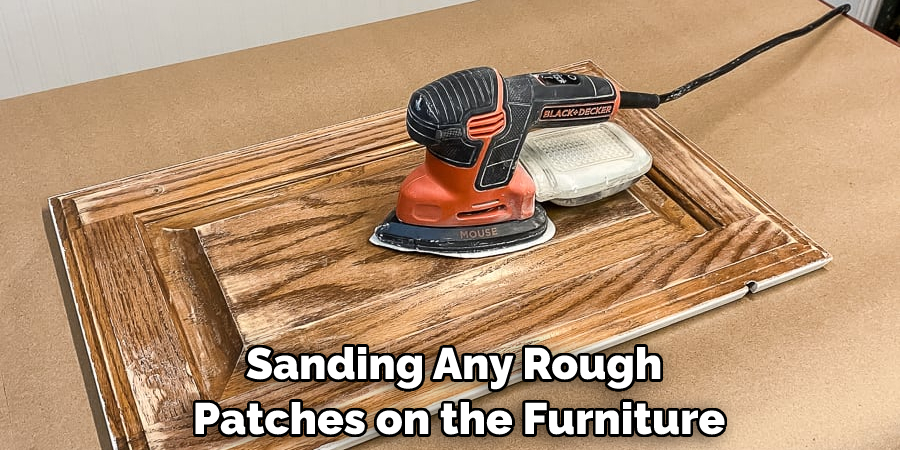
• Sandpaper: Used to sand down any rough patches on the furniture surface before painting.
• Primer Helps to create a seal between the furniture surface and the paint, improving adhesion.
• Paintbrushes: Used to apply the paint evenly on surfaces. Can be either synthetic or natural bristles depending on what type of material you are painting.
• Drop Cloths/Sheets: To protect your floor from accidental spills.
10 Simple Step-by-step Instructions on How to Paint My Bedroom Furniture
Step 1: Prepare the Surface
Begin by sanding any rough patches on the furniture and wiping away any dust with a damp cloth. You may also need to apply a primer if you are working with wood surfaces. If needed, use a wood filler to patch any holes in the furniture. Otherwise, you are ready to begin painting! Always remember to wear a protective mask and safety glasses when sanding furniture.
Step 2: Choose Your Paint Color
When selecting the color of your paint, keep in mind that lighter colors will make the furniture appear larger, while darker shades can create a more dramatic effect. Choose a color that complements your existing decor and makes you feel good when you enter your room. If you are unsure, it’s always best to test the paint color on a piece of scrap wood first before committing.
Step 3: Apply Primer (If Needed)
For wood surfaces, apply an even coat of primer with a brush or roller before painting. This will help improve adhesion between the paint and the surface of the furniture. You can also use spray primer for easier application but make sure you wear protective gear to avoid inhaling any fumes. It’s important to allow the primer to dry completely before proceeding to the next step.
Step 4: Paint!
Once the primer is dry, it’s time to start painting! Use brushes or rollers depending on what type of material you are working with. Start by painting the edges first and then move to larger sections. If you are using multiple colors, make sure to let each layer of paint dry before adding the next one. It’s always best to paint several thin coats as opposed to one thick coat.
Step 5: Let Dry & Reapply
Once you’ve finished painting your furniture, allow it to dry overnight before applying any additional coats of paint if needed. This will ensure that the paint adheres properly and gives you a smooth finish in the end. If you are using spray paint, make sure to use several thin coats rather than one thick one. Otherwise, the paint can run and create a mess. This can also help you achieve a more even finish.
Step 6: Seal the Paint
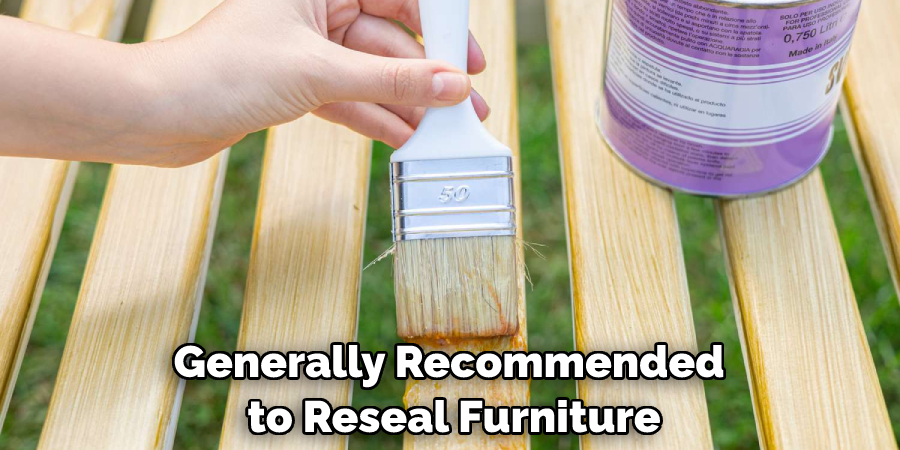
Once you have let the paint dry, it’s time to seal it. This will help protect your furniture from wear and tear over time and make it easier to clean. You can purchase a sealer specifically designed for furniture or use a polyurethane topcoat. It’s important to apply the sealer in thin coats rather than one thick layer.
Step 7: Maintain Your Furniture
With the painting process now complete, it’s important to remember to maintain your furniture. Regular dusting and cleaning will help keep the paint looking fresh for years to come. You may also want to consider applying a fresh coat of sealer every few years. If your furniture is exposed to direct sunlight, make sure to use a UV protectant or move the piece away from the window.

Step 8: Have Fun With It!
Painting your bedroom furniture is a great way to add some personality to your room. Feel free to experiment with different colors and finishes and have fun with it! But don’t forget to take the necessary safety precautions and use protective gear when sanding or painting. Otherwise, you’ll be able to enjoy your new furniture for years to come.
Step 9: Dispose of Paint and Brushes Properly
Once you’re done painting, make sure to dispose of any leftover paint and brushes properly. Never pour the paint down the sink or throw it in the trash as this can cause harm to the environment. Most local hardware stores will take paint cans for disposal, and you can recycle any used brushes at a craft store. But if you’re not sure how to properly dispose of these items, contact your local waste management company for more information.
Step 10: Enjoy Your New Look
The final step in painting your bedroom furniture is simply enjoying the fruits of your labor! Now that you have transformed a piece into something unique and special, sit back and admire your work. Always remember to keep your furniture clean and well taken care of, so you can continue to enjoy it for years to come. Now that’s something to be proud of!
Now that you know how to paint my bedroom furniture, it’s time to get started! With a few steps and some patience, you can breathe new life into any piece of furniture in no time. Good luck!
Do You Need to Use a Professional Painter?
In most cases, you don’t need to use a professional painter when painting your furniture. However, if you are planning on using multiple colors or doing any complex techniques such as staining, it is best to consult with an experienced painter first. They can help ensure that your project turns out looking perfect!

How Much Will It Cost?
The cost of painting your bedroom furniture will depend on the materials you use and how many layers of paint you need. In general, expect to spend around $50-$100 for a basic single-color job. However, if you are doing something more complex like decoupage or stenciling, it could cost upwards of $200.
No matter what type of project you have in mind, painting can be an easy and affordable way to give any piece of furniture a fresh new look. So go ahead and get creative! With these tips, you’ll be transforming your furniture in no time.
Frequently Asked Questions
Q: How Long Does It Take to Paint Bedroom Furniture?
A: On average, painting a single piece of furniture can take anywhere from two to four hours depending on the size and complexity of the piece.
Q: Can You Paint Over Existing Paint on Furniture?
A: Yes, you can paint over existing paint as long as it is in good condition and properly prepped before painting.
Q: What Type of Primer Should I Use for Painting Furniture?
A: Primers come in both oil-based and latex varieties. If your project involves wood, an oil-based primer is recommended whereas latex primers are better suited for metal or plastic surfaces.
Q: How Often Do I Need to Seal Painted Furniture?
A: Depending on the type of sealer you use, it is generally recommended to reseal furniture every one to three years.
Conclusion
Painting is a creative and economical way to give furniture in your bedroom a complete makeover. It can create a dramatic effect without having to purchase expensive pieces or hire professional painting services.
Hopefully, this article on how to paint my bedroom furniture has inspired you to take on the project and get to work! To ensure successful results, thoroughly clean and sand down all surfaces before you start painting. Lay down a drop cloth if necessary and begin taping off any areas that need protection.
Make sure to use quality primers and paint products, as well as apply at least two coats of each for maximum coverage and durability. Before long, you’ll have an updated space with fresh, vibrant colors that will breathe new life into your bedroom. So hop to it; with planning, motivation, and effort even DIY projects can show great success!