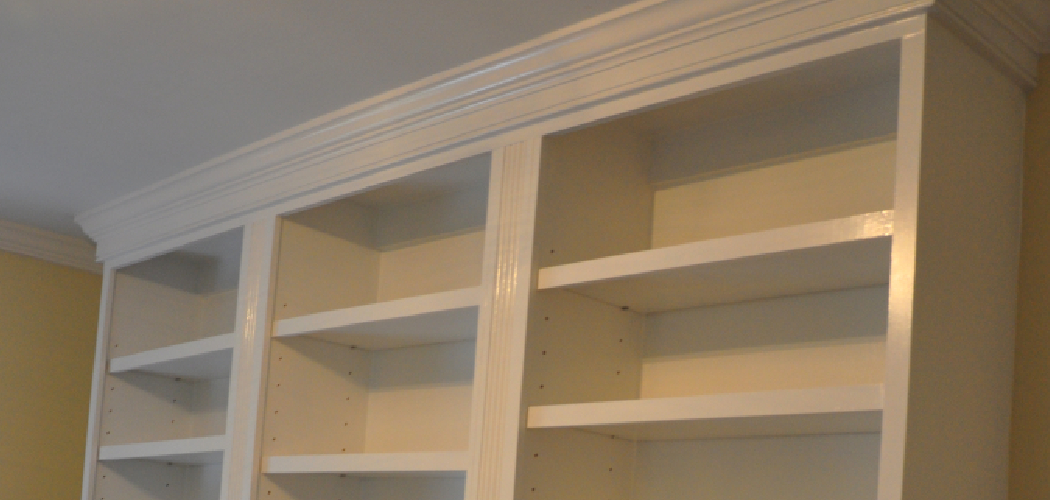
Painting a laminate bookcase can be a cost-effective way to revive an old piece of furniture and give it a fresh, modern look. Unlike natural wood, laminate surfaces require special preparation techniques to ensure that the paint adheres properly and produces a durable, attractive finish.

This guide on how to paint laminate bookcase will walk you through the necessary steps and provide tips on selecting the right materials, preparing the surface, and applying the paint for the best possible results. Whether you’re looking to match your bookcase with a new room decor or simply want to give it a new lease of life, this tutorial will have you covered.
What is Laminate?
Before we dive into the painting process, let’s first understand what laminate is. Laminate is a synthetic material that mimics the appearance of natural wood. It typically consists of multiple layers of paper and plastic resins pressed together under high heat and pressure. This creates a hard, durable surface that is commonly used for furniture, countertops, and flooring.
You can easily identify laminate by its smooth, slick surface and the characteristic visible seams where two pieces were joined together. Due to its non-porous nature, regular paint will not adhere well to laminate surfaces, making it important to use appropriate techniques and materials when painting.
Why Paint Laminate Bookcase?
There are several reasons why you may want to paint your laminate bookcase instead of leaving it in its original form. Some common reasons include:
Updating an Old Piece of Furniture:
If your bookcase has been around for a while and is starting to look outdated or worn-out, painting it can give it a new lease of life. You can choose from a wide variety of paint colors and finishes to match your current decor or try out a new style.

Repairing Damage:
Laminate surfaces are prone to scratches, chips, and other damage due to their hard nature. If your bookcase has any unsightly marks or imperfections, painting over them can help conceal and protect the surface.
Cost-Effective Makeover:
Painting is a much more affordable option compared to replacing your entire bookcase with a new one. With the right techniques and materials, you can achieve a professional-looking finish without breaking the bank.
Materials Needed
Before starting your painting project, make sure you have all the necessary materials on hand. Here’s a list of what you’ll need:
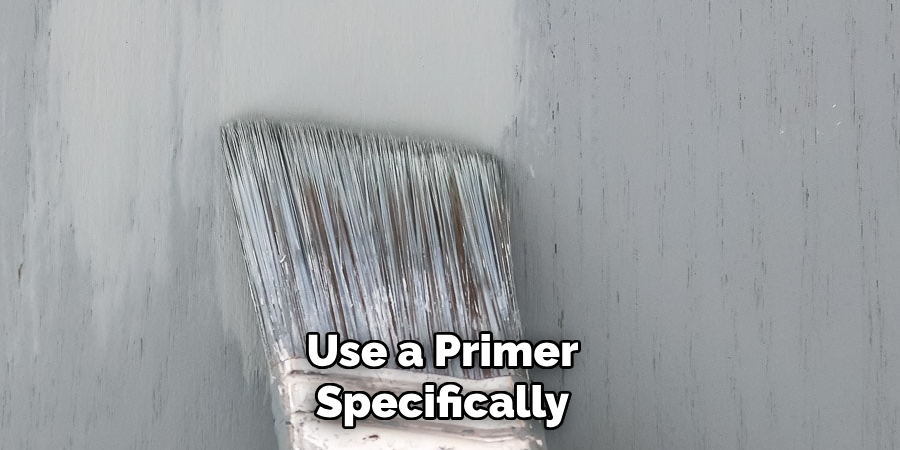
Primer:
A high-quality primer is essential for ensuring good adhesion and providing a smooth surface for the paint to adhere to. Look for a primer specifically designed for use on laminate surfaces. If your bookcase has any chips or scratches, opt for a filler primer that can help smooth out the surface.
Paint:
You can use either latex or oil-based paint on laminate surfaces. However, oil-based paint tends to have better adhesion and durability. Whichever type of paint you choose, make sure it is suitable for the materials you are working with.
Sandpaper:
To ensure good adhesion, lightly sanding the surface before painting is crucial. Use fine-grit sandpaper (220-300 grit) to gently roughen up the surface and remove any gloss or texture.
Paintbrushes and Rollers:
You’ll need a good-quality paintbrush for the edges and corners of your bookcase, while a roller is perfect for covering larger flat surfaces quickly.
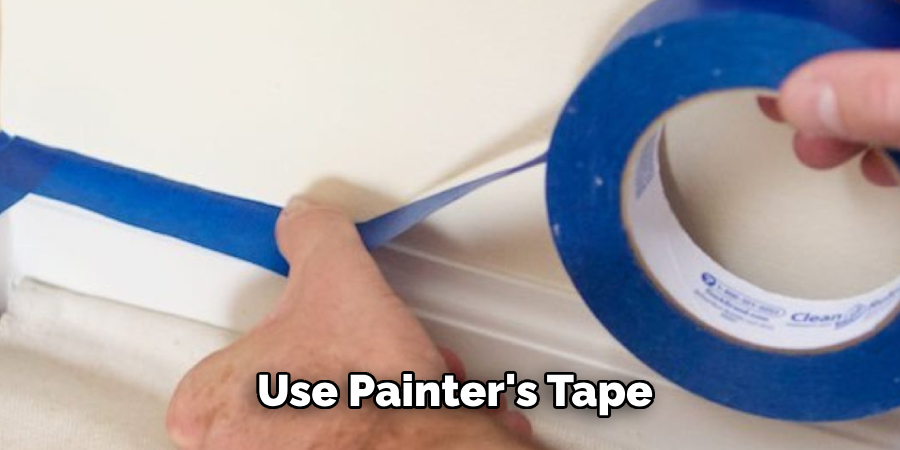
Painter’s Tape:
To protect any areas you don’t want to get paint on, use painter’s tape to mask off edges, trim, or other surfaces.
9 Easy Step-by-step Guidelines on How to Paint Laminate Bookcase
Step 1: Prepare Your Workspace
Before you begin painting your laminate bookcase, it is crucial to set up a proper workspace. Choose a well-ventilated area, such as a garage or an outdoor space, to avoid inhaling fumes from the primer and paint. Lay down a drop cloth or plastic sheeting to protect the floor and surrounding areas from accidental drips and spills.
Ensure you have all your materials organized and within reach, including your primer, paint, brushes, rollers, sandpaper, and painter’s tape. Clear the bookcase of any books or items and give it a quick clean to remove dust and debris. By preparing your workspace adequately, you will create a safe and efficient environment for your painting project.
Step 2: Remove Hardware and Shelves
For a professional-looking finish, it’s essential to remove all hardware (such as knobs or hinges) and shelves from your bookcase before painting. This will make it easier to paint each piece separately and ensure there are no missed spots. Place the hardware in a safe place where it won’t get lost or damaged.
Step 3: Clean the Surface
Before you start sanding, use a cleaner like trisodium phosphate (TSP) to remove any grime, grease, or wax buildup from the surface. Follow the manufacturer’s instructions for proper application and safety precautions. Once clean, rinse the surface with water and allow it to dry completely.
You may also want to fill in any holes or cracks with wood filler and sand them smooth before cleaning the surface. This will give you a clean, even surface for painting.
Step 4: Lightly Sand the Surface
Using a fine-grit sandpaper, gently sand the entire bookcase to create a rougher texture for better paint adhesion. Make sure to remove any old finish, gloss, or dirt from the surface. Take caution not to oversand and damage the laminate layer.
Once done, wipe down the bookcase with a damp cloth or tack cloth to remove any dust from the sanding.
Step 5: Apply Primer
Using a brush or roller, apply a thin layer of primer to the entire surface of your bookcase. The primer will create a smooth and even base to which your paint can adhere. Make sure to cover all edges, corners, and other hard-to-reach areas.
Allow the primer to dry completely before applying a second coat (if necessary). Follow the manufacturer’s instructions for drying times.
Step 6: Sand Again (Optional)
If you notice any imperfections or rough spots after the primer has dried, you can lightly sand them with fine-grit sandpaper and wipe away any dust before proceeding to the next step. The primer should have helped fill in any minor scratches or holes, giving you a smoother surface to work with.
It’s also a good idea to lightly sand between coats of paint for an even smoother finish.
Step 7: Apply Paint
Once the primer is dry and any necessary touch-ups have been made, it’s time to apply your paint. Use a brush or roller to apply an even layer of paint over the entire surface of your bookcase. Make sure to follow the direction of the wood grain for a smooth finish.
If you are using oil-based paint, you may need to use multiple coats with ample drying time in between. Latex paint usually requires only one or two coats.
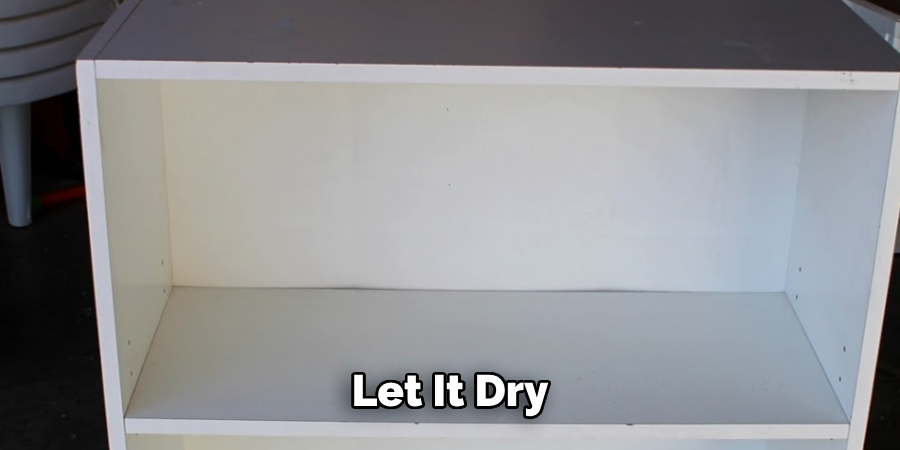
Step 8: Let It Dry
After applying the final coat of paint, allow your bookcase to dry completely. This step is crucial to ensure a durable and long-lasting finish. Drying times can vary based on the type of paint used, humidity levels, and temperature. Generally, latex paint will dry to the touch within a few hours but may take up to a week to fully cure. Oil-based paint might require a longer drying time, often needing 24 hours or more between coats and several days to fully cure.
Avoid placing any items on the bookcase until the paint has completely dried and cured to prevent smudges, dents, or imperfections in the finish. By patiently allowing the paint to set, you will achieve a professional and polished look for your revamped laminate bookcase.
Step 9: Reattach Hardware and Shelves
Once the paint is fully dry, you can reattach any hardware and shelves to your bookcase. Take caution not to damage or smudge the fresh paint while doing so. Carefully align all pieces and secure them in place.
Congratulations! You have successfully transformed your laminate bookcase into a beautiful piece of furniture with a new coat of paint. Remember to clean your brushes and rollers promptly after use according to the manufacturer’s instructions on how to paint laminate bookcase for longer-lasting use. Enjoy your newly painted bookcase!
Frequently Asked Questions
Q: Can I Skip Sanding and Priming My Laminate Bookcase?
A: While it may be tempting to save time by skipping these steps, sanding and priming are crucial for ensuring proper adhesion of the paint and creating a smooth finish on your bookcase. Skipping these steps may result in the paint peeling or chipping off over time.
Q: Can I Use Regular Wall Paint on My Laminate Bookcase?
A: It is not recommended to use regular wall paint on laminate surfaces as it may not adhere properly and can easily chip or peel off. It’s best to use a primer specifically made for laminate surfaces and then choose an appropriate type of paint (latex or oil-based) for better results.
Q: How Do I Care for My Painted Laminate Bookcase?
A: To keep your painted laminate bookcase looking its best, avoid using harsh cleaning chemicals or abrasive cleaners. Instead, use a mild soap and water solution to clean any spills or dirt from the surface. Additionally, be mindful of placing hot objects directly on the surface as it may cause damage to the paint. Regular dusting and occasional touch-ups can also help maintain the appearance of your painted laminate bookcase.
Conclusion
Painting a laminate bookcase can be a fulfilling DIY project that breathes new life into an otherwise outdated piece of furniture. By carefully following each step on how to paint laminate bookcase, from disassembling and cleaning to sanding, priming, and painting, you can achieve a professional-looking finish that endures over time. Remember, patience and attention to detail are key to ensuring that the paint adheres properly and dries evenly.
With the right materials and a bit of effort, you can transform your laminate bookcase into a stylish addition to your home décor. Enjoy your newly refreshed piece and take pride in your handiwork!