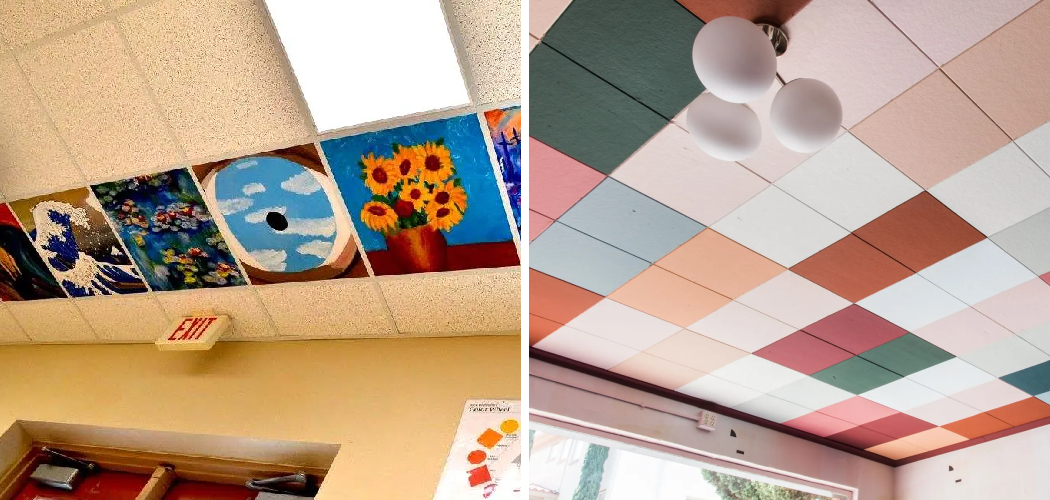
Painting ceiling tiles can significantly revive and refresh any room, offering a cost-effective alternative to replacement while dramatically altering the atmosphere of the space.

Over time, ceiling tiles may become discolored, stained, or simply outdated, detracting from the overall aesthetics of a room. By learning how to paint ceiling tiles, you can breathe new life into these often-overlooked surfaces, transforming them into attractive design features.
The process of painting ceiling tiles involves several key steps, from preparation to choosing the right materials and applying the paint using the correct techniques.
Properly painted ceiling tiles can enhance the visual appeal of a room, complement existing decor, and even improve the room’s brightness by reflecting more light. Moreover, painting can also add a protective layer to the tiles, making them more durable and easier to clean.
In this guide, we will walk you through the essential steps on how to paint ceiling tiles, providing detailed instructions and helpful tips to ensure a professional-looking finish. Whether you’re a DIY enthusiast or tackling this task for the first time, our comprehensive guide aims to equip you with the knowledge and confidence needed to achieve outstanding results.
Understanding Ceiling Tile Materials
Different Types of Ceiling Tile Materials and Their Properties
When learning how to paint ceiling tiles, you must understand the different types of ceiling tile materials you might encounter. Each type of material has distinct properties that can affect how you should approach the painting process. The most common types of ceiling tile materials include vinyl, fiberglass, and mineral fiber tiles.
Vinyl Ceiling Tiles
Vinyl ceiling tiles are popular due to their durability and ease of maintenance. They are often installed in commercial settings but are also suitable for residential use. Vinyl tiles are relatively lightweight and resistant to moisture, making them ideal for areas with high humidity, such as bathrooms and kitchens.
However, their smooth, non-porous surface can sometimes make it a bit challenging for paint to adhere to without proper preparation and using a suitable primer.
Fiberglass Ceiling Tiles
Fiberglass tiles are known for their excellent acoustic properties and are commonly used in spaces where sound absorption is important, such as offices and recording studios.
These tiles are generally lightweight and offer good thermal insulation. Painting fiberglass tiles requires careful surface preparation to ensure the paint adheres well and remains durable over time. The porous nature of fiberglass can absorb primers and paints unevenly, so multiple coats may be necessary to achieve a uniform finish.
Mineral Fiber Ceiling Tiles
Mineral fiber tiles, also known as acoustic tiles, are widely used in both commercial and residential settings due to their affordability and acoustic performance. These tiles are made from a blend of natural and synthetic materials, including recycled content, which makes them an environmentally friendly choice.

Mineral fiber tiles tend to have a rougher surface than vinyl or fiberglass, which can provide better paint adhesion. However, their porous nature can also require more paint and careful application to avoid an uneven appearance.
Considerations for Painting Various Materials
When painting vinyl tiles, choosing a high-quality primer designed for slick surfaces is crucial to ensure good paint adhesion.
Fiberglass and mineral fiber tiles also benefit from a primer, but you may need to select ones specifically formulated for porous materials to achieve optimal results. Additionally, always check the manufacturer’s recommendations for compatible paint types and application methods.
Surface preparation is key for all types of ceiling tiles. Thorough cleaning to remove dust, dirt, and grease will help the primer and paint adhere properly. Depending on the material, light sanding may be required to create a slightly roughened surface for better adhesion.
By understanding the unique properties and considerations for painting different ceiling tile materials, you’ll be better equipped to choose the right products and techniques, ensuring a beautiful and lasting finish.
Preparing the Workspace
Clearing the Area and Protecting Furniture and Floors
Before you begin painting ceiling tiles, it is essential to prepare the workspace to ensure a smooth and safe painting process. Start by removing as much furniture as possible from the room. This will protect your furnishings from paint splatters and provide you with ample space to move around freely. Cover any furniture that cannot be moved with plastic sheeting or drop cloths.
This protective layer will prevent any accidental paint drips or splashes from damaging your belongings. Additionally, use drop cloths or old sheets to cover the floors, especially in the area directly beneath the ceiling tiles you will paint. Secure these covers with painter’s tape to keep them in place and avoid tripping hazards.
Ensuring Proper Ventilation and Lighting
Proper ventilation is critical when painting, as paint fumes can harm your health. Adequate airflow helps to dissipate these fumes, making the workspace safer and more comfortable.
To ensure proper ventilation, open windows and doors where possible. You may also want to use fans to create cross-ventilation and expedite drying. If you’re working in an area with poor ventilation, consider using a respirator mask designed for paint fumes for added protection.
Good ventilation and lighting are crucial for achieving a professional-looking paint job. Ensure your workspace is well-lit so you can easily see any areas that need touch-ups or additional coats of paint.
Natural light is ideal, but if that’s not an option, use portable work lights or bright floor lamps to illuminate your workspace. Proper lighting helps you maintain consistency in your painting, ensuring a uniform finish.

Gathering Necessary Tools and Materials
Having all the necessary tools and materials on hand before you start painting will make the process much more efficient and stress-free. Essential tools and materials for painting ceiling tiles include:
- Primer and paint suitable for your ceiling tile material
- Paint trays and liners
- Paint rollers with extension poles
- Angled paintbrushes for edges and corners
- Painter’s tape for masking off walls, fixtures, and other areas
- Sandpaper or sanding blocks for surface preparation
- Cleaning supplies, such as sponges, cloths, and mild detergent
- Ladder or scaffold to safely reach the ceiling
- Protective gear, including gloves, goggles, and a respirator mask if needed
By carefully clearing the area, ensuring proper ventilation and lighting, and gathering all the necessary tools and materials beforehand, you set the stage for a smooth and successful painting project. This thorough preparation will protect your space and contribute to achieving the best possible results.
Surface Preparation
Cleaning the Ceiling Tiles Thoroughly to Remove Dust and Dirt
Before applying primer or paint, cleaning the ceiling tiles thoroughly is crucial. Dust, dirt, and grease can all hinder paint adhesion and result in an uneven finish. Start by dusting the tiles with a soft cloth or a vacuum cleaner fitted with a brush attachment to remove loose debris.
For deeper cleaning, prepare a solution of mild detergent and warm water. Use a sponge or a soft cloth to gently scrub the surface, focusing on any areas with noticeable stains or buildup. Rinse the tiles with clean water to remove any soap residue and allow them to dry completely.

Repairing Any Cracks, Holes, or Damage on the Tiles
Once the tiles are clean, inspect each one for cracks, holes, or other forms of damage. Small imperfections can be filled with a high-quality, pre-mixed spackle. Apply the spackle with a putty knife, smoothing it over the damaged areas and removing any excess.
You may need to use a ceiling tile repair kit or replace the damaged tiles for larger cracks or holes. Allow the spackle or repair compound to dry according to the manufacturer’s instructions before moving on to the next step.
Sanding the Surface to Create a Smooth Base for Paint Adhesion
Sanding the ceiling tiles is an essential step to ensure strong paint adhesion. Begin with a coarse-grit sandpaper to tackle any rough spots or uneven surfaces. Progress to a finer grit to create a smooth and uniform base. Use a sanding block or an electric sander to make the job easier, especially for raised or textured tiles.
Wear protective goggles and a dust mask to protect against inhaling particles and irritants. After sanding, wipe down the tiles with a damp cloth to remove dust and sanding residue. Ensure the tiles are completely dry before applying primer.
Choosing the Right Paint and Primer
Selection Criteria for Ceiling Tile Paint
Choosing the right paint for ceiling tiles is crucial to achieving a professional and durable finish. When selecting paint, consider the following criteria:

- Water-Based Paints: Water-based or latex paints are ideal for ceiling tiles because they dry quickly, emit fewer fumes, and can be cleaned up easily with soap and water. They also provide excellent coverage and are less likely to yellow over time than oil-based paints.
- Low-VOC Formulas: Volatile Organic Compounds (VOCs) are chemicals found in many paints that can release harmful gases into the air. Opting for low-VOC or zero-VOC paints minimizes health risks and makes the painting process safer, especially indoors. These paints provide high-quality finishes without compromising on performance.
- Durability and Washability: Depending on the room’s usage, you may need paint that can withstand cleaning and moderate wear. Look for paints that are specifically designed for high-traffic areas if you anticipate the need for frequent cleaning or if the ceiling is in a kitchen or bathroom where humidity levels may be higher.
- Sheen Levels: Matte or flat paint sheens are typically recommended for ceilings as they reduce glare and hide imperfections well. However, due to their slightly more washable nature, a satin or eggshell finish might be more appropriate for areas that require occasional cleaning.
Priming Options and Their Importance in Achieving Optimal Results
Applying a primer before painting is essential for achieving a smooth, long-lasting finish. Primers serve several key purposes, including improving paint adhesion, blocking stains, and ensuring even paint coverage. Here are some primer options to consider:
- Stain-Blocking Primers: If your ceiling tiles have water stains, smoke damage, or other discolorations, a stain-blocking primer is necessary. These primers prevent stains from bleeding through the topcoat, ensuring a uniform appearance.
- Bonding Primers: For tiles made from materials like vinyl or laminate, a bonding primer can enhance adhesion, enabling the paint to stick more effectively. This is particularly important for non-porous surfaces that might otherwise resist standard primers and paints.
- Sealing Primers: These primers are ideal for porous surfaces, such as acoustical tiles or older ceilings that may have been previously painted. Sealing primers help to create a stable surface, reducing the risk of paint absorption and ensuring a more even finish.
- Multi-Purpose Primers: For general use, multi-purpose primers provide good adhesion and coverage across a variety of surfaces. They are a convenient option if your ceiling tiles don’t have any special requirements or issues that need addressing.
Matching Paint Colors to Desired Aesthetics and Existing Decor

Selecting the right paint color for your ceiling tiles can significantly impact the room’s overall aesthetics and ambiance. Here are a few tips for matching paint colors to your decor:
- Neutral Tones: White and off-white shades are popular choices for ceilings because they create a sense of openness and reflect light well, making rooms feel larger and brighter. These colors also provide a clean backdrop that easily complements any existing wall color or decor.
- Coordinated Palettes: To achieve a cohesive look, consider selecting a ceiling paint color that harmonizes with the walls and furnishings. For example, a light beige or soft grey ceiling can subtly enhance a room’s color scheme decorated in warm or cool tones, respectively.
- Bold Contrasts: If you want to make a statement, bolder colors can be used on the ceiling to create visual interest. Deep blues, dramatic blacks, or rich jewel tones can add a touch of sophistication and draw attention upwards, especially in rooms with high ceilings.
- Consider Texture and Finish: Ceiling textures, such as popcorn or coffered designs, can influence paint color choice. Lighter colors tend to highlight textures, while darker shades can give a more uniform appearance. Additionally, ensuring the chosen color works well with the desired finish (matte, satin, etc.) is key to achieving the best results.
Choosing the right paint and primer tailored to your specific ceiling tile material, room conditions, and aesthetic preferences will ultimately ensure a beautiful and lasting finish. Careful selection and application of these products are paramount to the success of your painting project.
Painting Techniques and Application
Brushing vs. Rolling vs. Spraying: Pros and Cons
When it comes to painting ceiling tiles, each application method—brushing, rolling, and spraying—offers unique advantages and challenges:
- Brushing:
- Pros: Brushing provides exceptional control, making it ideal for precise work around edges and in tight spaces. It’s also effective for applying paint to textured tiles or small areas that require detailed attention.
- Cons: Brushing can be time-consuming and may result in visible brush strokes if not done skillfully. It is less efficient for covering large ceiling areas compared to rolling or spraying.
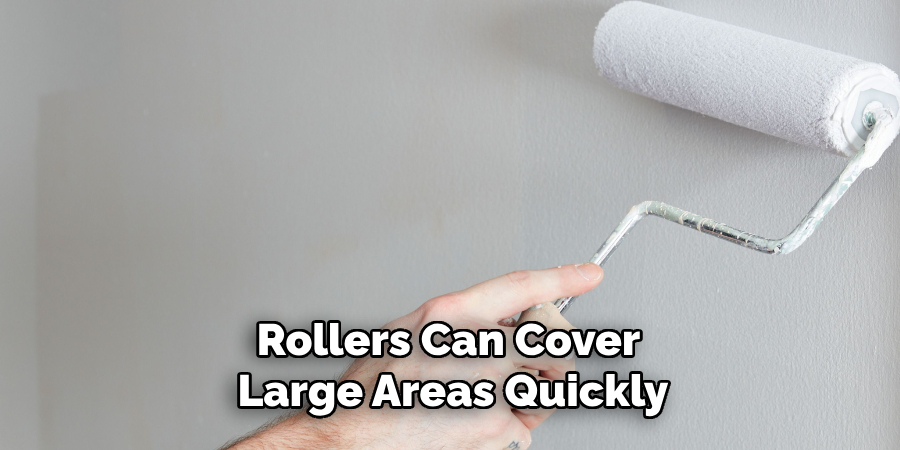
- Rolling:
- Pros: Rolling is a popular method because it is efficient and provides smooth, even coverage. It is particularly well-suited for flat or slightly textured ceiling tiles. Rollers can cover large areas quickly, reducing overall painting time.
- Cons: Rolling can be cumbersome when working on ceilings, leading to potential splatters and drips if not carefully managed. It also requires careful handling to avoid leaving roller marks.
- Spraying:
- Pros: Spraying offers the fastest application and ensures a uniform, consistent finish without brush or roller marks. It’s ideal for large-scale projects and textured surfaces, providing excellent coverage in less time.
- Cons: Spraying requires more preparation, including masking off areas to prevent overspray. Additionally, it can be messy and necessitates proper ventilation and protective equipment to ensure safety.
Tips for Achieving Even Coverage and Avoiding Drips or Streaks
Regardless of the application method chosen, achieving even coverage and avoiding drips or streaks is crucial for a professional finish. Here are some tips to help:
- Prep the Surface: Ensure the ceiling tiles are clean, dry, and primed as needed. Sand any rough spots for a smoother application.
- Use High-Quality Tools: Invest in good-quality brushes, rollers, or sprayers to ensure smoother application and better results.
- Avoid Overloading: Do not overload brushes or rollers with paint. Excess paint can cause drips and uneven coverage. Instead, apply thinner coats and build up as needed.
- Maintain a Wet Edge: When painting, keep a wet edge to avoid lap marks. This is particularly important when using rollers. Overlap slightly with each stroke to maintain consistency.
- Work in Sections: Divide the ceiling into manageable sections. This helps maintain control and ensures even application without missing spots.
Proper Technique for Cutting in Edges and Corners
Cutting in around edges and corners requires precision to achieve a neat, professional look. Follow these steps for effective cutting in:
- Use an Angled Brush: An angled brush provides better control and accuracy for cutting in.
- Load the Brush Properly: Dip the brush into the paint, loading only the tip. Tap off excess paint to prevent drips.
- Start Away from the Edge: Begin painting slightly away from the edge or corner. Gradually work the brush towards the edge to avoid excess paint buildup.
- Steady Hand and Consistent Stroke: Use a steady hand and smooth, consistent strokes. Maintain consistent pressure to achieve an even line.
- Blend Immediately: Blend the cutting-in paint with the main painted area immediately to avoid visible lines or differences in texture.
By selecting the right painting technique and following these best practices, you can ensure a flawless finish for your ceiling tiles, enhancing the overall aesthetic of your space.

How to Paint Ceiling Tiles: Step-by-Step Painting Guide
Step 1: Starting from One Corner and Working Methodically Across the Ceiling
To ensure a smooth and efficient painting process, begin at one corner of the ceiling and work methodically across. Starting at a corner helps maintain a reference point, allowing you to cover the entire ceiling systematically without missing any spots.

Use a ladder or scaffolding to safely reach the ceiling and plan your progress in sections to keep the work manageable. Move the ladder or scaffolding incrementally as you complete each section to maintain continuity.
Step 2: Applying Primer and Allowing It to Dry Thoroughly
Before painting, it’s crucial to apply a primer to the ceiling tiles. Primer ensures better paint adhesion, provides a uniform surface, and helps cover any stains or imperfections on the tiles. Using a roller or sprayer, apply an even coat of primer, starting from the same corner where you begin your painting.
Allow the primer to dry thoroughly as per the manufacturer’s instructions before moving on to the paint. This usually takes a few hours, but drying times can vary based on humidity and temperature.
Step 3: Painting Multiple Coats as Needed for Desired Opacity and Finish
After the primer has dried thoroughly, you’re ready to apply the first coat of paint. Using your chosen method—brushing, rolling, or spraying—apply a thin, even coat of paint, working in the same methodical manner as you did with the primer. Allow this coat to dry completely before assessing the coverage.
Most ceilings will require at least two coats of paint to achieve full opacity and a smooth finish. Apply additional coats as needed, ensuring each coat dries thoroughly in between to avoid streaks or uneven textures.
Step 4: Allowing Sufficient Drying Time Between Coats
Ensuring sufficient drying time between coats is essential for a professional-looking finish. Rushing this process can result in smudging, streaking, and an uneven appearance. Typically, it’s best to wait at least 4-6 hours between coats, although exact times can depend on the paint type and environmental conditions.

Make sure each coat feels dry to the touch and does not smudge when lightly pressed before applying the next coat. You’ll achieve a more durable and visually appealing result by being patient and allowing adequate drying time.
Following these steps will help you master the process of painting ceiling tiles, achieving a flawless, long-lasting finish that enhances the beauty and cohesiveness of your space.
Adding Texture or Patterns
Techniques for Creating Texture or Patterns with Paint
Adding texture or patterns to your ceiling can create visual interest and elevate the entire room. Techniques such as sponge painting, rag rolling, and using textured rollers allow you to introduce a variety of textures. For a subtle look, consider a knockdown texture or a stylized combing technique, which can add depth without overwhelming the space.
Stenciling Options for Adding Decorative Elements

Stenciling is an excellent option for adding decorative elements to your ceiling. Choose from a wide range of pre-made stencils or create custom designs to personalize your space. Position the stencil securely and apply the paint with a sponge or a stencil brush, ensuring even application. Repeat the pattern across the ceiling for a cohesive look.
Considerations for Achieving a Uniform Look Across the Ceiling
To ensure a uniform look, plan your design carefully and maintain consistency in technique and paint application. Use high-quality materials and tools to achieve precise results. Test your chosen technique on a small, inconspicuous area before proceeding with the entire ceiling to ensure the desired effect.
Finishing Touches and Cleanup
Inspecting the Painted Surface for Any Touch-Ups or Imperfections
Once all coats of paint are fully dry, inspect the ceiling thoroughly for any missed spots, drips, or uneven areas. Use a bright light to highlight imperfections and touch up as needed with a small brush. This ensures a flawless finish and enhances the overall appearance of your work.

Removing Painter’s Tape and Protective Coverings
Carefully remove any painter’s tape applied to protect edges and fixtures. Do this slowly to avoid peeling away any fresh paint. Dispose of the tape and any plastic or fabric coverings used to protect your flooring and furniture. This step helps reveal your new paint job’s clean, sharp lines and prevents any mess left behind.
Proper Disposal of Paint Cans and Cleanup of Tools and Workspace
Dispose of paint cans according to your local regulations. Many areas have specific guidelines for hazardous waste disposal, which includes paint.
Clean your brushes, rollers, and other tools with the appropriate solvents—water for latex paints and mineral spirits for oil-based paints. Store reusable tools properly for future projects. Wipe down any surfaces that might have accumulated dust or drip during the painting process.
Paying attention to these finishing touches and cleanup tasks ensures a polished, professional result and leaves your space in pristine condition.
Conclusion
Painting ceiling tiles offers a straightforward yet impactful way to rejuvenate your spaces. The process allows you to cover up old stains, introduce new colors or patterns, and refresh the overall appearance of a room.
By following a systematic approach, including applying primer, multiple coats of paint, and finishing touches, you can achieve a high-quality, professional finish that enhances the aesthetic appeal of your ceilings.
Additionally, adding textures or stenciling can bring a unique character to your spaces, making them feel more personalized and inviting.
Embarking on a project to paint your ceiling tiles can seem daunting at first, but it becomes a rewarding and enjoyable endeavor with the right preparation and techniques. Remember that patience and attention to detail are crucial to achieving the best results.
As you follow the steps outlined in this guide on how to paint ceiling tiles, you’ll find that transforming your ceilings is achievable and a satisfying way to breathe new life into your home. So gather your materials, take your time, and confidently approach the project—your beautifully painted ceiling tiles will be a testament to your hard work and creativity.